SVENSKA
SE GB
ENGLISH
STIGA Badminton nät
- Art.nr.
78-1000-xx & 78-1200-xx STIGA Badminton net
- Art.no.
78-1000-xx & 78-1200-xx
OBSERVERA!
• Kontrollera att alla delar finns med innan montering.
• Om någon del är trasig på produkten, avbryt monteringen.
• Kontrollera utrustningen varje gång före användning.
• Luta dig inte mot produkten och häng inte på den.
CAUTION!
•
Check that all parts are included before assembly
.
• If any breakage is found on the product
, please stop the assembly
.
•
Check the equipment before each time you use it
.
•
Don’t lean on the product and don’t hang any object on it
.
INNEHÅLL CONTENT
• 2 st Stolpar (6st rör) • 1 st Nät • 2 st Spännlinor • 4 st Jordankare • 2 pcs Poles (6 pcs tubes) • 1 pc Net • 2 pcs Ropes • 4 pcs Ground anchors
MONTERING
•
Montera ihop stolparna
.
•
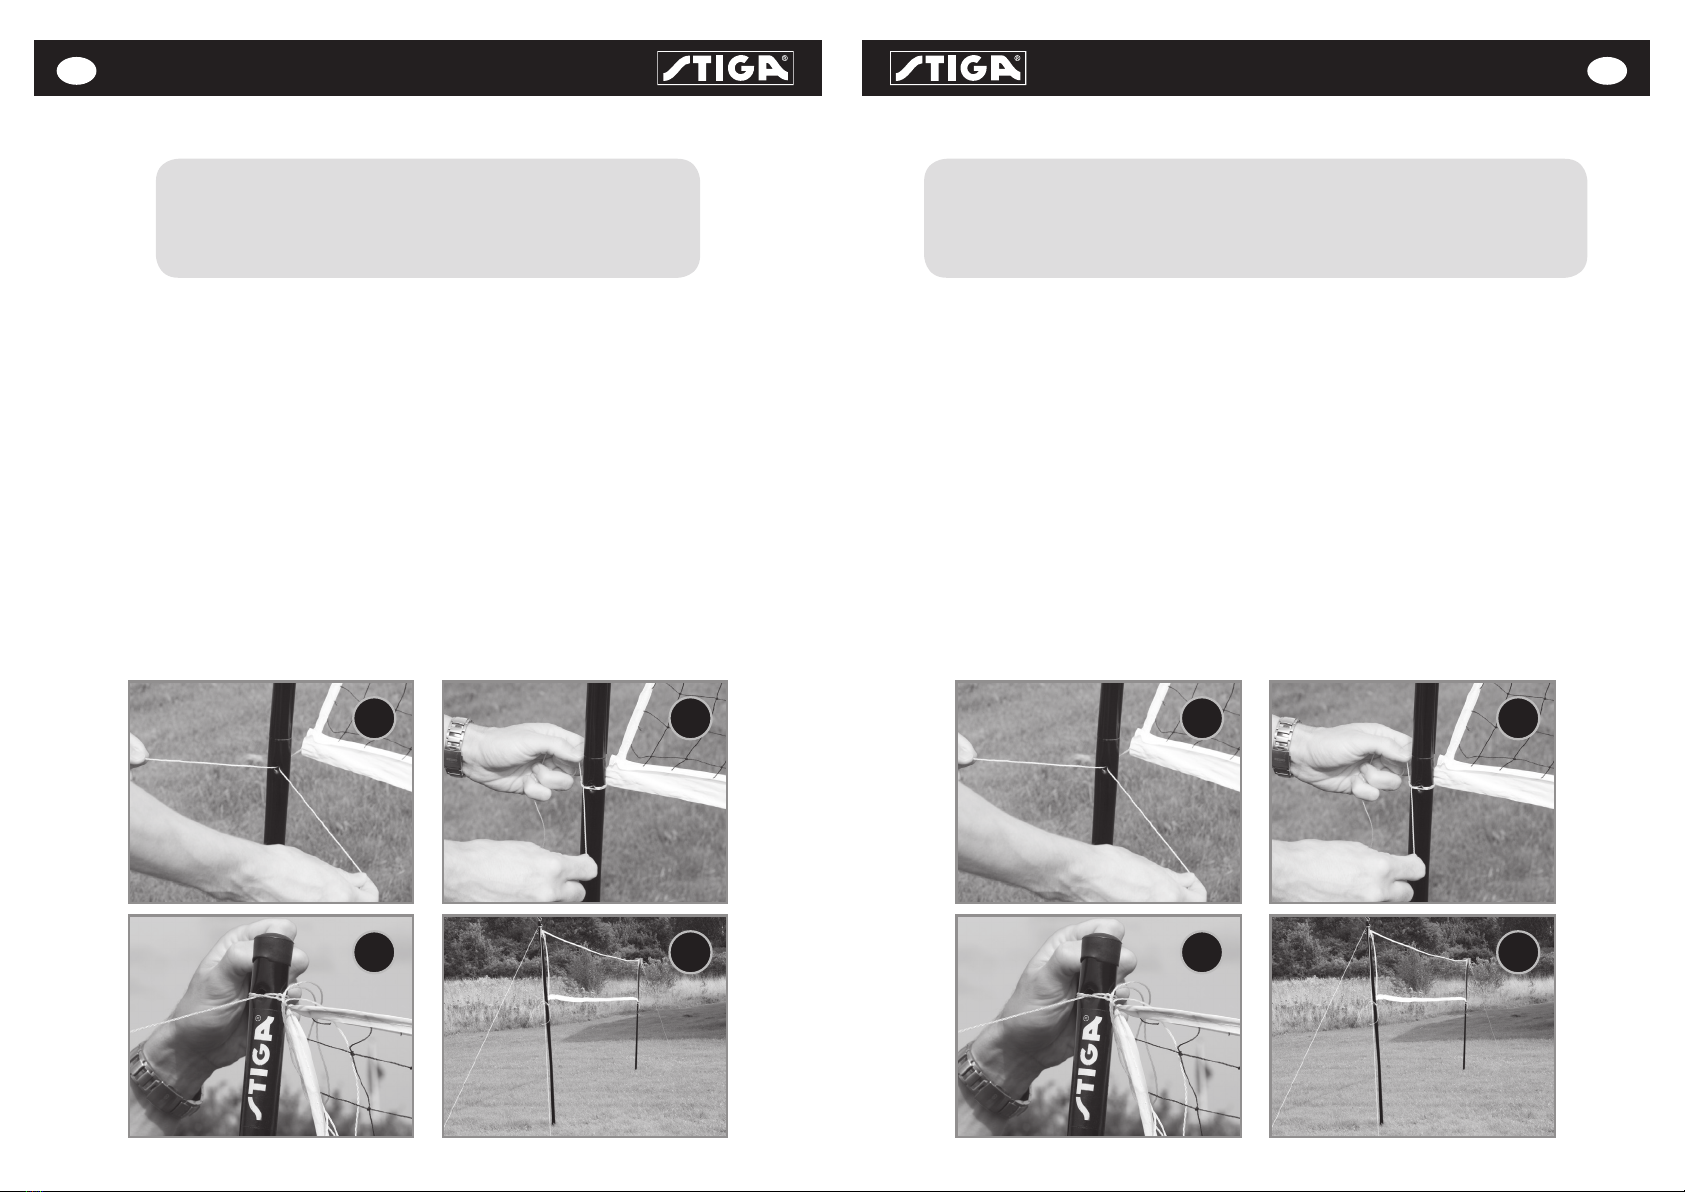
Fäst nätet vid stolparna genom att trä igenom och knyta nätets snören i stolpens nedre
respektive övre hål (se bild 1-2)
.
OBS! Nätets breda vita kant skall vara vänd nedåt.
•
Tryck ner den ena stolpen i marken så långt som möjligt
.
•
Trä igenom spännlinan genom det övre hålet (se bild 3)
.
•
Knyt fast spännlinan i de två jordankarna och tryck ner dessa i marken
.
Är marken hård
använd gummihammare.
•
Gör likadant på andra sidan och spänn nätet. Bild 4
.
ASSEMBLY
•
Assemble the metal poles
.
• Attach the net to the metal poles by threading the strings of the net through the upper
respectively the lower hole and then tie them (see picture 1-2).
NOTE! The wide white edge of
the net should be facing down.
•
Press down one pole into the ground.
• T
hread the rope through the upper hole of the pole (
see picture
3)
.
•
Tie the rope to the two ground anchors and press them into the ground
.
If the ground is
very hard, use a rubber hammer.
•
Repeat the procedure on the other side and eject the net. Picture 4.
.
1 1
3 3
2 2
4 4


