Stuv 30 Compact User manual

S 30 - IME - US - 0807
installation & directions for use
installation & mode d’emploi
[ en ]
[ fr ]
SN 29378 - ...
Stûv fireplaces are designed and made in Belgium by/Les foyers Stûv sont conçus et fabriqués en Belgique par :
Concept & Forme sa/nv - rue Jules Borbouse 4 - B-5170 Bois-de-Villers - info@stuv.be - www.stuv.be
Exclusive importer for Canada / Importateur exclusif pour le Canada :
STÛV America inc. - 2090, rue Moreau suite 101 - Montréal (Qc) H1W 2M3 Canada - Téléphone : +1 514 396 9463

[ en ] [ fr ]
installation installation 3 »» 13
directions
for use mode d'emploi 15 »» 22
grill grill 23 »» 24
certificate
of guarantee
certificat
de garantie 26 »» 27
Cet appareil a été testé et certifié par Intertek Testing services AN Ltée selon les normes CSA-B366.2 et ULC
S-627 (Canada) et UL-1482 (Etats-Unis).
This appliance has been tested and certified by Intertek Testing Services NA Ltd according to the standards
CSA-B366.2 and ULC S-627 (Canada) and UL-1482 (USA).

installation
installation
[ en ]
[ fr ]

S30 - IME - US
06-07
4
Instructions de sécurité
Avant d’installer votre Stûv, contactez
les autorités locales en bâtiment ou le
service des incendies et suivez leurs
directives.
L’installation de votre Stûv doit être
confiée à un professionnel qualifié.
Si votre Stûv n’est pas installé de
façon adéquate, un incendie pourrait
s’ensuivre. Votre Stûv peut devenir très
chaud : il faut empêcher les enfants et
les animaux domestiques de toucher le
foyer lorsqu’il fonctionne
Les matériaux combustibles tels que
le bois de chauffage, les vêtements
mouillés, etc. placés trop près de
l’appareil pourraient prendre feu. Les
objets placés devant l’appareil doivent
être gardés à une distance d’au moins
1,22m (48") de la face vitrée de
l’appareil.
Ne laissez pas le foyer chauffer au
point où des parties deviennent
rougeoyantes.
Brûlez le bois de chauffage directement
sur les briques réfractaires. N’utilisez
pas de chenet et n’essayez pas de
surélever le feu de quelque façon.
Ne pas installer dans une maison
mobile.
Les instructions concernant l’installation
de votre poêle à bois sont conformes
aux normes ULC-S627 et UL-1482.
Vous devez les suivre rigoureusement
afin d’éliminer tout risque d’ennuis
majeurs.
Veuillez lire attentivement ce manuel
avant d’installer ou d’opérer votre
poêle. Si votre poêle est mal installé, il
peut en résulter un incendie détruisant
votre maison. Pour réduire les risques
d’incendie, suivez les instructions d’ins-
tallation. Le fait de ne pas respecter
les instructions peut occasionner des
dommages à la propriété, des lésions
corporelles et même la mort.
Consultez le représentant de votre
municipalité ou votre compagnie
d’assurance concernant les exigences
locales relatives aux permis et à l’instal-
lation de votre poêle.
Gardez ce manuel pour pouvoir le con-
sulter ultérieurement
1
Safety instructions
Before installing your Stûv, please
contact the local building authorities
or the fire department and follow their
directives.
The installation of your Stûv should be
entrusted to a skilled professional.
If the Stûv fireplace is not properly
installed, this can provoke a fire.
Your Stûv can be very hot : children and
domestic animals should not touch the
fireplace when operating.
Combustible materials, such as
firewood, wet clothes, etc., placed too
close to the appliance could catch fire.
Objects placed in front of the fireplace
should be kept at a distance of at least
1.22m (48”) of the glass front.
Do not let the fireplace heat up until
some parts glow red.
Burn the firewood directly on the
refractor plates. Do not use a firedog
and do not try in any way to raise the
fire.
Do not install in a mobile home.
To reduce the risk of fire, follow the
installation instructions. Contact
local building or fire officials about
restrictions and installation inspection
requirements in your area.
This manual contain all the information
required for safe, efficient installation
and use of your STÛV fireplace. Read
carefully all the instructions contained
herein and keep this manual handy so
you may refer to it whenever necessary.
Before starting to install the fireplace,
consult local authorities to obtain a
building permit and learn about all
applicable regulatory requirements.
Failure to follow instructions may result
in property damage, bodily injury, or
even death.
ATTENTION :
• NE PAS UTILISER DES PRODUITS
CHIMIQUES OU AUTRES LIQUIDES
POUR ALLUMER LE FEU.
• NE JAMAIS LAISSER LE POÊLE
SANS SURVEILLANCE LORSQUE LA
PORTE EST OUVERTE.
• TOUJOURS FERMER LA PORTE
APRÈS LA PÉRIODE D'ALLUMAGE.
• NE PAS BÛLER DE DÉCHETS ET/
OU DE LIQUIDES INFLAMMABLES
COMME L'ESSENCE, LA NAPHTA
ET L'HUILE DE MOTEUR.
• NE PAS CONNECTER LE POÊLE
À UN SYSTÈME DE DISTRIBUTION
D'AIR CHAUD.
CAUTIONS:
• HOT WHILE IN OPERATION.
KEEP CHILDREN, CLOTHING AND
FURNITURE AWAY. CONTACT MAY
CAUSE SKIN BURNS.
• DO NOT USE CHEMICALS OR
FLUIDS TO IGNITE THE FIRE.
• DO NOT LEAVE THE STOVE
UNATTENDED WHEN THE DOOR
IS SLIGHTLY OPENED.
• DO NOT BURN WASTES,
FLAMMABLE FLUID SUCH AS
GASOLINE, NAPHTHA OR MOTOR
OIL.
• DO NOT CONNECT TO ANY AIR
DISTRIBUTION DUCT OR SYSTEM.
• ALWAYS CLOSE THE DOOR
AFTER THE IGNITION.

S30 - IME - US
06-07
5
2
A
B
C
3
A
4
4’
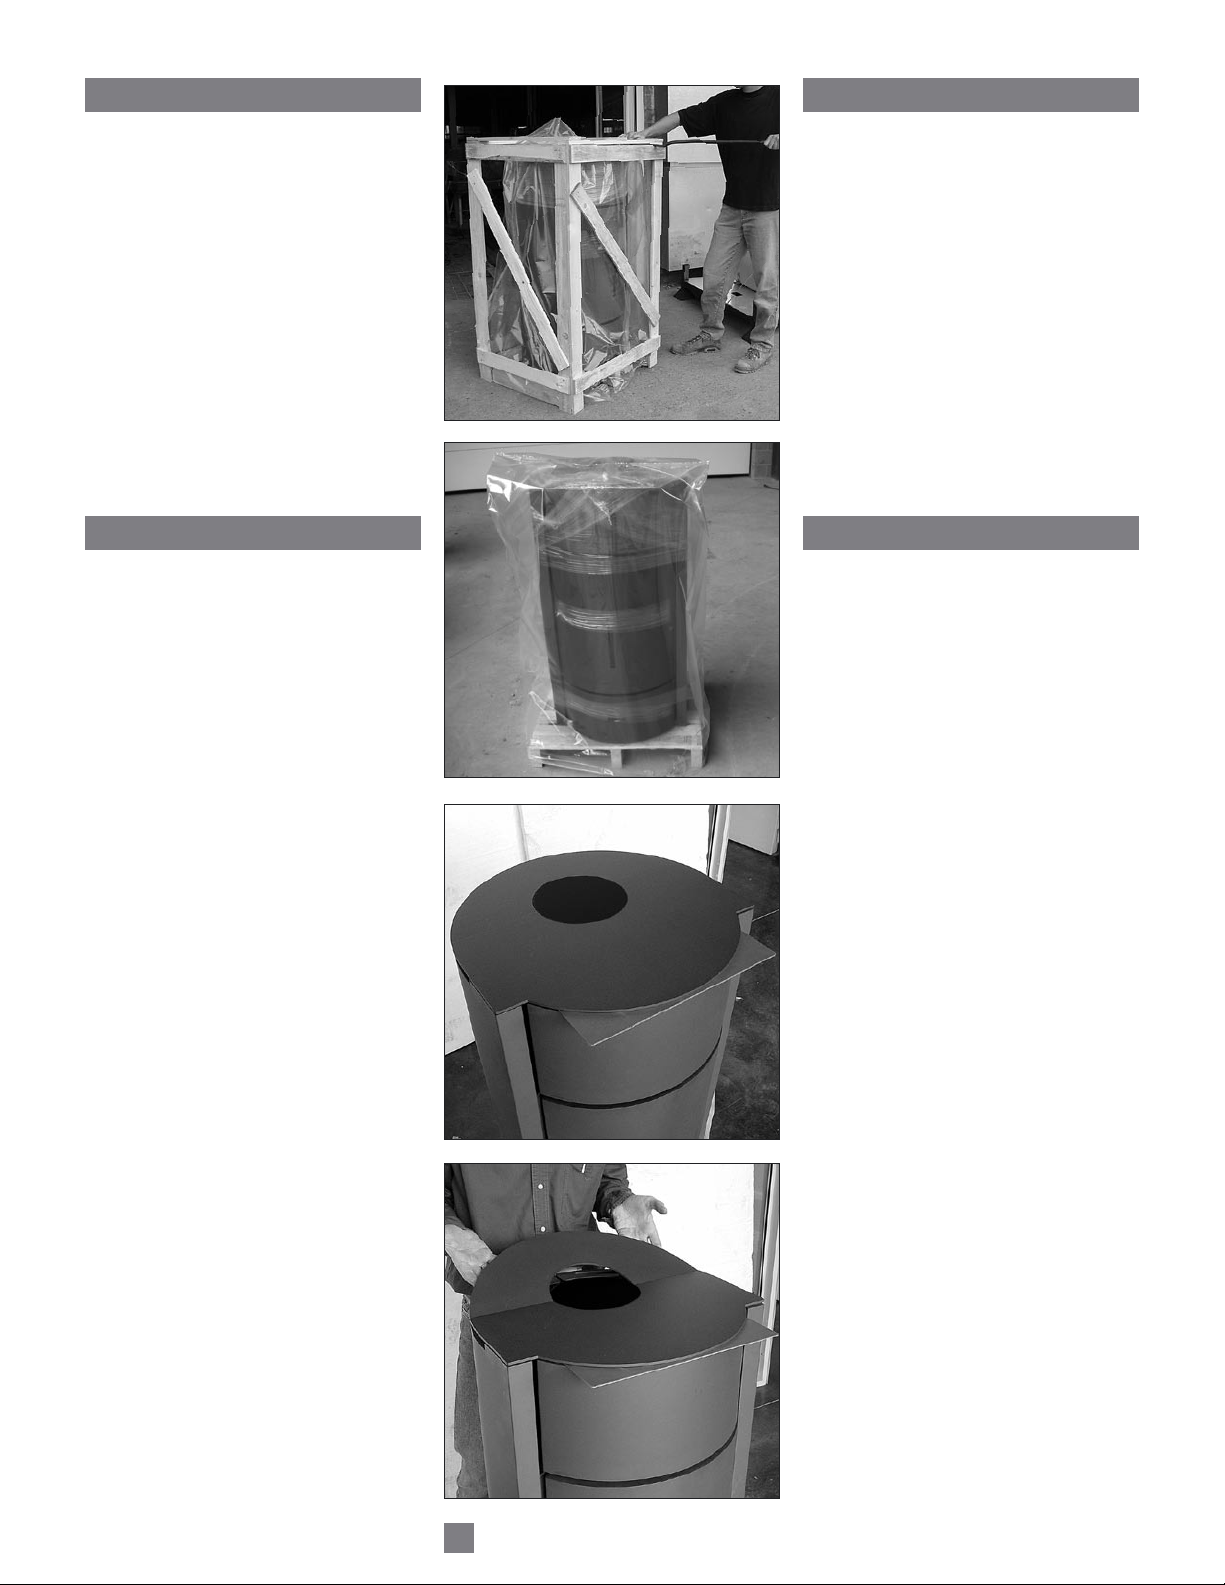
À la réception du matériel
Avec le foyer, vous recevez :
– une bombe de peinture pour
réparation,
– une poignée "main froide" (photo
2B) pour la manipulation du registre
et du tambour,
– une clé Allen 6mm,
– un sachet contenant les pieds
réglables du foyer (photo 2C),
– le disque d’obturation de sortie
supérieur de fumée (photo 2A),
– un pare-étincelle,
– des documents :
- certificat de garantie (à renvoyer
à STÛV America),
- instructions d'installation,
- mode d'emploi,
- fiche de contrôle final du foyer.
– en option : le plateau tournant.
Attention !
Vérifier que les vitres ne se sont pas
brisées au cours de la livraison; en effet
la garantie ne couvre les détériorations
dues au transport que si elles sont
signalées dans les 48 heures de la
livraison.
La peinture n'est pas cuite au four; elle
est donc relativement fragile mais elle
durcira lors des premières chauffes; par
conséquent, manipuler l'appareil avec
précaution lors de son installation.
Lors du premier feu, certains
dégagements de fumée et d'odeur
peuvent se produire : ventiler
abondamment.
En cas de réclamation, communiquez
toujours le n° du foyer visible sur le
corps de l’appareil au centre au dessus
du cendrier en position porte pleine
(photo 3A) et adressez une copie de la
fiche de contrôle final du foyer.
Remettez les documents à l’utilisateur
et recommandez-lui de renvoyer
le certificat de garantie chez STÛV
America.
At the receipt of the material
Along with the fireplace, you will
receive :
– a paint repair spray,
– a “cold” handgrip (picture 2B) for
handling the doors, damper and
drum,
– a 6mm Allen key,
– a bag containing the adjustable legs
of the fireplace (picture 2C),
– the closure seal for the upper smoke
outlet (picture 2A),
– a fireguard,
– documents :
- certificate of guarantee (to be
returned to STÛV America),
- installation instructions,
- directions for use,
- final inspection card for the
fireplace.
– Optional : turn-plate.
Caution !
Check that the window has not been
broken during delivery. In actual fact,
the guarantee only covers damage
due to transport if it is notified within
48 hours of delivery.
The paint is not oven-baked and it
is therefore relatively fragile but will
harden when it is heated for the first
few times. Consequently, take care
when handling the appliance when it is
being fitted.
When lighting the fire for the first time,
some unpleasant smoke or smells may
be released. Ventilate with a plentiful
supply of air.
If you have a complaint to make, always
communicate the no. of the fireplace
which can be seen on the main frame
of the appliance, in the middle, above
the ashpan in the sold door position
(photo 3A) and send a copy of the
final inspection card for the fireplace.
Hand the documents over to the user
and recommend that he should return
the certificate of guarantee to STÛV
America.
S30 - IME - US
06-07
6
7
8
Mise en place du Stûv 30
Outils nécessaires :
- une clé à douille ou plate n°8 (mm)
- un tournevis cruciforme
- 1 clé plate de 13 mm
- une visseuse
- un diable
- une couverture
- un cutter
- un pied de biche
Attention : le foyer doit être positionné
de telle sorte qu’il repose sur
l’emballage en bois ou sur la plaque à
bord droit prévue à cet effet (photo 4
et 4’).
Déballage du Stûv 30
À l’aide du pied de biche retirer
l’emballage en bois protégeant le foyer
pour le transport (photo 5).
Prendre soin de ne pas griffer le foyer !
La peinture n’est pas cuite au four.
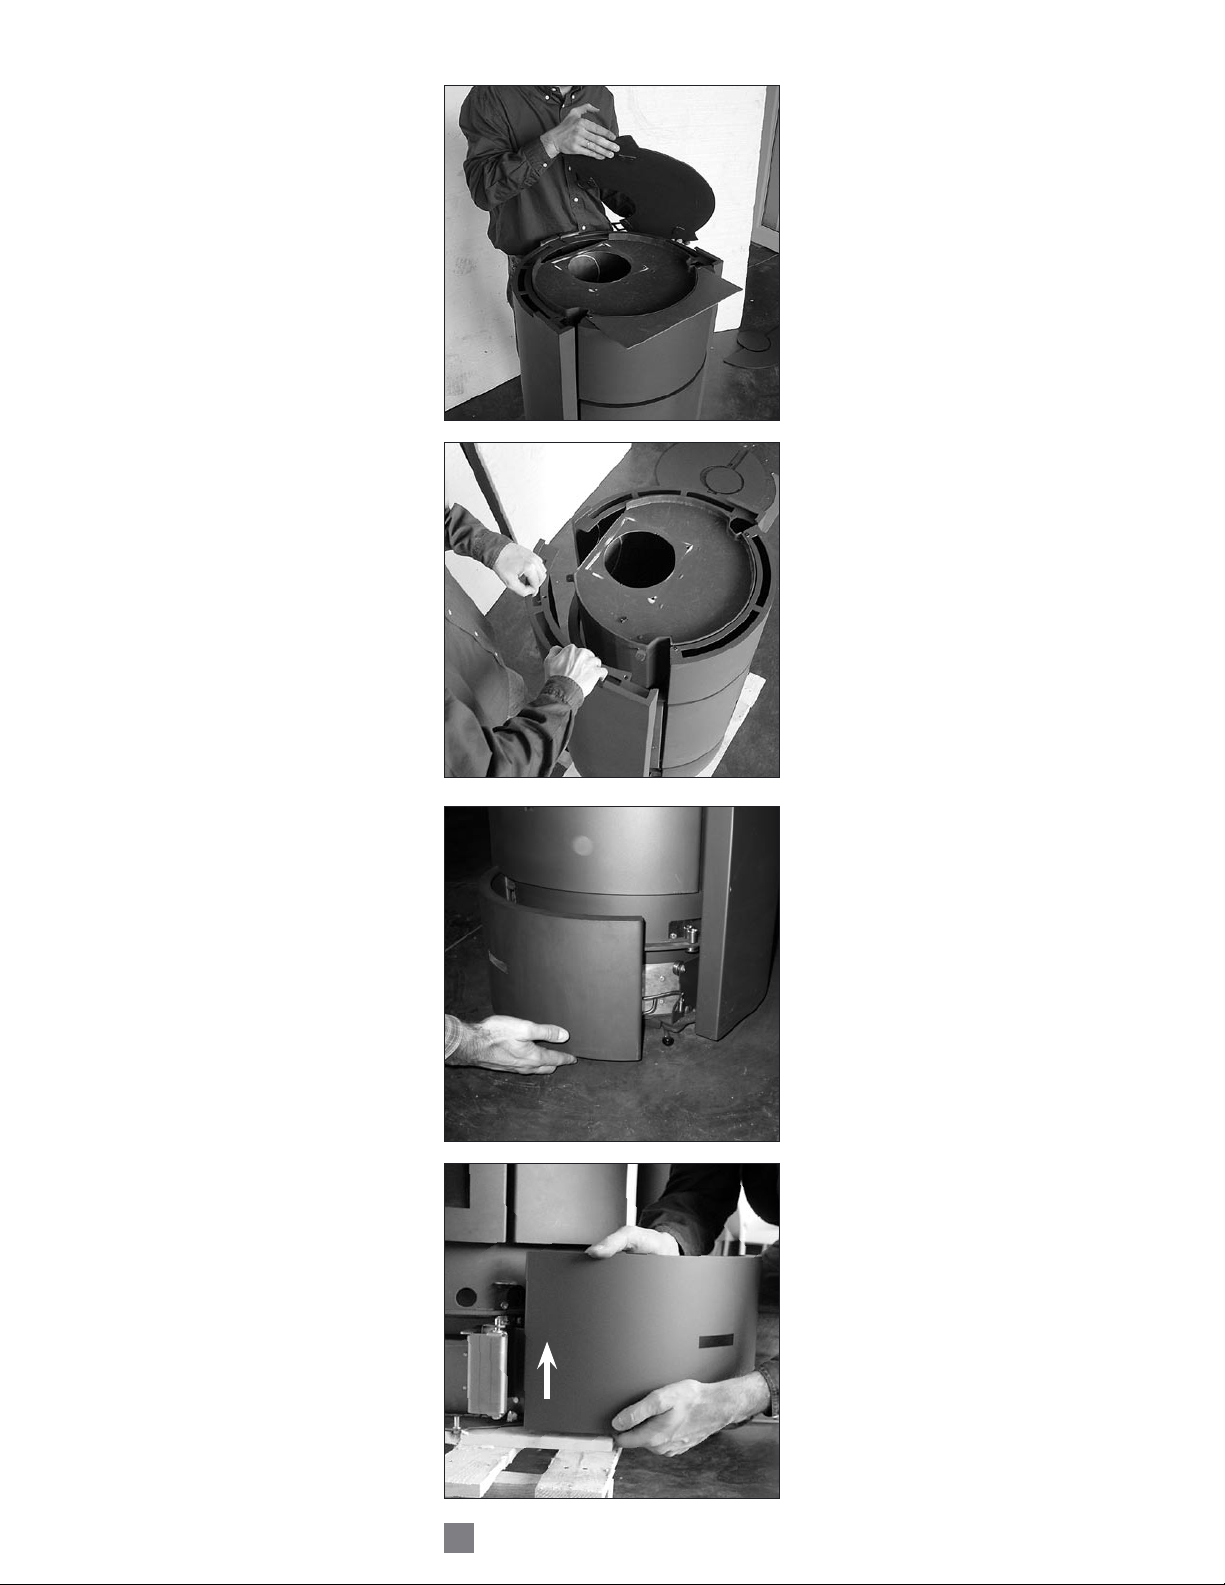
Enlever complètement le sac plastique
de protection (photo 6).
Pour vous faciliter la tâche, et pour
réduire le poids du foyer à transporter,
vous pouvez retirer les éléments situés
dans la chambre de combustion.
Retirer les films plastiques étirables qui
maintiennent les portes fermées durant
le transport.
Une des extrémités du film plastique des
portes de la chambre de combustion
est coincée entre la porte bandeau et le
corps du foyer.
Ne pas arracher le film, ouvrir la porte
bandeau pour le décoincer.
Installation of the Stûv 30
Tool requirements :
- an 8 mm box spanner or open-end
spanner (mm)
- a cruciform screwdriver
- a 13 mm open-end spanner
- a driver
- a trolley
- a blanket
- a cutter
- a claw hammer
Caution : the fireplace should be
positioned so that it rrests on the
wooden packing or on the plate
provided for that purpose (photo 4 and
4’).
Unpacking the Stûv 30
Using the claw hammer, remove
the wooden packing that protected
the fireplace during transport (photo 5).
Take care not to scratch the fireplace.
The paint is not oven baked.
Remove completely the plastic packing
(photo 6).
In order to make your job easier, and
to reduce the weight of the fireplace to
be transported, you can unpack it and
take out the components located in the
combustion chamber.
Remove the plastic films which hold the
doors closed during transport. Do not
tear down the plastic film. But just open
the « open fire » door to loosen one of
its ends.
5
6
S30 - IME - US
06-07
7
9
10
12
11 Ouvrir la porte du cendrier.
11
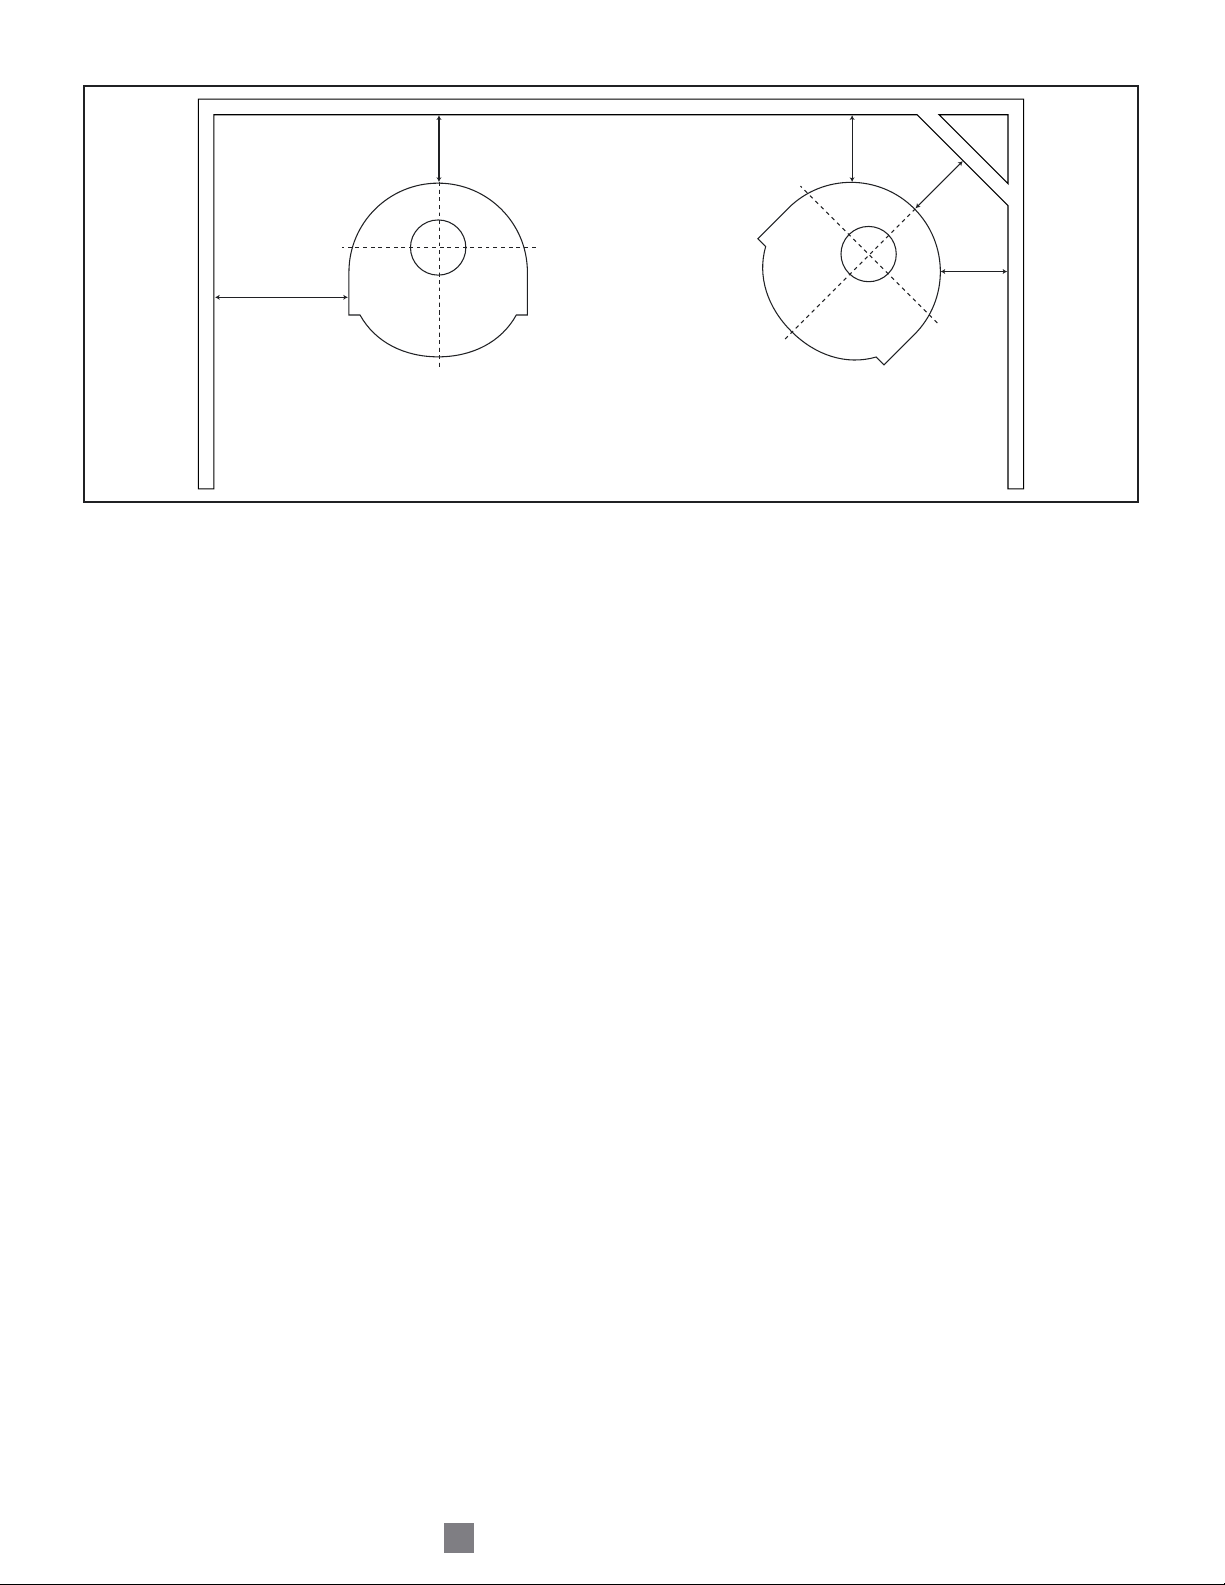
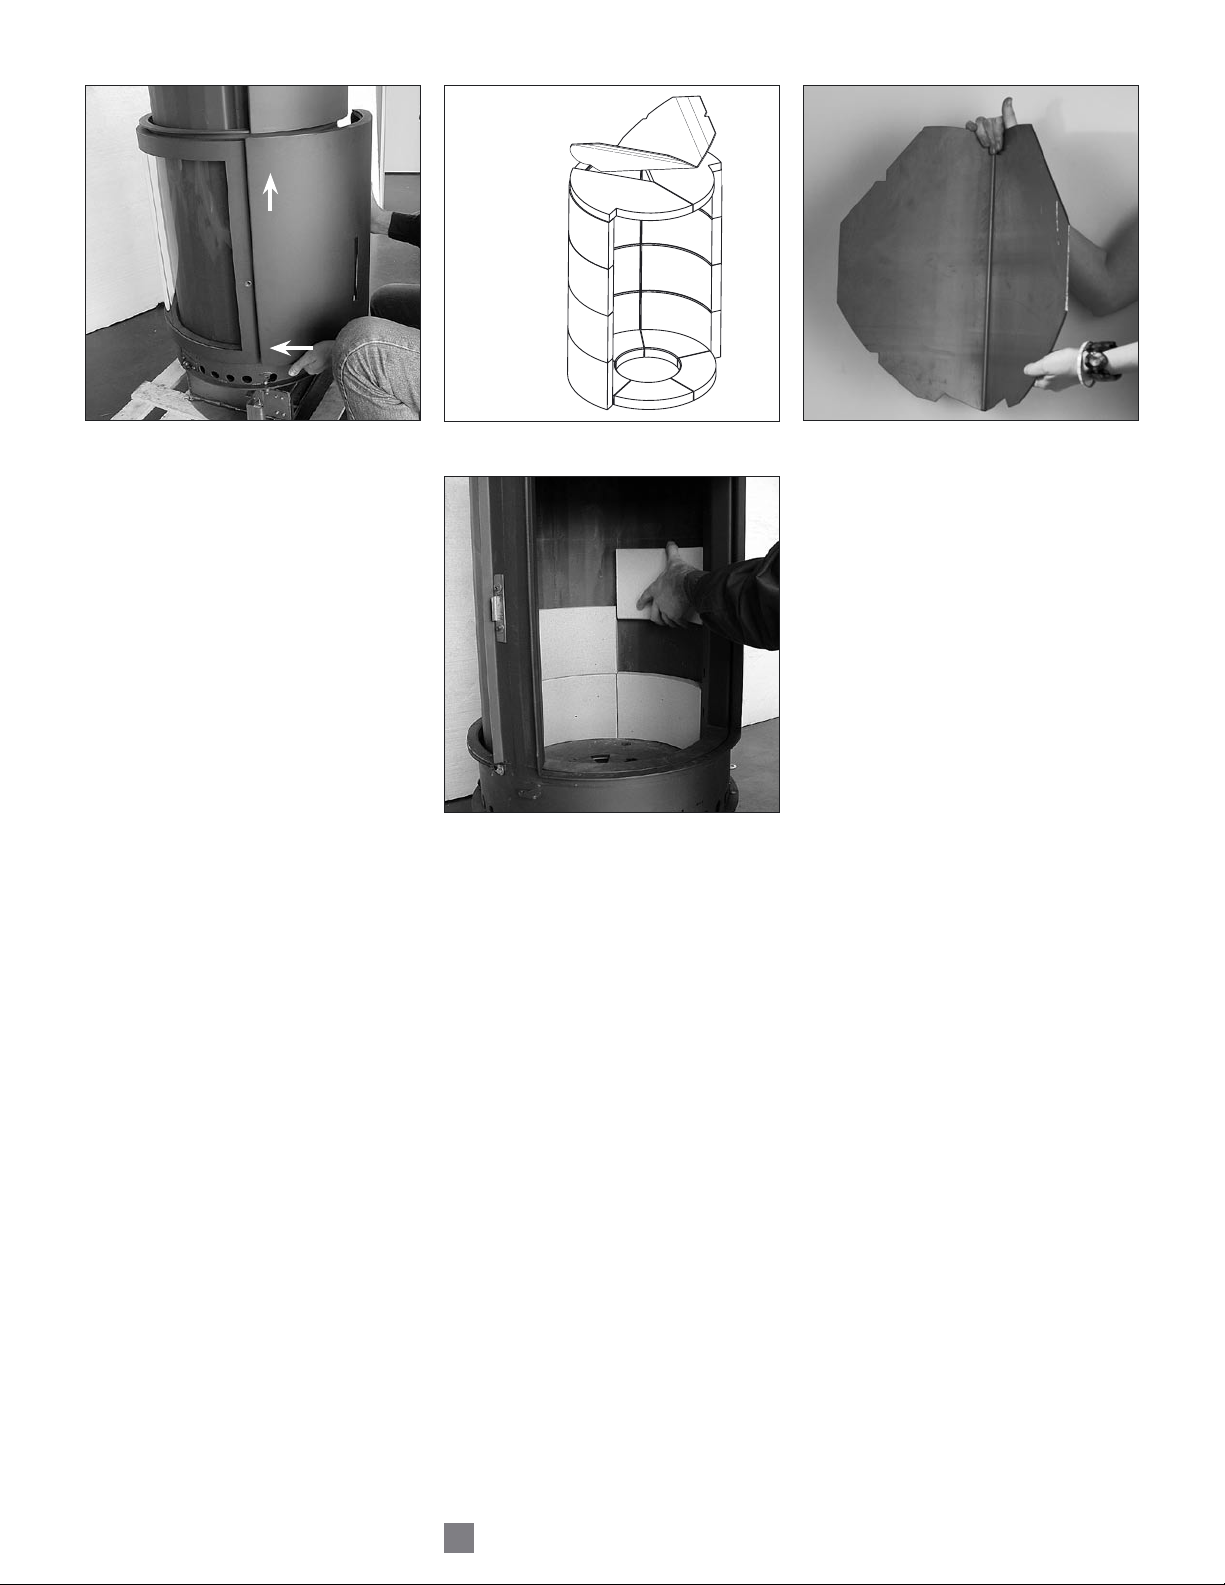
7, 8 et 9 Retirer les 2 tablettes situées
sur le haut du foyer.
10 À l’aide de la clé à douille de 8mm
dévisser et retirer les parements
latéraux.
12 Enlever la porte du cendrier en la
soulevant hors de ses gonds.
10 Using the 8 mm box spanner,
unscrew and remove the side panels..
11 Open the door of the ashpan.
12 Remove the door of the ashpan by
lifting it off its hinges.
7, 8 and 9 Take out the plates
located on the top of the fireplace.
S30 - IME - US
06-07
8
Placer l’appareil au sol suivant les
dégagements de sécurité requis, voir
schémas.
Les dégagement indiqués sont pour
tous matériaux combustibles (ex.: Bois,
Gypse, etc.).
Dégagement à l’avant de l’appareil :
1220mm (48")
Dégagement arrière :
203mm (8")
Dégagement des côtés : 420mm
(16 1/2")
Hauteur minimale du plafond :
2135mm (84")
Un matériel de protection incombustible
doit être placé au sol à l'avant de
l'appareil sur une longueur de 406mm
(16") et 203mm (8") de chaque côté de
la vitre.
Cet appareil ne doit pas être inséré dans
un âtre de maçonnerie
Place the appliance on the floor
according to the required safe distances,
see schedules.
The indicated safe distances are suitable
for all combustible materials (for
example wood, gypsum, etc.).
Safe distance in front of the appliance:
1220mm (48”).
Backwall : 203mm (8")
Sidewall : 420mm (16 1/2")
Ceiling height : 2135mm (84")
A 536mm x 869mm (21 1/8» x 34
1/4») minimum hearth extension made
of non combustible material is required
as Canadian building code requirements.
Sixteen inches (406 mm) beyond the
front and 8 inches (203 mm) beyond
each side of the fuel loading and ash
removal opening(s).
Do not use as an insert.
S30 - IME - US
06-07
9
15
16
Dégarnissage du Stûv 30
Pour retirer les portes, entrouvrir
légèrement celles-ci à l'aide de la clé
Allen de 6mm
Les soulever pour les sortir de leurs
gonds puis les pousser vers la gauche
(photo 13).
Enlever la barre d'acier soutenant les
réfractaires en vermiculite horizontaux.
Il suffit de pousser sur celle-ci pour
qu'elle sorte de ses encoches.
Enlever les réfractaires en vermiculite
horizontaux (14C) puis le déviateur
de fumée (14D et 15) verticalement.
Retirer ensuite les réfractaires
horizontaux du fond du foyer (14A).
Ils sont simplement posés.
Enfin démonter les réfractaires verticaux
(14B et 16).
Regarnissage de la chambre de
combustion du foyer (voir page 16).
Si ce n’est pas encore fait, amener
l'appareil à proximité du conduit de
cheminée.
17 Ouvrir et retirer le cendrier.
Pour retirer les portes, entrouvrir
légèrement celles-ci.
18 Soulever les portes pour les sortir
hors de leurs gonds puis les pousser
vers la gauche.
13
1
2
A 5 pieces
B 12 pieces
C 2 pieces
B
D
A
C
B
14
Stripping the Stûv 30
To remove the doors, slightly open
them using the 6mm Allen key.
Lift them off their hinges and push
them to the left (picture 13).
Remove steel rod supporting horizontal
vermiculite refractors. It simply pushes
away out of its notches.
Remove horizontal vermiculite refractors
(14C) then smoke deflector (14D & 15)
vertically.
Then remove horizontal refractors from
bottom of stove (14A). They are simply
laid down.
Finally remove vertical refractors
(14B & 16).
Refitting stove combustion chamber
(see page 16).
If that has not yet been done, bring the
fireplace close to the chimney flue.
17 Open and take out the ashpan.
To remove the doors, first open
them slightly.
18 Raise the doors slightly to take them
off their hinges, and then push them
to the left.

S30 - IME - US
06-07
10
19
20
21
19 Enlever les 4 vis qui maintiennent
le foyer à la palette. Placer une
couverture sur le bord de la chambre
de combustion.
20 Replacer le foyer sur le diable
(toujours du côté de la plaque
protectrice).
21 Une fois le Stûv 30 couché, il devient
aisé de placer les pieds réglables.
17 18
1
2
Raccordement à la cheminée
Attention: N’employez pas de moyens
de fortune pendant l’installation: ils
pourraient devenir dangereux et entraî-
ner un incendie.
Ne reliez pas cet appareil à une che-
minée qui dessert un autre appareil de
chauffage.
Ne coupez ni chevrons ni solives de
plafond sans consulter au préalable
un agent du service du bâtiment pour
éviter de compromettre l’Intégralité
Structurale.
Utiliser un connecteur à doubles parois
(noir) 7 pouces. Utiliser uniquement
une cheminée de 7 pouces répertoriée
selon la norme UL 103 HT ou ULC S-
629 dès que vous traversez une paroi
combustible, selon les normes d’instal-
lations en vigueur dans votre localité.
Note: Il est possible d’utiliser un con-
necteur noir simple paroi de 7" si vous
respectez les dégagement requis de ce
conduit, soit : 458 mm (18").
UNE CHEMINÉE SERVANT D’ÉVACUA-
TION À UN FOYER NE DOIT PAS SER-
19 Unscrew the 4 screws holding the
fireplace to the pallet. Place a blanket
on the edge of the combustion
chamber.
20 Put the fireplace back onto the
trolley (always on the side of the
protective plate).
21 Once the Stûv 30 is lying flat, it
becomes easy to fit the adjustable
legs.
Connection to a chimney
Caution : Do not use makeshift
compromises during installation as they
may be safety hazards, and a fire could
result.
Do not connect this unit to a chimney
system serving another appliance.
Do not cut rafters or celling joists
without first consulting a Building
Official to ensure Structural Integrity is
not compromised.
Use a double walled connector off the
top of the stove. Use only a 7 inch-
chimney according to the ULC S-629
standard.
This room heather must be connected
to :
- A chimney complying with the requi-
rements for Type HT chimneys in the
Standard for Chimney, Factory -Built,
Residential Type and Building Heating
Appliance, UL 103 HT or ULC S629
- a code-approved masonry chimney
with a flue liner.
Note: it is possible to use a single-sided
black flue of 7” if you respect the
required safe distance of this flue, being

S30 - IME - US
06-07
11
22
VIR POUR AUCUN AUTRE APPAREIL.
ATTENTION : VEUILLEZ VOUS RÉFÉ-
RER AU MANUEL D’INSTRUCTION
DU MANUFACTURIER DE CHEMINÉE
POUR LES DÉTAILS D’INSTALLATION.
PRÉCAUTIONS: Si cet appareil n’est
pas adéquatement installé, un incendie
peut s’ensuivre. Afin de réduire tout
risque d’incendie, suivez les instructions
d’installation. Consultez les autorités
locales pour obtenir un permis de cons-
truction ainsi que prendre connaissance
de toutes les exigences règlementaires
en vigueur.
23
24
25 27
26
Re-lining the combustion
chamber (if necessary)
22 Place the 4 levels of vertical
refractories from left to right, cover
the bottom of the fireplace with the
remaining refractories.
23, 24 et 25 The deflector is set easily
on the refractories owing to the lugs
which perfectly match their shape.
26 Place the two vermiculite refractories
in the upper part of the combustion
chamber.
27 Use one hand to keep them in a
horizontal position.
458mm (18”).
A CHIMNEY SERVING AS AN OUTLET
FOR A FIREPLACE CANNOT BE USED
FOR ANY OTHER APPLIANCE.
CAUTION: PLEASE REFER TO THE
INSTRUCTION MANUAL OF THE
CHIMNEY MANUFACTURER FOR THE
INSTALLATION DETAILS.
Install the fireplace structly according
to the methods described herein and
ensure proper clearance is provided to
combustibles. Use only the parts and
chimneys specified in this manual. Any
non-compliance with these directions
could create a hazardous situation,
thus voiding the certification and the
warranty.
Regarnissage de la chambre
de combustion (si nécessaire)
22 Placer les 4 étages de réfractaires
verticaux de gauche à droite,
couvrir le fond du foyer avec les 5
réfractaires restants.
23, 24 et 25 Le déviateur se dépose
facilement sur les réfractaires grâce
aux ergots qui épousent parfaitement
leur forme.
26 Placer les 2 réfractaires en vermiculite
dans la partie supérieure de la
chambre de combustion.
27 D'une main, les maintenir en position
horizontale.

S30 - IME - US
06-07
12
30
Rhabillage du Stûv 30
30 Dans le cas où la sortie de fumée se
situe à l’arrière, libérer les 2 demi-
lunes se trouvant sur les parements
latéraux.
Pour rhabiller le foyer, il suffit
d’effectuer les opérations de
déshabillage en sens inverse c’est-à-
dire :
– couvercle du cendrier,
– cendrier,
– porte du cendrier,
– les 3 portes,
– parements latéraux :
- introduire d’abord le mentonnet
avant du socle dans le parement
(photo 31),
- faire pivoter le parement pour
introduire l’axe arrière,
- fixer la partie supérieure,
– plaques supérieures.
31
28
29
28 et 29 De l'autre, insérer la barre
d'acier dans les encoches prévues
à cet effet.
Re-assembling the Stûv 30
30 If the smoke outlet is located at the
rear, release the 2 half-moons to be
found on the side facings.
To re-assemble the fireplace, you need
only carry out the stripping operations
in the opposite direction, i.e. :
– ashpan lid,
– ashpan,
– ashpan door,
– the 3 doors,
– side facings :
- first, fit the front lug of the base
into the panel (photo 31),
- swivel the facing to insert the rear
pin,
- fix the upper part.
– solid door and top plates.
28 et 29 and 45 Use your other hand
to insert the steel bar in the holes
provided.

S30 - IME - US
06-07
13

S30 - IME - US
06-07
14

directions for use
mode d'emploi
[ en ]
[ fr ]

S30 - IME - US
06-07
16
Vous avez choisi un foyer Stûv ;
Concept & Forme vous en remercie.
Ce foyer a été conçu pour vous offrir un
maximum de plaisir, de confort et de
sécurité.
Nous vous recommandons :
- de confier son installation (ou en tout
cas son contrôle) à un professionnel
qualifié,
- de lire attentivement ce mode
d’emploi et de respecter les
consignes d’entretien,
- de nous retourner le certificat de
garantie dûment complété en
mentionnant bien le n° de fabrication
visible sur le corps de l’appareil au
centre au dessus du cendrier en
position porte pleine (photo 2),
- de faire ramoner le conduit
régulièrement (une fois par saison
de chauffe, pour une utilisation
régulière) pour vous assurer un
fonctionnement optimal et une
sécurité maximale.
Précautions
- La peinture n'est pas cuite au four;
elle est donc relativement fragile
mais elle durcira lors des premières
chauffes; par conséquent, manipuler
l'appareil avec précaution lors de son
installation.
Nettoyer avec un chiffon sec.
- Une bombe de peinture fournie avec
l’appareil permet d’effectuer des
retouches si nécessaire.
- Lors du 1er feu, certains
dégagements de fumée et d'odeur
peuvent se produire. Ventiler
abondamment.
Les combustibles
Quel bois choisir ?
LE CHARBON EST PROSCRIT !
Ne jamais utiliser d’essence, d’huile à
lampe, de kérosène, de liquide à fondu
ou tout autres liquides similaires pour
allumer ou rafraîchir le feu dans cet
appareil. Gardez tout type de liquides de
ce type le plus éloigné possible de cet
appareil au moment de son utilisation.
Les différentes essences de bois ont
des pouvoirs calorifiques différents et
elles ne brûlent pas toutes de la même
façon; d’une manière générale, donnez
votre préférence aux bois durs comme le
1
2
You have chosen a Stûv fireplace ;
Concept & Forme thanks you for doing
so. This fireplace was designed to offer
you maximum pleasure, comfort and
safety..
We recommend that you should :
- entrust its installation (or at any
rate its inspection) to a skilled
professional,
- carefully read these directions for
use and comply with the cleaning
instructions,
- duly fill in the certificate of guarantee
and return it to us, while clearly
mentioning the manufacturer’s
no., which can be seen on the
main frame of the appliance, in the
middle, above the ashpan in the sold
door position (photo 2),
- have the flue swept at regular
intervals (once a heating season,
for regular use) in order to ensure
optimum operation and maximum
safety.
Precautions
- The paint is not oven-baked and it
is therefore relatively fragile but will
harden when it is heated for the first
few times. Consequently, take care
when handling the appliance when it
is being fitted.
Clean with a dry cloth.
- A paint spray supplied with the
appliance allows you to touch up the
paintwork, if necessary.
- When lighting the fire for the first
time, some unpleasant smoke or
smells may be released. Ventilate
with a plentiful supply of air.
Fuel
Which wood should you choose ?
COAL IS FORBIDDEN !
Different species of wood have different
heat capacities and they do not all burn
in the same way. Generally speaking,
you should opt for hard wood such as
oak, beech, ash, hornbeam or fruit trees.
They provide lovely flames and a lot of
embers which will glow for a long, long
time.
Never use gasoline, gasoline-type
lantern fuel, kerosene, charcoal lighter
fluid, or similar liquids to start or
‘freshen up’ a fire in this unit. Keep all

S30 - IME - US
06-07
17
3
4
5
6
chêne, le hêtre, le frêne, le charme, les
fruitiers : ils produisent de belles flammes
et beaucoup de braises qui restent
longtemps incandescentes.
Le séchage
Quel que soit le bois choisi, il doit
être bien sec ; le bois humide chauffe
infiniment moins : une grande partie
de l’énergie n’est utilisée que pour
évaporer l’eau qu’il contient ; l’aubier
– c’est ainsi qu’on appelle le bois jeune
immédiatement sous l’écorce – peut
contenir jusqu’à 75% d’eau. De plus,
le bois mouillé dégage beaucoup
de fumée et peu de flammes et il
provoque l’encrassement du foyer,
de sa vitre et de la cheminée. Pour
favoriser le séchage, il est important
que les gros rondins soient fendus ; le
bois sera couvert ou abrité de la pluie,
mais bien ventilé. En général, il faut
compter deux années de séchage. Avec
l’expérience, vous apprécierez le séchage
en soupesant les bûches : plus elles sont
sèches, plus elles sont légères et plus
elles produisent un son clair quand on
les cogne l’une contre l’autre.
À proscrire
Les bois qui ont subi des traitements
chimiques, traverses de chemin de fer,
agglomérés qui encrassent rapidement
l’appareil et la cheminée et peuvent
produire des émanations toxiques.
Le hêtre (photo 3), le frêne
Des bois de chauffage à recommander :
ils sèchent vite et on en trouve
facilement. Ils doivent être stockés sous
abri immédiatement après avoir été
débités et refendus, sinon ils pourrissent
très vite et perdent leur pouvoir
calorifique. Ils sont faciles à allumer,
offrent des feux dynamiques et des
flammes très lumineuses.
Le chêne (photo 4)
C’est un excellent combustible, mais il
doit − contrairement aux autres bois −
rester non couvert pendant deux ans
pour que la pluie le débarrasse des tanins
qu’il contient ; ensuite, on l’entreposera
sous abri encore un an ou deux avant
de le brûler. Dans les petites branches, la
proportion d’aubier (qui brûle trop vite)
est importante. Il brûle lentement, offre
un feu calme et donne de belles braises.
Idéal pour faire un barbecue et pour
fonctionner à feu continu.
Le charme (photo 5), le merisier (photo
such liquids well away from the unit
while it is in use.
Drying
Whatever wood you choose to use, it
must be really dry. Damp wood heats
a great deal less: a best part of energy
is only used to evaporate the water
that it contains. The sapwood – as the
soft wood just beneath the bark is
called – can contain up to 75% water.
Furthermore, moist wood releases a lot
of smoke and not many flames and it
causes the fireplace, its window and
the chimney to get dirty and soot up.
The big logs should be split for the
wood to dry better. The wood should
be covered or sheltered from the rain,
but well ventilated. Generally speaking,
you should allow two years for the
wood to dry properly. You will learn
to estimate the extent of drying from
experience by weighing the logs in your
hand. The drier they are, the lighter
they are and they make a clearer sound
when you knock them together.
Wood never to be used
Wood which has been treated
with chemicals, railway sleepers, or
fibreboard, which are quick to dirty the
appliance and soot up the chimney and
may also give off toxic fumes.
Beech (Pic. 3), ash
Firewood to be recommended: they
dry quickly and are readily available.
They should be stored under shelter as
soon as they have been cut and split
otherwise they rot very quickly and lose
their heat capacity. They are easy to
ignite, provide dynamic fires and rather
bright flames.
Oak (Pic. 4)
An excellent fuel but – contrary to other
wood – must remain unsheltered for
two years so that rain can wash away
the tannins it contains. Then it should
be stored under shelter for another
two years or so before being suitable
for burning. There is a significant
proportion of sapwood (which burns
too quickly) in small branches. Oak
burns slowly, provides a quiet fire
and gives nice embers. It is ideal for a
barbecue and for a slow-burning fire.
Hornbeam (Pic. 5), cherry wood
(Pic. 6), fruit trees
Excellent fuels but scarce. These are

S30 - IME - US
06-07
18
7
8
9
6), les fruitiers
Excellents combustibles, mais rares.
Ce sont des bois durs. Ils offrent de
belles flammes, harmonieuses, calmes,
et donnent de belles braises. Idéal pour
faire un barbecue et pour effectuer un
feu continu.
Le bouleau (photo 7), le tilleul, le
marronnier, le peuplier, le robinier,
l'acacia
Ce sont des feuillus à bois tendre. Ils
offrent de belles flammes harmonieuses
mais vives, et peu de braises. Ils brûlent
vite : on les utilisera pour lancer (ou
relancer le feu).
Attention :
Le peuplier provoque des cendres
abondantes et volatiles.
Le robinier et l'acacia provoquent des
projections de braises importantes.
Les résineux
Ils dégagent beaucoup de chaleur,
mais ils se consument rapidement ; ils
projettent des braises et les résines qu’ils
contiennent encrassent les cheminées.
À éviter.
Les foyers Stûv sont conçus pour un
usage domestique, en tout cas pas pour
incinérer des déchets, quels qu’ils soient.
Respecter la puissance nominale du
foyer (8 kW= ± 2,5 kg de bois sec par
heure).
Allumage
Effectuer l’allumage en position porte
à feu ouvert. Enflammer d’abord des
boules de papier et du petit bois.
Ouvrir le registre (photo 8) au
maximum (vers la droite)
Quand le petit bois est bien enflammé,
charger de bois de plus en plus gros
jusqu’à pouvoir enflammer des buches ;
passez sur une autre porte quand
l'appareil atteint une température
suffisante.
Lancer le feu assez vivement pour
échauffer le foyer, favoriser un bon
tirage puis régler le registre (photo 8)
pour obtenir l'allure souhaitée.
Attention : en position feu ouvert (porte
bandeau), fermer le registre.
+
-
hard woods providing nice flames,
harmonious, quiet and give nice embers.
Ideal for a barbecue or a slow-burning
fire.
Birch (Pic. 7), lime, chestnut, poplar,
robinia, acacia
These are broad-leaved trees producing
soft wood. They provide nice but lively
flames and few embers. Wood burns
fast and will be used to light or rekindle
the fire.
Warning :
Poplar produces abundant and volatile
embers.
Robinia and acacia can cause important
ember projections.
Conifers
They produce a lot of heat but burn
quickly; they sputter embers and the
resin they contain foul up the flue.
They should be avoided.
Stûv fireplaces are designed for
domestic use, in all events not to
incinerate waste, whatever it may be.
Respect the rated power of the fireplace
(8 kW = ± 2.5 kg of dry wood per
hour).
Lighting of the fire
Light the fire in open fire position. First
of all, set balls of paper and kindling on
fire.
When the kindling is blazing, load
with wood increasingly thick until the
logs catch fire; switch to another door
position when the appliance is enough
warm in order to avoid sooting up the
window.
Start the fire rather briskly to heat
the fireplace, see that there is a good
draught and then set the damper
(picture 8) to obtain the required level.
Caution : close the damper in the "open
fire" position.

S30 - IME - US
06-07
19
11
12
Décendrage
Laisser au fond du foyer un lit de
cendres qui favorise la combustion et
contient encore du combustible.
À l’aide de la main froide, actionner
la grille de décendrage pour libérer le
surplus de cendres (photo 10).
À l’aide de la main, ouvrir la porte et
sortir le cendrier (photo 11 et 12).
Attention: Les cendres peuvent causer
des incendies, même après plusieurs
journées d’inactivité. Ne
jetez jamais de cendres dans un
récipient combustible. Les cendres et le
poêle doivent avoir refroidi
avant qu’on ne les en enlève (utiliser
une pelle ou un aspirateur à cendres)
et les stocker un certain temps à
l'extérieur, dans un seau métallique.
Enlèvement des cendres : Il faut mettre
celles-ci dans un récipient
métallique dont le couvercle ferme
hermétiquement. Le récipient qui
renferme les cendres doit alors être
placé sur un plancher incombustible
ou sur le sol, loin de tous matériaux
combustibles, jusqu’à ce qu’on s’en
10
Rechargement
des combustibles
Le chargement du bois s’effectue en uti-
lisant la porte à feu ouvert seulement.
Si vous êtes déjà sur ce mode de fonc-
tionnement, retirez le pare-étincelle,
chargez de bois et réinstallez le pare-
étincelle.
Si vous êtes en mode de fonctionnement
à porte vitrée ou à porte pleine, escamo-
tez les portes en un tournemain jusqu’à
la porte à feu ouvert et chargez direc-
tement de bois. Escamotez de nouveau
les portes jusqu’au mode de fonctionne-
ment préalable. Si vous désirez rester au
mode de fonctionnement à feu ouvert,
réinstallez alors le pare-étincelle.
Note : Vous devez préalablement retirer
le pare-étincelle en mode de fonction-
nement à porte à feu ouvert pour passer
aux autres modes soit porte vitrée ou
porte pleine. Utilisez la main froide (poi-
gnée) pour escamoter les portes.
Consommation maximum pour
éviter une surchauffe : 2,5 kg de bois
à l'heure (à titre indicatif).
Removal of ashes
Leave a bed of ashes at the bottom
of the fireplace since it encourages
combustion and still contains somefuel.
Using the cold handgrip, operate the
ash removal grate to release the excess
ash (photo 10).
Open the door and take out the ashpan
(photo 11 and 12), using the cold
handgrip.
Caution : Ashes can start fires, even
after several days of inactivity. Never
dispose of ashes in a combustible
container. Remove ashes only when
stove and ashes are cold (use a shovel
or a vacuum cleaner for ashes) and
be careful to store them for a while
outside, in a metal bucket.
Disposal of ashes
Ashes should be placed in a metal
container with a tight fitting lid. The
closed container of ashes should be
placed on a noncombustible floor or
on the ground, well away from all
combustible materials, pending final
disposal. If the ashes are disposed of
by burial in soil or otherwise locally
Reloading with fuel
The wood can only be loaded with the
door in open fire position. If you are
already in this position, pull back the
fire-guard, load with wood and reinstall
the fire-guard.
If you are in the glass door or solid
door position, retract the doors in an
instant until the open fire position and
load directly with wood. Retract the
doors again until reaching the previous
position. If you wish to maintain the
open fire position, reinstall the fire-
guard.
Note: First remove the fire-guard in
open fire position before passing to the
other positions, either the glass door
or solid door position. Use the « cold »
handgrip to retract the doors.
Maximum consumption to avoid
overheating : 2.5 kg of wood per hour
(for your information).

S30 - IME - US
06-07
20
13
débarrasse pour de bon.
Si vous voulez enterrer les cendres
ou les disperser dehors, vous devriez
les conserver dans le récipient
hermétiquement fermé jusqu’à ce que
les braises se soient toutes refroidies. Ne
mettez pas d’autres sortes de déchets
dans ce récipient métallique.
Rotation du tambour
Ouvrir la porte du cendrier (photo 11).
Effectuer 1 ou 2 tiers de révolution
jusqu’à la butée (clic de verrouillage)
pour l’obtention de la configuration
désirée (photo 13).
Prendre soin de toujours effectuer les
rotations de gauche à droite.
Utiliser l'appareil uniquement sur une
porte bien enclenchée, ne pas l'utiliser
entre 2 positions.
Entretien et nettoyage
Nettoyez le poêle fréquemment afin de
lutter contre l’accumulation de suie, de
cendres et de créosote.
Ne nettoyez pas le poêle, sa porte ou
ses vitres lorsqu’il est chaud.
Entretien de la vitre
La porte s’ouvre pour l'entretien de sa
face intérieure. Utiliser la clé Allen 6mm
fournie. (photo 9)
- Attendre le refroidissement complet,
- utiliser une mousse en spray comme
pour l'entretien des vitres de
four (protéger les parties peintes,
revêtement de sol...),
- bien sécher la vitre car les résidus
graisseux fixent les fumées,
- terminer - si nécessaire - avec un
produit d'entretien pour vitres.
Drum rotation
Open the door of the ashpan (photo
11). Make one or two-thirds of a
revolution to obtain the required
configuration photo 13).
Take care to always carry out rotations
from left to right.
Never leave drum in-between positions
during utilisation.
dispersed, they should be retained in the
closed container until all cinders have
thoroughly cooled.
Care and Cleaning
Clean the stove frequently so that soot,
ash and creosote do not accumulate. Do
not attempt to clean the stove, glass or
door when the unit is hot.
Glass Cleaning
The door opens so that its inner surface
can be cleaned. Use the supplied 6mm
Allen key.
- Wait for it to cool down completely,
- use a spray foam as used for
cleaning oven windows (protect the
painted parts, floor covering, etc.),
- dry the pane properly because smoke
settles on greasy residue,
- finish, if necessary, with a window
cleaning product.
Remplacement de la vitre
On procède de la même manière pour
la porte vitrée et pour la porte «feu
ouvert»
Replacement of the panes
The procedure is the same for the
glass door and for the «open fire»
door.
14
14 Entrouvrir légèrement la porte.14 Slightly half-open the door.
Other manuals for 30 Compact
7
Table of contents
Other Stuv Indoor Fireplace manuals


Popular Indoor Fireplace manuals by other brands

Napoleon
Napoleon Grandville GVF36 Installation and operating instructions

Rinnai
Rinnai Symmetry RDV3611ETRN installation guide

RAIS
RAIS POLEO 95 user manual

Renaissance
Renaissance RUMFORD 1000 Handbook

Jøtul
Jøtul F 602 N installation instructions

Hearth and Home Technologies
Hearth and Home Technologies AZTEC owner's manual

Harman
Harman Magnafire Series Coal StovesMark I Installation and operating manual

Desa
Desa EFS33NRB OWNER'S OPERATION AND INSTALLATION MANUAL

Amantii
Amantii ZECL-26-2923-BG Installation and operation instructions

Jøtul
Jøtul FS 73 installation instructions

Element4
Element4 Modore 185 Installation, operation and owner's manual

Dimplex
Dimplex EF830 manual


