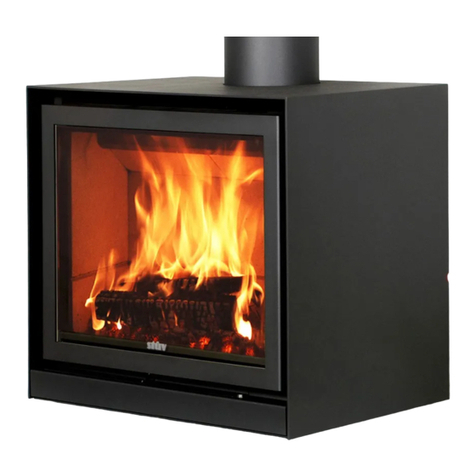
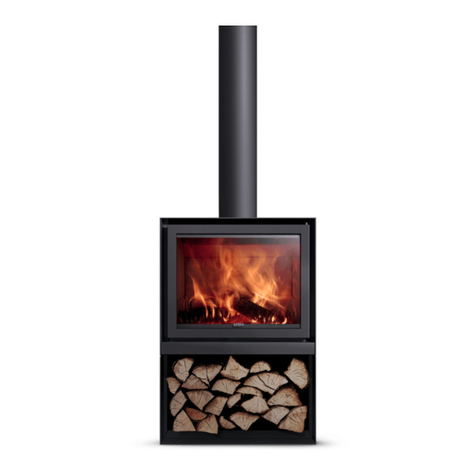
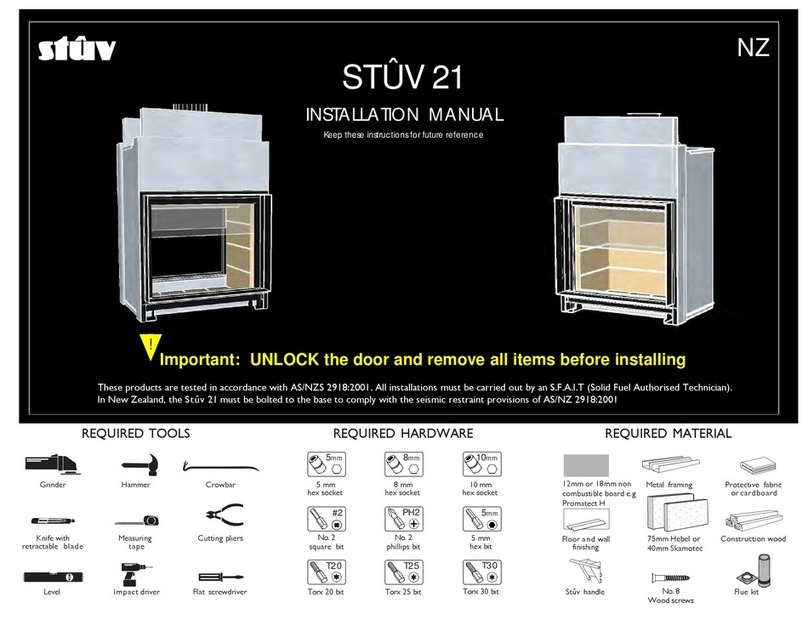
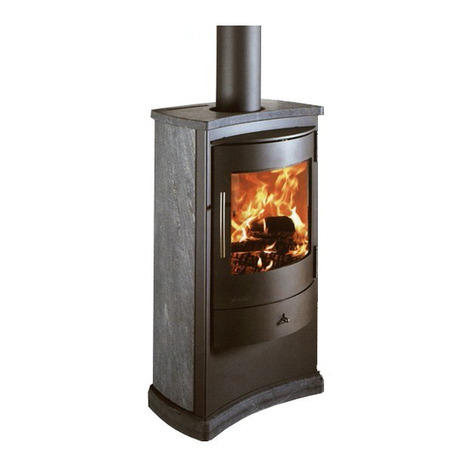
Stuv 21 Series User manual

STUV 21:
SPECIFICATIONS &
MANUFACTURER
INSTALLATION
GUIDE
^

PAGE 2 STUV 21 | MODEL SPECIFICATIONS
^
1. PRELIMINARY INSTALL INFORMATIONS
In relation to the installation and use of this appliance, the installer and the user should strictly
adhere to local and national regulations as well as Australian & New Zealand Standards AS/NZS
2918:2001. They should also follow the instructions detailed in the Stuv 21 installation and user
manual. Safe operation of the fireplace is directly dependent thereon. The liability of the manufacturer
can neither be retained nor assured following failure of installation or incorrect use which is not
compliant with AS/NZS 2918:2001.
As each installation is different, a qualified and licensed trades professional should take all required
preliminary precautions depending on the technical elements inherent to each job.
In-observance of the assembly instructions in conjunction with AS/NZS 2918:2001 entails the liability
of the person who carries it out.
Fireplace structure and finishes shall be to your own design providing the exact and minimum
dimensions are maintained.
The floor must have adequate strength to support the fireplace. N.B. Timber floors may require
additional reinforcing.
Construction of the fireplace structure from floor to ceiling shall be: solid brick (110mm minimum),
Silca 250KM board (40mm), stone (100mm minimum) or Hebel aerated blocks (150mm minimum).
When installed on a combustible floor surface the Stuv 21 firebox must be fitted on a raised platform
(height 150mm minimum) constructed of non combustible materials.
As a result of faulty assembly, use of parts or additional components not supplied by the
manufacturer/distributor, and/or modifying of the appliance or components will result in inferior or
unsafe operation. Should this occur the manufacturer/distributor bears no liability, and will result in a
null and void product warranty.

PAGE 3 STUV 21 | MODEL SPECIFICATIONS
^
2. SPECIFICATIONS
DETERMINED UNDER TEST CONDITIONS:
D
Q
S
T
R
E
GF
A
H
I
U
Ø6” Ø4”
P
W
V
X
Y
B
C
J
N
M
O
K
L
Combustion air intake box (optional)
SINGLE SIDED MODELS WITH ZERO CLEARANCE CASING - DIMENSIONS (mm)

PAGE 4 STUV 21 | MODEL SPECIFICATIONS
^
2. SPECIFICATIONS
SINGLE SIDED MODELS WITH ZERO CLEARANCE CASING - DIMENSIONS (mm)
SINGLE SIDED MODELS - OTHER DETAILS
STUV 21 / 95 SF STUV 21 / 105 SF STUV 21 / 125 SF STUV 21 / 135 SF
A699 610 679 610
B210 165 200 162
C178 171 200 171
D1108 1210 1410 1508
E556 603 705 756
F184 203 203 203
G762 800 1000 1102
H298 279 298 283
I1613 1426 1499 1426
J1429 1241 1318 1241
K629 479 616 479
L886 984 1181 1299
M619 378 540 403
N772 870 1070 1184
O700 752
P378 340 368 308
Q464 511 610 660
R327 344 400 419
S930 743 822 743
T152 152 152 152
U48 48 48 48
V394 302 371 308
W397 302 371 308
X397 440 540 591
Y171 171 171 171
STUV 21 / 95 SF STUV 21 / 105 SF STUV 21 / 125 SF STUV 21 / 135 SF
MATERIAL
Steel, ceramic bricks,
glass, galvanised steel ,
rockwool
Steel, ceramic bricks,
glass, galvanised steel ,
rockwool
Steel, ceramic bricks,
glass, galvanised steel ,
rockwool
Steel, ceramic bricks,
glass, galvanised steel ,
rockwool
OUTPUT KW 10kw to 18kw 7kw to 19kw 11kw to 23kw 11kw to 21kw
HEATING CAPACITY 120m2125m2145m2130m2
MINIMUM FLUE HEIGHT 4.5m 4.5m 4.5m 4.5m
WEIGHT (excluding zero clearance casing) 292kg 224kg 305kg 286kg
MAX LOG SIZE 60cm 80cm 100cm 100cm
ACTIVE FLUE SIZE 10” 8” 10” 10”

PAGE 5 STUV 21 | MODEL SPECIFICATIONS
^
2. SPECIFICATIONS
DOUBLE SIDED MODELS WITH ZERO CLEARANCE CASING - DIMENSIONS (mm)
8
I
J
K
H
A
B
DC
E
M
L
F
G
N
O
P
Combustion air intake box (optional)

PAGE 6 STUV 21 | MODEL SPECIFICATIONS
^
DOUBLE SIDED MODELS WITH ZERO CLEARANCE CASING- DIMENSIONS (mm)
STUV 21 / 95 DF STUV 21 / 125 DF
A1108 1410
B556 705
C184 203
D762 1000
E752 752
F248 248
G175 200
H337 337
I930 822
J149 149
K41 41
L1429 1470
M1613 1499
N629 616
O772 1070
P619 540
2. SPECIFICATIONS
DOUBLE SIDED MODELS - OTHER DETAILS
STUV 21 / 95 DF STUV 21 / 125 DF
MATERIAL Steel, ceramic bricks,
glass, galvanised steel ,
rockwool
Steel, ceramic bricks,
glass, galvanised steel ,
rockwool
OUTPUT KW 12kw to 27kw 14kw to 27kw
HEATING CAPACITY 165m2165m2
MINIMUM FLUE HEIGHT 4.5m 4.5m
WEIGHT (excluding zero clearance casing) 297kg 310kg
MAX LOG SIZE 70cm 100cm
ACTIVE FLUE SIZE 12” 12”

PAGE 7 STUV 21 | MODEL SPECIFICATIONS
^
2. SPECIFICATIONS
SINGLE SIDED MODELS WITHOUT CLEARANCE CASING - DIMENSIONS (mm)
D
A
Ø L*
A
B
65
Ø L*
M
C
J
F
250
P
C
J J
F
250
M
E
F
Flat exhaust plate Conical exhaust plate
SINGLE SIDED MODELS WITHOUT ZERO CLEARANCE CASING - DIMENSIONS (mm)
STUV 21 / 95 SF STUV 21 / 105 SF STUV 21 / 125 SF STUV 21 / 135 SF
A950 1050 1250 1350
B1225 1040 1115 1040
C590 496 563 500
D1455 1295
E770 870 1070 1170
F615 400 535 400

PAGE 8 STUV 21 | MODEL SPECIFICATIONS
^
2. SPECIFICATIONS
DOUBLE SIDED MODELS WITHOUT CLEARANCE CASING - DIMENSIONS (mm)
D
A
Ø L*
A
B
65
Ø L*
M
C
J
F
250
P
C
J J
F
250
M
E
F
D
A
Ø L*
A
B
65
Ø L*
M
C
J
F
250
P
C
J J
F
250
M
E
F
Flat exhaust plate Conical exhaust plate
SINGLE SIDED MODELS WITHOUT ZERO CLEARANCE CASING - DIMENSIONS (mm)
STUV 21 / 95 DF STUV 21 / 125 DF
A950 1250
B1225 1115
C670 670
D1455 1295
E770 1070
F615 535

PAGE 9 STUV 21 | MODEL SPECIFICATIONS
^
STANDARD INCLUSIONS
OPTIONAL INCLUSIONS
Combustion air intake box
(optional and only for 95 and 105 models)
EXPLODED DIAGRAM - SINGLE SIDED MODEL (WITH ZERO CLEARANCE CASING)
2. SPECIFICATIONS

PAGE 10 STUV 21 | MODEL SPECIFICATIONS
^
3. CLEARANCES
When installed on a floor made from combustible material, the appliance and enclosure must sit on a raised
platform consisting of a non-combustible framework, no less than 150mm high with a solid 18mm non-
combustible top (minimum). The raised platform must be at least the same width and depth of the appliance
(including the zero clearance box). The fireplace height can then be adjusted as desired using the adjustable
feet. (Fig A)
When installed on a non combustible floor the fireplace can be installed directly onto the floor and adjusted in
height using the adjustable feet. (Fig B)
In situations with combustible walls and when using the insulating casing the sides and rear wall of the
enclosure shall be no closer than 150mm to the appliance. (Fig A, B, C & D)
In situations with non combustible walls (brickwork or Silca boards) the sides and rear wall of the enclosure
shall be no closer than 50mm to the appliance. There is no need to use the insulating casing in such situations.
(Fig E, F, G & H)
Only non-combustible material shall be used on the front wall of the enclosure.
All internal framework above the appliance shall be made of non-combustible material.
When using the insulating casing a 40mm thick Silca board matching the width and depth of the appliance must
be fitted to the top of the appliance to stop heat transfer onto the ceiling and walls. (Fig A & B)
The cavity above the appliance must not be capped and must have a minimum of 2500cm2 of venting.
(Fig C & D)
The appliance must be fitted with the specially designed Stuv 21 four casing flue kit.
The appliance must be fitted with a minimum of two heat transfer ducts and two room air inlet ducts.
In situations with non combustible walls and when the insulating casing is not used a cavity lid made using
40mm Silca board is required to sit 600mm above the appliance and no less than 300mm below the combustible
ceiling. (Fig E, F, G & H)
To conform with the requirement of the joint AS/NZS 2918:2001 the appliance must be fitted with a minimum two
heat transfer ducts and two room air inlet ducts.

PAGE 11 STUV 21 | MODEL SPECIFICATIONS
^
COMBUSTIBLE WALL
30mm
SILCA PLATE
18mm
NON COMBUSTIBLE
BOARD
RAISED PLATFORM
CONSTRUCTED WITH NON COMBUSTIBLE MATERIALS
MIN HIGHT 150mm
COMBUSTIBLE FLOOR
COMBUSTIBLE WALL
150mm
MINIMUM 150mm
150mm
SPECIALLY DESIGNED STUV21
QUADRUPLE CASING FLUE
COMBUSTIBLE WALL
30mm
SILCA PLATE
NON COMBUSTIBLE FLOOR
COMBUSTIBLE WALL
150mm
ADJUSTABLE HEIGHT 16 to 60cm
150mm
SPECIALLY DESIGNED STUV21
QUADRUPLE CASING FLUE
Figure B: front view (non combustible floor)
CLEARANCES TO COMBUSTIBLES (USING THE INSULATING CASING)
3. CLEARANCES
Figure A: front view (combustible floor)

PAGE 12 STUV 21 | MODEL SPECIFICATIONS
^
COMBUSTIBLE WALL
COMBUSTIBLE FLOOR
Combustible floor
150mm
30mm
SILCA PLATE
500mm
150mm
CAVITY ABOVE THE APPLIANCE
MUST BE A MINIMUM OF 2500CM2
NON COMBUSTIBLE BOARD
18mm
NON COMBUSTIBLE
BOARD
FRONT
BACK
Non combustible hearth
(floor protector)
Non combustible hearth
(floor protector) FIREPLACE
300mm300mm
500mm
COMBUSTIBLE WALL
NON COMBUSTIBLE FLOOR
Non combustible floor
150mm
30mm
SILCA PLATE
CAVITY ABOVE THE APPLIANCE
MUST BE A MINIMUM OF 2500CM2
NON COMBUSTIBLE BOARD
FRONT
BACK
FIREPLACE
Figure D: side and top views (non combustible floor)
CLEARANCES TO COMBUSTIBLES (USING THE ZERO CLEARANCE CASING)
3. CLEARANCES
Figure C: side and top views (combustible floor)

PAGE 13 STUV 21 | MODEL SPECIFICATIONS
^
CLEARANCES TO NON-COMBUSTIBLES
3. CLEARANCES
P
NON COMBUSTIBLE BOARD
FRONT
BACK
BRICK WORK
50mm air gap
50mm air gap
BRICK WORK
NON-COMBUSTIBLE FLOOR
NON-COMBUSTIBLE FLOOR
Standard triple skin flue
CAVITY LID
made with Silca 40mm board
600mm above the appliance
and min 300mm below the ceiling.
CAVITY LID
Figure F: side view
CLEARANCES TO MASONRY (NO ZERO CLEARANCE CASING)
Figure E: front view

PAGE 14 STUV 21 | MODEL SPECIFICATIONS
^
P
SILICATE BOARD
30mm or 40mm Silca board
FRONT
BACK
50mm air gap
50mm air gap
NON-COMBUSTIBLE FLOOR
NON-COMBUSTIBLE FLOOR
CAVITY LID
made with Silca 40mm board
600mm above the appliance
and min 300mm below the ceiling.
Silca 40mm board
Silca 40mm board
Standard triple skin flue
3. CLEARANCES
CLEARANCES TO NON-COMBUSTIBLES
Figure H: side view
CLEARANCES TO SILICATE BOARD (NO ZERO CLEARANCE CASING)
Figure G: front view

PAGE 15 STUV 21 | MODEL SPECIFICATIONS
^
COMBUSTIBLE SHELF
3. CLEARANCES
A
100mm 400mm

PAGE 16 STUV 21 | MODEL SPECIFICATIONS
^
4. C0NVECTION
Convection air inlets are through single wall flexible ducts.
Convection air outlets must be through insulated double wall ducts.
It is important that the air flow is continuous. It is therefore forbidden to remove the air from a room and
send it to another airtight room.
Use a minimum of 2 fresh air inlets and 2 hot air outlets.
The distance between the ceiling and the center of the hot convection grill must be at least 35cm.
The horizontal distance between the hot air convection grill and the appliance cannot be greater than 3m.
The vertival distance between the hot air convection grill and the appliance is not limited.
See fig I and J.
35cm (minimum)
35cm (maximum)
155cm (minimum - from the base of the appliance)
CONVECTION AIR OUTLET
CONVECTION AIR INLET
Figure I

PAGE 17 STUV 21 | MODEL SPECIFICATIONS
^
CONVECTION AIR CIRCULATION CONVECTION AIR INLET CONVECTION AIR INLET
The convection air never comes into contact with the fire. The convection is an independant air channel.
The air circulates around the combustion chamber, gets hot and goes out through convection grates in
the same room or in other rooms.
4. C0NVECTION
∞
3000mm max
HOT AIR OUTLETS
CONVECTION AIR CIRCULATION
Figure J

PAGE 18 STUV 21 | MODEL SPECIFICATIONS
^
5. C0MBUSTION
When operating with an open fire, the Stuv 21 consumes a large amount of air. Therefore, we recommend
providing an external air supply, although this is not mandatory.
A sufficient air inlet must be created under the stove, at the front. When not using the air intake box with
connected duct, the base of the fire must be supplied with fresh air. The fresh air must come from a ventilated
empty space, a ventilated room or from outside the house (mandatory for passive/air tight buildings).
ONLY DUCT THE FRESH AIR INLET TO THE APLLIANCE USING THE INTAKE BOX.
The air intake, which varies depending on the model, should ideally be located beneath the front of the unit
and incorporate a shut-off register (fig a).
Ideally the fresh air inlet would be fitted with a closure valve (fig e and f) to prevent the room from becoming
cold when the appliance is not in use. It should ideally be located as close as possible to the outside wall and
controlled from inside the room.
26
Ø6”
Ø4”
Ø6”
Ø4”
Ø6”
11
8
12
9 10
Le conduit qui amène cet air...
... sera protégé à l'extérieur par une grille dont la section
de passage libre est au moins équivalente à la section
d'arrivée d'air. Attention aux infiltrations d'eau et à
l'influence des vents qui peuvent annihiler le système.
... sera le plus court possible pour éviter des pertes de
charges et pour ne pas refroidir la maison.
... sera idéalement équipé d'un clapet de fermeture [figure
8] pour éviter de refroidir la pièce quand le foyer n'est
pas en fonctionnement. Celui-ci sera placé idéalement au
plus près du mur extérieur. Il pourra être commandé de
l'intérieur s'il n'est pas trop éloigné du foyer (longueur du
câble= 47").
S'il n'est pas possible d'amener de l'air extérieur à
proximité du foyer (cas le plus défavorable)...
...il faut puiser l'air dans la pièce où est installé le foyer
[schéma 10 & 12]. Dans ce cas, il faut s'assurer que le
renouvellement d’air dans la pièce sera toujours suffisant
quand le foyer est en fonctionnement.
Note
Attention aux systèmes d’extraction actifs d’air (hotte de
cuisine, air-conditionné, ventilation mécanique contrôlée,
autre foyer…) situés dans le même espace ou dans une
pièce contigüe. Ils consomment eux aussi beaucoup d'air,
pourraient créer une dépression dans le local et perturber
le bon fonctionnement du foyer (risque de refoulement).
The duct carrying this air...
... will be protected on the outside by a grill the free
passage section of which is at least equivalent to the
section of the air inlet. Please note that the infiltration of
water and the effect of the wind can damage the system.
... will be as short as possible to prevent pressure loss and
to prevent making the house cold.
... will ideally be fitted with a closure valve [photo 8] to
prevent the room from becoming cold when the stove is
not in use. It should ideally be located as close as possible
to the outside wall. It can be controlled from inside if it is
not too far away from the stove (cable length = 47").
If it is not possible to bring in outside air near the
stove (most unfavourable case)...
the necessary air for combustion will be taken from the
room. In that case make sure the air renewal is sufficient
when the fireplace is in function.
Please note
Be careful with air extraction systems (kitchen hoods, air
conditioning, mechanically-controlled ventilation, other
stoves) in operation in the same space or in an adjacent
room. They also use lots of air and can cause a depression
in the room and prevent the stove from operating correctly
(risk of draughtback). They can affect the operation of the
stove even if it is connected to an outside air inlet.
STUV 21
CLOSURE VALVE
a. COMBUSTION AIR CIRCULATION
d. COMBUSTION AIR INTAKE BOX e. EXTERNAL COMBUSTION AIR INTAKE f. EXTERNAL COMBUSTION AIR INTAKE
b. COMBUSTION AIR INLET c. COMBUSTION AIR INLET WITH DUCTED INTAKE BOX

PAGE 19 STUV 21 | MODEL SPECIFICATIONS
^
5. C0MBUSTION
COMBUSTION AIR INLET
INLET
DIAMETER
STUV 21 / 95 SF 6 inches
STUV 21 / 105 SF 6 inches
STUV 21 / 125 SF 6 inches
STUV 21 / 135 SF 6 inches
STUV 21 / 95 DF 6 inches
STUV 21 / 125 DF 6 inches
Ø6”
Ø4”
Ø6”
Ø4”
Ø6”
EXTERNAL COMBUSTION AIR (INTAKE BOX) EXTERNAL COMBUSTION AIR (NO INTAKE BOX) INTERNAL COMBUSTION AIR (INTAKE BOX)

PAGE 20 STUV 21 | MODEL SPECIFICATIONS
^
6. TEST REPORT
TEST REPORT NO ASFT18044 (PRELIMINARY REPORT)
TESTING LABORATORY: Australian Solid Fuel Testing
MANUFACTURER: Stuv
MODEL: Stuv 21
WORK REQUESTED: Compliance with AS/NZS2918:2001 Standards
ISSUE DATE: 4/05/2018
INVESTIGATING OFFICER: Steve Marland
CONCLUSION:
The Stuv 21 Inbuilt appliance installed with a triple skin flue system, conforms to the requirements
of Australian/New Zealand Standard 2918:2001, with respect to floor, side wall and rear wall
surface temperatures, when tested in the test position shown in p11, p14 and 15p of this report in accordance
with Appendix B of AS/NZS2918;2001.
This manual suits for next models
4
Table of contents
Other Stuv Wood Stove manuals
Popular Wood Stove manuals by other brands

Jøtul
Jøtul 3 USA Installation and operating instructions
Henley
Henley THE DRUID user manual
Osburn
Osburn 1800 owner's manual
HETAS
HETAS 8 Installation and operating instructions
Dovre
Dovre 350CB Installation instructions and operating manual

Sierra Flame
Sierra Flame Lynwood W76 Installation and operation instructions
Nibe
Nibe Contura Style 896G manual
Quadra-Fire
Quadra-Fire 4300 Series Installation, operation & maintenance instructions
Enerzone
Enerzone Solution 2.9 manual

Unforgettable Fire
Unforgettable Fire Kimberly owner's manual

RIKA
RIKA Tavo operating instructions
Efel
Efel STANFORD 80 Installation, operating and maintenance instructions
