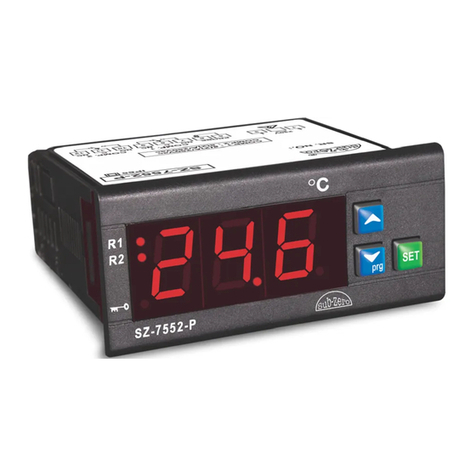
Sub-Zero SZ-81145 User manual

User Manual
SZ-81145
INDIA
www.pvrcontrols.com
RH + TEMPERATURE
INDICATOR

H4
H5
05
05
Differential for humidity.
Humidity probe calibration.
LP
FS
EP
Ad
AL
Power on alarm delay.
Alarm logic.
06
06
Lock keypad.
Restore all factory set values.
End programming.
06
07
07
Fault Messages.
Technical Data.
07
08
E0 05
Power on display setting.
E1 06
Delay to Toggle display between temperature
and RH.
INDEX
01
DESCRIPTIONPARAMETER
Pg.
No.
SZ-81145
Introduction 02
03
P2
P3 03
Maximum allowable high temperature limit and
alarm.
Minimum allowable low temperature limit and
alarm.
P4
P5
04
04
Differential for temperature.
Temperature probe calibration.
04
H2
H3 05
Maximum allowable high humidity limit and alarm.
Minimum allowable low humidity limit and alarm.
Suggested Connection Diagram.
Panel cutout, Bezel and Dimensions.
Precautions & Disclaimer
09
10
11-12
02
SZ-81145
Application
RH + Temperature Indicator.
TM
Get to Know Your Controller
One external key provided for display toggling function, RH or temperature
display.
On PCB tactile switches for user interface UP, SET, DOWN/ Prg.
Key Introduction
Key Description
UP
DOWN /
PRG
SET
Used to increment the parameter value in program mode.
Used to decrement the parameter value in program mode.
In program mode used to set the changed value of
parameter.

03 SZ-81145
Sr.No.
Description of parameters and functions.
Parameter setting
method.
Parameter
Parameter List
Min : MINIMUM Max : MAXIMUM
Fact. Set : FACTORY SETTING(DEFAULT)
Use Down/Prg key to enter program mode,
Use Up, down, set keys to change values of parameters.
P2
01
press set key.
To change the parameter value, Use UP/DOWN keys to set desired
range.
Range
Min Max Fact. Set
P3+1.0 0
99.9 C 0
99.9 C
Function: To set maximum allowable high
temperature limit and alarm.
Example: Setting this parameter at
0
99.9 C will not allow the set point to go
0
above 99.9 C. Also if the temperature
0
reaches or goes above 99.9 C.the display
will show High Temp. Alarm & at this point
the alarm will activate.
Once set at a particular range, this will
not allow the set point to go above this
range.
P3
02
press set key.
To change the parameter value, Use UP/DOWN keys to set desired
range.
Range
Min Max Fact. Set
0
-50 C P2-1.0 0
-50 C
Function: To set minimum allowable low
temperature limit and alarm.
0
-50 C. Also, if the temperature reaches or
0
goes below -50 C the display will show
Low Temp. Alarm and at this point the
alarm will activate.
Once set at a particular range, this will not
allow the set point to go above this range.
0
Example: Setting this parameter at -50 C
will not allow the set point to go below
O
Note : Below -9.9 C, resolution automatically
O
change to 1 C .
04
SZ-81145
Use UP/DOWN keys to set desired
range.
0
Example: If the set point is set at 10.0 C
0
and differential is set as 2.0 C, then when
0
the s y stem r each e s 10. 0 C,th e
compressor will cutout. Since differential
0
is 2.0 C, the compressor will cut in(restart)
0 0 0
at 12.0 C (10.0 C + 2.0 C).
press set key.
To change the parameter value,
03
0.5ºC 20.0ºC 2.0ºC
Range
Min Max Fact. Set
P4 Function: To set differential for
temperature.
Use UP/DOWN keys to set desired
value.
Function: To set temperature probe
calibration.
P5
press set key.
To change the parameter value,
04
Range
Min Max Fact. Set
-9.9ºC 10.0ºC 0.0ºC
Example: If the actual temperature is
20.0ºC and the temperature on the
controller shows 22.0ºC set this
O
parameter to -2.0 C and once out of this
mode, the temperature will display
20.0ºC. (22.0ºC-2.0ºC).
H2
05
To change the parameter value,
press set key.
Use UP/DOWN keys to set desired
range.
Range
Min Max Fact. Set
H3+1 100% 100%
Function: To set maximum allowable high
alarm limit relative Humidity.
Once set at a particular range, this will not
allow the set point to go above this range.
Example: Setting this parameter at 100%
will not allow the set point to go above
100%.Also if the humidity reaches or goes
above 100%. the display will show High
humidity Alarm & at this point the alarm
will activate.
Sr.No.
Description of parameters and functions.
Parameter setting
method.
Parameter

05 SZ-81145
Sr.No.
Description of parameters and functions.
Parameter setting
method.
Parameter
H3
06
To change the parameter value,
press set key.
Use UP/DOWN keys to set desired
range.
Range
Min Max Fact. Set
0% H2-1 0%
Function: To set minimum allowable low
humidity limit and alarm.
Use UP/DOWN keys to set desired range.
press set key.
To change the parameter value,
07
1% 20% 2%
Range
Min Max Fact. Set
H4 Function: To set differential for humidity.
(10% + 2%).
Example: If the set point is setat 10% and
differential is set as 2%, then when the
system reaches 10%, thecompressor will
cutout. Since differential is 2%, the
compressor will cut in(restart) at 12%
Use UP/DOWN keys to set desired value.
Function: To set humidity probe calibration.H5
To change the parameter value,
press set key.
08
Range
Min Max Fact. Set
-10% 10% 0%
Example: If the actual humidity is 20%
and the humidity on the controller shows
22% set this parameter to -2% and once
out of this mode, the humidity will display
20% (22%-2%).
E0
09
To change the parameter value,
press set key.
Use UP/DOWN keys to set desired
range.
Range
Min Max Fact. Set
022
Function: To set Power ON display
setting.
0= temperature
When E0 set to 2, and E1 is 0, then E1
value set to 10 sec default .
1= RH
2= temperature + RH
06
SZ-81145
Sr.No.
Description of parameters and functions.
Parameter setting
method.
Parameter
Use UP/DOWN keys to set desired range.To change the parameter value,
press set key.
10
3 Sec 60 sec 3 sec
Range
Min Max Fact. Set
E1 Function: To set Delay to Toggle display
between temperature and RH.
Note : This parameter activated only
when E0 = 2.
12
Range
Min Max Fact. Set
02 0
To change the parameter value,
press set key.
Use UP/DOWN keys to set desired
range.
AL Function : To set alarm logic.
2= enable Relay + buzzer
1=enable only relay
0=disbale,
11
Range
Min Max Fact. Set
0 Min 99 Min 0 Min
To change the parameter value,
press set key.
Use UP/DOWN keys to set desired
range.
Ad Function : To set Power on alarm delay.
Example : If this parameter is set to 20,
once the power is switched on, the alarm
will not activate for 20 minutes after the
power is switched on. This is most useful
to avoid the nuisance alarms when the
ambient are high when the machine is
switched on after a long time.
LP Function : To enable / disable keypad lock
13
Range
Min Max Fact. Set
01 0
To change the parameter value,
press set key.
Use UP/DOWN keys to set desired range.
0 = Disables keypad lock.
1= Enables keypad lock

07 SZ-81145
Sr.No.
Description of parameters and functions.
Parameter setting
method.
Parameter
EP Function : To end programming.
15
Once the SET key is pressed the control
goes into the normal mode and displays
the temperature.
To end Program mode press
set key.
FS Function : To restore all factory set values.
14
To change the parameter value,
press set key.
Use UP/DOWN keys to set desired
range.
Range
Min Max Fact. Set
01 0
To restore default settings of the
controller. When set to 1, all parameters
are programmed to factory settings. Used
to debug setting related problems.
Ht
Lt
Fault Messages :
Message Parameter
Description
High temperature alarm for Room. Means room
temperature is above the set value.
Low temperature alarm for Room. Means room
temperature is below the set value.
PP Room probe Fail means Temperature / RH
sensor not connected or out of range .
HH
LH
High humidity alarm for Room. Means room
humidity is above the set value.
Low humidity alarm for Room. Means room
humidity is below the set value.
P2, P4
P3, P4
H2, H4
H3, H4
08
SZ-81145
Technical Data

09 SZ-81145
Connection Diagram
1 2 345911 12 13 14 16 17 18 20
RH
+12V
IN
GND
PROBE
RESET
KEY
ALARM
C NCNO
10VAC
BUZZER
+
-
PHASE
NEUTRAL
ALARM (5A / 250VAC)
To
SZ-B75
(10Vdc,10mA max)
To SZ-N75
Caution : Wiring for 230Vac Loads Only.
10
SZ-81145
Panel Cutout & Dimensions
300
230
85
Front View Side View

11
WIRING : The probe and its corresponding wires should never be installed
in a conduit next to control or power supply lines. The electrical wiring
should be done as shown in the diagram. The power supply circuit should
be connected to a protection switch.
WARNING : Improper wiring may cause irreparable damage and personal
injury. Kindly ensure that wiring is done by qualified personnel only.
Maintenance : Cleaning : Clean the surface of the controller with a soft
moist cloth. Do not use abrasive detergents, petrol, alcohol or solvents.
Controller
Controller should be installed in a place protected by vibration, water and
corrosive gasses and where ambient temperature does not exceed the values
specified in the technical data.
Probe
To give a correct reading, the probe must be installed in a place protected from
thermal influences, which may affect the temperature to be controlled.
Caution
SZ-81145 12
SZ-81145
The information in this document is subject to change in order to improve
reliability, design or function without prior notice and does not represent a
commitment on the part of the company. In no event will the company be liable
for direct, indirect, special, incidental or consequential damage arising out of
the use or inability to use the product or documentation, even if advised of the
possibility of such damages. No part of this manual may be reproduced or
transmitted in any form or by any means without the prior written permission of
the company.
Notice
Disclaimer
Warranty
This manual & its contents remain the sole property of PVR Controls, India and
shall not be reproduced or distributed without authorization. Although great
care has been taken in the preparations of this document, the company or its
vendors in no event will be liable for direct, indirect, special, incidental or
consequential damage arising out of the use or inability to use the product or
documentation, even if advised of the possibility of such damages. No part of
this manual may be reproduced or transmitted in any form or by any means
without the prior written permission of the company. PVR Controls reserves the
right to make and changes or improvements without prior notice.
This product is warranted against defects in materials and workmanship for a
period of one year from the date of purchase. During the warranty period,
product determined by us to be defective in form or function will be repaired or,
at our option, replaced at no charge. This warranty does not apply if the product
has been damaged by accident, abuse, and misuse or as a result of service or
modification other than by the company. This warranty is in lieu of any other
warranty expressed or implied. In no event shall the company be held liable for
incidental or consequential damages, such as lost revenue or lost business
opportunity arising from the purchase of this product.

INDIA
Ball Valves
Globe Valves
Hand Valves
Flow Switches
Solenoid Valves
OUR OTHER PRODUCTS
Cold Room Controller
Chiller Controller
Two Compressors Controller
Heating Controller
Humidity Controller
Pressure Controller
TM
01 / 09.03.15
Other Sub-Zero Temperature Controllers manuals