Ironing Center Instructions
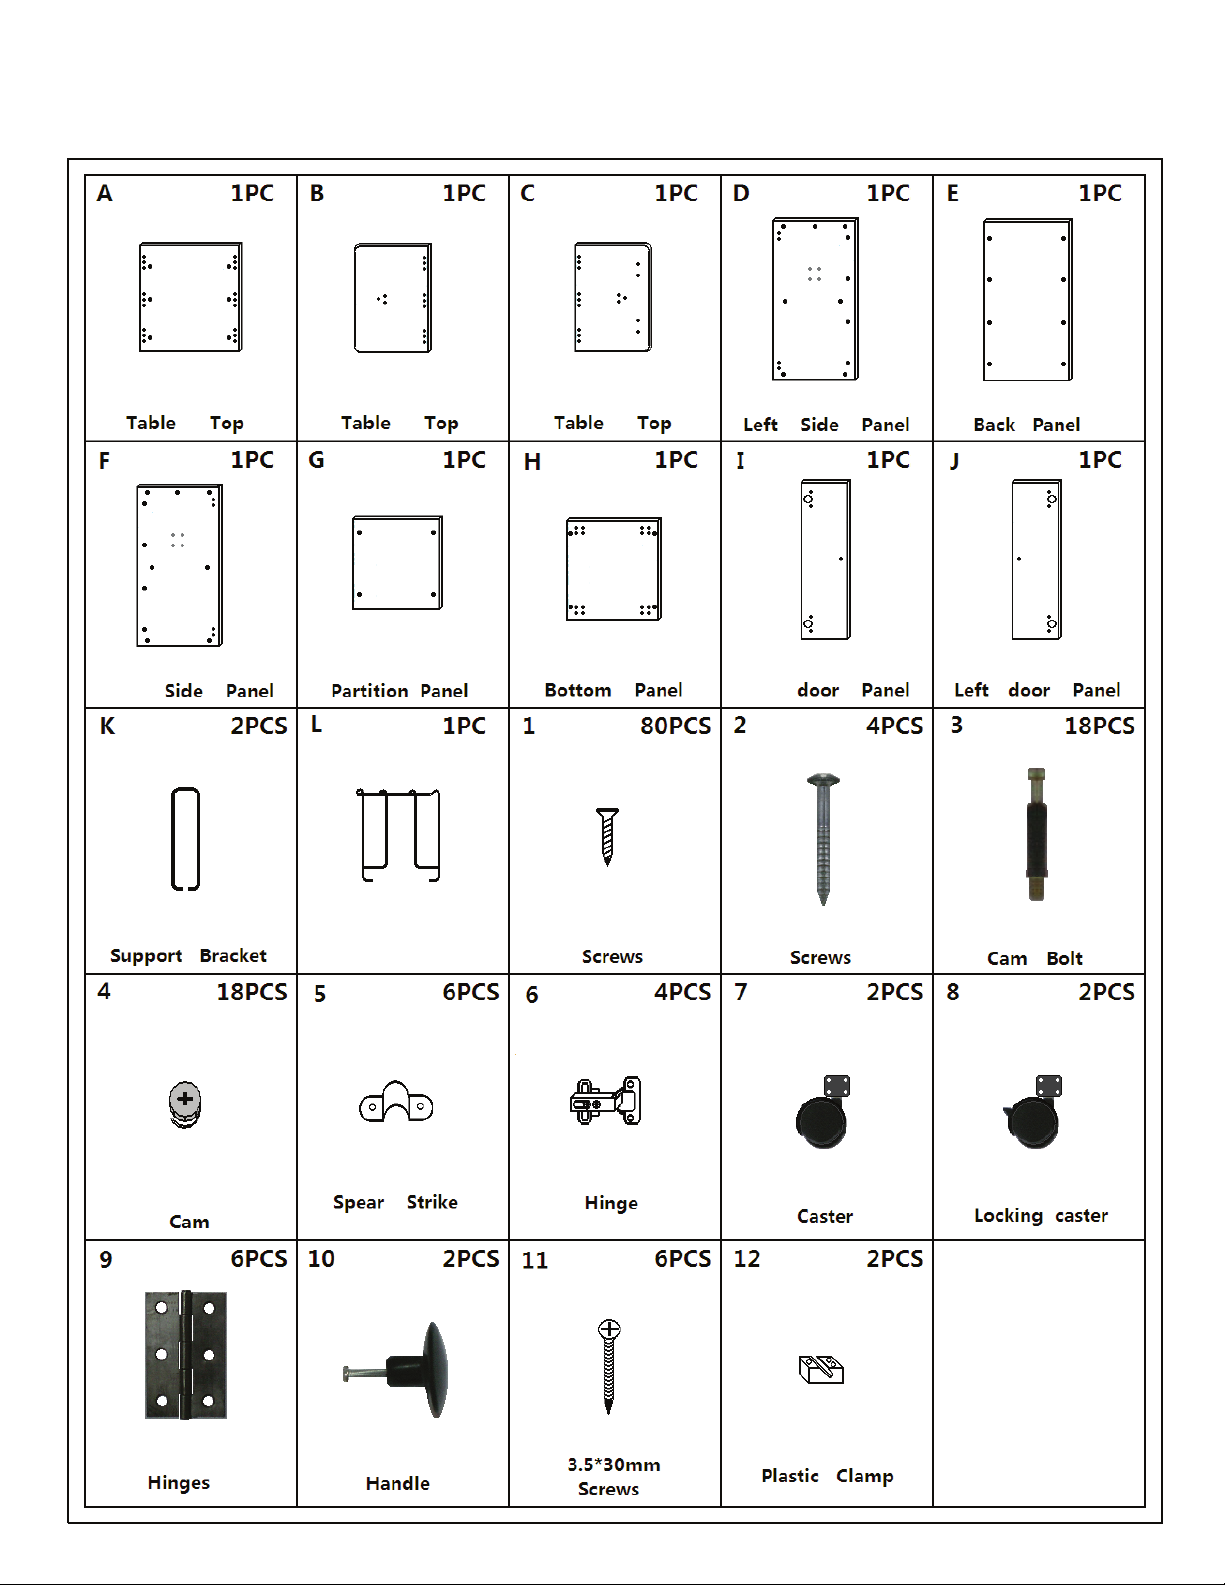
3. Insert Cam bolt (3) from board Ainto the cams (4) on board D and F, turn the cams clockwise.
Use screw (1) and spear strike (5) to connect the support bracket K onto board D.
Screw handle and knob (10) into doors J and I.
Insert the locking screw of hinges (6) onto boards D and F to connect left and right doors I and J. Tighten until doors are vertical,
if when closed the doors are not aligned, you may need to loosen or tighten Adjusting Screw on hinges (6).
To completely open your Ironing Center, lift up boards B and C and lock them in place by introducing the support brackets (K)
into the plastic clamps (12), pull them out one side at a time in order to fold it down for storage.
IMPORTANT: Before Ironing, make sure to place Ironing Cover on Ironing Center. Never place a hot Iron directly on the surface.
Always remove Ironing Cover one side at a time before folding down your Ironing Center for storage.
Adjusting Screw
Page. 3
SAFETY AND MAINTENANCE
DO NOT allow children to play on, under or
around the Ironing Center. Never rest a hot iron directly on
the surface, always use Ironing Cover.
To clean use a cloth or sponge and some mild detergent.
DO NOT USE any abrasive pads or cleaners.
___DO NOT RETURN TO STORE___
Sullivans will replace any missing manufacturing or defective parts
PLEASE NOTE: Our 30-day No Charge replacement policy for parts does not apply to items sold AS IS, CLEARANCE, CLOSEOUT, FINAL SALE, ETC.
Any parts requested under these circumstances will be charged to the customer, including shipping charges.
Shipping charges for replacement parts to Alaska, Hawaii or any point outside of The Contiguous United States are not covered under our policy.
within 30 days of purchase. Send a dated receipt copy to
THIS POLICY DOES NOT APPLY TO SHIPPING DAMAGES.
For further assistance please call our toll free number
Sullivans USA, Inc.
4341 Middaugh Avenue, Downers Grove, IL, 60515
Toll Free: (800) 862.8586 •Fax: 630.435.1532
Some restrictions apply. See website for details.