manuals.online logo
Brands
  1. Home
  2. •
  3. Brands
  4. •
  5. Sunbeam
  6. •
  7. Mixer
  8. •
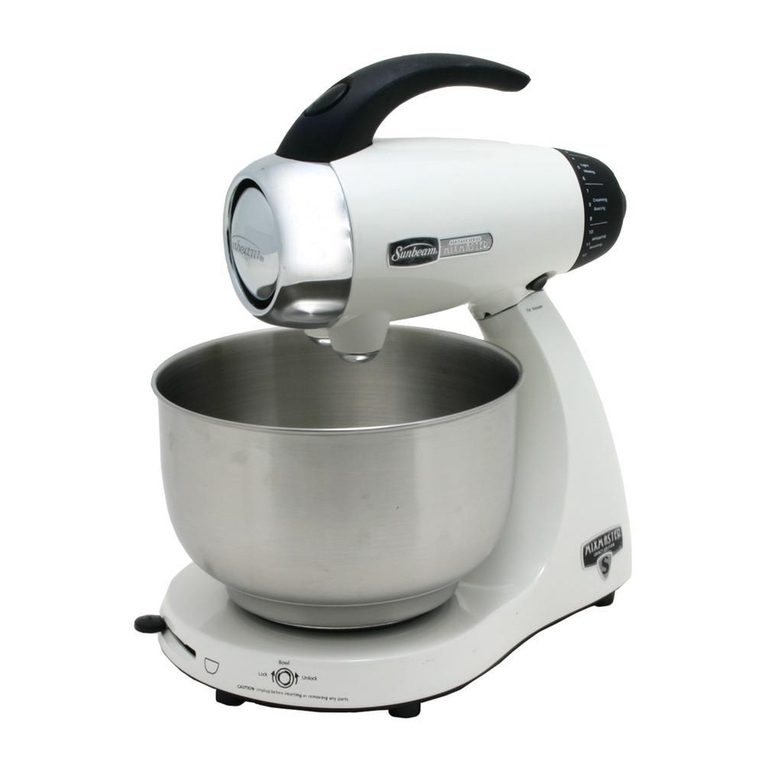
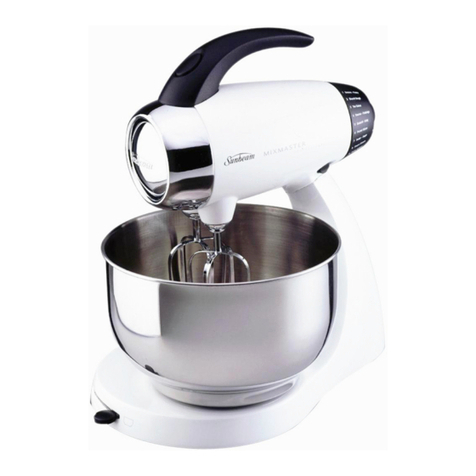
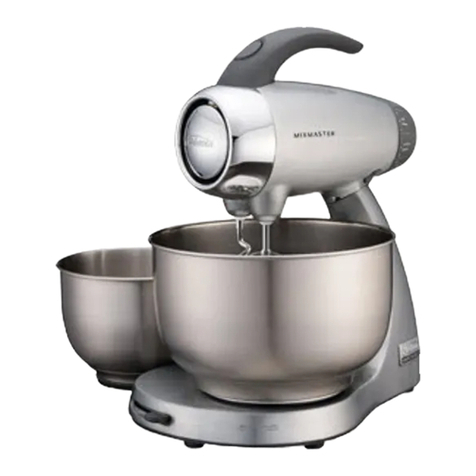
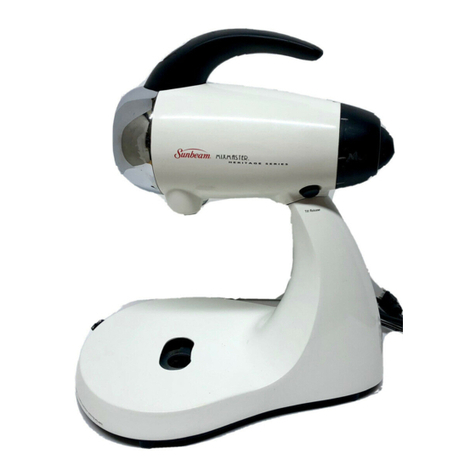
  9. Sunbeam Mixmaster 2370 Series User manual

Sunbeam Mixmaster 2370 Series User manual

Visit us at www.sunbeam.com P.N. 170955 REV 2
———
FOLD
———
———
FOLD
———
———
FOLD
———
———
FOLD
———
———
FOLD
———
———
FOLD
———
———
FOLD
——————
FOLD
———
MODELS/
MODELOS
User Manual
Mixmaster
®
Stand Mixer
Manual de Instrucciones
Batidora de Pedestal Mixmaster
®
SERIES / SERIE
2370 , 2590 , FPSBSMGL
DO NOT RETURN THIS PRODUCT TO THE PLACE OF PURCHASE
For produ t questions:
Sunbeam Consumer Servi e
USA : 1.800.458.8407
Canada : 1.800.667.8623
www.sunbeam. om
© 2015 Sunbeam Produ ts, In . doing business as Jarden Consumer Solutions. All rights reserved.
Distributed by Sunbeam Produ ts, In . doing business as Jarden Consumer Solutions,
Bo a Raton, Florida 33431.
NO RETORNE ESTE PRODUCTO AL LUGAR DONDE LO COMPRÓ
Para preguntas sobre los produ tos:
Sunbeam Consumer Servi e
EE.UU. : 1.800.458.8407
Canadá : 1.800.667.8623
www.sunbeam. om
© 2015 Sunbeam Produ ts, In . operando bajo el nombre de Jarden Consumer Solutions.
Todos los dere hos reservados. Distribuido por Sunbeam Produ ts, In . operando bajo el nombre de
Jarden Consumer Solutions, Bo a Raton, Florida 33431.
Printed in China Impreso en China
2370_2590_FPSBSMGL_15ESM1 GCDS-SUN41100-BB
2 Year Limited Warranty
Sunbeam Produ ts, In . doing business as Jarden Consumer Solutions or if in Canada, Sunbeam
Corporation (Canada) Limited doing business as Jarden Consumer Solutions ( olle tively “JCS”)
warrants that for a period of two years from the date of pur hase, this produ t will be free from
defe ts in material and workmanship. JCS, at its option, will repair or repla e this produ t or any
omponent of the produ t found to be defe tive during the warranty period. Repla ement will be
made with a new or remanufa tured produ t or omponent. If the produ t is no longer available,
repla ement may be made with a similar produ t of equal or greater value. This is your ex lusive
warranty. Do NOT attempt to repair or adjust any ele tri al or me hani al fun tions on this produ t.
Doing so will void this warranty.
This warranty is valid for the original retail pur haser from the date of initial retail pur hase and is
not transferable. Keep the original sales re eipt. Proof of pur hase is required to obtain warranty
performan e. JCS dealers, servi e enters, or retail stores selling JCS produ ts do not have the right
to alter, modify or any way hange the terms and onditions of this warranty.
This warranty does not over normal wear of parts or damage resulting from any of the following:
negligent use or misuse of the produ t, use on improper voltage or urrent, use ontrary to the
operating instru tions, disassembly, repair or alteration by anyone other than JCS or an authorized
JCS servi e enter. Further, the warranty does not over: A ts of God, su h as fire, flood, hurri anes
and tornadoes.
Wh t re the limits on JCS’s Li bility?
JCS shall not be liable for any in idental or onsequential damages aused by the brea h of any
express, implied or statutory warranty or ondition.
Ex ept to the extent prohibited by appli able law, any implied warranty or ondition of mer hantability
or fitness for a parti ular purpose is limited in duration to the duration of the above warranty.
JCS dis laims all other warranties, onditions or representations, express, implied, statutory or otherwise.
JCS shall not be liable for any damages of any kind resulting from the pur hase, use or misuse of, or
inability to use the produ t in luding in idental, spe ial, onsequential or similar damages or loss of
profits, or for any brea h of ontra t, fundamental or otherwise, or for any laim brought against
pur haser by any other party.
Some provin es, states or jurisdi tions do not allow the ex lusion or limitation of in idental or
onsequential damages or limitations on how long an implied warranty lasts, so the above limitations
or ex lusion may not apply to you.
This warranty gives you spe ifi legal rights, and you may also have other rights that vary from
provin e to provin e, state to state or jurisdi tion to jurisdi tion.
How to Obt in W rr nty Service
In the U.S.A.
If you have any question regarding this warranty or would like to obtain warranty servi e, please all
1-800-458-8407 and a onvenient servi e enter address will be provided to you.
In C n d
If you have any question regarding this warranty or would like to obtain warranty servi e, please all
1-800-667-8623 and a onvenient servi e enter address will be provided to you.
In the U.S.A., this warranty is offered by Sunbeam Produ ts, In . doing business as Jarden Consumer
Solutions lo ated in Bo a Raton, Florida 33431. In Canada, this warranty is offered by Sunbeam
Corporation (Canada) Limited doing business as Jarden Consumer Solutions, lo ated at 20 B Hereford
Street, Brampton, Ontario L6Y 0M1. If you have any other problem or laim in onne tion with this
produ t, please write our Consumer Servi e Department.
PLEASE DO NOT RETURN THIS PRODUCT TO ANY OF THESE
ADDRESSES OR TO THE PLACE OF PURCHASE.
Garantía Limitada de 2 Años
Sunbeam Produ ts, In . operando bajo el nombre de Jarden Consumer Solutions, o en Canadá,
Sunbeam Corporation (Canada) Limited operando bajo el nombre de Jarden Consumer Solutions,
(en forma onjunta, “JCS”), garantiza que por un período de dos años a partir de la fe ha de ompra,
este produ to estará libre de defe tos de materiales y mano de obra. JCS, a su ele ión, reparará o
reemplazará este produ to o ualquier omponente del mismo que presente defe tos durante el
período de garantía. El reemplazo se realizará por un produ to o omponente nuevo o reparado.
Si el produ to ya no estuviera disponible, se lo reemplazará por un produ to similar de valor igual o
superior. Ésta es su garantía ex lusiva. No intente reparar o ajustar ninguna fun ión elé tri a o
me áni a de este produ to. Al ha erlo elimínará ésta garantía.
La garantía es válida para el omprador minorista original a partir de la fe ha de ompra ini ial y la
misma no es transferible. Conserve el re ibo de ompra original. Para soli itar servi io en garantía se
requiere presentar un re ibo de ompra. Los agentes y entros de servi io de JCS o las tiendas
minoristas que venden produ tos de JCS no tienen dere ho a alterar, modifi ar ni ambiar de ningún
otro modo los términos y las ondi iones de esta garantía.
Esta garantía no ubre el desgaste normal de las piezas ni los daños que se produz an omo resultado
de uso negligente o mal uso del produ to, uso de voltaje in orre to o orriente inapropiada, uso
ontrario a las instru iones operativas, y desarme, repara ión o altera ión por parte de un ter ero
ajeno a JCS o a un Centro de Servi io autorizado por JCS. Asimismo, la garantía no ubre a tos
fortuitos tales omo in endios, inunda iones, hura anes y tornados.
¿Cuál es el límite de respons bilid d de JCS?
JCS no será responsable de daños in identales o emergentes ausados por el in umplimiento de
alguna garantía o ondi ión expresa, implí ita o legal.
Ex epto en la medida en que lo prohíba la ley apli able, ualquier garantía o ondi ión implí ita de
omer iabilidad o aptitud para un fin determinado se limita, en uanto a su dura ión, al plazo de la
garantía antes men ionada.
JCS queda exenta de toda otra garantías, ondi iones o manifesta iones, expresa, implí ita, legal o
de ualquier otra naturaleza.
JCS no será responsable de ningún tipo de daño que resulte de la ompra, uso o mal uso del produ to,
o por la imposibilidad de usar el produ to, in luidos los daños in identales, espe iales, emergentes o
similares, o la pérdida de ganan ias, ni de ningún in umplimiento ontra tual, sea de una obliga ión
esen ial o de otra naturaleza, ni de ningún re lamo ini iado ontra el omprador por un ter ero.
Algunas provin ias, estados o jurisdi iones no permiten la ex lusión o limita ión de los daños
in identales o emergentes ni las limita iones a la dura ión de las garantías implí itas, de modo que
es posible que la ex lusión o las limita iones antes men ionadas no se apliquen en su aso.
Esta garantía le otorga dere hos legales espe ífi os y es posible que usted tenga otros dere hos que
varían de un estado, provin ia o jurisdi ión a otro.
Cómo solicit r el servicio en g r ntí
En los Est dos Unidos
Si tiene alguna pregunta sobre esta garantía o desea re ibir servi io de garantía, llame al 1-800-458-8407
y podrá obtener la dire ión del entro de servi io que le resulte más onveniente.
En C n dá
Si tiene alguna pregunta sobre esta garantía o desea re ibir servi io de garantía, llame al 1-800-667-8623
y podrá obtener la dire ión del entro de servi io que le resulte más onveniente.
En los Estados Unidos, esta garantía es ofre ida por Sunbeam Produ ts, In . operando bajo el nombre de
Jarden Consumer Solutions, Bo a Ratón, Florida 33431. En Canadá, esta garantía es ofre ida por
Sunbeam Corporation (Canada) Limited operando bajo el nombre de Jarden Consumer Solutions, 20 B
Hereford Street, Brampton, Ontario L6Y 0M1. Si usted tiene otro problema o re lamo en onexión on
este produ to, por favor es riba al Departamento de Servi io al Consumidor.
POR FAVOR NO DEVUELVA ESTE PRODUCTO A NINGUNA
DE ESTAS DIRECCIONES NI AL LUGAR DE COMPRA.
IMPORTANT SAFEGUARDS
When using electrical a liances, basic safety recautions should always be followed
including the following:
READ ALL INSTRUCTIONS BEFORE USE
1. To prote t against risk of ele tri al sho k, do not put mixer in water or other liquid. This may ause
personal injury or damage to the produ t.
2. Close supervision is ne essary when mixer is used by or near hildren or in apa itated persons.
3. Unplug from outlet while not in use, before putting on or taking off parts, and before leaning.
4. Avoid onta ting moving parts. Keep hands, hair, lothing, as well as spatulas and other utensils away
from beaters during operation to redu e the risk of injury to persons and/or damage to the mixer.
5.
Do not operate mixer with a damaged ord or plug or after the applian e malfun tions, or is dropped
or
damaged in any manner. If the mixer be omes damaged please onta t Consumer Servi es for assistan e.
(1- 00-45 - 407 in the U.S. or 1- 00-667- 623 in Canada)
6.
The use of atta hments not re ommended or sold by Sunbeam may ause fire, ele tri al sho k or injury.
7. Do not use outdoors or for ommer ial purposes.
8. Do not let ord hang over edge of table or ountertop or tou h hot surfa es, in luding the stove.
9. Remove beaters from mixer before washing.
10.
Do not pla e mixer or bowls on or near a hot gas or ele tri burner, in a heated oven (microwave,
convention, convection, etc.) or on any other heated surfa e.
11. Do not use mixer for other than intended use.
12. Do not leave mixer unattended while it is operating.
13. Any servi ing, other than leaning and user maintenan e should be performed by any authorized servi e
representative.
14. When mixing liquids, espe ially hot liquids, use a tall ontainer or make small quantities at a time
to redu e spillage.
15. Don’t Abuse Cord. Never arry the mixer by the ord or yank it to dis onne t from an outlet;
instead, grasp the plug and pull to dis onne t.
SAVE THESE INSTRUCTIONS
THIS UNIT IS FOR HOUSEHOLD USE ONLY
The motor of your
MIXMASTER®Mixer
is prote ted by a heat ured insulation.
This is a standard
pro ess. Due to the heat uring of the insulation, you may experien e an
odor and possibly a
slight wisp of smoke from your mixer’s motor. This effe t will disappear after the first few uses.
SPECIAL INSTRUCTIONS
FOR PRODUCTS PURCHASED IN THE U.S. AND CANADA ONLY
To redu e the risk of ele tri al sho k, this applian e is equipped with a polarized plug (one blade is
wider than the other). This plug fits a polarized outlet only one way; if the plug does not fit fully
into the outlet, reverse the plug. If it still does not fit, onta t a qualified ele tri ian. Do not
attempt to defeat this safety feature. Also, do not pull, twist or otherwise abuse the power ord;
instead, grasp the plug and pull to remove from the outlet.
PRECAUCIONES IMPORTANTES
Cuando use algún a arato eléctrico siem re deben seguirse recauciones básicas de seguridad
incluyendo las siguientes:
LEA TODAS LAS INSTRUCCIONES ANTES DE USAR
1.
Para protegerse ontra peligros de ele tri idad no sumerja la batidora en agua u otros líquidos
ya que podría o asionar lesiones personales o daños al produ to.
2. Es ne esario ontar on supervisión ontinua uando la Batidora es usada o está er a de niños
o personas in apa itadas.
3. Des one te la batidora del toma orriente uando el aparato no está en uso, antes de poner
oquitar partes y antes de limpiarla.
4. Evite el onta to on las partes en movimiento. Mantenga las manos, abello, ropa, así omo
también espátulas y otros utensilios lejos de los batidores durante el fun ionamiento del aparato,
para redu ir el riesgo de lesiones personales o daños a la batidora.
5.
No opere la batidora que tenga el able o en hufe dañado, ni después de haber dete tado
un mal
fun ionamiento o si se ae o está dañada de modo alguno. Si la batidora está dañada,
omuníquese
on Servi ios al Consumidor para soli itar asisten ia. (1- 00-45 - 407 en
EE.UU. ó 1- 00-667- 623 en Canadá)
6. El uso de a esorios no re omendados o vendidos por Sunbeam puede ausar in endios,
des argas elé tri as o lesiones.
7. No use la tostadora al aire libre o para propósitos omer iales
8. No deje el able olgado sobre el borde de la mesa ni que toque superfi ies alientes, in luyendo
el horno.
9. Quite los batidores de la batidora antes de lavarlos.
10.
No oloque la batidora o el tazón sobre o er a de quemadores de estufas de gas o de quemadores
elé tri os, o dentro de un horno aliente.
11. No use la Batidora más que para lo que ha sido diseñada.
12. No opere la batidora sin ontinua supervisión.
13. La batidora tiene una seguridad interna que evita el sobre alentamiento. Si la batidora deja
de fun ionar por sobre alentamiento, lleve el dis o de ontrol de velo idades a la posi ión OFF
y desen hufe la batidora. Espere 1 minuto y vuelva a en hufarla. No lo haga si la velo idad
no ha sido sele ionada omo OFF.
14.
Cualquier repara ión, que no sea limpieza y mantenimiento de usuario, lo debe realizar
un representante té ni o autorizado.
15. Al mez lar liquidos, espe ialmente alientes, utilize el tazón de fuente que se mez la grande o ha e
antidades pequeñas a la vez para redu ir derramamiento.
16.
No Abuse del Cordón. Nun a jale el mez lador por la uerda ni dé tirones para desen hufar
del toma orriente;
más bien, agarre del en hufe para jalar y desen hufar.
GUARDE ESTAS INSTRUCCIONES
ESTA UNIDAD ESSÓLO PARA USO DOMÉSTICO
El motor de su batidora MIXMASTER®está protegido on un aislante urado por alor.
Éste es un pro eso estándar. Debido al urado por alor del aislante, es posible que per iba
un olor y posiblemente un po o de humo saliendo del motor de la batidora. Estos in onvenientes
desapare erán después de las primeras ve es que utili e la batidora.
INSTRUCCIONES ESPECIALES
PARA PRODUCTOS ADQUIRIDOS EN LOS EE.UU. Y CANADÁ ÚNICAMENTE
Para redu ir el riesgo de hoque elé tri o, este ele trodomésti o está equipado on un en hufe
polarizado (una lámina es más ancha que la otra). Este en hufe alza en un toma orriente polarizado
sólo de una manera; si el en hufe no abe totalmente en el toma orriente, gire el en hufe. Si aun así
no alza, onsulte a un ele tri ista alifi ado. No intente anular esta ara terísti a de seguridad.
Además, no hale, tuerza ni maltrate el ordón de alimenta ión; en su lugar, tome el en hufe y hálelo
para retirarlo del toma orriente.
If the use of an extension ord is ne essary, please follow these guidelines:
•
Use only extension ords having an ele tri al rating not less than the rating of the mixer.
•
Examine the extension ord before using and do not use if the extension ord is damaged.
•Do not abuse the extension ord and do not yank on any ord to dis onne t.
• Keep extension ord away from heat and sharp edges.
WELCOME
Congratulations on your pur hase of a SUNBEAM®MIXMASTER®
Stand Mixer!
To learn more about SUNBEAM®produ ts, please visit us at www.sunbeam. om.
CARING FOR YOUR MIXER
CLEANING YOUR MIXER
To lean the mixer, turn off, unplug,wipe the mixer head, stand and turntable with a damp loth,
then dry.
DO NOT IMMERSE THE STAND MIXER IN WATER.
Avoid the use of
abrasive leaners, as they may damage the finish of the mixer. Wash the beaters and bowls in hot,
soapy water after ea h use. Rinse thoroughly and dry. Beaters and bowls may also be washed in
an automati dishwasher.
If mixing bowls re scr tched or chipped, do not use mixer.
STORING YOUR MIXER
Store the mixer in a dry lo ation, su h as on a ountertop or table top, or in a loset or upboard.
Insert the beaters into the proper so kets. Pla e the dough hooks and other atta hments in the
mixing bowl.
Store the bowl(s) on the turntable. Wind the ele tri ord into a oil, then se ure it with a
twist fastener.
MAINTENANCE
The motor of your stand mixer has been arefully lubri ated at the fa tory and does not require
any additional lubri ant. Other than the re ommended leaning, no further user maintenan e
should be ne essary.
For servi ing or repairs please onta t Consumer Servi es for assistan e. (1- 00-45 - 407
in the U.S.
or 1- 00-667- 623 in Canada)
HELPFUL HINTS
• When mixing liquids, espe ially hot liquids, use the large mixing bowl or make small quantities
at a time to redu e spillage.
•Ingredients should be added to the mixing bowl as they are spe ified in the re ipe.
• Use the mixing speed that is re ommended in the re ipe. Use the mixing guide on the speed
ontrol dial of the mixer to help you find the orre t speed to use.
• If times are spe ified in the re ipe, use them! BE CAREFUL NOT TO OVER MIX.
Over mixing an ause the mixture to be ome very tough.
• Should an obje t, su h as a spatula, fall into the bowl while the mixer is operating,
turn the mixer OFF immediately then remove the obje t.
•For easier leanup remove beaters and rinse immediately with warm water.
Si es ne esario el uso de un able de extensión, siga estas instru iones:
• Utili e úni amente ables de extensión que tengan una lasifi a ión elé tri a no inferior a la
lasifi a ión de la batidora.
• Examine el able de extensión antes de utilizarlo y no lo utili e si está dañado.
• No maltrate el able de extensión y no tire de ningún able para des one tarlo.
• Mantenga el able de extensión lejos del alor y de bordes on filo.
BIENVENIDOS
¡Feli ita iones por su ompra de una Batidora SUNBEAM®MIXMASTER®
HERITAGE SERIES
™
.
Para aprender más sobre produ tos SUNBEAM®, por favor visítenos en www.sunbeam. om!
CÓMO CUIDAR SUBATIDORA
CÓMO LIMPIAR SUBATIDORA
Limpie el abezal de la batidora,
apagar, desen hufar
la base y la plataforma giratoria on un
paño húmedo; después,
séquelos. NO SUMERJA LA BATIDORA EN AGUA. Evite el uso de
limpiadores abrasivos porque
pueden dañar el a abado de la batidora. Lave los batidores y
tazones en agua aliente y jabonosa después de ada uso. Enjuague bien y deje se ar. También
puede lavarlos en el lavaplatos.
Si los t zones de mezcl r se r sguñ n o se
desportill n, no use más l mezcl dor .
DÓNDE GUARDAR LA BATIDORA
Guarde la batidora en un lugar se o, omo por ejemplo sobre la mesa o superfi ie de trabajo,
en un gabinete. Inserte los batidores en los re eptá ulos orrespondientes. Coloque los gan hos
para amasar y demás a esorios en el tazón de mez lado.
Guarde el(los) tazón(tazones) en la superfi ie giratoria. Enrolle el able elé tri o en una bobina;
después, fíjelo al porta ables.
MANTENIMIENTO
El motor de su batidora ha sido uidadosamente lubri ado en la fábri a y no ne esita lubri a ión
adi ional. No es ne esario realizar ninguna tarea de mantenimiento además de la limpieza
re omendada.
Si ne esita servi io té ni o o repara iones, omuníquese on Servi ios al Consumidor para re ibir
asisten ia. (1-800-458-8407 en EE.UU. o 1-800-667-8623 en Canadá)
CONSEJOS ÚTILES
•
Al mez lar líquidos, espe ialmente alientes, utilize el tazón de fuente que se mez la grande
o ha e antidades pequeñas a la vez para redu ir derramamiento.
• Debe agregar los ingredientes al tazón de mez lado según lo espe ifi ado en la re eta.
• Use la velo idad de mez lado re omendada en la re eta. Utili e la guía de mez lado del dial
de ontrol de velo idades de la batidora para ayudarlo a en ontrar la velo idad orre ta.
• Si se espe ifi an tiempos en la re eta, ¡úselos! TENGA CUIDADO DE NO MEZCLAR
EN EXCESO, pues podría endure er la mez la.
• En aso de que un objeto, omo por ejemplo una espátula, aiga en el tazón on la batidora
en fun ionamiento, apague ésta de inmediato para retirar el objeto.
•P
ara una limpieza más fá il, retire los batidores y enjuáguelos inmediatamente on agua tibia.
———
FOLD
———
———
FOLD
———
———
FOLD
———
———
FOLD
———
———
FOLD
———
———
FOLD
———
FIGURE/FIGURA 4
POWER /SPEED INDICATOR LIGHT
LUZINDICADORA DE CORRIENTE/VELOCIDAD
SPEED CONTROL DIAL
DISCO DE CONTROL DE VELOCIDADES
FIGURE/FIGURA 2
CONE
BEATER
BATIDOR
CÓNICO
FIGURE/FIGURA 3
FIGURE/FIGURA 1
A. BOTÓN DE EXPULSIÓN DE ACCESORIOS:
El botón de expulsión, ubicado en
la parte superior de la agarradera, libera las paletas o los ganchos de amasar
para poder limpiarlos fácilmente.
B. PALETAS Y CABEZAL LATERALES:
El cabezal de la batidora de pedestal
MIXMASTER®y las paletas están colocados a un lado del bol para facilitar
la colocación de los ingredientes durante la mezcla.
C. BOL DE VIDRIO:
Dos bols de 2,202 cm3y de 4,404 cm3son ideales para
mezclar pequeñas o grandes cantidades de ingredientes
. (Modelo 2371
únicamente)
(El Modelo FPSBSMGLW y FPSBSMGLR incluye un bol de vidrio
para mezclado de 4 cuartos de galón)
D. BOLES DE ACERO INOXIDABLE:
Los boles de 2.0 y 4.0 cuartos son ideales
para mezclar grandes o pequeñas cantidades de ingredientes. Los Modelos
2379, 2591, 2594 y FPSBSM2596R incluyen un Bol de 4 Cuartos de Galón
únicamente. El Bol de 2 Cuartos de Galón 11 7 -001 se vende por separado.
E. SELECTOR DE BOL DEL PLATO GIRATORIO:
Simplemente deslice la palanca
selectora del bol hacia la izquierda cuando utilice el bol pequeño y hacia
la derecha cuando utilice el bol grande.
F. PLATO GIRATORIO:
Diseñado para ajustarse tanto a boles pequeños
como
grandes, el plato giratorio permite que el bol gire mientras mezcla
los ingredientes.
G. BOTÓN DEL CABEZAL DE BLOQUEO DE INCLINACIÓN TRASERA:
El cabezal
de la batidora de pedestal MIXMASTER®se inclina hacia atrás y se calza
en forma segura en su lugar para permitir que los boles y los accesorios
se extraigan fácilmente.
H. GATILLO DE LIBERACIÓN DE LA BATIDORA:
Retire el cabezal de la base
de la batidora para limpiarla y guardarla en forma conveniente.
I. LUZ INDICADORA DE COR RIENTE/VELOCIDAD:
La luz de ON/OFF
(encendido/apagado) también se utiliza para indicar el ajuste de velocidad.
J.
12 VELOCIDADES VARIABLES:
Las 12 velocidades variables con arranque
suave aseguran un control superior de la mezcla y mantienen la velocidad
independientemente de la carga de la mezcla.
K. AGARRADERA CON ASA SUAVE:
La agarradera moldeada con asa suave
le brinda comodidad y un control más firme mientras utiliza la batidora.
L. BOTÓN DEL BURST OF POWE R®DE LA BATIDORA:
Presione el botón para
aumentar automáticamente la velocidad de la batidora y obtener
inmediatamente una velocidad máxima.
M. BATIDORAS DE CROMO:
Para batir manteca y azúcar, también para mezclas
densas de tortas.
N. BATIDORES PARA MASA DE CROMO:
Estos batidores facilitan el trabajo
de amasar y batir mezclas densas.
(No están disponibles para el Modelos
2591)
O. BATIDORAS DE MANO:
Las batidoras de mano son para montar mezclas
como claras de huevo, yemas o crema. (Están disponibles en los modelos 2371,
2379 y FPSBSM2596R)
(No están disponibles en el modelos 2591, 2594,
FPSBSMGLW y FPSBSMGLR )
A. ATTACHMENT EJECT BUTTON –
The eject button, located on the top
of the handle, releases the beaters or dough hooks for easy cleaning.
B. OFF-CENTER HEAD AND BEATERS –
The head of the MIXMASTER®
Stand Mixer and beaters is positioned off-center to the bowl to make
it easier to add ingredients during mixing.
C. GLASS MIXING BOWL –
2.0 and 4.0 quart mixing bowls
are ideal for mixing large or small quantities of ingredients.
(Model 2371 Only)(Model FPSBSMGLW includes one 4 quart glass
mixing bowl )
D. STAINLESS STEEL BOWLS –
2.0 and 4.0 quart mixing bowls are ideal
for mixing large or small quantities of ingredients. Models 2379, 2591,
2594 and FPSBSM2596R include 4 quart mixing bowl only. 2 Quart
Mixing Bowl 11 7 -001 sold separately.
E. TURNTABLE BOWL SELECTOR –
Simply slide the bowl selector
lever to the left when using the small bowl and to the right when
using the large bowl.
F. TURNTABLE –
Designed to fit both the large and small bowl, the
turntable allows the bowl to turn while mixing.
G. TILT BACK LOCKING HEAD BUTTON –
The head of the
MIXMASTER®Stand Mixer tilts back and locks securely into
position to allow easy removal of mixing bowls and attachments.
H. MIXER RELEASE TRIGGER –
Remove the mixer head from the base
for convenient cleaning and storage.
I. POWER/SPEED INDIC ATOR LIGHT –
The ON/OFF light is also
used to indicate speed setting.
J. 12 VARIABLE SPEEDS –
The 12 variable speeds with soft-start
ensure superior mixing control and maintain speed regardless
of the mixing load.
K. SOFT GRIP HANDLE –
The soft grip molded handle gives you
comfort and a firmer grip while mixing.
L. BURST OF POWER®MIXER BUTTON –
Press down on button to
automatically increase the beater speed for an immediate burst of power.
M. CHROME BEATERS –
For creaming butter and sugar, plus mixing
heavy cake mixes.
N. CHROME DOUGH HOOKS –
Dough hooks take the hard work
out of kneading dough and other heavy mixtures.
(Not available on model 2591)
O. WHISKS –
The whisks are used to beat air into mixtures such as egg whites,
yolks or cream. (Available on Models 2371, 2379, and FPSBSM2596R) (Not
available on Models 2591, 2594, FPSBSMGLW and FPSBSMGLR)
N
MO
A
B
G
C
E
H
M
J
I
F
K
L
FEATURES OF YOUR STAND MIXER CARACTERÍSTICAS DE SUBATIDORA DE PEDESTAL
PREPARING THE STAND MIXER FOR USE
Before preparing the mixer for use, be sure the speed ontrol dial is in the OFF position and
the ele tri ord is unplugged. Be sure to wash bowls and atta hments before initial use.
ATTACHING THE TURNTABLE
Pla e the revolving turntable into the base of the stand by pressing the turntable into the
enter hole of the adjustable slot until it snaps into pla e.
ADJUSTING THE TURNTABLE
The turntable must be adjusted depending upon whi h bowl size is being used. To adjust,
press down on the Turntable Bowl Sele tor Swit h and slide the swit h to the proper i on.
(See Figure 1)
ATTACHING AND REMOVING THE MIXING HEAD
To atta h the mixing head, press in on the mixer-release trigger, lo ated at the rear of the
stand. Pla e the mixer head on the stand so that the metal pivot on the bottom of the mixer
head goes into the lat hed opening on top of the stand. As you release pressure from the
mixer-release trigger, the top of the lat h should lamp around the metal pivot. On e the
mixing head is lowered into position, it will lo k into pla e. (See Figure 2A)
RAISING AND LOWERING THE MIXING HEAD
Press the head lo k button, lo ated on the ne k of the
stand mixer
. While the button is
depressed, hold the handle and ease the head of the
stand mixer
ba k. The MIXMASTER®
stand mixer head will lo k into this position. To lower the mixing head, press the head lo k
button. While the button is depressed, hold the handle and ease the head of the
stand mixer
down. A “ li k” sound will indi ate when the mixer head has lo ked into position.
(See Figure 2B) Be sure the mixer head is se urely in position before using.
NOTE:
This
mixer is NOT intended for use away from the stand.
INSTALLING THE ATTACHMENTS
Be sure the speed ontrol dial is in the OFF position and unplug ele tri ord from the ele tri al
outlet.
Lift mixer head up and ba k to pull it out of the way of the bowl. (See Figure 2B)
NOTE:
It is important that the beaters, dough hooks or whisks go into the orre t so kets,
otherwise the mixer will not give you the proper mixing a tion. Do not risk ruining a re ipe
or damaging your mixer. Read the following instru tions arefully.
Insert the beaters, dough hooks or whisks one at a time, using a ombination pressing and
twisting motion, until they snap into position. If an atta hment does not properly snap into
pla e, pull it out of the so ket and rotate it one quarter turn. Reinsert the atta hment into
the so ket until it snaps into position.
BEATERS
One of the beaters is shaped like a one and has a nylon button on the bottom. It goes
into the so ket on the side of the mixer nearest the side of the bowl. The other beater goes
into the so ket nearest the enter of the bowl. (See Figure 4) See beater symbols lo ated on
the bottom of the mixer head.
DOUGH HOOKS
The dough hook with the smaller washer and foot goes into the so ket on the side of the
mixer nearest the side of the bowl. The other dough hook with the large washer goes into
the so ket nearest the enter of the bowl. See the dough hook symbols lo ated on the
bottom of the mixer head.
WHISKS
The whisks are designed to fit into either so ket. Insert as instru ted above.
PREPARATION
ADDING THE MIXING BOWL
On e you have sele ted the bowl you wish to use, move the turntable bowl sele tor swit h to
the proper setting – the large bowl i on if you are using the large bowl, and the small bowl
i on if you are using the small bowl. Pla e the desired mixing bowl onto the turntable.
Stainless Steel Bowls lo k into turntable (Models 2379, 2591, 2594, and FPSBSM2596R).
NOTE:
Mixing bowls should NEVER be used in a onventional oven, mi rowave oven,
on top of the range or on any other heated surfa e. If mixing bowls are s rat hed
or hipped, do not use the mixer.
OPERATING INSTRUCTIONS
ABOUT THE SPEED CONTROL DIAL
The speed ontrol dial is used for turning the mixer ON and OFF and for sele ting its
12 mixing speeds.
(See Figure 3)
Rotate the speed ontrol dial in a lo kwise dire tion to in rease mixing speed, and in
a ounter lo kwise dire tion to de rease mixing speed.
As you rotate the speed ontrol dial, noti e that a numbered speed is aligned with the indi ator
light on the side of the mixer head. This numbered speed indi ates the speed at whi h the
mixer is operating. With soft start, the speed will gradually in rease to prevent splatter.
Rotate the speed ontrol dial until the indi ator is opposite the numbered speed you wish
to use.
MIXING GUIDE
Please keep in mind that the various mixing tasks and related speeds listed in the following
table may vary slightly from re ipe to re ipe.
For most re ipes, it is better to begin your mixing on a slower speed until the ingredients
begin ombining, then move to the appropriate speed range for the parti ular task.
When mixing larger quantities you may need to in rease the speed due to the amount of
mixing required and the larger load on the ma hine.
When building up a re ipe that requires the addition of dry ingredients, su h as flour,
slow the speed down while these ingredients are being added to avoid a snow storm effe t.
On e the extra ingredients begin ombining, slowly in rease to the appropriate speed for
the parti ular mixing task.
Use the hart below to determine the best setting to use when preparing your favorite re ipes.
MONTAJE DE LA BATIDORA DE PEDESTAL
Antes de montar la batidora, asegúrese que la perilla de ontrol de velo idad esté
en la posi ión “OFF” (apagado) y que el able de alimenta ión esté desen hufado.
Asegúrese de lavar los boles y los a esorios antes de utilizarlos por primera vez.
COLOCACIÓN DEL PLATO GIRATORIO
Ponga el plato giratorio en la base del pedestal presionándolo en el orifi io entral
de la ranura de ajuste hasta que se a omode en su lugar.
AJUSTE DEL PLATO GIRATORIO
El plato giratorio se puede ajustar dependiendo del tamaño de re ipiente que se esté utilizando.
Para ajustarlo presione ha ia abajo el sele tor del bol del plato giratorio y deslí elo hasta
el i ono que orresponda. (Vea la Figura 1)
COLOCACIÓN Y RETIRADA DEL CABEZAL DE LA BATIDORA
Para olo ar el abezal de la batidora, presione el gatillo de libera ión ubi ado en la parte
trasera del pedestal. Ponga el abezal de la batidora sobre el pedestal de modo que el pivote
de metal de la parte inferior del abezal de la batidora se inserte en el orifi io on traba que
se en uentra en la parte superior del pedestal. Al soltar el gatillo para retirar la batidora,
la parte superior de la traba debe errarse alrededor del pivote de metal. Al bajar el abezal
de la batidora a su posi ión, el abezal se traba en su lugar. (Vea la Figura 2A)
ELEVACIÓN Y DESCENSO DEL CABEZAL DE LA BATIDORA
Presione el botón de seguro del abezal que está ubi ado en el uello de la batidora de pedestal.
Mientras presiona el botón, sostenga la agarradera y mueva ha ia atrás el abezal de la batidora
de pedestal. El abezal de MIXMASTER®se bloqueará en su lugar. Para bajar el abezal de
la batidora, presione el botón de seguro del abezal. Mientras presiona el botón, sostenga el
asa y baje el abezal de la batidora de pedestal. Es u hará un “ li ”, el ual indi ará uándo
el abezal de la batidora se en uentre trabado en su posi ión. (Vea la Figura 2B) Asegúrese que
el abezal de la batidora esté firmemente asentado en su posi ión antes de usar la batidora.
NOTA: Esta batidora NO puede usarse fuera del pedestal.
INSTALACIÓN DE LOS ACCESORIOS
Asegúrese que la perilla de ontrol de velo idad esté en posi ión “OFF” (APAGADA)
y desen hufe el able de alimenta ión del toma orriente. Levante el abezal de la batidora
ha ia arriba y ha ia
atrás para retirarla del bol. (Vea la Figura 2B)
NOTA:Es importante que los batidores o gan hos para amasar estén insertados en los one tores
apropiados, de lo ontrario la batidora no fun ionará orre tamente. No se arriesgue a arruinar
una re eta o dañar su batidora. Lea uidadosamente las siguientes instru iones. Inserte las
paletas o gan hos para amasar, de uno en uno, usando un movimiento ombinado de presión
y rota ión, hasta que se a omoden en su posi ión. Si un a esorio no se a omoda orre tamente
en su lugar, retírelo del one tor y gírelo un uarto. Vuelva a olo ar la paleta o gan ho para
amasar en el one tor hasta que quede a omodado en su posi ión.
PALETAS
Una de las paletas tiene forma de ono y tiene un botón de nylon en la parte inferior.
Debe insertarse en el one tor del lado de la batidora que está más er a del ostado del bol.
La otra paleta tiene forma uadrada y debe insertarse en el one tor que está más er a del
entro del bol. (Vea la Figura 4) Vea los símbolos de las paletas que están ubi ados en la parte
inferior del abezal de la batidora.
GANCHOS PARA AMASAR
El gan ho para amasar on la arandela y el soporte pequeño debe insertarse en el one tor
del lado de la batidora que está más er a del ostado del bol. El otro gan ho para amasar
on la arandela grande debe insertarse en el one tor que está más er a del entro del bol.
Vea los símbolos de los gan hos para amasar en la parte inferior del abezal de la batidora.
ESCOBILLAS DE ALAMBRE DE ACERO INOXIDABLE
Las e obillas estan diseñados para insertarse en ualquiera one tor.
PREPARACIÓN
COLOCACIÓN DEL BOL
Una vez que haya sele ionado el bol que desea utilizar, mueva el sele tor del bol del plato
giratorio al ajuste apropiado, el i ono del bol grande si está utilizando el bol grande y el i ono
del bol pequeño si está utilizando el bol pequeño. Ponga el bol deseado sobre el plato giratorio.
Los bols de a ero inoxidables se ajustan a la plataforma giratoria (Modelos 2379, 2591, 2594,
y FPSBSM2596R).
NOTA:
NUNCA se deben usar los boles de la batidora en un horno onven ional, horno de
mi roondas, sobre la o ina o en ualquier otra superfi ie aliente. Si los boles están rayados
o astillados, no use la batidora.
INSTRUCCIONES DE OPERACIÓN
ACERCA DE LA PERILLA DE CONTROL DE VELOCIDAD
La perilla de ontrol de velo idad se usa para en ender “ON” y apagar “OFF” la batidora,
ypara sele ionar sus 12 velo idades de batido. (Vea la Figura 3)
Gire la perilla de ontrol de velo idad ha ia la dere ha para aumentar la velo idad de mez la
y ha ia la izquierda para redu ir la velo idad de mez la.
A medida que gira la perilla de ontrol de velo idad, observe que una velo idad numerada
se alinea on la luz indi adora que está a un lado del abezal de la batidora. Esta velo idad
numerada indi a la velo idad a la ual está fun ionando la batidora. Con un ini io suave, la
velo idad se in rementará gradualmente para prevenir salpi aduras.
Gire la perilla de ontrol de velo idad hasta que el indi ador esté frente a la velo idad
que desee usar.
GUÍA DE BATIDO
No olvide que las diversas tareas de batido y velo idades rela ionadas que apare en
en la siguiente tabla pueden variar ligeramente de una re eta a otra.
Para la mayoría de re etas, es mejor omenzar a batir a una velo idad lenta hasta que
los ingredientes se mez len y luego ambiar al rango de velo idad ade uado para esa
tarea espe ífi a.
Cuando mez le antidades más grandes, es posible que tenga que aumentar la velo idad
debido a la antidad de mez la requerida y a la arga mayor de la batidora.
Cuando reali e una re eta que requiere añadir ingredientes se os, omo harina, reduz a la
velo idad mientras estos ingredientes se agregan para evitar un efe to de tormenta de nieve.
Una vez que los ingredientes adi ionales omienzan a mez larse, aumente lentamente
la velo idad a una apropiada para la tarea de batido espe ífi a.
Utili e la tabla que apare e a ontinua ión para determinar el mejor ajuste que se utilizará
en el momento de preparar sus re etas favoritas.
TILT BACK LOCKING HEAD BUTTO N
BOTÓN DEL CABEZAL DE BLOQUEO
DEINCLINACIÓN TRASERA
TURNTA BLE BOWL SEL ECTO R
Slide t e bowl selector lever to t e left w en using t e small
bowl and to t e rig t w en using t e large bowl.
SELECTOR DEL BOL D EL PLATO GIRATO RIO
Deslice la pala ca selectora del bol hacia la izquierda
cua do utilice el bol pequeño y hacia la derecha
cua do utilice el bol gra de.
MIXER RELEA SE TRIGGER
GATILLO DE LIBERACIÓN DE LA BATIDORA
SPEED
SETTING MIXING GUIDE EXAMPLE
1 Fold-Knead Use when mixing dry ingredients or when folding two
portions of a re ipe together, su h as a beaten egg white
into a batter or when dire tions all for LOW speed.
Use for kneading bread.
2 Stir Use when stirring liquid ingredients or when gentle a tion
is needed to moisten dry ingredients.
3 Blend Use when qui k breads require a brisk a tion, just enough
to blend ingredients but not enough to develop
a smooth batter.
4 Mix Use when mixing dry ingredients and liquid ingredients
together alternately in a re ipe.
5 Combine Use when re ipe alls for ombining ingredients together.
6 Cake Mixes Use when preparing pa kaged ake mixes or when dire tions
all for MEDIUM speed.
7 Cream Use when reaming sugar and butter together.
8 Whip Use to whip potatoes or to develop a smooth batter.
9 Whip/Cream Use to whip ream or to develop a light, fluffy texture.
10 Desserts Use to beat air into whipped desserts.
11 Frostings Use when preparing light, fluffy frostings and andies.
12 Egg Whites Use when aerating eggs and egg whites.
Use when dire tions all for HIGH speed.
N
OTE
:
Due to variations in ingredient temperatures and quantities, the Mixing Guide speeds are
only suggestions. If ne essary, adjust speeds as needed to a hieve desired results.
2.0 qt.
4.0 qt.
(A) (B)
Ajuste de
Velocid d Guí de B tido Ejemplo
1 Amasar-Mez lar Para batir ingredientes se os o uando mez le dos
partes de una re eta, omo laras de huevo batidas
en una paleta o uando se espe ifi a que se utili e
velo idad BAJA. Para amasar pan.
2 Revolver Para revolver ingredientes líquidos o uando
se requiere una a ión suave para humede er
los ingredientes se os.
3 Mez lar Para panes rápidos que requieren una a ión rápida,
justo lo sufi iente para mez lar ingredientes pero
no para amasar una mez la homogénea.
4 Batir Para mez lar ingredientes se os e ingredientes
líquidos a la vez en una sola re eta.
5 Revolver Cuando una re eta requiere que se revuelvan
los ingredientes.
6 Mez las para Pasteles Para preparar pasteles on mez las empa adas
o uando las instru iones indiquen velo idad
MEDIA.
7 Crema Para ha er una rema on azú ar y mantequilla.
8 Batir Para batir papas o preparar una masa homogénea.
9 Batir/Crema Para batir remas o preparar una textura ligera
y esponjosa.
10 Postres Para in orporar aire en postres batidos.
11 Baños Para preparar baños o dul es ligeros y esponjosos.
12 Claras de Huevo Para in orporar aire uando se baten huevos o
laras de huevo. Utilí ela uando las instru iones
indiquen velo idad ALTA.
NOTA:
Debido a las varia iones en las temperaturas y a las antidades de ingredientes, las velo idades
de la Guía de Batido son sólo sugeren ias. En aso ne esario, ajuste la velo idad para lograr los
resultados deseados.
D
(Model 2371 only)
(Modelo 2371 únicamente)
4 Quart Bowl available on Models 2379, 2591,
2594, and FPSBSM2596R 2 Quart bowl
11 7 -001 sold separately
Bol de 4 Cuartos de Galón pueden encontrarse
en los Modelos 2379, 2591, 2594 y FPSBSM2596R .
El Bol de 2 Cuartos de Galón 11 7 -001 se vende por
separado.
(Not Available on
Model 2591)
(No Están Disponibles
en el Modelo
2591)
(Not Available on
Models 2591,
2594, FPSBSMGLW and
FPSBSMGLR)
(No Están Disponibles
en el Modelos 2591, 2594,
FPSBSMGLW y FPSBSMGLR)
N
NO
OT
TE
E:
:
Image above reflects white unit. Product color
will vary depending on model purchased.
N
NO
OT
TA
A:
:La foto de arriba refleja la unidad en blanco. El color del
Producto podrá variar dependiendo del modelo adquirido
ACCESSORIES/ACCESSORIOS (Available on Sunbeam.com)
Part# Description Fits Models/Modelos
115969-002-000 Beater, right with
white tip
2371, 2379, 2591, 2594,
FPSBSMGLW, FPSBSMGLR
115969-003-000 Beater, left with
white tip
2371,2379,2591,2594,FPSBSMGLW,
FPSBSM2596R, FPSBSMGLR
115969-004-000 Dough Hook, right,
with short rounded tip
2371,2591,2594,FPSBSMGLW,
FPSBSM2596R, FPSBSMGLR
115969-005-000 Dough Hook, left,
with long square tip
2371,2591,2594,FPSBSMGLW,
FPSBSM2596R, FPSBSMGLR
118780-003-000 Dough Hook, right,
with long square tip 2379
118780-004-000 Dough Hook, left,
with short rounded tip 2379
118780-006-000 Whisk 2371, 2379, 2591, 2594, FPSBSMGLW,
FPSBSM2596R, FPSBSMGLR
118780-000-000 SS Bowl 4.0 t 2371,2379, 2591, 2594, FPSBSMGLR
118780-001-000 SS Bowl 2.0 t 2371,2379, 2591, 2594, FPSBSMGLR
115969-000-000 Glass Bowl, 2.0 t 2371, FPSBSMGLW, FPSBSMGLR
115969-001-000 Glass Bowl, 4.0 t 2371, FPSBSMGLW, FPSBSMGLR
Other manuals for Mixmaster 2370 Series

1

This manual suits for next models

2

Other Sunbeam Mixer manuals

Sunbeam MixMaster JM7000 User manual

Sunbeam

Sunbeam MixMaster JM7000 User manual

Sunbeam PLANETARY MIXMASTER MX9200 Operational manual

Sunbeam

Sunbeam PLANETARY MIXMASTER MX9200 Operational manual

Sunbeam Mixmaster Combo Pro MXP1000WH User manual

Sunbeam

Sunbeam Mixmaster Combo Pro MXP1000WH User manual

Sunbeam MIXMASTER 2366 User manual

Sunbeam

Sunbeam MIXMASTER 2366 User manual

Sunbeam MIXMASTER 2372 User manual

Sunbeam

Sunbeam MIXMASTER 2372 User manual

Sunbeam Mixmaster 2371 User manual

Sunbeam

Sunbeam Mixmaster 2371 User manual

Sunbeam FPSBSM3481 series User manual

Sunbeam

Sunbeam FPSBSM3481 series User manual

Sunbeam Mixmaster MX003 User manual

Sunbeam

Sunbeam Mixmaster MX003 User manual

Sunbeam Mixmaster MX7700 Operational manual

Sunbeam

Sunbeam Mixmaster MX7700 Operational manual

Sunbeam MXM5000 User manual

Sunbeam

Sunbeam MXM5000 User manual

Sunbeam FPSBSM210X User manual

Sunbeam

Sunbeam FPSBSM210X User manual

Sunbeam MIXMASTER 2346 User manual

Sunbeam

Sunbeam MIXMASTER 2346 User manual

Sunbeam MIXMASTER 2346 User manual

Sunbeam

Sunbeam MIXMASTER 2346 User manual

Sunbeam MX9500 Operational manual

Sunbeam

Sunbeam MX9500 Operational manual

Sunbeam MIXMASTER 2345 User manual

Sunbeam

Sunbeam MIXMASTER 2345 User manual

Sunbeam Mixmaster MX8900W Operational manual

Sunbeam

Sunbeam Mixmaster MX8900W Operational manual

Sunbeam Planetary Mixmaster MX7900 User manual

Sunbeam

Sunbeam Planetary Mixmaster MX7900 User manual

Sunbeam Planetary Mixmaster MX7900B User manual

Sunbeam

Sunbeam Planetary Mixmaster MX7900B User manual

Sunbeam StickMaster SM6400 User manual

Sunbeam

Sunbeam StickMaster SM6400 User manual

Sunbeam Planetary Mixmaster The Tasty One User manual

Sunbeam

Sunbeam Planetary Mixmaster The Tasty One User manual

Sunbeam Mixmaster 2395 User manual

Sunbeam

Sunbeam Mixmaster 2395 User manual

Sunbeam MXM5000 User manual

Sunbeam

Sunbeam MXM5000 User manual

Sunbeam Mixmaster MX7700 Operational manual

Sunbeam

Sunbeam Mixmaster MX7700 Operational manual

Sunbeam MX9200 Cafe series User manual

Sunbeam

Sunbeam MX9200 Cafe series User manual

Popular Mixer manuals by other brands

SoundCraft GicRac1000st user guide

SoundCraft

SoundCraft GicRac1000st user guide

Hear Technologies Hear back pro user guide

Hear Technologies

Hear Technologies Hear back pro user guide

Toa AX-1000A operating instructions

Toa

Toa AX-1000A operating instructions

Larius NOVA MIX 2K Operating and maintenance instruction

Larius

Larius NOVA MIX 2K Operating and maintenance instruction

TREVIDEA G3 FERRARI PASTAIO GOURMET user manual

TREVIDEA

TREVIDEA G3 FERRARI PASTAIO GOURMET user manual

Beper 90.702 use instructions

Beper

Beper 90.702 use instructions

Sound Devices 688 user manual

Sound Devices

Sound Devices 688 user manual

Rane TTM 56 Operator's manual

Rane

Rane TTM 56 Operator's manual

Amitek AP10 Installation, operating and service instructions

Amitek

Amitek AP10 Installation, operating and service instructions

Springlane Hanno instruction manual

Springlane

Springlane Hanno instruction manual

IKEA RINGSKAR manual

IKEA

IKEA RINGSKAR manual

Preethi Blue Leaf Platinum Instruction manual & warranty card

Preethi

Preethi Blue Leaf Platinum Instruction manual & warranty card

Adler AD 4201 user manual

Adler

Adler AD 4201 user manual

Life FMS-003 INOX+ user manual

Life

Life FMS-003 INOX+ user manual

Sottoriva VELA 90-130/1 Instruction book

Sottoriva

Sottoriva VELA 90-130/1 Instruction book

BOMANN SM 354 CB instruction manual

BOMANN

BOMANN SM 354 CB instruction manual

Kenwood KM262 instructions

Kenwood

Kenwood KM262 instructions

Tascam LM-8ST owner's manual

Tascam

Tascam LM-8ST owner's manual

manuals.online logo
manuals.online logoBrands
  • About & Mission
  • Contact us
  • Privacy Policy
  • Terms and Conditions

Copyright 2025 Manuals.Online. All Rights Reserved.