manuals.online logo
Brands
  1. Home
  2. •
  3. Brands
  4. •
  5. Sunlight Supply
  6. •
  7. Controllers
  8. •
  9. Sunlight Supply TITAN Controls Saturn 4 User manual

Sunlight Supply TITAN Controls Saturn 4 User manual

Saturn™4
Digital Environmental Controller
Instruction Manual
VANCOUVER, WASHINGTON U.S.A.
www.titancontrols.net
Notes:
_________________________________________________
_________________________________________________
_________________________________________________
_________________________________________________
_________________________________________________
_________________________________________________
________________________________________________
1 Square = 1 Foot
®
VANCOUVER, WASHINGTON U.S.A.
www.titancontrols.net
Revision H – 2/19/2013 © Titan Controls®
2 7
Saturn™4 Digital Humidity Controller
Warnings & Cautions
• Read all instructions before operating controller.
• Do not put your controller in an area where it can get wet or sprayed.
• Mount your controller securely to the wall.
• When using “bug bombs” in area, cover sensor completely to avoid corrosion.
• There are no serviceable parts in controller. Do not attempt to repair the unit.
• Breaking tamper proof seal will void your warranty.
• Do not put paper clips, tools, etc. into unit. Possible electrocution may occur.
• Plug controller into surge protector to avoid potential damage to the unit.
• Confirm that your power source is 120 Volts/15 Amps prior to plugging controller into
outlet.
• Check that all equipment that will be activated by this controller is the proper voltage(s).
• Verify that the equipment you are controlling does not exceed a total of
14.5 Amps.
• This controller is designed for “inside use” only.
• Avoid placing the controller near heat generating sources such as a
CO2generator.
• Use caution if operating controller in extremely humid environments (90% and above).
• Do not use controller for purposes other than the unit was designed to function
• Use controller within defined environmental specifications.
• Ask your Dealer for tips and techniques regarding the use of this controller.
• Be conscientious when disposing of any products.
• Enjoy your Titan Controls®environmental controller for years to come.
CAUTION: DO NOT install your controller near electronic/digital ballasts, ozone generators and
other devices that emit large amounts of electromagnetic interference (EMI) & radio frequency
interference (RFI), it will disable the controller. Maintain a minimum distance of 8 feet between the
controller & sensor, and all high EMI/RFI devices.
Saturn™4 – Digital Environmental Controller
The simplicity in the design of the Saturn™4 is what makes it such a unique environmental con-
troller. It provides the grower with the essential controls for temperature, humidity and CO2in their
garden. The Saturn™4 offers three options to maintain the environment in your garden. 1) It can in-
dependently lower the temperature via an exhaust fan and decrease humidity using a dehumidifier
(Mode A). 2) It can simultaneously lower the temperature via an exhaust fan and decrease humidity
using a dehumidifier (Mode B) or 3) Independently lower the temperature via an exhaust fan and
increase humidity using a humidifier (Mode C). The Saturn™4 also allows you to integrate an
optional CO2system using a CO2monitor/controller. The CO2Output only operates during daytime
hours and is defeated when the Cooling Output is activated so you’re not wasting your valuable
CO2that you’ve provided for your garden. The Night Output allows you to activate a circulation
fan or other devices during the nighttime hours. The Saturn™4 provides you with the total control
you’re looking for in your garden. Titan Controls®…keepin’ it simple.
Include the following if returning directly to Titan Controls®
• Proof of purchase copy • This completed form • RMA # on the outside of the box
Return Merchandise Authorization Number (Required
Dealer/Customer’s Name: ___________________________________________________________________________
Dealer/Customer’s Contact Name: __________________________________________________________________
Shipping Address: _________________________________________________________________________________
____________________________________________________________________________________________________
Phone #: ___________________________________________________________________________________________
Email address: _______________________________________________________________________________
What is the nature of the problem? Please provide as much information as possible __________
___________________________________________________________
___________________________________________________________
___________________________________________________________
___________________________________________________________
___________________________________________________________
Shipping address will be given when the RMA # is issued:
www.titancontrols.net
For technical assistance call us at 1-888-80-Titan or 1-888-808-4826.
®
WARRANTY SERVICE: Please read warranty information first
If after reviewing the troubleshooting tips the unit will still not work, you should return it to the
Dealer where you purchased it. They may be able to further evaluate the unit and test its various
components and quite possibly will be able to identify and/or fix any problems. If the Dealer is unable
to fix the unit, they will return it to us for factory repair.
If there are no Dealers in your area, you may contact us directly for technical support. If we cannot
help you resolve the problem over the phone, we will issue you a Return Merchandise Authorization
(RMA) number authorizing you to return the unit to us for factory reconditioning (if the controller is
currently under warranty). Contact the number below for a RMA number and shipping address.
Please complete the form below and include it with your unit, and write the RMA number clearly on
the outside of the box.
Please package the unit in its original packaging. If it is damaged in shipment we cannot be held
responsible. Insuring the parcel is recommended.
Once we receive the unit back, we will repair it within 48 hours (business) and return it to you freight
prepaid via UPS ground shipment.
• Warnings and Cautions
• Saturn™4 – Digital Environmental
Controller
• Instructions for Operation
• Troubleshooting Tips
• Controller Specifications
• Warranty Information
• Service & Repair Program
• Installation Example
6 3
Instructions for Operation
1. Securely mount your Saturn™4 in your grow area and away from any moisture, spray,
pesticides or other materials that could harm the unit.
2. Ensure that all of the devices being connected to the controller are 120 Volt only and will
not exceed the maximum amperage rating for the Saturn™4.
3. Connect your gear (exhaust fan, CO2controller, night circulation fan, dehumidifier, etc.) to
the Saturn™4. The sensor has a quick connect cord set to easily connect or move the
sensor. Secure the quick connect cord to the Saturn™4 by plugging it in and securing the
QD screw to the unit.
4. Place the sensor in an area with good air movement, and where it is exposed to your
grow lights and not shaded or covered. Avoid placing the sensor in direct sunlight or
under direct HID lighting. NOTE: Do not place sensor anywhere it might get wet. SENSOR
IS NOT WATER PROOF.
5. Plug the power cable into a standard 120 Volt wall outlet.
6. Adjust the knobs to the desired settings on the Saturn™4.
7. The Saturn™4 should now activate and deactivate your equipment based on the pre-
ferred settings you selected.
COOLING OUTPUT:
This outlet is intended to active an exhaust fan to ventilate the garden due to high temperature
conditions.
CO2OUTPUT:
This outlet is for a CO2device and powers ON during the daytime period only. It will deactivate
when the ‘Cooling Output’ is activated. By achieving this, you are not ventilating the CO2as
you’re enriching your grow area and wasting your CO2.
NIGHT OUTPUT:
The outlet can be used for a variety of devices that only require power at night. This outlet acti-
vates only during the nighttime period.
HUMIDITY OUTPUT:
This output is for use with a humidifier or dehumidifier.
USING THE TEMPERATURE & HUMIDITY DIALS:
Temperature Dial:
Use the dial on the left to set the maximum temperature for the growing area. If the tempera-
ture reaches or rises above this set point, the controller will activate the cooling device, and the
cooling device will remain on until the temperature is reduced to 3° F below the set point. For
instance: If the temperature set point is 75°F, the Saturn™4 will activate the exhaust fan at 75°F
and deactivate the fan when the temperature drops below 72° F.
Humidity Dial:
Use the dial on the right to set the maximum humidity level for the growing area. If the humidity
your garden rises or falls above or below this setting (depending on whether you’re using a
humidifier or dehumidifier) the Saturn™4 will activate the humidity device, and it will stay
active until the level is raised or lowered by 5%. For instance: If the dehumidify set point is
50%, then the Saturn™4 will activate at 50% and deactivate when the humidity level goes below
45%. Conversely, if the humidify set point is 50%, then the Saturn™4 will activate at 50% and
deactivate at 55%.
Installation Example
4 5
OPERATING MODES:
The Saturn™4 has three operating modes. This selection depends on the type of devices being
connected to the controller. Press the Select Mode button to change from MODE A, B or C. A
green LED will let you know what MODE you are operating in.
Mode A: This mode independently lowers your temperature and humidity. If you are connecting
a cooling device (such as a exhaust fan) to lower the temperature AND a dehumidifier to lower
the humidity level, the controller will activate these devices independently based on the tempera-
ture and humidity levels in your grow room and your preferred set points. The ‘Cooling Output’
is activated when the temperature set point is exceeded and the ‘Humid/Dehumid Output’ is
activated when the humidity set point is exceeded
Mode B: This mode simultaneously lowers your temperature and humidity. If you are connect-
ing a cooling device (such as an exhaust fan) to lower your temperature AND a dehumidifier to
lower the humidity levels, the controller will activate the devices simultaneously if the temperature
rises above the set point AND/OR the humidity level rises above the set point. The ‘Cooling
Output’ and ‘Humid/Dehumid Output” will both be activated until both the temperature and/or
humidity set point is reached.
Mode C: This mode independently lowers the temperature and increases the humidity. If you’re
connecting a cooling device (such as a fan) to lower your temperature AND a humidifier to raise
the humidity level, the controller will activate these devices independently based on the tempera-
ture and humidity levels in your grow room and your preferred set points. The ‘Cooling Output’
is activated when the temperature set point is exceeded, and the ‘Humid/Dehumid Output’ is
activated when the humidity set point is exceeded.
Troubleshooting Tips
• The Saturn™ 4 has no power? Verify power source is providing 120 Volts A/C. Reset
the circuit breaker on the Saturn™4 by turning OFF the unit, then turn ON.
• The circuit breaker keeps tripping on my Saturn™ 4? Check to see
that you are not exceeding the maximum amperage (14.5 Amps) of the Saturn™4.
• The CO2Output is not working? This could be because your Saturn™4 is not exposed
to light. Put the Saturn™4 in a location in your grow room so that the PHOTOCELL is not
shaded or covered from lights. It also could be because your Cooling Output is active.
When this occurs it deactivates the CO2Output so you don’t ‘dump your room’ and
exhaust all the CO2you’ve injected.
• The MODE LED’s are flashing? The Saturn™4 has detected a problem with the remote
sensor. This can normally be remedied by turning OFF the Saturn™4 & disconnecting the
sensor, then re-attaching the sensor back to the Saturn™4 and turn the unit back ON.
The Saturn™4 should be functioning properly again. If not, contact our Technical Service
Specialist at 888-808-4826 to assist you further.
• The humidity is increasing instead of decreasing or decreasing instead of increas-
ing? Verify that your MODE is correct. MODE’s A & B are used to decrease humidity and
MODE C is used to increase humidity.
Controller Specifications
Size = 9”H x 7”W x 3 ¾ “D
Input Voltage = 120 Volts
Output Voltage = 120 Volts
Maximum Amperage = 14.5 Amps
Operating Hertz = 60 Hz.
Minimum/Maximum Humidity Control Levels = 5% to 95% RH (non-condensing)
Humidity Accuracy = +/-3% RH of desired setting
Humidity Deadband = 5% RH
Minimum/Maximum Temperature Controls = 41°F to 113°F
Temperature Accuracy = +/- 1°F
Temperature Deadband = 3°F
Warranty Information
• Titan Controls®warrants the original purchase of this product against defects in material
and workmanship under normal use for three (3) years from the date of purchase.
• During the warranty period, Titan Controls®will, at our option, and without charge, repair
or replace this product if the controller or any of its components fail or malfunction.
• All returns or repairs must be accompanied by a Return Merchandise Authorization (RMA)
number prior to any service of the product.
• This warranty is in lieu of all other warranties, expressed or implied, including the warran-
ties of merchantability and fitness for use, and of all other obligations or liabilities on the
part of the seller.
• This warranty shall not apply to this product or any part thereof which had been damaged
by accident, abuse, misuse, modification, negligence, alteration or misapplication.
• Controllers with serial numbers or date tags that have been removed, altered or obliterat-
ed; broken seals that show evidence of tampering or nonconforming parts, are excluded
from coverage.
• Titan Controls®makes no warranty whatsoever in respect to accessories or parts not
supplied by Titan Controls®.
• Monetary refunds of the warranty will not be given.
• The Buyer assumes all responsibility regarding the proper use & installation of this controller.
• All warranty service is provided through the Titan Controls®factory.
• This warranty shall apply only to the United States, including Alaska, Hawaii & territories of
the United States and Canada.
• Defective controllers are required to be returned with the “proof of purchase/receipt” for
warranty coverage.
• For additional warranty information, contact the Titan Controls®Technical Service Repre-
sentative at 888-808-4826 or your local Dealer.
• NOTE: Titan Controls®is a Manufacturer of environmental, timing, lighting, ventilation and
CO2controls. All sales offerings to the public are done through a nationwide group of
Dealers. No sales offerings will be made directly to the general public.
Service & Repair Program
• For all service and repairs, please contact by our Technical Service Representative at 888-
808-4826 for troubleshooting your gear and attaining a Return Merchandise Authorization
(RMA) number, if applicable.
• All factory service & repairs will be completed within 48 hours of receipt of controller at the
factory.
• Titan Controls®will, at its discretion, repair or replace the controller.
• Factory calibration services are available for all Titan Controls®.
• Returning Units: Please contact your retail store for information regarding returns.

Other Sunlight Supply Controllers manuals

Sunlight Supply TITAN CONTROLS HELIOS 8 User manual

Sunlight Supply

Sunlight Supply TITAN CONTROLS HELIOS 8 User manual

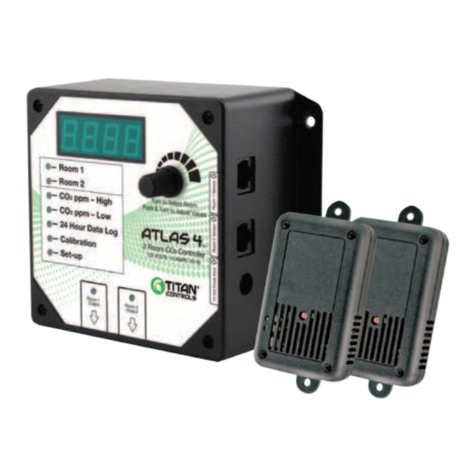
Sunlight Supply Titan Controls Atlas 4 User manual

Sunlight Supply

Sunlight Supply Titan Controls Atlas 4 User manual

Sunlight Supply Titan Controls Helios 1 User manual

Sunlight Supply

Sunlight Supply Titan Controls Helios 1 User manual

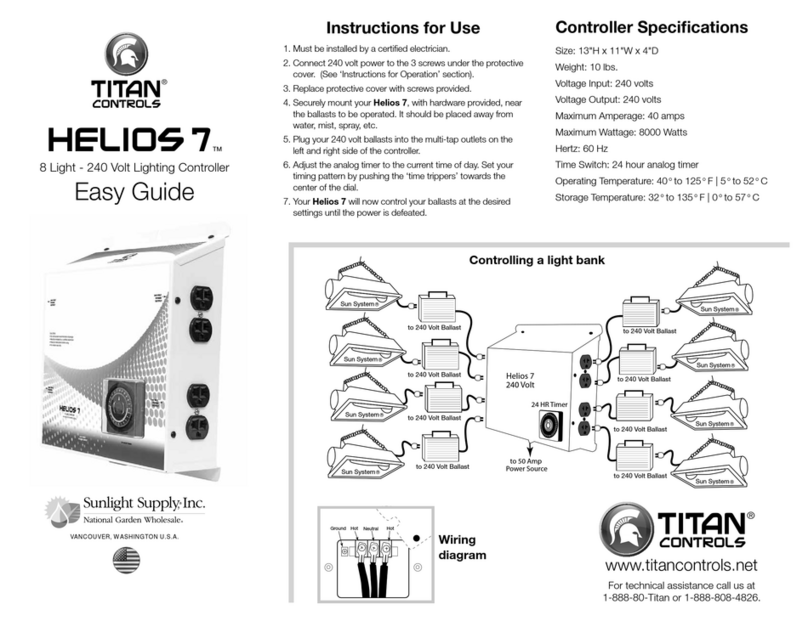
Sunlight Supply Titan Controls Helios 7 Product information sheet

Sunlight Supply

Sunlight Supply Titan Controls Helios 7 Product information sheet

Sunlight Supply Sun System 1 User manual

Sunlight Supply

Sunlight Supply Sun System 1 User manual

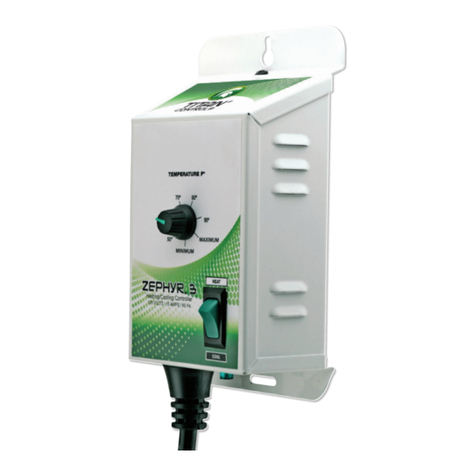
Sunlight Supply TITAN CONTROLS ZEPHYR 3 User manual

Sunlight Supply

Sunlight Supply TITAN CONTROLS ZEPHYR 3 User manual

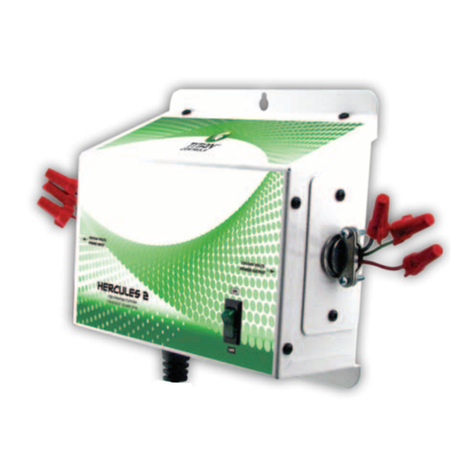
Sunlight Supply TITAN CONTROLS HERCULES 2 User manual

Sunlight Supply

Sunlight Supply TITAN CONTROLS HERCULES 2 User manual

Sunlight Supply Titan Controls Helios 2 User manual

Sunlight Supply

Sunlight Supply Titan Controls Helios 2 User manual

Sunlight Supply TITAN CONTROLS Helios 5 User manual

Sunlight Supply

Sunlight Supply TITAN CONTROLS Helios 5 User manual

Sunlight Supply TITAN CONTROLS HELIOS 8 Product information sheet

Sunlight Supply

Sunlight Supply TITAN CONTROLS HELIOS 8 Product information sheet

Sunlight Supply TITAN CONTROLS KRONUS 2 User manual

Sunlight Supply

Sunlight Supply TITAN CONTROLS KRONUS 2 User manual

Popular Controllers manuals by other brands

LAE electronic T4 Instructions for installation and use

LAE electronic

LAE electronic T4 Instructions for installation and use

Thermotron 3800 Operator's manual

Thermotron

Thermotron 3800 Operator's manual

Parker HTR Series product manual

Parker

Parker HTR Series product manual

elco CRM-2H quick start guide

elco

elco CRM-2H quick start guide

Pilz PIT js2 operating manual

Pilz

Pilz PIT js2 operating manual

XHC WHB04B-6 user manual

XHC

XHC WHB04B-6 user manual

JB Systems LEDCON XL Operation manual

JB Systems

JB Systems LEDCON XL Operation manual

dbx 3BX instruction manual

dbx

dbx 3BX instruction manual

ComAp InteliDrive DCU Marine reference guide

ComAp

ComAp InteliDrive DCU Marine reference guide

Supermicro AOC-MHIBF-m2Q2G user guide

Supermicro

Supermicro AOC-MHIBF-m2Q2G user guide

Norlake CP6 Series instruction manual

Norlake

Norlake CP6 Series instruction manual

Vacon 100 flow user manual

Vacon

Vacon 100 flow user manual

White Rogers 50A55-843 Wiring And Configuration Guide

White Rogers

White Rogers 50A55-843 Wiring And Configuration Guide

PCB Piezotronics IMI SENSORS 683A101003 Installation and operating manual

PCB Piezotronics

PCB Piezotronics IMI SENSORS 683A101003 Installation and operating manual

SOMFY Animeo WM 24 V installation guide

SOMFY

SOMFY Animeo WM 24 V installation guide

Johnson Controls HS3032 Reference manual

Johnson Controls

Johnson Controls HS3032 Reference manual

Spektrum FC6250HX manual

Spektrum

Spektrum FC6250HX manual

Sulzer PC 111 Installation and user guide

Sulzer

Sulzer PC 111 Installation and user guide

manuals.online logo
manuals.online logoBrands
  • About & Mission
  • Contact us
  • Privacy Policy
  • Terms and Conditions

Copyright 2025 Manuals.Online. All Rights Reserved.