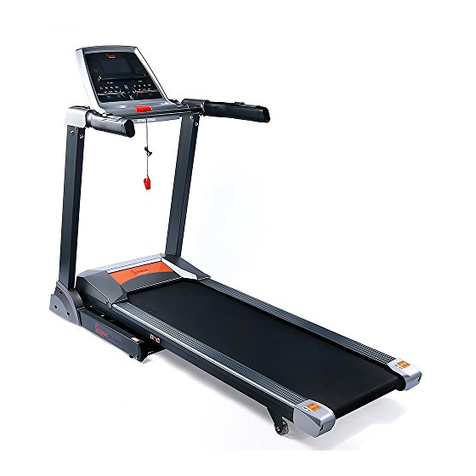
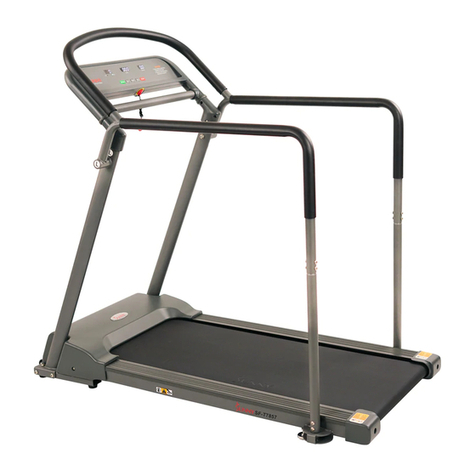
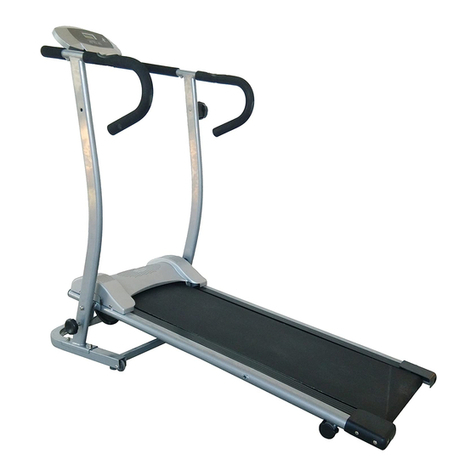
Sunny SF-T7514 User manual

HEAVY DUTY WALKING TREADMILL
SF-T7514
USER MANUAL
IMPORTANT: Please read this manual carefully before using the product.
Retain owner’s manual for future reference. For Customer Service, please
contact: support@sunnyhealthfitness.com

IMPORTANT SAFETY INFORMATION
We thank you for choosing our product. To ensure your safety and health, please use this
equipment correctly. It is important to read this entire manual before assembling and using
the equipment. Safe and effective use can only be assured if the equipment is assembled,
maintained, and used properly. It is your responsibility to ensure that all users of the
equipment are informed of all warnings and precautions.
1. Before starting any exercise program you should consult your physician to determine if
you have any medical or physical conditions that could put your health and safety at
risk or prevent you from using the equipment properly. Your physician’s advice is
essential if you are taking any medication that may affect your heart rate, blood
pressure, or cholesterol level.
2. Be aware of your body’s signals. Incorrect or excessive exercise can damage your
health. Stop exercising if you experience any of the following symptoms: pain,
tightness in your chest, irregular heartbeat, shortness of breath, lightheadedness,
dizziness, or feelings of nausea. If you do experience any of these conditions, you
should consult your physician before continuing with your exercise program.
3. Keep children and pets away from the equipment. The equipment is designed for adult
use only.
4. Use the equipment on a solid, flat level surface with a protective cover for your floor or
carpet. To ensure safety, the equipment should have at least 2 feet of free space all
around it.
5. Ensure that all nuts and bolts are securely tightened before using the equipment. The
safety of the equipment can only be maintained if it is regularly examined for damage
and/or wear and tear.
6. It is recommended that you lubricate all moving parts on a monthly basis.
7. Always use the equipment as indicated. If you find any defective components while
assembling or checking the equipment, or if you hear any unusual noises coming from
the equipment during exercise, stop using the equipment immediately and don’t use
the equipment until the problem has been rectified.
8. Wear suitable clothing while using the equipment. Avoid wearing loose clothing that
may become entangled in the equipment.
9. Do not place fingers or objects into the moving parts of the equipment.
10.The maximum weight capacity of this unit is 350 pounds.
11.This equipment is not suitable for therapeutic use.
12.Move with caution when lifting and moving the equipment. Always use proper lifting
technique and seek assistance if necessary.
13.Your product is intended for use in cool, dry conditions. You should avoid storage in
extreme cold, hot, or damp areas as this may lead to corrosion and other related
problems.
14.This equipment is designed for indoor use only! It is not intended for commercial use!
1

IMPORTANT OPERATIONAL INSTRUCTIONS
WARNING! To reduce the risk of electric shock, personal injuries, and potential damage
to your equipment, please ensure to follow these instructions:
Always unplug the treadmill from the outlet immediately after use and before cleaning,
assembling, or servicing.
This product must be grounded. If it should malfunction, grounding provides a bath of
least resistance for electrical current –reducing the risk of electric shock.
Do not leave the treadmill unattended when plugged in. Disconnect by turning off the
master power switch and unplugging the outlet.
Do not operate this treadmill if the cord or plug has been damaged or exposed to water.
Do not attempt any maintenance or adjustments other than those described in this manual.
Should any issues arise, discontinue use and consult with a representative at
Do not operate in areas where aerosol (spray cans) are used.
Do not pull or maneuver the treadmill by its power cord.
Close supervision is necessary if the treadmill is being used near children, people with
disabilities and pets.
Keep the electrical cord away from heated surfaces
Do not insert any foreign objects into this unit
This equipment is designed for one person’s use. Refrain from having multiple persons
on this machine.
Do not place any sharp objects around the machine.
This machine should not be used for medical purposes.
If the supply cord or any other parts have been damaged, it must be replaced by the
manufacturer. Do not continue use if the issue has not been rectified.
The plug of this treadmill must be plugged into an appropriate outlet that is properly
installed and grounded in accordance with all local codes and ordinances.
Improper connection of this treadmill may result in electric shock. Check with a qualified
electrician if you are unsure as to whether this product is properly grounded.
Do not modify the plug provided on this treadmill. If it does not fit your outlet, have a
proper grounded outlet installed by a qualified electrician.
This unit must be plugged into 110 volts.
Keep hands clear of all moving parts. Do not place your hands or other body parts under
this machine.
Do not use this treadmill on carpet.
Before each use, check that the running belt is aligned and centered on the treadmill deck
and all visible fasteners on the treadmill are sufficiently tightened and secured.
2

EXPLODED DRAWING
3

PARTS LIST
No.
Description
Spec.
QTY
No.
Description
Spec.
QTY
1
Base Frame
1
41
Safety Key
1
2
Height Adjuster
1
42
Computer
1
3
Main Frame
1
43
Screw
ST4.0*15
10
4
Support Tube-L
1
44
End Cap-C
2
5
Support Tube-R
1
45
Pin
2
6
Connecting Tube
1
46
Pad
2
7
Handlebar
1
47
Screw
M8×55
2
8
Bracket
1
48
Pad
2
9
Carrier
2
49
Pad
6
10
Screw
M8x50
2
50
Screw
M4*8
4
11
Nut
M8
6
51
Screw
M4*12
2
12
Washer
φ8
10
52
Overload Protector
1
13
Transportation Wheels
2
53
Power Switch
1
14
Pad
4
54
Power Cord
1
15
Washer
M8x45
1
55
Controller
1
16
Washer
M8x30
1
56
Protector
1
17
Cylinder
1
57
Screw
M8×40
3
18
Pin Head
1
58
Screw
M10*25
4
19
Pin Axel
1
59
Spring Washer
φ10
4
20
Spring
1
60
Motor
1
21
Clip-R
2
61
Screw
M8*60
3
22
Magnet Ring
1
62
Side Rails
2
23
Nut
M10
8
63
Rear Caps L/R
2
24
Arc Washer
φ10
2
64
Running Deck
1
25
Screw
M10x65
2
65
Running Belt
1
26
Screw
M10x100
2
66
Screw
M6*25
8
27
Screw
M12x55
2
67
Front Roller
1
28
Washer
φ12
2
68
Rear Roller
1
29
Nut
M12
2
69
Belt –Motor
1
30
Washer
φ10
6
70
Motor Cover
1
31
End Cap
40*80
2
71
End Cap
30*30
2
32
Screw
M8×20
8
72
Cable-Lower
1
33
Arc Washer
φ8
8
73
Cable-Mid
1
34
Cable Clip
2
74
Cable-Upper
1
35
End Cap
30*60
4
75
Pulse Sensor Wire-L
1
36
Screw
ST4.0*50
4
76
Pulse Sensor Wire-R
1
37
Screw
ST4.0*40
4
77
Cable-AC
1
38
Screw
ST4.0*15
14
78
Cable-Single
1
39
Foam Grip
2
79
Speed Sensor
1
40
Sensor keys L/R
2
80
Silicone Oil
1
4

PACKAGE CONTENTS
TOOLS & HARDWARE KIT
Part
Description
Qty
Part
Description
Qty
23
Nut
2
T1
Hex Wrench #5
1
24
Arc Washer
2
T2
Hex Wrench #6
1
26
Screw
2
T3
Spanner
1
32
Screw
4
80
Silicone Oil
1
33
Arc Washer
4
#26 Screw
(2 PCS)
#32 Screw
(4 PCS)
#23 Nut
(2 PCS)
#24 Arc Washer
(2 PCS)
#33 Arc Washer
(4 PCS)
#T1 Hex Wrench
(1 PC)
#T2 Hex Wrench
(1 PC)
#T3 Spanner
(1 PC)
#80 Silicone Oil
(1 PC)
5

ASSEMBLY INSTRUCTIONS
WARNING: Do not attempt to plug the treadmill to a power source until you’ve completed
assembly.
STEP 1:
Open the carton to remove the contents. Place the Main Frame (No. 3) on level ground and
carefully raise the Right & Left Support Tubes (No. 4 & No. 5).Fix the bottom of the
Right & Left Support Tubes using 2Screws (No. 26), 2 Arc Washers (No. 24),and 2
Nuts (No. 23).
6

ASSEMBLY INSTRUCTIONS
STEP 2:
*IMPORTANT NOTE: For this step of assembly, it is strongly advised to seek assistance as
it requires the help of an extra set of hands to hold a heavy component while you fix the top
console.
With the help of your assistant holding up the Top Console, connect Mid Cable (No. 73) and
Upper Cable (No. 74).If the wires run long, please ensure to tuck the wire into the tube.
Any punctures to the wires may cause permanent damage to your treadmill. Next, align the
Handlebars (No. 7) to the Left & Right Support Tubes (No. 4 & 5) and attach using 4
Screws (No. 32) and 4 Arc Washers (No. 33).
7

ASSEMBLY INSTRUCTIONS
STEP 3:
Insert the Safety Key (No. 41) into the magnetic area of the top console. In case of
emergency, pull out the Safety Key (No. 41) to immediately stop the treadmill.
The assembly is complete!
NOTE: You may now plug in the Power Cord (No. 54) into an appropriate power source
then turn on the Power Switch (No. 53).
Safety Key (No. 41)
Rise Right and Left
Upright tubes evenly
and carefully. Attach
2 Screws (26) and 2
Arc Washers (24)
and 2 Nut to fix the
bottom of Upright
tubes.
Power Switch (No. 53)
Overload Protector (No. 52)
8

THE DISPLAY CONSOLE
DISPLAY WINDOW & FUNCTION KEYS:
1. LCD display window shows: Time, Speed, Distance, Calories Burned, and Pulse.
2. Function Keys: START, STOP, PROG (Program), MODE, +SPEED, -SPEED.
3. 1 MPH, 2 MPH, 3 MPH, 4 MPH are “Quick Speed” keys for convenient access to
preprogrammed speeds.
4. When the display window shows “---“, insert the Safety Key (No. 41) into the
console for activate operations.
5. The system will automatically turn off after 10 minutes of inactivity. This is the sleep
function, to activate the system again, press any key.
OPERATION:
1. Press the START key to activate the treadmill belt. After a 5 second countdown, the
treadmill will start at the default speed of 0.5 MPH.
2. To manually adjust the speed, press the + or -buttons to increase or decrease.
3. You may also use the Quick Speed keys (1MPH, 2MPH, 3MPH, 4MPH) on the
console or handlebar to directly access a preset speed.
4. Pressing the STOP key to bring the treadmill gradually into a complete stop.
5. If the TIME has elapsed for over 99:59 minutes, the system will not stop and the
time will restart from 00:00.
9

THE DISPLAY CONSOLE
HANDLEBAR KEYS (No. 40):
1. Right side: SPEED buttons + and –
2. Left side: START and STOP buttons
PULSE SENSORS (ON HANDLEBARS):
1. Grab the Pulse Sensors (No. 40) located on the left & right handlebars and hold for
8 seconds. The console screen will display your heart frequency. It will not function if
only one side of the handlebar is sensed. The Pulse window will display your current
heart rate in beats per minute, with a range from 40 to 199.
MODE KEY:
1. Press the MODE key to access Countdown Mode. You may set a target Time,
Distance, or Calories Burned by using the +or –keys to adjust to the desired amount.
Press the START key to begin your set workout.
2. Press STOP to decrease speed and bring the treadmill to a complete stop.
3. The system will shut down and stop after your desired goal has been reached and
the LCD window will display ‘END’.
PROGRAM (PROG) KEY:
1. Press the PROG key to select from 12 different preprogrammed interval settings for
your workout (P1-P12). Once pressed, the Speed display window will show ‘PROX’
and the Time display window will show ‘TIME’. Use the +and –keys to adjust the
desired length of time then press the START button to activate the desired interval
program. Each program equals the set time divided into 20 sections of various levels
of intensity (from Level 1-4).
2. Press the STOP key to bring the treadmill gradually to a complete stop.
PRESET SPEED INTERVALS IN PROGRAM MODE:
TIME
PROGRAM
INTERVALS = Set Time/20 sections of various levels of intensity
1
2
3
4
5
6
7
8
9
10
11
12
13
14
15
16
17
18
19
20
P1 speed
1
2
3
4
4
3
2
1
1
2
3
4
4
3
2
1
1
2
3
4
P2 speed
2
3
2
1
1
2
3
4
4
3
2
1
1
2
3
4
4
3
2
1
P3 speed
1
2
3
4
1
2
3
4
1
2
3
4
1
2
3
4
1
2
3
4
P4 speed
2
1
4
3
2
1
4
3
2
1
4
3
2
1
4
3
2
1
4
3
P5 speed
1
4
2
3
1
4
2
3
1
4
2
3
1
4
2
3
1
4
2
3
P6 speed
1
3
2
4
1
3
2
4
1
3
2
4
1
3
2
4
1
3
2
4
P7 speed
2
1
3
4
2
1
3
4
2
1
3
4
2
1
3
4
2
1
3
4
P8 speed
3
1
2
4
3
1
2
4
3
1
2
4
3
1
2
4
3
1
2
4
P9 speed
2
1
2
3
4
1
2
3
4
1
2
3
4
1
2
3
4
1
2
3
P10 speed
3
2
4
1
3
2
4
1
3
2
4
1
3
2
4
1
3
2
4
1
P11 speed
2
4
3
1
2
4
3
1
2
4
3
1
2
4
3
1
2
4
3
1
P12 speed
1
1
2
2
3
3
4
4
1
1
2
2
3
3
4
4
1
1
2
2
10

THE DISPLAY CONSOLE
CONSOLE DISPLAY:
Initialization
Setting Initialization
Setting Range
Display Range
Time (MIN: SEC)
0:00
30:00
8:00-99:00
0:00~99:59
Speed (MPH)
0.0
N/A
N/A
0.5-4
Distance (MI)
0.0
1.0
1.0-99.0
0.0-99.9
Heart Rate (TIME/MIN)
P
N/A
N/A
40-199
Calorie (KCAL)
0
50
20-990
0-999
BODY FAT CALCULATION:
1. To test your body fat percentage, press the PROG key
2. Enter your gender (the Distance window will display “1” and the Calorie window will
display “1”). Press the +and –keys to adjust to 1 for Male and 2 for Female.
3. Enter your age by pressing the MODE key (the Distance window will display “2” and
the Calorie window will display “25”). From 25 (years old), use the +and –keys to
adjust your age (from 10-99 years old).
4. Enter your height by pressing the MODE key (the Distance window will display “3”
and the Calorie window will display “68”. From 68 (inches), use the +and –keys to
adjust to your height (from 40-86 inches).
5. Enter your weight by pressing the MODE key (the Distance window will display “4”
and the Calorie window will display “154”. From 154 (lbs), use the +and –keys to
adjust to your weight (from 44-330 lbs).
6. Enter body fat calculation by pressing the MODE key (the Distance window will
display “5”) and place your hands on the Pulse Sensors located on the left & right
handlebars for 8 seconds. The body fat calculation will be shown in the Calorie
window.
Sex
01 MALE
02 FEMALE
Age
10~99 YEARS OLD
Height
40~86 INCHES
Weight
44~330 LBS
BQI
≤19
Underweight
BQI
=(20---25)
Normal Weight
BQI
=(26---29)
Overweight
BQI
≥30
Obesity
11

EXERCISE INSTRUCTIONS
Before beginning a workout, ensure that the Safety Key (No. 41) is properly attached onto
the Top Console and the Safety Clip is securely attached to an article of your clothing.
Always begin by standing on the Side Rails (No. 62), not the running belt. Allow the
treadmill to reach the default speed of 0.5 MPH before walking onto the running belt.
1. Ensure that the treadmill is plugged into a power source with 110 volts.
2. Turn the Power Switch (No. 53) ON, press the START key, and the treadmill will start.
3. To read your Heart Rate, you must hold the Pulse Sensors (No. 40) located on both
sides of the handlebars for 8 seconds.
4. Turn off and unplug the Power Cord (No. 54) before proceeding with any maintenance or
inspections. Failure to do so may result in serious injury.
STARTING YOUR WORKOUT:
1. Ensure all screws and bolts are tightened securely before use.
2. Ensure the Power Cord (No. 54) is plugged into an electrical outlet and turn ON the
Power Switch (No. 53).
3. Warm up by stretching to prevent muscle strains.
4. A recommended workout routine to start is a quick 30 minute workout session 3 times a
week. You may build your stamina gradually from there.
5. Always start by standing on the side rails.
6. Ensure the Safety Key (No. 41) is inserted.
7. Do not attempt to make adjustments to the running belt during use.
8. In case of emergency, remove the Safety Key (No. 41) to immediately stop the unit.
ENDING YOUR WORKOUT:
1. Remove the Safety Key (No. 41) from the console.
2. Turn the Power Switch (No. 53) OFF.
3. Unplug the Power Cord (No. 54) from the electrical outlet. This is especially important if
you are not going to use your treadmill for an extended period.
4. Store the Power Cord (No. 54) clear from all pathways.
5. Wipe the treadmill surfaces with a dry cloth or towel.
6. Make sure to store your treadmill in a clean and dry area.
12

MOVING & STORING THE MACHINE
INCLINE/HEIGHT ADJUSTMENT:
This treadmill is designed with 3 levels of incline preferences. Remove Pin (No. 18) and
reinsert the Pin (No. 18) into one of the 3 holes located on the sides of the Height Adjuster
(No. 2). Please ensure that both sides of the Height Adjusters (No. 2) are evenly adjusted.
TO FOLD THE TREADMILL:
Pull the Pin (No. 18) out on the left side of the Base Frame (No. 1).Lift the Running Deck
(No. 64) up until the Cylinder (No. 17) pops into the locked position.
TO UNFOLD THE TREADMILL:
Hold the rear end of the treadmill with one hand, and with the other hand, pull the Cylinder
(No. 17) to unfold the treadmill. Keep all body parts clear from under the Running Deck (No.
64) when unfolding the treadmill.
MOVING THE TREADMILL:
Check that the Cylinder (No. 17) is in the locked position before moving the treadmill. The
treadmill is equipped with Transportation Wheels (No. 13) for easy mobility. Before moving,
ensure the Power Switch (No. 53) is OFF and the Power Cord (No. 54) is unplugged. Tilt
the Base Frame (No. 1) downward, then move the treadmill by the Transportation Wheels
(No. 13) to the desired location.
2
2
13
17

LUBRICATING YOUR TREADMILL
This treadmill has been lubricated with Silicone Oil (No. 80) before leaving the
manufacturer. Silicone oil is free of volatility and is gradually permeated through the
Running Belt (No. 65). There’s no need to reapply the lubricant in normal
circumstances, however, in other circumstances, lubrication may be required before
the first use.
Included in your package is a small bottle of Silicone Oil (No. 80). You will need to
apply the oil once the resistance has increased and the Running Belt (No. 65) starts
rubbing against the Running Deck (No. 64). Do not over-lubricate the running board.
Excess lubricant should be wiped down with a clean towel. Please keep the silicone
oil out of reach from children. Always unplug the Power Cord (No. 54) from the
electrical outlet before cleaning, lubricating or repairing the unit.
NOTE: Only use silicone oil lubricants for this equipment. Do not add any other oil
based products, which may permanently damage your treadmill. Do not over-lubricate
the running board.
The following time table is recommended for lubrication:
Light use (less than 3 hours/ week) once a year
Medium use (3-5 hours/ week) every six months
Heavy use (more than 5 hours/ week) every three months
14

MAINTENANCE & CARE
General cleaning will help prolong the life and performance of your treadmill. Keep the unit
clean and maintained by dusting the components on a regular basis. Clean both sides of
the running belt to prevent dust from accumulating underneath the belt. Keep your running
shoes clean so the dirt from your shoes do not wear out the Running Deck (No. 64) and
Running Belt (No. 65). Clean the surface of the running belt with a clean damp cloth.
CENTERING THE RUNNING BELT:
The Running Belt (No. 65) has been centered at the manufacturer but may become loose
during shipping and after use. Turn ON the Power Switch (No. 53) and set the treadmill
at 1-3MPH to check if the Running Belt (No. 65)is centered.
1. If the Running Belt (No. 65) is
shifted to the right, turn the adjusting
bolt on the right side ¼turn clockwise.
You should see the belt move towards
the center with every turn. Repeat this
process until the belt is centered.
2. If the Running Belt (No. 65) is
shifted to the left, turn the adjusting
bolts on the left side ¼of a turn
clockwise. You should see the belt
move towards the center with every
turn. Repeat this process until the belt
is centered.
3. Over time the Running Belt (No.
65)will loosen. To tighten the belt,
first turn OFF the Power Switch (No.
53), then turn both the Left & Right
adjustment bolts a ¼turn clockwise.
Continue this process until belt is at
the correct tension. Make sure to
adjust both sides equally to ensure
correct belt alignment.
to diagram “C”
15
Table of contents
Other Sunny Treadmill manuals

Sunny
Sunny TreadPad SF-T7970 User manual

Sunny
Sunny SF-T722021 User manual

Sunny
Sunny SF-T808M User manual

Sunny
Sunny SF-T7917 User manual

Sunny
Sunny SF-T7610 User manual

Sunny
Sunny SF-T7946 User manual

Sunny
Sunny SF-T722022 User manual

Sunny
Sunny SF-T7971 User manual

Sunny
Sunny SF-T1407M User manual

Sunny
Sunny SF-T1409M User manual

Sunny
Sunny SF-T7635 User manual

Sunny
Sunny SF-T722052 User manual

Sunny
Sunny SF-T7515 User manual

Sunny
Sunny SF-T7857 User manual

Sunny
Sunny SF-T7603 User manual

Sunny
Sunny SF-T7604 Installation and operation manual

Sunny
Sunny SF-T4400 User manual

Sunny
Sunny SF-T7610 User manual

Sunny
Sunny SF-TD7884 User manual

Sunny
Sunny SF-T7971 User manual