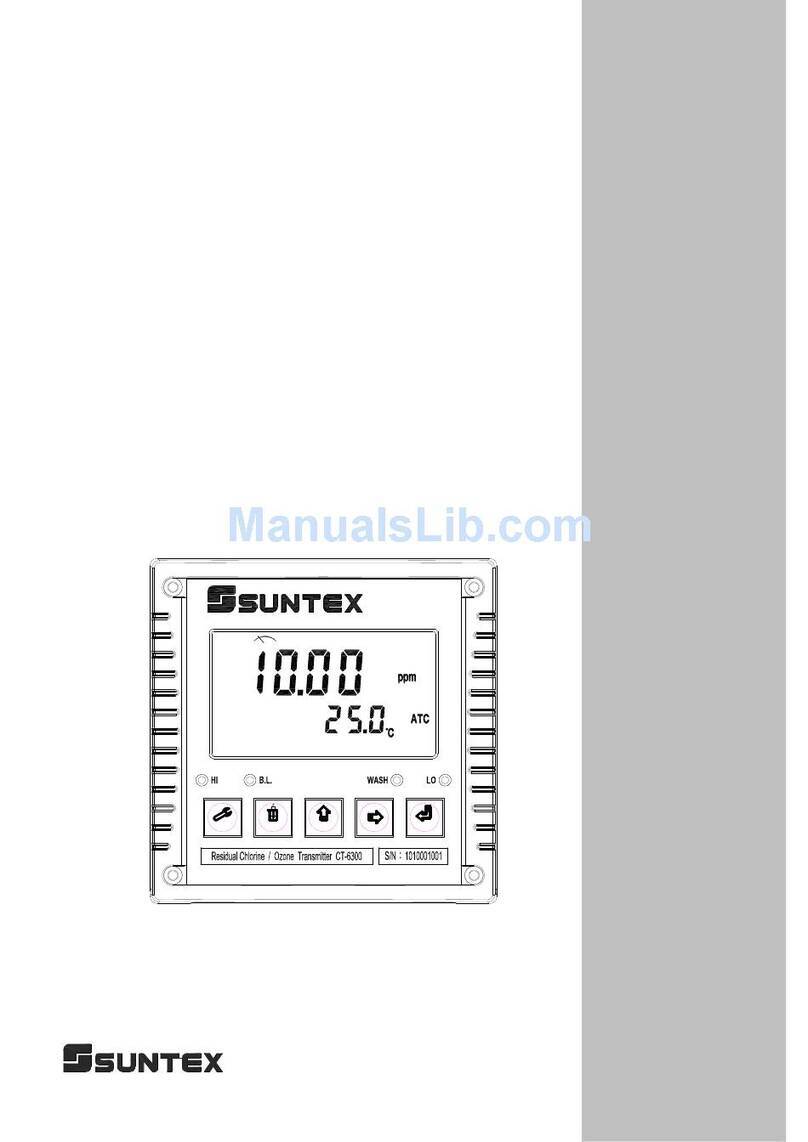
Suntex TC-7310-RS User manual

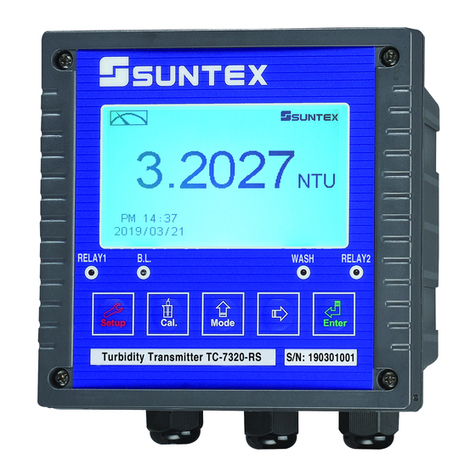
TC-7310-RS
Intelligent
Turbidity/S.S.
Transmitter
Operation
Manual

Thank you for purchasing Suntex products. In order to continuously improve and enhance the transmitter’s
function and capabilities, Suntex reserves the right to modify the content and icon display of the product
without notice. When using this transmitter, please follow all instructions on installation and operation as
described within this manual. Suntex Instruments Co., Ltd. is not liable for any direct or indirect loss or
damages caused by improper usage of this product. If there are any omissions or mistakes, questions or
concerns, regarding the product of this operation manual, please contact our staff. Thank you.
Precautions for Installation
Please read this operation manual thoroughly before installation to prevent incorrect wiring
which may lead to instrument damage and/or safety issues.
•In order to avoid electrical hazards, all wiring must be correctly connected and inspected
before connecting to power supply.
•Meter installation site should be properly ventilated and kept from direct sunlight and high
temperature.
•The signal cable requires a special coaxial cable material. Cables provided by Suntex are
strongly recommended. Please do not use normal electric wires.
•Prevent power surge interference to the transmitter. Especially when using a three-phase
power system, make sure the device is properly grounded. If power surge interference occurs,
separate the power supply of the transmitter from that of the controlled device (i.e. dosing
machines, mixers, etc.), or install surge absorber to reduce power surges from all
electromagnetic switches and power control device coils.
•To protect the instrument, the internal relays must be connected to external power relays
with sufficient ampere capacity before connecting to external alarms or devices. (Please
refer to chapter 3.5 “Electrical Connection Illustration”)
•Suntex logo is shown on the top right corner of the display during all operations. For function
illustration purposes, the logo is not shown in the figures presented in this operation manual.

Precautions for Installation
Brief Instructions 1
1. Specifications 4
2. Assembly and Installation
2.1 Transmitter Installation 5
2.2 Panel Mounting Illustration 5
2.3 Wall Mounting and Pipe Mounting Illustration 6
3. Overview of Turbidity/S.S. Transmitter TC-7310-RS
3.1 Rear Panel Illustration 7
3.2 Terminal Function Illustration 7
3.3 Terminal Function Description 8
3.4 Cable Wiring 8
3.5 Electrical Connection Illustration 9
4. Configuration
4.1 Front Panel Illustration 10
4.2 Keypad 10
4.3 LED Indicators 10
5. Operation
5.1 Measurement Mode 11
5.2 Setup Menu 11
5.3 Calibration Menu 11
5.4 Shortcuts 11
5.5 Default Values 11
5.5.1 Settings Default Values 11
5.5.2 Calibration Default Values 12
6. Measurement Display Mode
6.1 Text Mode 13
6.2 Real-Time Chart Mode 14
6.3 Trace Mode 15
6.4 Warning Symbols and Text 16
7. Settings
Settings Block Diagram 17
7.1 Setup Menu 19
7.2 Settings Security Code (Code) 20
7.3 Language 21
7.4 Measurement Mode/Unit (Mode) 22
7.5 Product Adjustment 24
CONTENTS

7.6 Relay 1 25
7.7 Relay 2 26
7.8 Wiper 27
7.9 Electrode Zero 28
7.10 Clean 39
7.11 Analog Output 30
7.12 Date/Time (Clock) 31
7.13 RS-485 Communication 32
7.14 Sample Measurement Average (Digital Filter) 33
7.15 Backlight 34
7.16 Contrast 35
7.17 Logbook 36
7.18 Automatic Return (Return) 37
8. Calibration
Calibration Block Diagram 38
8.1 Calibration Setup Menu 39
8.2 Calibration Security Code (Code) 41
8.3 Calibration 42
8.3.1 Known Solution Calibration 42
8.4 Correction Factor 45
8.5 Automatic Return (Return) 46
9. MODBUS Protocol and Instructions
9.1 Communication Connection 47
9.2 MODBUS Name and Address Table 49
9.3 MODBUS Description Example 53
10. Error Messages (Error Code) 54
11. Maintenance 54

Brief Instructions
Description of Setup Settings (See Chapter 7 for Details)
Press and simultaneously to see the overview of the setup settings. Then press to
modify setup settings. Press keypad according to the index bar on the bottom of the screen.
Index of Keypad
Keypad Index Bar Description
Return to previous level or action
Left or left page
Increase digit
Right or right page
Decrease digit
Confirm and proceed to next step
Setup Items
Function Icon Description
Mode
Measurement mode
1. Select from TC-100, TC-500, TC-3000, or TCS-1000
electrodes.
2. Select display mode from text, real-time or trace mode.
3. Measuring unit selection
TC-100, TC-500, TC-3000: NTU, FNU, or FTU.
TCS-1000: ppm or mg/l
Product Adj.
Product Adjustment. Modify the measuring value attained from
the field based on the measuring value attained by sampling, so
it is not necessary to take out the sensor for calibration.
Relay 1 First relay settings, select action off or Hi/Lo alarm
Relay 2 Second relay settings, select action off or Hi/Lo alarm
1

Wiper
Automatic wiper wash time settings, adjust detector window
cleaning duration and interval
Electrode
Zero
Sensor itself zero point correction, for sensor internal
calibration
Clean
Automatic wash time settings; adjust external sensor cleaning
device ON and OFF duration
Analog Current output corresponding to Turbidity/SS setting range
Clock
Time and date settings (An internal battery keeps the clock
running when disconnected from power. Replace with 3V
CR2025/2032 lithium battery.)
RS-485 RS485 serial interface (Modbus protocol)
Digital Filter
Take 1~60 serial measurements, average continuously, and
display as the reading following stabilization
Black-light Backlight settings, set Auto/ON/OFF backlight, brightness, and
sensitivity
Contrast Screen contrast settings
Logbook Event recorder logbook (50 data)
Return Measurement mode return settings
Code
Setup mode security code. The setup code is precedential to
calibration code. A different security code for calibration mode
can be set.
Language Available in English, Traditional Chinese, and Simplified
Chinese
2

Description of Calibration Settings (See Chapter 8 for Details)
Press and simultaneously to see the last calibration information. Press to make a
new calibration or to modify calibration settings. Press keypad according to the index bar on the
bottom of the screen.
Index of Keypad:
Keypad Index Bar Description
Return to previous level or action
Left or left page
Increase digit
Right or right page
Decrease digit
Confirm and proceed to next step
Calibration Items (Up to Five-Point Calibration)
Function Icon Description
Known Sol.
Calibration by known value solution
Correction
Calibration by correction factor (applicable for Turbidity and SS
measurement value interconversion)
Code Calibration mode security passcode
Return Measurement mode return settings
Note
Due to the need for continuous improvement of the transmitter, we reserve the right to modify the icons and
content. The icons and contents of the instrument are subject to change without notice.
3

1. Specifications
Model TC-7310-RS
Measuring Mode Turbidity/Suspended Solids
Measuring Unit Turbidity: NTU, FTU, FNU
Suspended Solids: mg/l, ppm
Measuring Range
0~100
NTU
(TC
-
100 sensor)
0~500 NTU (TC-500 sensor)
0~3000 NTU (TC-3000 sensor)
0~1000 ppm (TCS-1000 sensor)
Resolution
0.01
NTU
(TC
-
100 sensor)
0.1 NTU (TC-500 sensor)
1 NTU (TC-3000 sensor)
0.1 ppm (TCS-1000 sensor)
Calibration Mode Turbidity or S.S. standard solution up to 5 points calibration
and calibration by factor correction
Electrode Zero Sensor internal zero point correction activation function
Ambient Temp. 0~50 °C
(Turbidity/S.S. sensor working temp.: 0~40°C)
Storage Temp. -20~70 °C
Display
Large LCM with sensor for backlight and contrast
Text mode: Numerical display
Chart mode: 3 min real-time dynamic graph
Trace mode: Programmable 3 min to 4 week trend graph
Analog Output Isolated DC 0/4~20 mA corresponding to main measurement,
Max. load 500Ω
Serial Interface Isolated RS-485 (MODBUS RTU or ASCII)
Logbook 50 events
Settings
Contact RELAY contact, 240 VAC 0.5 A Max. (recommended)
Activate Hi/Lo, Hi/Hi, Lo/Lo selectable, two limited programmable,
ON/OFF
Wash RELAY contact: ON 0~99 min 59 sec / OFF 0~999 hr 59 min
Sensor Wiper
Auto, sensor internal function for fixed 30min per wipe (TC-100
sensor), or 10 min per wipe (TC-500, TC-3000, TCS-1000 sensor)
Manual, setting from 2~29 min per wipe(TC-100), or 2~9 min per wipe
Voltage Output DC
±
12V
Power Supply 100 V~240 VAC ±10 %, 8W max., 50/60 Hz
Installation Wall or Pipe or Panel Mounting
Dimensions 144 mm x 144 mm x 115 mm (H×W×D), 1/2 DIN
Cut-off Dimensions 138 mm ×138 mm (H×W)
Weight 0.8 kg
Protection IP65 (NEMA 4X)
Note: The specifications are subject to change without notice.
4

2. Assembly and Installation
2.1 Transmitter Installation
The transmitter can be installed by panel mounting, wall mounting, or 2” pipe mounting.
Panel Mounting:
Prepare a square hole of 138 mm x 138 mm on the panel box, and then insert the controller
directly into the hole. Insert the accessorial mounting bracket from the rear, and fix into the
pickup groove.
2.2 Panel Mounting Illustration
138 mm
1
3
8
mm
Hole size
Minimum
200mm
+
Hole distances on the panel box
Mounting bracket
Panel mounting illustration,
fix with mounting brackets
+
+
+
9
0
mm
Minimum
200mm
5

2.3 Wall Mounting and Pipe Mounting Illustration
Pipe mounting illustration,
fix with a U-shaped pipe
clamp (optional).
(Order Number: 8-34)
Sun Shield (pipe mounting, optional)
(Order No.: 8-35 + 8-35-1)
Sun Shield (wall mounting, optional)
(Order No.: 8-35 + 8-35-2)
Insert rubber plug into
unused cable glands.
Tighten up the cable gland
to prevent water vapor
infiltration.
6

3. Overview of Turbidity/S.S. Transmitter TC-7310-RS
3.1 Rear Panel Illustration:
3.2 Terminal Function Illustration:
POWER
WASH/Cln
REL2
REL1
AC
INPUT
POWER
4/20m
A
+
-
RS-485
D+(B)
G
D
-
(A)
S+
Cal.
S-
V-
V+
Check
Shield
7

3.3 Terminal Function Description
1100~240AC: Power supply terminal
2
3WASH: Wash relay contact for an external relay
4
5REL2: Second alarm control, the contact for an external relay
6
7REL1: First alarm control, the contact for an external relay
8
9
D
-
(
A
)
:
RS-485 output D+(A)
10
G: RS-485 output GND
11
D+(B): RS-485 output D+(B)
12
4~20mA–Terminal: Turbidity/SS current output terminal -, for an
external recorder or PLC control
13
4~20mA+Terminal: Turbidity/SS current output terminal +, for an
external recorder or PLC control
14
Shield
:
Sensor signal shield wire
15
V+
:
BROWN sensor wire (power + terminal)
16
Check
:
GREEN sensor wire (self-test signal output terminal)
17
V
-
:
BLUE sensor wire (power - terminal)
18
S
-
:
BLACK sensor wire (signal - terminal)
19
Cal.
:
RED sensor wire (calibration signal input terminal)
20
S+ : WHITE sensor wire (signal + terminal)
3.4 Cable Wiring
S+(White)
Cal.(Red)
S-(Black)
V-(Blue)
Check(Green)
V+(Brown)
Shield
8

3.5 Electrical Connection Illustration
100V~240VAC
Relay 2
Relay 1
WASH/Cln
100V~240VAC
Transmitter
Surge absorber
External relay
Surge absorber
External relay
Surge absorber
External relay
Cleaning device
Surge absorber
M
Dose feeder
Surge absorber
M
Dose feeder
Surge absorber
M
Note: The transmitter’s built-in miniature relays are required to be repaired and replaced by professional
technicians. External relays (Power Relay) must be connected to activate external devices to protect
the instrument.
9

4. Configuration
4.1 Front Panel Illustration:
4.2 Keypad:
In order to prevent unauthorized operations, the transmitter utilizes multi-key and passcode
functions to enter parameter and calibration setting modes. Descriptions of the key functions are
as follows:
:In parameter set-up mode, press this key to exit and return to measurement mode.
:In calibration mode, press this key to exit and return to measurement mode.
:1. In the parameter set-up mode and calibration mode, press this key to move left or
return to the previous page.
2. When adjusting values, press this key to increase the value.
:1. In the parameter set-up mode and calibration mode, press this key to move right
or advance to the next page.
2. When adjusting values, press this key to decrease the value.
:Key for confirmation; press this key to confirm data values or select parameter item
settings.
4.3 LED Indicators:
WASH :Washing device operation indicator
RELAY1
: Controlling of dose feeding operation indicator (Relay 1)
RELAY2
: Controlling of dose feeding operation indicator (Relay 2)
B.L. : Light sensor, under automatic display backlight mode, the indicator will light up
when the surrounding brightness changes
10

5. Operation
5.1 Measurement Mode:
After all electrical connections are secured and tested, connect the instrument to the power
supply and turn it on. The transmitter will automatically enter measurement mode with the
factory default settings or the previous user settings.
5.2 Setup Menu:
Please refer to the set-up instructions in Chapter 7. Press and simultaneously to enter
set-up menu, and press to return to measurement mode.
5.3 Calibration Menu:
Please refer to the calibration instructions in Chapter 8. Press and simultaneously to
enter calibration menu, and press to return to measurement mode.
5.4 Shortcuts:
1. Under measurement mode, press and hold for 2 seconds to enter Logbook function.
Press to return to measurement mode.
2. Under measurement mode, press and hold for 2 seconds to switch from display mode to
text mode, trace mode, or real-time chart display mode.
5.5 Default Values:
5.5.1 Settings Default Values:
Sensor model: TCS-1000
Measuring unit: mg/l
Product adjustment: 0.0 mg/l
Relay 1: High point alarm: AUTO, SP1=800.0 mg/l, Hys = 10.0 mg/l
Relay 2: Low point alarm: AUTO, SP2= 200.0 mg/l, Hys = 10.0 mg/l
Wash time: OFF
Wiper: Manual, 9 minute/per wipe
Analog current output: 4~20 mA, 0.0~1000.0 mg/l
Date & Time: 2016/1/1 00:00:00
RS-485: RTU, 19200, Even, 1, ID: 001
Digital filter: 30
Backlight settings: OFF
Contrast: 0
Logbook: None
Auto return: Auto, 3 minutes
Code settings: OFF
11

5.5.2 Calibration Default Values:
Calibration unit: mg/l
Calibration point: No Cal.
Correction factor: 1.0000
Auto return: Auto, 3 minutes
Code settings: OFF
Note: The factory default calibration setting is “No Cal”, and the calibration value is “None”. This means
that the user has not yet calibrated the sensor with the transmitter. After every calibration, the
calibration information display will be updated.
12

6. Measurement Display Mode
6.1 Text Mode
Text mode is the main measurement screen and shows the measurement value and unit,
temperature compensation mode, temperature measurement and unit, time and date, as seen
in the following illustration.
Main
measurement
unit
Main measurement
Time and date
13

6.2 Real-Time Chart Mode
Real-time chart mode shows a dynamic change of the measuring values during the last 3 minutes.
Under setting mode, users are allowed to set corresponding Turbidity/SS measuring range (see
section 7.4) to adjust the resolution of the curve. The smaller the range is being set, the higher
resolution the display is. When the unit enters the setup or calibration mode, the real-time
graphic will be re-updated after returning to measurement mode. When the measured value
exceeds a set range of the upper and lower limit, the graphics will be presented in the upper and
lower limits dotted line. Real-time chart mode display is shown as below. There are also
real-time measurement value, & unit, and temperature value & unit which are displayed in the
bottom of the screen. The timeline in real-time graphic is divided into 12 depicts, each of which
describes a quarter minute (15 seconds).
3 minutes of main measurement
record curve
Main measurement
value and unit
The current
instantaneous value
Upper limit
Lower limit
15s
14

6.3 Trace Mode
Trace mode features value tracing on a graph with duration configurable from three minutes up
to four weeks. The graph is composed of 60 record sets over time interval T. Each set of data
(T/60) is displayed by calculating the mean, maximum, and minimum value of the previous 60
values. When a new data set is calculated, the set will be displayed on the right and thus shifting
the previous sets to the left by one unit. If time (T) is set for 60 hours, then each displayed set
will represent a calculation of the mean, maximum, and minimum values of the data recorded
during the hour (T/60). The horizontal x-axis of the graph is divided into 12 marks, with each
mark representing T/12, and five data sets between each mark. The user can set the Turbidity/SS
graph range under Mode in Settings (see section 7.4). The smaller the range, the higher the
display resolution. Trace mode shows the real-time measurement value and unit, and temperature
value and unit at the bottom of the screen, as seen in the following illustration.
Attention: If the time interval is reset, the trend in the data will not be retained, and will start a
new trace record.
Note: The time is displayed as (XX: XX) (hr: min); e.g. four weeks (672:00).
T/12
Trend recording interval
(60 sets of data)
Main measurement
value and unit
Upper limit
Lower limit
The max. value of
the T/60 interval
The min. value of
the T/60 interval
The mean value of
the T/60 interval
The latest set of record
shown on the right sector
Record duration (T),
the negative sign is
to mean the record
time has passed.
15

6.4 Warning Symbols and Text
1. When detector wiper is activated, the display will show “HOLD” and flash “Wiper Running”. At the
same time, the transmitter will automatically turn off Relay 1 and Relay 2 function. After wiper cleaning
is completed, both Relay 1 and Relay 2 will automatically returns normal status.
2. When the clean function is activated, the display will show “HOLD” and flash “Clean Running”. At the
same time, the WASH indicator LED will light up, and the transmitter will automatically turn off Relay
1 and Relay 2 function. After cleaning is completed, both Relay 1 and Relay 2 will automatically returns
normal status.
3. When Relay 1/Relay 2 Hi settings are activated, the display will flash “REL1-HI/ REL2-HI”, and
RELAY1/RELAY2 indicator LED will light up. hen Relay 1/Relay 2 Lo settings are activated, the
display will flash “REL 1-Lo/ REL 2-Lo”, and the RELAY1/RELAY2 indicator LED will light up.
4. When the Analog current output exceeds the upper/lower limit, the display will flash “mg/l-mA__
/mg/l-mA , or ppm-mA / ppm-mA
Note: The “HOLD” warning text appears when clean function is activated, or when in setup menu, or in
calibration menu. Under HOLD status, the corresponding display and output are as follows:
1. Both Relay 1 and Relay 2 will cease from action. When entering settings menu or calibration
menu under cleaning status, the instrument will automatically halt the cleaning action.
2. The current output corresponding to measurement value remains at the last output value before
HOLD status.
3. The last signal output value from the RS-485 interface is kept at the last output value before
HOLD status.
Relay function
on hold
:Measurement mode
:Set-up mode
:Calibration mode
REL 1 high or
low point alarm
Cleaning is in
action
Time and date
REL 2 high or
low point alarm
Analog output
over range alarm
Sensor detector
wiper is in action
Product Adjust ON
Measurement unit
▲
▼
▼
▲
16
Table of contents
Other Suntex Transmitter manuals

Suntex
Suntex IT-8100 User manual

Suntex
Suntex CT-6300 User manual

Suntex
Suntex CT-6110-POL User manual

Suntex
Suntex EC-4110-I User manual

Suntex
Suntex PC-300A Series User manual

Suntex
Suntex PC-3110-RS User manual

Suntex
Suntex PC-3310-RS User manual

Suntex
Suntex PC-3310 Installation manual

Suntex
Suntex PC-3110-P User manual

Suntex
Suntex TC-7100 User manual