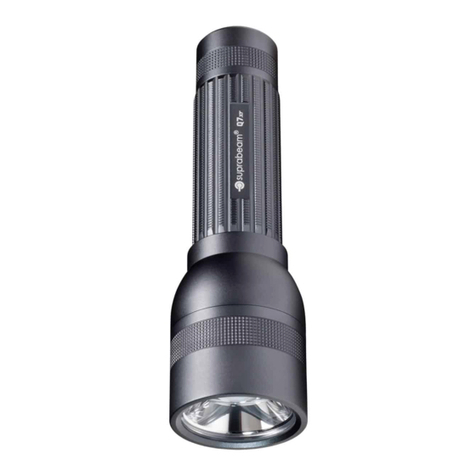
suprabeam Q1mini Operating instructions

Repair and
Troubleshooting
Guide

TROUBLESHOOTING
This document is intended for clarifying the most frecuent questions regarding user errors and issues with the
Suprabeam flashlights and headlamps.
We encourage you to read it throughly in order to get familiar with possible issues you may be presented to. Feel free
to come back to it as often as necessary, and to contact us in case you need any further assistance.
Find out how old the product is by looking at the batch number which is placed inside the torch or battery pack of
a headlamp. Here below is a short definition of Suprabeam Batch numbers, first letter is year and second letter is
month, here are some exsamples:
AE = (A)2010 -(E)05 BA = (B)2011 - (A)01 CD = (C)2012 - (D)04 DG = (D)2013 - (G)07
BATCH, FIND OUT HOW OLD A PRODUCT IS
SUPRABEAM SPAREPART KIT, GREAT SERVICE IN ONE BOX

TABLE OF CONTENTS
4
6
8
10
12
14
16
18
20
23
25
27
30
33
35
38
41
45
Q1prime
Q1mini
Q1
Q2
Q3classic
Q3defend
Q3
Q3r
Q4xr
Q7compact
Q7defend
Q7r
Q7xr
V3air
V3air rechargeable
V3pro
V3pro rechargeable
V4pro rechargeable

4
Q1prime
This issue may be due to an incorrect contact between the battery and the contacts of the flashlight. Possible causes
for this are:
1
2
UNABLE TO TURN ON THE FLASHLIGHT / FLICKERING
1
2
Please check that the flashlight is clean,
particularly between the tube and the tail
cap:
1) Remove the tail cap.
2) Make sure that the flashlight is clean,
particularly around the highlighted area.
DIRT
Make sure that the security tape of the
battery has been removed:
1) Check for any security tape on the
flashlight.
2) Remove the tail cap, and then remove the
tape protecting the battery.
SECURITY TAPE
SCAN THE QR CODE TO SEE VIDEO TUTORIALS

5
1
2
Control the interior of the tube for any
object that may obstruct the contacts. Our
flashlights have a “Batch nr.” sticker located
inside the body of the flashlight. In some
cases this sticker may fall inside the tube.
1) Look inside the tube of the flashlight.
2) Make sure that the “Batch nr.” sticker
is placed properly and not fallen at the
bottom of the tube. Look also for any
other objects.
OBSTRUCTING OBJECTS
Check that the battery is properly placed
and not drained.
1) Make sure that the battery is placed
correctly. The minus (-) side of the battery
should be facing upwards.
2) Close the flashlight and tighten the tail
cap firmly to ensure a proper contact.
BATTERY
12

6
Q1mini
This issue may be due to an incorrect contact between the battery and the contacts of the flashlight. Possible causes
for this are:
1
2
UNABLE TO TURN ON THE FLASHLIGHT / FLICKERING
1
2
Please check that the flashlight is clean,
particularly between the tube and the tail
cap:
1) Remove the tail cap.
2) Make sure that the flashlight is clean,
particularly around the highlighted area.
DIRT
Make sure that the security tape of the
battery has been removed:
1) Check for any security tape on the
flashlight.
2) Remove the tail cap, and then remove the
tape protecting the battery.
SECURITY TAPE
There could be a problem with the switch. In
this case remove the tail cap completely and
try with a new unit.
SWITCH
SCAN THE QR CODE TO SEE VIDEO TUTORIALS

7
1
2
Control the interior of the tube for any
object that may obstruct the contacts. Our
flashlights have a “Batch nr.” sticker located
inside the body of the flashlight. In some
cases this sticker may fall inside the tube.
1) Look inside the tube of the flashlight.
2) Make sure that the “Batch nr.” sticker
is placed properly and not fallen at the
bottom of the tube. Look also for any
other objects.
OBSTRUCTING OBJECTS
Check that the battery is properly placed
and not drained.
1) Make sure that the battery is placed
correctly. The minus (-) side of the battery
should be facing upwards.
2) Close the flashlight and tighten the tail
cap firmly to ensure a proper contact.
BATTERY
12
When it gets very dicult to use the focus,
most of the time it is caused by insucient
cleaning. Make sure that the flashlight is
clean around the area of the focus. Use a
damp cloth to clean it.
1) Turn the head to open the focus.
2) Make sure that the flashlight is clean,
particularly around the highlighted area.
PROBLEMS WITH THE FOCUS
1
2

8
This issue may be due to an incorrect contact between the battery and the contacts of the flashlight. Possible causes
for this are:
1
2
1
2
Please check that the flashlight is clean,
particularly between the tube and the tail
cap:
1) Remove the tail cap.
2) Make sure that the flashlight is clean,
particularly around the highlighted area.
DIRT
Make sure that the security tape of the
battery has been removed:
1) Check for any security tape on the
flashlight.
2) Remove the tail cap, and then remove the
tape protecting the battery.
SECURITY TAPE
UNABLE TO TURN ON THE FLASHLIGHT / FLICKERING
Q1
There could be a problem with the switch. In
this case remove the tail cap completely and
try with a new unit.
SWITCH
SCAN THE QR CODE TO SEE VIDEO TUTORIALS

9
1
2
OBSTRUCTING OBJECTS
Control the interior of the tube for any
object that may obstruct the contacts. Our
flashlights have a “Batch nr.” sticker located
inside the body of the flashlight. In some
cases this sticker may fall inside the tube.
1) Look inside the tube of the flashlight.
2) Make sure that the “Batch nr.” sticker
is placed properly and not fallen at the
bottom of the tube. Look also for any
other objects.
1
2
PROBLEMS WITH THE FOCUS
When it gets very dicult to use the focus,
most of the time it is caused by insucient
cleaning. Make sure that the flashlight is
clean around the area of the focus. Use a
damp cloth to clean it.
1) Turn the head to open the focus.
2) Make sure that the flashlight is clean,
particularly around the highlighted area.
1
2
BATTERIES
Check that the batteries are properly placed
and not drained.
1) Make sure that the batteries are placed
correctly. The minus (-) side of the
batteries should be facing upwards.
2) Close the flashlight and tighten the tail
cap firmly to ensure a proper contact.

10
This issue may be due to an incorrect contact between the battery and the contacts of the flashlight. Possible causes
for this are:
1
2
UNABLE TO TURN ON THE FLASHLIGHT / FLICKERING
Please check that the flashlight is clean,
particularly between the tube and the tail
cap:
1) Remove the tail cap.
2) Make sure that the flashlight is clean,
particularly around the highlighted area.
DIRT
Q2
There could be a problem with the switch. In
this case remove the tail cap completely and
try with a new unit.
SWITCH
1
2
OBSTRUCTING OBJECTS
Control the interior of the tube for any
object that may obstruct the contacts. Our
flashlights have a “Batch nr.” sticker located
inside the body of the flashlight. In some
cases this sticker may fall inside the tube.
1) Look inside the tube of the flashlight.
2) Make sure that the “Batch nr.” sticker
is placed properly and not fallen at the
bottom of the tube. Look also for any
other objects.
SCAN THE QR CODE TO SEE VIDEO TUTORIALS

11
1
2
BATTERY
Check that the battery is properly placed
and not drained.
1) Make sure that the battery is placed
correctly. The minus (-) side of the
battery should be facing upwards.
2) Close the flashlight and tighten the tail
cap firmly to ensure a proper contact.
1
2
PROBLEMS WITH THE FOCUS
When it gets very dicult to use the focus,
most of the time it is caused by insucient
cleaning. Make sure that the flashlight is
clean around the area of the focus. Use a
damp cloth to clean it.
1) Turn the head to open the focus.
2) Make sure that the flashlight is clean,
particularly around the highlighted area.
1
2
Follow these steps in order to replace a lens:
1) Unscrew the topmost part of the head.
2) Locate the security ring inside the head.
Unscrew this ring for disassembling the
head.
3) Replace the lens and reassemble the
head firmly.
REPLACING A DAMAGED LENS
3

12
This issue may be due to an incorrect contact between the battery and the contacts of the flashlight. Possible causes
for this are:
1
2
UNABLE TO TURN ON THE FLASHLIGHT / FLICKERING
1
2
3
Please check that the flashlight is clean,
particularly between the tube and the tail
cap:
1) Remove the tail cap.
2) Make sure that the flashlight is clean,
particularly around the highlighted area.
DIRT
There could be a problem with the switch. In
this case you might have to try with a new
unit.
1) Remove the battery pack from the
flashlight.
2) Remove the tail cap from the battery
pack.
3) The switch is located inside the tail cap.
SWITCH
Q3classic SCAN THE QR CODE TO SEE VIDEO TUTORIALS

13
In older models it is necessary to replace the
entire tail unit (battery pack + tail cap).
12
BATTERIES
Check that the batteries are properly placed
and not drained.
1) Make sure that the batteries are placed
correctly. Look at the engravings on the
battery pack showing the corresponding
end of the battery.
2) Close the flashlight and tighten the tail
cap firmly to ensure a proper contact.
1 2
PINS ON THE BATTERY PACK
In some rare cases, it could happen that the
pins of the battery pack get stuck or sunk. If
this is the case, it is necessary to take them
out to their normal position.
1) Check for any of the three pins to be stuck
or sunk inside the battery pack.
2) Take the pin out with tweezers.

14
This issue may be due to an incorrect contact between the battery and the contacts of the flashlight. Possible causes
for this are:
1
2
UNABLE TO TURN ON THE FLASHLIGHT / FLICKERING
Please check that the flashlight is clean,
particularly between the tube and the tail
cap:
1) Remove the tail cap.
2) Make sure that the flashlight is clean,
particularly around the highlighted area.
DIRT
Q3defend
There could be a problem with the switch. In
this case remove the tail cap completely and
try with a new unit.
SWITCH
12
3
SCAN THE QR CODE TO SEE VIDEO TUTORIALS

15
12
BATTERIES
Check that the batteries are properly placed
and not drained.
1) Make sure that the batteries are placed
correctly. Look at the engravings on the
battery pack showing the corresponding
end of the battery.
2) Close the flashlight and tighten the tail
cap firmly to ensure a proper contact.
1 2
PINS ON THE BATTERY PACK
In some rare cases, it could happen that the
pins of the battery pack get stuck or sunk. If
this is the case, it is necessary to take them
out to their normal position.
1) Check for any of the three pins to be stuck
or sunk inside the battery pack.
2) Take the pin out with tweezers.
1
2
Please check that the flashlight is clean
under the dust cover, particularly in the area
around the button:
1) Remove the end of the tail cap.
2) Clean the dust cover and area around the
button.
DUST COVER

16
1
2
OBSTRUCTED LIGHT BEAM
The Q3defend has a cover filter to protect
the lens. It is possible that this filter may
become damaged or scratched, which will be
visible on the light beam. In this case, it may
necessary to replace the filter:
1) Remove the strike bezel.
2) Replace the filter for a new one.
1
2
SEALING THE FLASHLIGHT
The Q3defend has covers that make it dust
and water resistant. Please make sure that
these areas are clean and closed tight:
1) Remove the strike bezel and the scalloped
cap
2) Make sure the flashlight is clean and dry.
Check for possible damaged parts to be
replaced.

17
This issue may be due to an incorrect contact between the battery and the contacts of the flashlight. Possible causes
for this are:
1
2
UNABLE TO TURN ON THE FLASHLIGHT / FLICKERING
1
2
3
Please check that the flashlight is clean,
particularly between the tube and the tail
cap:
1) Remove the tail cap.
2) Make sure that the flashlight is clean,
particularly around the highlighted area.
DIRT
There could be a problem with the switch. In
this case you might have to try with a new
unit.
1) Remove the battery pack from the
flashlight.
2) Remove the tail cap from the battery
pack.
3) The switch is located inside the tail cap.
SWITCH
Q3
In older models it is necessary to replace the
entire tail cap unit (battery pack + tail cap).
SCAN THE QR CODE TO SEE VIDEO TUTORIALS

18
1 2
BATTERIES
Check that the batteries are properly placed
and not drained.
1) Make sure that the batteries are placed
correctly. Look at the engravings on the
battery pack showing the corresponding
end of the battery.
2) Close the flashlight and tighten the tail
cap firmly to ensure a proper contact.
1 2
PINS ON THE BATTERY PACK
In some rare cases, it could happen that the
pins of the battery pack get stuck or sunk. If
this is the case, it is necessary to take them
out to their normal position.
1) Check for any of the three pins to be stuck
or sunk inside the battery pack.
2) Take the pin out with tweezers.
1
2
PROBLEMS WITH THE FOCUS
When it gets very dicult to use the focus,
most of the time it is caused by insucient
cleaning. Make sure that the flashlight is
clean around the area of the focus. Use a
damp cloth to clean it.
1) Turn the head to open the focus.
2) Make sure that the flashlight is clean,
particularly around the highlighted area.

19
12
Follow these steps in order to replace a lens:
1) Unscrew the topmost part of the head.
2) Locate the security ring inside the head.
Unscrew this ring for disasembling the
head.
3) Replace the lens and reassembly the
head firmly.
REPLACING A DAMAGED LENS
3

20
This issue may be due to an incorrect contact between the battery and the contacts of the flashlight. Possible causes
for this are:
1
2
UNABLE TO TURN ON THE FLASHLIGHT / FLICKERING
1
2
Please check that the flashlight is clean,
particularly between the tube and the tail
cap:
1) Remove the tail cap.
2) Make sure that the flashlight is clean,
particularly around the highlighted area.
DIRT
Make sure that the security tape of the
batteriy has been removed:
1) Check for any security tape on the
flashlight.
2) Remove the tail cap, and then remove the
tape protecting the battery.
SECURITY TAPE
Q3r
There could be a problem with the switch. In
this case remove the tail cap completely and
try with a new unit.
SWITCH
1
2
BATTERY
Check that the battery is properly placed
and charged.
1) Place the battery correctly. The minus (-)
side should be facing upwards.
2) Tighten the tail cap firmly to close it.
NOTE: Replace the battery immediately in
case it is damaged in any way.
SCAN THE QR CODE TO SEE VIDEO TUTORIALS
This manual suits for next models
17
Table of contents
Other suprabeam Flashlight manuals

suprabeam
suprabeam I4r User manual

suprabeam
suprabeam D2r User manual

suprabeam
suprabeam V3 air User manual

suprabeam
suprabeam Q Series User manual
suprabeam
suprabeam Q3 User manual

suprabeam
suprabeam Q1 User manual
suprabeam
suprabeam W6r User manual

suprabeam
suprabeam D4r User manual

suprabeam
suprabeam W4r User manual

suprabeam
suprabeam W2r User manual