manuals.online logo
Brands
  1. Home
  2. •
  3. Brands
  4. •
  5. Surveon
  6. •
  7. DVR
  8. •
  9. Surveon EMR2000 User manual

Surveon EMR2000 User manual

Only qualified service personnel should install and service this product in order to avoid risk of injury from
electrical shock and energy hazard.
Observe all ESD (Electro-static Discharge) procedures during installation to avoid damage to the recorder
and its components.
Warning!
User-provide Items
/4
QUICK INSTALLATION GUIDE
Installation
© by Surveon Technology, Inc. All rights reserved.
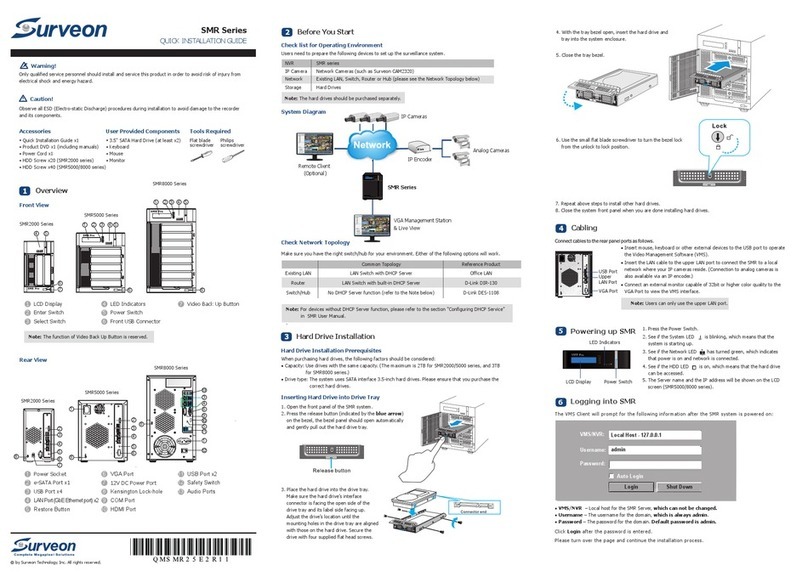
EMR Desktop Series
Rear View
1Power Socket
2e-SATA Port x1
3USB Port x4
HDMI Port
LAN Port x2
Restore Button USB Port x2
Safety Switch
Audio Ports
VGA Port
Kensington Lock-hole
COM Port
12V DC Power Port
EMR2000 Series
EMR5000 Series
EMR8000 Series
2
3
4
5
6
2
3
4
3
4
1
5
5
6
6
9
10
11
12
13
7
88
8
1
Hardware Overview
Front View
1
Note: The function of Video Back Up Button is reserved.
EMR5000 Series
EMR8000 Series
1LCD Display
2Enter Switch
3Select Switch
LED Indicators
Power Switch
4
5
6
7
Front USB Connector
Video Back Up Button
EMR2000 Series
4 5
1 2 3 4 5
1 2 3 4 5
6
6 6
7
2
System Connections
3
●
● Insert the LAN Cable to the LAN Port to a local network where your IP Camera reside.
(Connection to analog cameras is also available via an IP encoder).
● Connect an external monitor capable of 32 bit or higher color quality to the VGA port to view the
Milestone XProtect interface.
Insert mouse, keyboard to the USB for installing Milestone XProtect Server on the EMR system.
Connect cables to the rear panel ports as follows:
Note: Shaded areas are optional devices.
Powering up EMR
4
LED Indicators
LCD Display Power Switch
1. Attach the power cable to the power socket on the rear panel.
2. (EMR8000 Series) Make sure the safety switch on the rear panel
is switched to the “-” side, which means that it is turned on.
3.
4. See if the system LED is blinking, which means that the system
is starting up.
5. See if the network LED has turned green, which indicates that
the power is on and network is connected.
6. See if the HDD LED is on, which means that the hard drive can
be accessed.
7. The Server name and the IP address will
be shown on the LCD screen.
Press the power switch.
(EMR5000/8000 series)
Q ME 2 5 8 0 A U R 1 0
1/4
Adding Hard Drives (Optional)
Hard Drive Installation Prerequisites
Purchase hard drives having the same capacity and using same interface with the pre-installed ones.
Inserting Hard Drive into Drive Tray
1. Open the front panel of the EMR system.
2. Press the release button (indicated by the blue arrow)
on the bezel, the bezel panel should open automatically
and gently pull out the hard drive tray.
3. Place the hard drive into the drive tray.
Make sure the hard drive’s interface
connector is the open side of the drive
tray and its label side facing up. Adjust
the drive’s location until the mounting
holes in the drive tray are aligned with
those on the hard drive. Secure the drive
with four supplied flat head screws.
4. With the tray bezel open, insert the hard drive and
tray into the system enclosure.
5. Close the tray bezel.
6. Use the small flat blade screw driver to turn the bezel lock
from the unlock to lock position.
7. Repeat above steps to install other hard drives.
8. Close the system front panel when you are done installing hard drives.
Password:
● Quick Installation Guide x1
● Product DVD x1 (including manuals)
● Power Cord x1
Accessories
● HDD Screw x20 (EMR2000 series)
● HDD Screw x40 (EMR5000/8000 series)
●
●
USB compatible Keyboard and Mouse
LAN Cable
●
●
●
Monitor
●
(Optional) Hard Drives for extra storage space
PC(s) with Windows XP (or above) Used as Remote
Milestone Smart Client Management Center
USB Drive Used for Installing Milestone Smart Client on
remote PC(s)
4
5
6
7
8
9
10
11
12
13
Flat blade
Screwdriver
Philips
Screwdriver
● ●
Hard drives are pre-installed in the EMR series. Users can also add supplementary hard drives and do RAID
configurations themselves. Please refer to the following table for more details.
IP Encoder
Analog Camera(s)
Remote Milestone XProtect Smart
Client Management Center
IP Camera(s)
Monitor
Internet
SELECT
ENTER
SMR Pro
Ethernet Connection
USB Connection
Video/Monitor Connection
Model
EMR2000
EMR5000
EMR8000
Numbers of Pre-installed
Hard Drives
1 HDD
2 HDD
1 HDD
3 HDD
2 HDD
Space for Additional
Hard Drives RAID Options for
Additional Hard Drives
Default RAID
Configuration
N/A
N/A
N/A
RAID5
RAID1
1 HDD
0 HDD
4 HDD
2 HDD
6 HDD
N/A
N/A
RAID0, 1 or above
RAID0, 1
RAID0, 1 or above
.
Note: (1) You should go to Windows Disk Management to allocate and format the logical drives
(set the block size as 64K). You can choose to do this before or after the RAID configration
is done. (2) Please refer to Advanced RAID Configuration section in the EMR Series User
Manual for more details.
.
Note: For more details about the Wizards and Management Application, please refer to Milestone
Essential Administrator’s Manual. XProtect
1. Double-click Intel Rapid Storage Technology shortcut on the desktop.
The program will prompt for creating disk volumes.
You can see the current status of your disk drives on the right-hand side.
Click Create a custom volume on the left or the Create button on the top.
RAID Configuration through Intel Utility (for EMR2000/5000 Series)
3/4
2/4
Note: (1) The trial version can be used for 30 days. Also, video channels are limited to
the maximum. You may purchase licenses for permanent use and channel
go to p3 Extending Trail Licenses for Milestone XProtect section for more details.
eight as
additions.
Please
.
Go to C:\XProtect Essential\ and double-click the installation file.
Choose Install Trial and follow the instructions to start the installation.
7
2. Select the RAID type. Click Next to continue.
Installing Milestone XProtect Server on the EMR System
Starting Milestone XProtect Smart Client
Intel Rapid Storage Technology
Staus Create Manage
Preferences
Help
Current Status
Creat
Your system is functioning normally.
Create a volume by combining available disks to enhance your storage system.
Create a custom volume
Manage
Click on any element in the storage system view to manage its properties.
Array_0000
MILESTONE Initializing 0% complete
Array_0000
Creat
MILESTON E
Tpye: RAID5
2.0 TB
1.8 TB
1.8 TB
1.8 TB
Internal disk
233 GB
Internal disk
More help on this page
3
Staus Create Manage
Preferences
Help
1.Select
2. Configure
3. Confirm
Intel Rapid Storage Technology
Select Volume Type
Flexible data protect ion (Recovery)
Real-time data protec tion (RAID 1)
Optimized disk perfor mance (RAID 0)
Efficient data host ing and protection (RAID 5)
Balanced performanc e and data protection
(RAID 10)
Protection
Performance
Capacity
Combine two disks to create a volume where each disk
stores an exact copy of the data and provides real-time
redundancy.
More help on this page
Next Cancel
5Milestone XProtect Installation
Milestone XProtect Level
Key Features XProtect
Essential
Number of Connected Cameras
Maximum Number of Users
Video Export Format
Web Client
26
5
JPEG, AVI,
Native Database
Yes
1
7RAID Configuration for Additional Hard Drives (Optional)
Hard drives are pre-installed in the EMR series. Users can also add supplementary hard drives and do
RAID configurations themselves. Please refer to the following table for more details.
.
Note: You can also download the XProtect installation file from Milestone's website at
http://www.milestonesys.com.
You must install Milestone XProtect Server on the EMR system, while the XProtect Smart Client can be
installed either on the system or on remote PC(s).
To install Milestone XProtect Smart Client for remote managements:
1. Copy the Milestone XProtect directory from your EMR series and save it in the USB drive.
2. Insert the USB drive to PC(s).
3. Double-click the installation files and follow the instructions to start the installation.
.
Installing Milestone XProtect Smart Client on Remote PC(s)
The Milestone XProtect Management Application Windows will prompt after the XProtect Server
installation is complete.
Basic System Settings through Wizards
Use the wizards to configure the surveillance system.
1. Camera and other hardware devices, such as video encoders, NVRs, etc, can be added to your XProtect
system through the Add Hardware Devices wizard. If microphones/speakers are attached to a hardware
device, they are automatically added as well.
4. The Smart Client window will open.
3. Specify your login information in the following fields.
When ready, click Connect.
●
● Authentication: Choose Windows authentication (current user), with which y
Server address: Type the IP address of your EMR server.
ou will be authenticated through
your current Windows login by default, and do not have to specify any user name or password.
1. Double-click the Smart Client shortcut on your desktop or select Start > Programs > Milestone
XProtect Smart Client from Windows Start Menu to start the software.
2. The Smart Client login window will prompt.
.
Note: to Milestone XProtect Essential Administrator’s Manual/Smart Client User
manual for more details.
Please refer
.
Note: (1) The default video recording path is under C:\. You should go to Advanced Configuration
> Hardware Devices > Camera Name on the side bar of
Windows to change it to D:\ or other drive partitions. (2) Audio settings should be
disabled under
Milestone XProtect Management
Application
Advanced Configuration for avoiding video loss of ONVIF cameras.
2. You can quickly configure your cameras’s video and recording properties through Configure Video and
Recording wizard.
3. The Adjust Motion Detection wizard helps you quickly configure your cameras’ motion detection
properties.
4. The Configure User Access wizard helps you quickly configure clients’ access to the XProtect server as
well as which users should be able to use clients.
.
Note: (1) You should go to Windows Disk Management to allocate and format the logical drives
(set the block size as 64K). You can choose to do this before or after the RAID configration
is done. (2) Please refer to Advanced RAID Configuration section in the EMR Series User
Manual for more details.
Model
EMR2000
EMR5000
EMR8000
Numbers of Pre-installed
Hard Drives
1 HDD
2 HDD
1 HDD
3 HDD
2 HDD
Space for Additional
Hard Drives RAID Options for
Additional Hard Drives
Default RAID
Configuration
N/A
N/A
N/A
RAID5
RAID1
1 HDD
0 HDD
4 HDD
2 HDD
6 HDD
N/A
N/A
RAID0, 1 or above
RAID0, 1
RAID0, 1 or above
4. Choose array type and initialization type. Select All can be clicked to select all the hard drives you have.
Click Create to start the configuration.
5. The new disk volume will appear in the Logical Device Information after it is created successfully.
3/4
5. The volume will start initialization after the configuration is done. Please wait until it is complete.
Note: Disk volume initialization for EMR series might take about several hours or more.
7. The system will shut down after the initialization is finished. Press the power switch to restart the system.
8. Go back to Intel Rapid Storage Tool again to check if the RAID is configured successfully.
3. Once successfully logged in, the information of your hard drives and existing disk volumes will be displayed.
Click Create Array.
/4
3/4
4. After selecting the disks, the system will ask you to confirm the settings you have just made.
Click Create Volume to continue.
3. Select the disks for RAID configuration.
For achieving better performance, remember to tick Initialize volume in Advanced section.
Click Next to continue.
8Extending Trail Licenses for Milestone XProtect (Optional)
Importing Licenses
Note: Offline activation is introduced below. Use online activation for a quick and convenient
procedure, if your EMR system has Internet access. Please refer to EMR User
details.
activation
Manual for more
The Trial Licenses for Milestone XProtect can be used for 30 days. Please contact your dealer for
purchasing license key.
When you purchase the license key, you receive a temporary licen se file (.lic) including a Software
License Code (SLC). Save the .lic file and SLC in a USB drive.
Intel Rapid Storage Technology
More help on this page
Staus Create Manage
Preferences
Help
1.Select
2. Configure
3. Confirm
233 GB
233 GB
111
Tpye: RAID1
233 GB
Array_0000
Name: 111
Select two disks:
Disk on port 3 (233GB)
Disk on port 4 (233GB)
Specify the volume size:
Volume size: 238,475 MB
Array allocation:
100%
Enable volume write-back cache
Initialize volume
Advanced
Next Cancel
Back
Staus Create Manage
Preferences
Help
Intel Rapid Storage Technology
1.Select
2. Configure
3. Confirm
233 GB
233 GB
111
Tpye: RAID1
233 GB
Array_0000
Create Volume Cancel
Back
Confirm Volume Creation
Review the selected configuration.
Warning: Performing a driver upgrade or
downgrade while a volume migration is in progress
will make the volume inaccessible due to driver
incompatibility. Back up data before continuing.
This process could take a while depending on the number
and size of the disks. You can continure using other
applications during this time.
More help on this page
User Name
Password
RAID
Login
Manage Event Task Setting SHI Logout Help
Please Login
Manage Event Task Setting SHI Logout Help
Logical Device Information
Type Capacity Cache Policy BlockSize SectorSize OS Name Status
Name
ARRAY_a-a RAID 1 8.58 GB 512 GB HPT DISK 0_2 Normal
Maintenance
ARRAY_a-a RAID 1 241.39 GB 512 GB HPT DISK 0_3 Normal
Maintenance
Create Array
Physical Device Information
Location Model Capacity Max Free
1/5 HDT722525DLA320-VDS41BT4E50UEJ 249.98 GB 0.0 GB
1/6
HDT722525DLA380-VDS41BT4E4Z4VJ 249.98 GB 0.0 GB
1/7 HDT722525VLSA80-VNRJMHC6CN8T2M 249.98 GB 249.98GB
1/8 HDT722525VLSA80-VNRJ3EC6DBNLSM 249.98 GB 249.98GB
Manage Event Task Setting SHI Logout Help
Create Array
Array Type RAID 0
Array Name Default
Initialization Method Quick Init
Cache Policy Write Back
Block Size 64K
Number of RAID5 member disks -1
Select all
Available Disks
Location Capacity Max Free
1/7 HDT722525VLSA80-VNRJMHC6CN8T2M 249.98 GB 249.98GB
1/8 HDT722525VLSA80-VNRJ3EC6DBNLSM 249.98 GB 249.98GB
Capacity:
(According to the
Max free space
on the selected
disks)
Create
Maximum (MB)
Manage Event Task Setting SHI Logout Help
RAID Configuration through HighPoint Utility (for EMR8000 Series)
1. Double-click HighPoint RAID Management Utility shortcut on the desktop.
The program will prompt for creating disk volumes.
2. Enter the default user name (RAID) and password (hpt) for logging in.
(Please note that the user name and password are case sensitive.)
Manage Event Task Setting SHI Logout Help
Logical Device Information
Type Capacity Cache Policy BlockSize SectorSize OS Name Status
Name
ARRAY_a-a RAID 1 8.58 GB 512 GB HPT DISK 0_2 Normal
Maintenance
ARRAY_a-a RAID 1 241.39 GB 512 GB HPT DISK 0_3 Normal
Maintenance
RAID_0_0 RAID 0 499.96 GB 512 GB HPT DISK 0_0 Normal
Maintenance
64k
1. Insert the USB drive with the .lic file and SLC to your EMR system.
2. Start the Milestone XProtect Smart Client. On the Management Application’s toolbar, click
License Offline > Import License, and select the temporary license file (.lic)
When the file is successfully imported, click OK.
File > Manage
to import it.
Activating Licenses
Precondition
Add at least one camera to your EMR system.
Step1: Export License for Activation
To export a license file with your currently added devices for activation, do the following:
1.On the Management Application’s toolbar, click File > Manage License Offline > Export License
Activation.for
2. Specify a file name for the license request(.Irq) file (automatically generated by XProtect), and
save it in the USB drive.
4. Under Current SLCs, select the SLC.
5.
6. You will receive the updated permanent license file (.lic) from Milestone via e-mail. Save it in
the USB drive.
Step2: Import License
1. Move the USB drive back to your EMR system.
2. On the Management Application's toolbar, click File > Manage License Offline > Import
License, and select your saved .lic file to import it.
3. When the permanent license file is successfully imported, click OK.
In the menu for SLC properties, use the Upload LRQ function to upload the generated .lrq file.
3/4
4/4
3. Move the USB drive with the .lrq file to a computer with internet access. Open an internet browser
and go to Milestone's website at http://www.milestonesys.com. Select Software Registration from
the top menu. If you have used the Software Registration Service Center before, log in with your
e-mail and password. Otherwise, click New to the System? to create a new user account and
register your SLC.

This manual suits for next models

2

Other Surveon DVR manuals

Surveon SMR Series Use and care manual

Surveon

Surveon SMR Series Use and care manual

Surveon NVR2100 Series User manual

Surveon

Surveon NVR2100 Series User manual

Surveon SMR5000 Series User manual

Surveon

Surveon SMR5000 Series User manual

Surveon SMR Series User manual

Surveon

Surveon SMR Series User manual

Surveon SMR2000 Series User manual

Surveon

Surveon SMR2000 Series User manual

Surveon NVR5316 User manual

Surveon

Surveon NVR5316 User manual

Surveon SMR5016 User manual

Surveon

Surveon SMR5016 User manual

Surveon SMR8040U User manual

Surveon

Surveon SMR8040U User manual

Surveon NVR2000 Series User manual

Surveon

Surveon NVR2000 Series User manual

Surveon SMR2000 Series Use and care manual

Surveon

Surveon SMR2000 Series Use and care manual

Popular DVR manuals by other brands

OPTICOM OWM-400 - datasheet

OPTICOM

OPTICOM OWM-400 - datasheet

Siemens SISTORE AX9 250 user manual

Siemens

Siemens SISTORE AX9 250 user manual

Cobra 63890 Owner's manual & safety instructions

Cobra

Cobra 63890 Owner's manual & safety instructions

ADT A-ADT8H Quick reference guide

ADT

ADT A-ADT8H Quick reference guide

Vipro MVR-504 user manual

Vipro

Vipro MVR-504 user manual

Speco N8NXL user manual

Speco

Speco N8NXL user manual

Motorola DCH3416 installation manual

Motorola

Motorola DCH3416 installation manual

Quaddrix QT-500-16 user manual

Quaddrix

Quaddrix QT-500-16 user manual

Zhejiang DVR200 series quick guide

Zhejiang

Zhejiang DVR200 series quick guide

Accele DVR-720P user manual

Accele

Accele DVR-720P user manual

Vista VVRL-960 owner's manual

Vista

Vista VVRL-960 owner's manual

Bosch DIVAR AN 3000 Operation manual

Bosch

Bosch DIVAR AN 3000 Operation manual

ERNITEC Series EDNS4000 user manual

ERNITEC

ERNITEC Series EDNS4000 user manual

Q-See QSC26404 user manual

Q-See

Q-See QSC26404 user manual

Planet NVR-3685 user manual

Planet

Planet NVR-3685 user manual

HIK VISION AE-MD5043-SD quick start guide

HIK VISION

HIK VISION AE-MD5043-SD quick start guide

Q-See QSD9004 series Manual recording guide

Q-See

Q-See QSD9004 series Manual recording guide

Magtec MT854 quick start guide

Magtec

Magtec MT854 quick start guide

manuals.online logo
manuals.online logoBrands
  • About & Mission
  • Contact us
  • Privacy Policy
  • Terms and Conditions

Copyright 2025 Manuals.Online. All Rights Reserved.