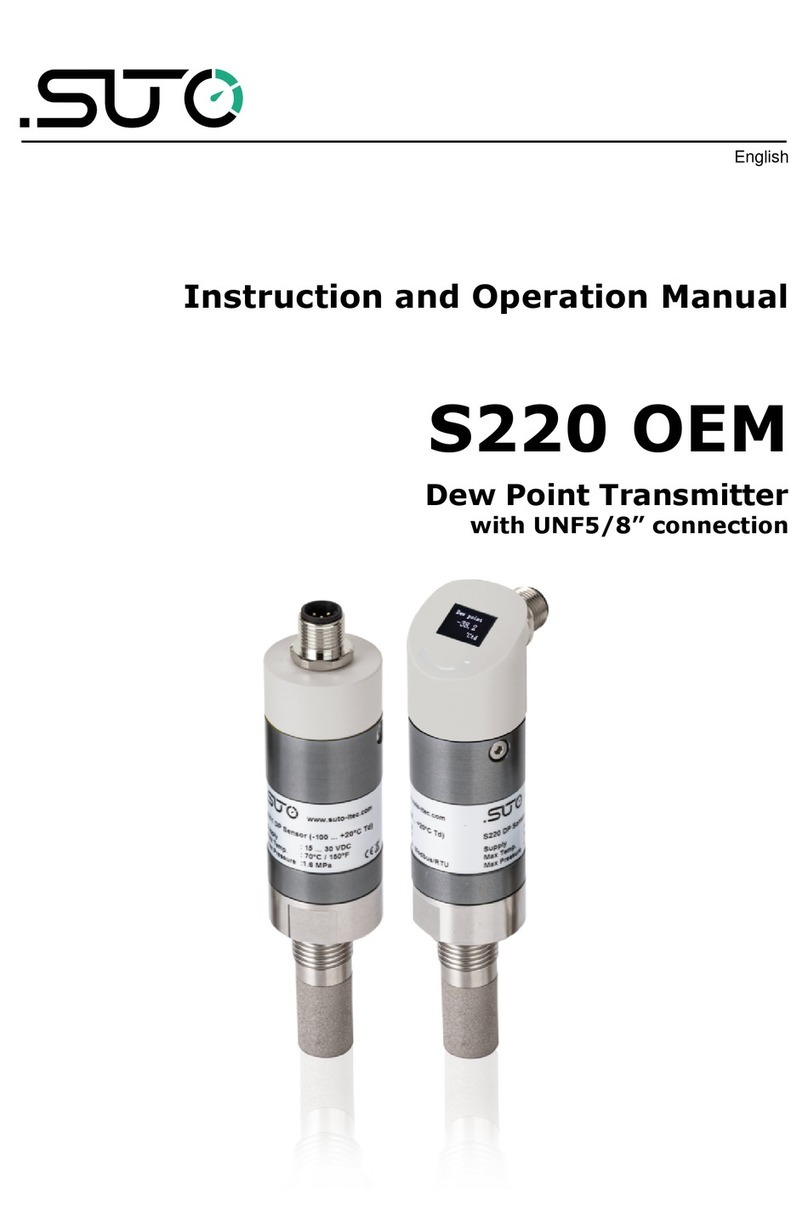
SUTO S217 Manual

English
Instruction and Operation Manual
S217
Dew Point Transmitter

Dear Customer,
Thank you for choosing our product.
The operating instructions must be read in full and carefully observed
before you start up the device. The manufacturer cannot be held liable
for any damage which occurs as a result of non-observance or non-
compliance with this manual.
Should the device be tampered with in any manner other than a
procedure which is described and specified in the manual, the warranty
is void and the manufacturer is e empt from liability.
The device is destined e clusively for the described application.
SUTO offers no guarantee for the suitability for any other purpose.
SUTO is also not liable for consequential damage resulting from the
delivery, capability or use of this device.
2 S217

Table of contents
1 Safety Instructions......................................................................4
2 Registered Trademarks.................................................................6
3 Application..................................................................................6
4 Features.....................................................................................6
5 Technical Data.............................................................................7
6 Dimensional Drawing...................................................................8
7 Electrical Connection ..................................................................9
8 Modbus Output (S217-8 and S217-9)...........................................10
8.1 Modbus Information.............................................................10
8.2 Modbus Holding Register Table...............................................11
8.3 Interpretation of System Status.............................................12
9 Installation ...............................................................................13
9.1 Installation Requirements......................................................13
9.2 Installation Procedure ..........................................................14
9.2.1 Install with Measuring Chamber A699 3491.......................14
9.2.2 Install with By-pass Measuring Chamber A699 3493...........15
9.2.3 Install without Measuring Chamber...................................17
9.3 Remove the Dew Point Transmitter.........................................18
9.4 Order Information................................................................18
10 Calibration..............................................................................19
11 Maintenance............................................................................19
12 Disposal or Waste....................................................................19
S217 3

1 Safety Instructions
Please check if this instruction manual matches with the
product type
Please observe all notes and instructions indicated in this
manual. It contains essential information which must be
observed before and during installation, operation and
maintenance. Therefore this instruction manual must be read carefully
by the technician as well as by the responsible user / qualified
personnel.
This instruction manual must be available at the operation site of the
Dew Point Transmitter at any time. In case of any obscurities or
questions, regarding this manual or the product, please contact the
manufacturer.
WARNING!
Compressed air!
Any contact with quickly escaping air or bursting
parts of the compressed air system can lead to
serious injuries or even death!
•Do not e ceed the ma imum permitted pressure range (see
sensors label).
•Only use pressure tight installation material.
•Avoid that persons get hit escaping air or bursting parts of the
instrument.
•The system must be pressureless during maintenance work.
WARNING!
Voltage used for supply!
Any contact with energized parts of the product, may
lead to a electrical shock which can lead to serious
injuries or even death!
•Consider all regulations for electrical installations.
•The system must be disconnected from any power supply during
maintenance work.
•Any electrical work on the system is only allowed by authorized
qualified personal.
4 S217

1 Safety Instructions
ATTENTION!
Permitted operating parameters!
Observe the permitted operating parameters, any
operation exceeding this parameters can lead to
malfunctions and may lead to damage on the
instrument or the system
•Do not e ceed the permitted operating parameters.
•Make sure the product is operated in its permitted limitations.
•Do not e ceed or undercut the permitted storage and operation
temperature and pressure.
General safety instructions
•It is not allowed to use the product in e plosive areas.
•Please observe the national regulations before/during installation
and operation.
Remarks
•It is not allowed to disassemble the product.
•Always use spanner to mount the product properly.
ATTENTION!
Measurement values can be affected by malfunction!
The product must be installed properly and
frequently maintained, otherwise it may lead to
wrong measurement values, which can lead to
wrong results
Storage and transportation
•Make sure that the transportation temperature of the transmitter
is between -30 ... +70°C.
•For transportation it is recommended to use the packaging which
comes with the transmitter.
•Please make sure that the storage temperature of the transmitter
is between -10 ... +50°C.
•Avoid direct UV and solar radiation during storage.
•For the storage the humidity must be <95% rH, no condensation.
S217 5

2 Registered Trademarks
SUTO® Registered trademark of SUTO iTEC
MODBUS® Registered trademark of the Modbus Organization,
Hopkinton, USA
3 Application
The SUTO Dew Point Transmitter S217-OEM provides reliable and long
term stable dew point monitoring in industrial applications. The newly
developed transmitter features improved signal and stability in
demanding industrial applications.
It’s designed for OEM applications in desiccant and refrigeration dryers.
The measured dew point is output via the loop-powered 4 ... 20 mA
signal. Parameters such as analogue output scaling, physical units, can
be set e factory.
4 Features
•Small size makes it ideal for dryer installations
•Measures dew points down to –60ºC Td
•2-wire loop powered sensor or 3-wire
•Modbus/RTU signal output (model depending)
•IP65 casing provides robust protection in rough industrial
environment
•Very fast response time ensures safe and reliable indication
whenever dew points are out of valid ranges
•Can be installed directly into dryers through G 1/2” thread
•High accuracy of 1 … 2ºC Td dew point
•Withstands condensation
6 S217

5 Technical Data
5 Technical Data
Measuring range
(model depending)
-60 ... +20°C Td
-50 ... +20°C Td
-20 ... +50°C Td
Accuracy * ±1ºC Td [-5 … +50ºC]
±2ºC Td [-60 … -5ºC]
Pressure range -0.1 ... 5.0 MPa
-0.1 ... 35 MPa (optional)
Power supply 12 ... 30 VDC
Measured gas Non-corrosive gases
Ambient temperature -20 ... +50°C
Ambient humidity 0 ... 100% rH
Transport temperature -30 ... +70°C
Response time t90
(@ 4 l/min)
-40°C Td → -20°C Td: 20 seconds
0°C Td → -40°C Td: 120 seconds
Output signal 4 ... 20 mA, 2-wire (S217-0 / S217-3 )
4 ... 20 mA, 3-wire (S217-4 / S217-5)
Modbus/RTU (S217-8 / S217-9)
Cable M8 connector, 1.8 m, open wires, 4 poles
Casing Process connection: stain-less steel
Casing: Al alloy
Cassification IP65
Process connection G ½” thread (ISO 228/1)
Sensor protection Stainless steel sinter filter pore size <30 µm
Approval CE
* Stated accuracy under following conditions:
•Ambient / process temperature 23 ± 3°C
•Ambient humidity <95% rH, no condensation
•Airflow > 2 l/min at sensor tip
S217 7

7 Electrical onnection
7 Electrical Connection
Pin assignment
Pin 1 Pin 2 Pin 3 Pin 4
2-wire SDI -VB +VB N/A
3-wire SDI -VB +VB +I
Modbus/RTU -D -VB +VB +D
Color Brown White Blue Black
Legend for pin assignment
SDI Digital signal (Internal use only)
-VB Negative supply voltage
+VB Positive supply voltage
+I 4 ... 20 mA (3-wire)
+D Positive data Modbus
-D Negative data Modbus
Schemas
S217 9

8 Modbus Output (S217-8 and S217-9)
8 1 Modbus Information
The default settings of the Modbus interface are as follows:
Mode : RTU
Baud rate : 19200
Device address : last two digits of serial number
Framing / parity / stop bit : 8, N, 1
Response time : 1 second
Response delay : 0 ms
Inter-frame spacing : 7 char
Response message that the device returns to the master:
•Function code: 03
The information of the byte order is shown in the table below:
Byte
Order
Sequence Data
Type
1st 2nd 3rd 4th
1-0-3-2 Byte 1
(MMMMMMMM*)
Byte 0
(MMMMMMMM *)
Byte 3
(SEEEEEEE)
Byte 2
(EMMMMMMM *) FLOAT
1-0-3-2 Byte 1 Byte 0
LSB
Byte 3
MSB Byte 2 UINT32
INT32
1-0 Byte 1
MSB
Byte 0
LSB --- --- UINT16
INT16
1-0 Byte 1
XXX *
Byte 0
DATA --- --- UINT8
INT8
* S: Sign, E: E ponent, M: Mantissa, XXX: no value
Explanations of MSB and LSB
MSB MSB refers to Most Significant Byte first, which follows the Big-
Endian byte order.
For e ample, if the main system follows the MSB first order:
When the 4-byte floating number, in the order of Byte1-Byte0-
Byte3-Byte2, is received from the slave (sensor), the master
must change the byte order to Byte3-Byte2-Byte1-Byte0 for the
correct display of the value.
10 S217

8 Modbus Output (S217-8 and S217-9)
LSB LSB refers t Least Significant Byte first, which f ll ws the Little-Endian
byte rder.
F r example, if the main system f ll ws the LSB first rder:
When the 4-byte fl ating number, in the rder f Byte1-Byte0-Byte3-Byte2,
is received fr m the slave (sens r), the master must change the byte rder
t Byte0-Byte1-Byte2-Byte3 f r the c rrect display f the value.
8 2 Modbus Holding Register Table
Modbus
Register
address
Data type Data
Length
Channel
description Unit Res * R/
W
0 FLOAT 4-Byte Temperature (°C,°F) 1 R
2 FLOAT 4-Byte Relative
humidity
(%) 3 R
6 FLOAT 4 Byte Pressure dew
point
(°Ctd or
°Ftd)
1 R
8 FLOAT 4 Byte Atmosphere
dew point
(°Ctd
atm,°Ftd
atm)
1 R
10 FLOAT 4 Byte Mi ing ratio (g/kg) 3 R
12 FLOAT 4 Byte Absolute
humidity
(g/m3, or
mg/m3)
3 / 1 R
16 FLOAT 4 Byte Volume ration (ppm) 1 R
49 INT32U 4 Byte Serial number NA 1 R
55 INT32U 4 Byte System status NA 1 R
200 FLOAT 4 Byte Temperature NA ** R
202 ASCII string
(°C, or °F)
4 Byte Unit of
temperature
NA 1 R
204 INT16U 2-Byte Resolution of
temperature
NA 1 R
205 INT16U 2 Byte Status
temperature
NA 1 R
212 FLOAT 4 Byte Humidity1 NA ** R
214 ASCII string
(%,°Ctd,°Ftd
,
g/m3,mg/m3
,g/kg, ppm,
°Ctd
8-Byte Unit of
Humidity1
NA 1 R
S217 11

8 Modbus Output (S217-8 and S217-9)
Modbus
Register
address
Data type Data
Length
Channel
description Unit Res * R/
W
atm,°Ftd atm
)
218 INT16U 2 Byte Resolution of
Humidity1
NA 1 R
219 INT16U 2 Byte Status of
Humidity1
NA 1 R
220 FLOAT 4 Byte Humidity2 NA ** R
222 ASCII string
(%,°Ctd,°Ftd
,
g/m3,mg/m3
,g/kg, ppm,
°Ctd
atm,°Ftd atm
)
8 Byte Unit of
Humidity2
NA 1 R
226 INT16U 2 Byte Resolution of
Humidity2
NA 1 R
227 INT16U 2 Byte Status of
Humidity2
NA 1 R
* Res. denotes resolution.
** The resolution varies with units.
Remark: Units can be changed using the service software.
8 3 Interpretation of System Status
The device provides the device statuses via Modbus as well. The 32-bit
data information is read as single bits. The meanings of these bits are
described as follows.
Bit Description
2Dew point over range
3 Temperature over range
6 calibration over due
7 EEPROM broken
8 Dew point sensor broken
12 S217

9 Installation
9 Installation
Before installing the transmitter, please make sure that all components
listed below are included in your package.
Qty Description Item No
1 S217 Dew Point Transmitter Model specific (See section 9.4.)
1 2 m cable with M8 connector No P/N
1 Instruction manual No P/N
1 Calibration certificate No P/N
9 1 Installation Requirements
•The flowing air or gas must pass the sensor tip for a proper
measurement. This can be realized with a measurement chamber.
For a installation without measuring chamber you need to concern
the installation depth which is described in the section 9.2.3 Install
without Measuring Chamber.
•Sensor orientation requirement is shown in the figure below.
Install the device only in
the recommended area, as
shown in picture on the
left.
The angle between the
device and the centre
vertical line of the tube
must be greater than 30°.
An upside down installation
is not permitted.
S217 13

9 Installation
9 2 Installation Procedure
The following steps e plain the procedure of an appropriate installation.
9 2 1 Install with Measuring Chamber A699 3491
1. Mount the transmitter on
the measuring chamber by
using the G1/2” connection.
2. Make sure the transmitter is
tightly sealed, therefore the
sealing ring on the
transmitter must be used.
3. Connect the measuring
chamber to the compressed
air system using a quick
connector. Make sure the
Dew Point Transmitter is
screwed on the chamber
before connecting.
The measuring chamber will
create a purge flow.
14 S217

9 Installation
9 2 2 Install with By-pass Measuring Chamber A699 3493
For the model A699 3493, there are two installation methods:
Method 1: Full pass through by-pass installation
This method is to be used when the full air flow is passing through the
measuring chamber.
1. Connect the inlet of the chamber using a 6 mm teflon hose to your
system.
Note: The full flow must pass the measuring chamber. Ensure a
certain flow rate to get fast response time.
2. Connect the outlet of the chamber to your system using the 6 mm
hose quick connector.
See figure below for details.
S217 15

9 Installation
Method 2: By-pass installation
Note: In order to use the measurement chamber in a by-pass you must
ensure a pressure difference between P1 and P2 as indicated in the
picture below.
1. Connect the inlet of the chamber to your pipe system.
2. Connect the outlet of the chamber to your pipe system where the
pressure is known to be lower than the inlet pressure.
Note: The pressure difference P1 > P2 is needed to create a by-pass
flow through the chamber. If there is no pressure difference between P1
and P2, there will be no flow through the chamber and therefore the
response time will be very slow or the device will not even respond at
all to the dew point changes.
16 S217

9 Installation
9 2 3 Install without Measuring Chamber
This is the full flow installation. The sensor is in the pipe.
Method 1: Install through a nozzle
•Install the device only
if the system is
pressure-less.
•Check the size of the
nozzle and make sure
that no less than 1/3
of the sensor tip is
inside of the pipe.
•The inner thread of
the nozzle must be G
1/2”.
Method 2: Install with NPT thread adapter
•Install the device only
if the system is
pressure-less.
•Please check the size
of the nozzle and
make sure not less
than 1/3 of the
sensor tip is inside of
the pipe.
•The thread adapter
(C190 0534) is used
to adapt from G 1/2"
sensor side to NPT
1/2" process
connection.
S217 17

9 Installation
9 3 Remove the Dew Point Transmitter
To remove the transmitter unscrew the transmitter from the
measurement chamber or from the nozzle. Please observe that the
system is pressureless when the transmitter is removed.
9 4 Order Information
Order no Description
S699 2170 S217-0, Dew Point Transmitter, 4 ... 20 mA (2-wire),
-50 ... +20ºC Td, G 1/2” thread, 50 bar, M8
S699 2173 S217-3, Dew Point Transmitter, 4 ... 20 mA (2-wire),
-20 ... +50ºC Td, G 1/2” thread, 50 bar, M8
S699 2174 S217-4, Dew Point Transmitter, 4 ... 20 mA (3-wire),
-20 ... +50ºC Td, G 1/2” thread, 50 bar, M8
S699 2175 S217-5, Dew Point Transmitter, 4 ... 20 mA (3-wire),
-50 ... +20ºC Td, G 1/2” thread, 50 bar, M8
S699 2176 S217-6, Dew Point Transmitter, 4 ... 20 mA (2-wire),
-60 ... +20°C Td, G 1/2” thread, 50 bar, M8
S699 2177 S217-7, Dew Point Transmitter, 4 ... 20 mA (3-wire),
-60 ... +20°C Td, G 1/2” thread, 50 bar, M8
S699 2178 S217-8, Dew Point Transmitter, Modbus/RTU, -60 ... +20°C
Td, G1/2" thread, 5.0 MPa, M8
S699 2179 S217-9, Dew Point Transmitter, Modbus/RTU, -20 ... +50°C
Td, G1/2" thread, 5.0 MPa, M8
A1390 S217, customized measuring range
A1391 S217, high pressure option 35 MPa (350 bar)
A554 2005 Service kit for sensor configuration including software
A699 3491 Measuring chamber for easy installation in compressed air
system up to 15 bar
A699 3493 Measuring chamber bypass type (in and out 6 mm hose
connection)
C198 0002 Sinter cap, stainless steel
18 S217

10 alibration
10 Calibration
The transmitter is calibrated e work. The e act calibration date is
printed on the certificate which is supplied together with the transmitter.
The accuracy of the transmitter is regulated by the on site conditions,
parameters like oil, high humidity or other impurities can affect the
calibration and furthermore the accuracy. However we recommend to
calibrate the instrument at least once per year. The calibration is
e cluded from the instruments warranty. For this please contact the
manufacturer.
11 Maintenance
Please observe from time to time the sinter cap. If it appears to be
dirty, it is recommended to replace it for this please contact the
manufacturer.
ATTENTION!
Contaminated filters can lead to longer response
time and to wrong measurements
12 Disposal or Waste
Electronic devices are recyclable material and do not
belong in the household waste.
The transmitter, the accessories and its packings must be
disposed according to your local statutory requirements.
The dispose can also be carried by the manufacturer of the
product, for this please contact the manufacturer.
S217 19

SUTO iTEC GmbH
Grißheimer Weg 21
D-79423 Heitersheim
Germany
SUTO iTEC (ASIA) Co., Ltd.
Room 10, 6/F, Block B, Cambridge Plaza
188 San Wan Road, Sheung Shui, N.T.
Hong Kong
Tel: +49 (0) 7634 50488 00
Email: [email protected]
Website: www.suto-itec.com
Tel: +852 2328 9782
Email: [email protected]
Website: www.suto-itec.com
SUTO iTEC Inc.
5460 33rd St SE
Grand Rapids, MI 49512
USA
Tel: +1 (616) 800-7886
Email: [email protected]
Website: www.suto-itec.com
All rights reserved © Modifications and errors reserved
S217_im_en_2023-1
20 S217
Other manuals for S217
1
This manual suits for next models
16
Table of contents
Other SUTO Transmitter manuals