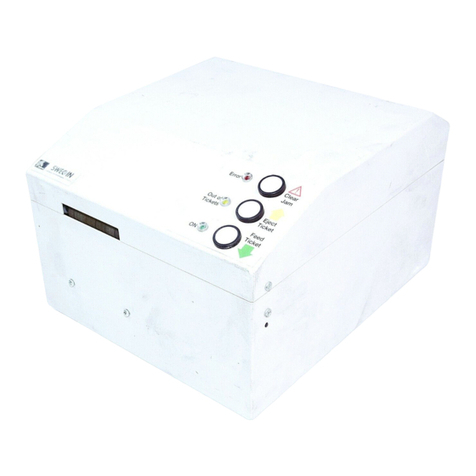
Swecoin TTP 5250 User manual

TTP 5250 Kiosk Printer
Evaluation Kit
Getting Started
Publ. No 01451-000 D

TTP 5250 Kiosk Printer Evaluation Kit – Getting Started 0110
Related manuals
TTP 5000 Operating Instructions (00809-000)
TTP 5100/5200/5250 Operating Instructions (38-1081-00)
TTP 5000 Installation Manual (00761-000)
TTP 5200/5250 Installation Manual (01436-000)
TTP 5000 Technical Specification (00873-000)
TTP 5200/5250 Technical Specification (01441-000)
This is a publication of Swecoin AB
Box 322, SE-192 30 Sollentuna, Sweden
Phone +46 8 623 45 60
Fax +46 8 594 709 89
E-mail techsupport@swecoin.se
sales@swecoin.se
Web site www.swecoin.se
© Swecoin AB 1997, 2001
All rights reserved. Reproduction in whole or in parts is
prohibited without written consent of the copyright owner. We
have taken great care to ensure that the information in this
manual is correct and complete. However, if you discover any
errors or omissions, or if you wish to make suggestions for
improvements, you are welcome to send your comments to
us. Swecoin AB disclaims any liability resulting from the use
of this information and reserves the right to make changes
without notice.
Edition D, October 2001
Printed in Sweden

0110 TTP 5250 Kiosk Printer Evaluation Kit – Getting Started 1
CONTENTS
1 INTRODUCTION.............................................................................................................. 2
2 UNPACKING.................................................................................................................... 3
3 PRODUCT PRESENTATION .......................................................................................... 4
4 INSTALLATION CONSIDERATIONS.............................................................................. 5
5 PRINTER PREPARATION............................................................................................... 6
5.1 Connect power cables ................................................................................... 6
5.2 Connect paper feed button ............................................................................ 6
5.3 Install paper roll.............................................................................................. 7
5.4 Test the printer............................................................................................... 9
5.5 Connect data communication cables............................................................. 9
6 OPERATING THE PRINTER ON-LINE ......................................................................... 10
6.1 Normal mode ............................................................................................... 10
6.2 Hex dump mode .......................................................................................... 10
6.3 Using the TTP Editor.................................................................................... 10
6.4 Printing under Windows............................................................................... 11
7 FAULT FINDING............................................................................................................ 11
8 PAPER JAM REMOVAL................................................................................................ 11

2 TTP 5250 Kiosk Printer Evaluation Kit – Getting Started 0110
1 INTRODUCTION
This manual describes how to install and set up the equipment contained in the TTP 5250
Kiosk Printer Evaluation Kit. The following TTP 5250 printer evaluation-kits are available:
TTP 5250 Evaluation Kit (basic printer configuration)
•01384-060 60 mm paper width
•01384-080 80 mm paper width
•01384-112 112 mm paper width
If no host computer or application program is available, running a test printout function
with the printer in off-line mode can still test a number of printer features and functions.
If a host computer is at hand, all the printer commands described in the TTP 5250
Installation Manual can be used to operate the printer. The printer can also be set in an
on-line hex dump mode to log the data transfer between the host and the printer.
The enclosed Windows printer drivers make it possible to print under Windows 95/98/ME
and Windows NT 4/2000 provided the correct layout, margins, etc. are selected, and that
the parallel printer interface is used.
An enclosed editor program (for MS Windows) serves as a guideline for programming.

0110 TTP 5250 Kiosk Printer Evaluation Kit – Getting Started 3
2 UNPACKING
The evaluation kit contains the following items:
Description Part No.
TTP 5250 Kiosk Printer 60 mm 01280-060
60mm paper roll, 3 pcs 04766-000
Or
TTP 5250 Kiosk Printer 80 mm 01280-080
80mm paper roll, 3 pcs 04767-000
Or
TTP 5250 Kiosk Printer 112 mm 01280-112
112 mm paper roll, 3 pcs 04768-000
And
Power supply unit 115/230V in, 24V out. 01035-004
Power cable, part No. 00370-000
Parallel interface adapter cable, L=230 mm 00601-000
Serial interface adapter cable, L=200 mm 00602-200
Serial RS232 cable 1.5m 10825-000
TTP 5250 Evaluation Kit — Getting Started, this manual 01451-000
TTP 5250 Technical Specification 01441-000
TTP 5250 Installation Manual 01436-000
TTP 5250 Operating Instructions 01434-000
TTP 5000 Series Service Manual 00803-000
TTP Editor, on 3.5" diskette 00910-620
Printer Driver for Windows 95/98/ME 00921-110
Printer Driver for Windows NT4/2000 00927-100
Paper feed button assembly with cable 01073-000
Already installed on most evaluation printers.
4 TTP 5250 Kiosk Printer Evaluation Kit – Getting Started 0110
3 PRODUCT PRESENTATION
Figure 1. Printer exterior
Figure 2. Power supply unit

0110 TTP 5250 Kiosk Printer Evaluation Kit – Getting Started 5
4 INSTALLATION CONSIDERATIONS
The TTP 5xxx printers are designed for installation in some kind of enclosure such as a
self-service kiosk.
Preventing ESD and earth currents from affecting the printer operation requires proper
connection of the printer chassis to protective earth through a mounting platform or
through a separate earth conductor.
Troublefree printer operation also requires that the printer is shielded from excessive
ambient light. Such light might disturb the printer operation by cheating a couple of built-in
opto sensors.
Additional space is required for paper replenishment and paper jam removal. Consider
mounting the printer on a movable platform so that the printer can be maintained outside
the printer enclosure.

6 TTP 5250 Kiosk Printer Evaluation Kit – Getting Started 0110
5 PRINTER PREPARATION
5.1 Connect power cables
1. Connect the power supply unit at the back of the printer (see figure 3).
Figure 3. Connectors at the back of the TTP 5250
2. Connect the power supply unit to a live wall outlet.
3. Switch ON the power supply unit. Both the green and the red power indicator should
light up. See figure 3.
5.2 Connect paper feed button
If the paper feed button is not already installed, connect the cable to the connector shown
in figure 3.

0110 TTP 5250 Kiosk Printer Evaluation Kit – Getting Started 7
5.3 Install paper roll
1. Turn the paper roll as shown. The temperature sensitive side of the paper should
face up.
Figure 4. Turn the paper roll with the temperature-sensitive side up
2. Tear off approximately 0.5 m from the paper roll.
CAUTION!
This is important since the outer end of the paper is usually fixed to the roll with some
type of glue or self-adhesive substance that might otherwise cause paper jam or
even printhead damage.
3. Raise the paper release lever to upright position.
4. Insert the edge of the paper into the back of the print module. The paper should pass
beneath a plastic bar (see arrow).
Figure 5. Feed the paper into the printer

8 TTP 5250 Kiosk Printer Evaluation Kit – Getting Started 0110
5. Feed the paper further into the print module and press the paper-feed button
momentarily (see figure 6). The printer will now automatically grab and advance the
paper, cut it, and eject it. The leading edge of the next document will have a properly
cut top edge.
An alternative way of loading the paper is to feed it manually, with the paper release
lever down, until the paper becomes visible in the presenter module. Then raise the
paper release lever and press the paper-feed button.
Figure 6. Perform cut and eject

0110 TTP 5250 Kiosk Printer Evaluation Kit – Getting Started 9
5.4 Test the printer
1. Switch OFF the power supply unit.
2. Press the paper-feed switch and keep it depressed.
3. Switch the power ON. Continue keeping the paper feed button depressed until the
paper forms a loop on top of the presenter module. The printer should now have
produced a printout showing the firmware version and some other printer data
followed (repeatedly) by all characters that can be produced by the printer with the
current firmware version.
4. Release the paper feed button to stop the printing. The printer cuts and ejects the
document, but remains in the self-test mode. You may repeat steps 1 — 3 any
number of times to produce successive printouts.
5. Exit the self-test mode by switching the power OFF and then ON again. The printer
returns to normal on-line operation mode.
5.5 Connect data communication cables
To operate the printer on-line from a host computer, connect the applicable data
communication cables as follows:
1. Switch OFF the power supply unit.
2. Connect either the serial or the parallel interface adapter cable at the back of the
printer (see figure 3). The Installation Manual describes pin configuration etc.
3. Connect the corresponding printer cable to the free end of the interface adapter
cable.
4. Connect the printer cable to the host computer.
NOTE! — If the serial interface is used, the communication parameters in the host
computer should be set to:
9600 baud
8 data bits
1 stop bit
No parity
These settings are the factory installed default values.
5. Switch ON the power supply unit.

10 TTP 5250 Kiosk Printer Evaluation Kit – Getting Started 0110
6 OPERATING THE PRINTER ON-LINE
Even though it is possible to see some of the printer's capabilities by running the off-line
test procedure described in Section 5.4, operating the printer on-line gives you the
possibility to test all printer functions in depth. See the Installation Manual for command
syntax and detailed descriptions of all available printer commands.
6.1 Normal mode
You can now operate the printer using the commands and ESC codes described in the
Installation Manual. Alternatively, use the MS Windows based TTP editor to select among
a number of command examples. See 6.3.
Pressing the paper feed switch produces a form feed operation.
6.2 Hex dump mode
The printer can be set to a hex dump mode during on-line operation. This means that all
data transferred between the host and the printer will be printed in both HEX code and as
ASCII characters.
1. Verify that the power is switched OFF.
2. Lower the print head lever to horizontal position.
3. Depress the paper feed button and keep it depressed.
4. Power ON the printer and release the paper feed button.
5. Raise the print head release lever to vertical position. The printer is now in the HEX
dump mode and all on-line communication is printed in both HEX format and ASCII
character format. The HEX print mode is formatted for 60 mm wide paper and 16
characters print width irrespective of the paper width used in the printer. If the last
line contains fewer that 16 characters, this line will not be printed until you execute
the next step.
6. Depress the paper feed button temporarily. This ensures that the last transmitted
characters become printed. The printer cuts the paper and feeds it out.
7. Exit from the HEX dump mode by switching the printer OFF.
8. Switch the power ON again to resume normal on-line operation.
6.3 Using the TTP Editor
If a PC is used as host, you can install the TTP Editor (MS Windows program) from the
enclosed diskette and operate the printer using a number of command string examples as
a basis. The on-line help contains all commands with explanations, it is most helpful.

0110 TTP 5250 Kiosk Printer Evaluation Kit – Getting Started 11
6.4 Printing under Windows
If the host is a PC with Windows 95/98/ME, or Windows NT 4/2000, you can print
documents from any Windows program that is capable of printing if the following
requirements are met:
•The applicable Windows printer driver is installed (see Chapter 2)
•The printer is connected through the parallel printer interface
•Correct printer model (60/80/112) is selected.
•Paper size, layout, and margins are correctly set in the application program.
7 FAULT FINDING
Refer to the enclosed Operating Instructions.
8 PAPER JAM REMOVAL
Refer to the enclosed Operating Instructions.

12 TTP 5250 Kiosk Printer Evaluation Kit – Getting Started 0110
This page intentionally left blank.
Other manuals for TTP 5250
1
Table of contents
Other Swecoin Printer manuals

Swecoin
Swecoin TTPM2 User manual

Swecoin
Swecoin TTP 101 User manual

Swecoin
Swecoin TTP 5250 User manual

Swecoin
Swecoin TTP 101 User manual

Swecoin
Swecoin TTPM3 User manual

Swecoin
Swecoin TTPM2 Manual

Swecoin
Swecoin TTP 2000 User manual

Swecoin
Swecoin TTP 2000 User manual

Swecoin
Swecoin TTP 10X0 User manual

Swecoin
Swecoin TTP 5000 User manual