Symetrix Room Combine 788 User manual

Integrator Series
Room Combine 788
Quick Start Guide

2
Quick Start Guide
6408 216th Street SW |Mountlake Terrace, WA 98043 USA
T+1.425.778.7728 F+1.425.778.7727 |www.SymetrixAudio.com

3
Integrator Series Room Combine 788
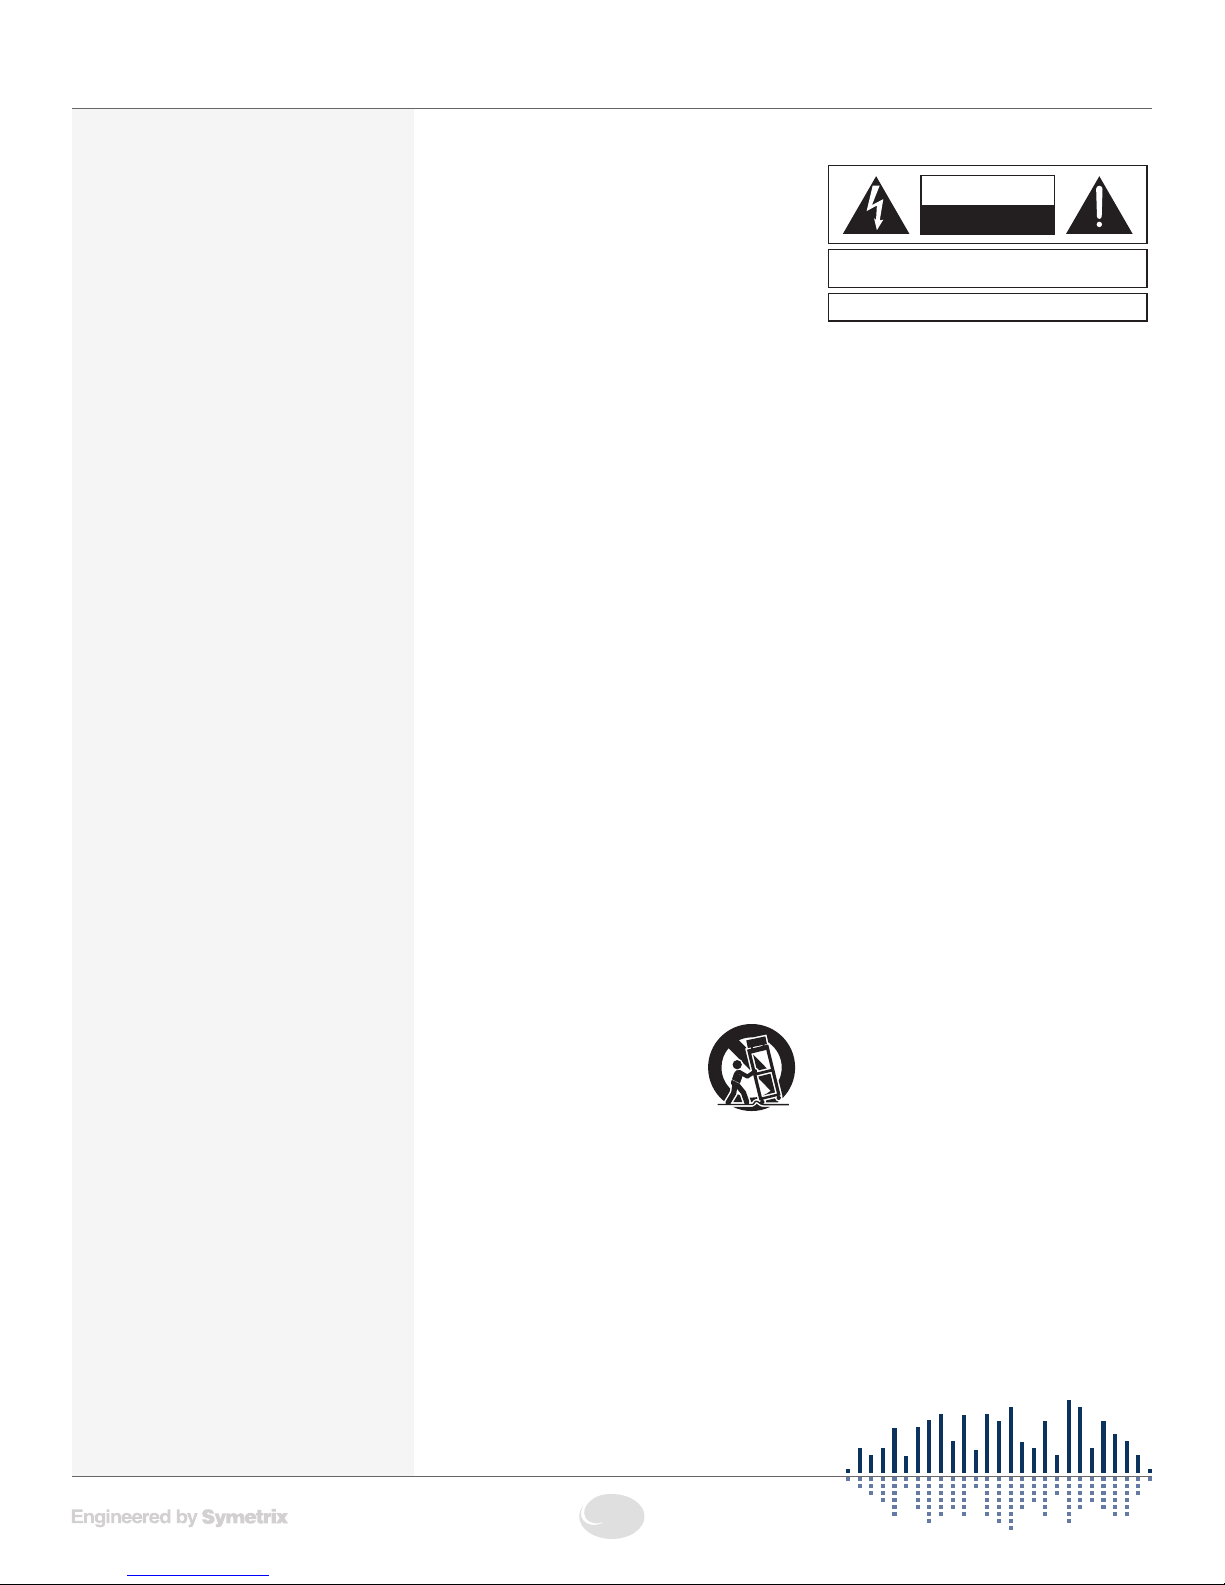
GThe lightning flash with arrowhead
symbol within an equilateral triangle is
intended to alert the user of the presence
of uninsulated “dangerous voltage”
within the product’s enclosure that may
be of sufficient magnitude to constitute
a risk of electric shock to persons. The
exclamation point within an equilateral
triangle is intended to alert the user of
the presence of important operating and
maintenance (servicing) instructions in the
literature accompanying the product (i.e.
this Quick Start Guide).
GCAUTION: To prevent electric shock,
do not use the polarized plug supplied
with the unit with any extension cord,
receptacle, or other outlet unless the
prongs can be fully inserted.
GPower Source: This Symetrix hardware
uses a switching power supply that
automatically adjusts to the applied
voltage. Ensure that your AC mains
voltage is somewhere between 100-240
VAC, 50-60 Hz. Use only the power
cord and connector specified for the
product and your operating locale. A
protective ground connection, by way of
the grounding conductor in the power
cord, is essential for safe operation. The
appliance inlet and coupler shall remain
readily operable once the apparatus has
been installed.
GUser Serviceable Parts: There are no
user serviceable parts inside this Symetrix
product. In case of failure, customers
inside the U.S. should refer all servicing to
the Symetrix factory. Customers outside
the U.S. should refer all servicing to an
authorized Symetrix distributor. Distributor
contact information is available online at:
http://www.SymetrixAudio.com.
AVIS:
NE PAS OUVRIR
Il ne se trouve a l’interieur aucune piece pourvant entre reparée l’usager.
SEE OWNERS MANUAL. VOIR CAHIER D’INSTRUCTIONS.
S’adresser a un reparateur compétent.
RISQUE DE CHOC ELECTRIQUE
No user serviceable parts inside. Refer servicing to qualified service personnel.
CAUTION
WARNING:
TO REDUCE THE RISK OF FIRE OR
ELECTRIC SHOCK DO NOT EXPOSE
THIS EQUIPMENT TO RAIN OR MOISTURE
DO NOT OPEN
RISK OF ELECTRIC SHOCK
Important Safety
Instructions
!Read these instructions.
@Keep these instructions.
#Heed all warnings.
$Follow all instructions.
%Do not use this apparatus near water.
This apparatus shall not be exposed to
dripping or splashing and no objects
filled with liquids, such as vases, shall be
placed on the apparatus.
^Clean only with dry cloth.
&Do not block any ventilation openings.
Install only in accordance with the
manufacturer’s instructions.
*Do not install near any heat sources such
as radiators, heat registers, stoves, or
other apparatus (including amplifiers) that
produce heat.
(This apparatus shall be connected to
a mains socket outlet with a protective
earthing connection. Do not defeat
the safety purpose of the polarized or
grounding-type plug. A polarized plug has
two blades with one wider than the other.
A grounding type plug has two blades
and a third grounding prong. The wide
blade or the third prong are provided for
your safety. If the provided plug does not
fit into your outlet, consult an electrician
for replacement of the obsolete outlet.
BL Protect the power cord from being
walked on or pinched particularly at
plugs, convenience receptacles, and the
point where they exit from the apparatus.
BM Only use attachments/accessories
specified by the manufacturer.
BN Use only with the cart, stand,
tripod, bracket, or table
specified by the manufacturer,
or sold with the apparatus.
When a cart is used, use
caution when moving the cart/apparatus
combination to avoid injury from tip-over.
BO Unplug this apparatus during lightning
storms or when unused for long periods
of time.
BP Refer all servicing to qualified service
personnel. Servicing is required when
the apparatus has been damaged in any
way, such as power-supply cord or plug
cord is damaged, liquid has been spilled
or objects have fallen into the apparatus,
the apparatus has been exposed to rain
or moisture, does not operate normally, or
has been dropped.
What Ships In the Box
• RoomCombine788hardwaredevice.
• RoomCombine788CD-ROM
(Windows).
• Detachablepowercord.
• 25detachablePhoenix(orEuroblock,
as applicable) connectors.
• ThisQuickStartGuide.
What You Need to Provide
• AWindows®PC with 1 GHz or higher
processor and:
• WindowsXPorVista.
• 250MBfreestoragespace.
• 1024x768graphicscapability.
• 16-bitorhighercolors.
• CD-ROMdriveorInternetconnection.
• 512MBormoreofRAMasrequiredby
your operating system.
• Network(Ethernet)interface.
• CAT5cableoranexistingEthernet
network.
Getting Help
Room Combine 788, the Windows
application that controls the hardware,
includes a help module which acts as a
complete User’s Guide for both hardware
and software. If you have questions
beyond the scope of this Quick Start
Guide or the software help file, contact
our Customer Support Group in the
following ways:
Tel: +1.425.778.7728
8:00 am to 4:30 pm
Monday through Friday,
Pacific Time
Web: http://www.SymetrixAudio.com
This device complies with part 15 of
the FCC Rules. Operation is subject
to the following two conditions: (1)
This device may not cause harmful
interference, and (2) this device must
accept any interference received,
including interference that may cause
undesired operation.
ThisClassBDigitalapparatusmeets
all requirements of the Canadian
Interference-Causing Equipment
Regulations
Cet appariel numerique de la classe
BrespectetouteslesExigencesdu
Reglement sur le materiel brouilleur
du Canada.
Safety

4
Quick Start Guide
6408 216th Street SW |Mountlake Terrace, WA 98043 USA
T+1.425.778.7728 F+1.425.778.7727 |www.SymetrixAudio.com
The RJ45 connectors labeled “ARC” are only for use with the ARC series of remotes.
DO NOT plug the ARC connectors on Symetrix products into any
RJ45 connector labeled “SYMLINK”,“ETHERNET” or “COBRANET”.
The “ARC” RJ45 connectors on Symetrix products can carry anywhere from 6 to 24 VDC which
can damage SymLink, Ethernet and CobraNet circuitry.
ARC
ARC
SYMLINK
TRANSMIT RECEIVE
COBRANET/
ETHERNETETHERNET
Warning

5
Integrator Series Room Combine 788
Introduction
Integrator Series products are designed with specific
applications in mind. The Room Combine 788 is a complete
solution for selectively combining or separating automixing,
paging and background music in up to eight (8) rooms in
hotels, banquet halls, schools, and conference venues.
Today’s hospitality and meeting centers demand
sophisticated audio systems that are easy to operate.
The 788 delivers with complete signal processing,
automixing and combining of eight (8) microphones and
four(4)backgroundmusic(BGM)sourcesintoasmany
as eight (8) rooms, each with comprehensive loudspeaker
management.Combinationsofaudio,page,andBGM
routing, including non-adjacent spaces, are assigned in the
setupsoftware.Buteaseofsetupisonlyhalfthestory.
The other half is real time user control. Our ARC-SWK
wall panel (sold separately) is perfectly suited for audio
sourceselectionandvolumecontrol.MultipleARC-SWK’s
dynamically synchronize as spaces are combined and
separated. Preset room combinations can be recalled
from the 788’s front panel, the ARC-2i wall panel, or
your favorite third-party control system. The 788 also
easily accommodates “soft wall” sensors with its eight (8)
analog control inputs for a simple, foolproof triggering of
combinations.
As with all of the Integrator Series products, ease of
integration is key. Software Wizards effortlessly guide
connection, wall panel programming, and graphical layout
of the rooms and their relationships. Room Combine 788,
Engineered by Symetrix to save integrators time and money.
Features
• Theeasiesttocongurecompleteroomcombining
solution for hotels, banquet halls, schools and conference
venues.
• Eight(8)Mic/LineInputswithlters,EQ,andfeedback
elimination into Gain-sharing Automixing, assignable to
any of the eight rooms or used as a common paging
source.
• Four(4)LineInputsfeaturinglters,EQandAutomatic
GainControl(AGC),handleallBackgroundMusic(BGM)
with ease.
• Eight(8)Outputs:Routeaudiotoasmanyaseight(8)
unique rooms, common or overflow areas.
• Wizard-drivensoftwareset-up;networkready.
PERFORMANCE DATA
Item Specifications
Sampling Rate 48 kHz, +/- 100 ppm
Frequency Response 20Hz–20kHz,+/-0.5dB
Dynamic Range >110dB(A-weighted)
Total THD+Noise -85dBtypicalat+22dBu,1kHz,0dBgain
Input Impedance > 4 kΩ balanced, > 2 kΩ unbalanced
Output Impedance 200 Ω balanced, 100 Ω unbalanced
Maximum Input Level +23dBu
Maximum Output
Level
+24dBu
Mic Pre-amp EIN <-127dBu,22Hz-22kHz,100Ωsourceimpedance
Mic Pre-amp Gain +20dB,+40dBor+50dB,micinputs;+0dBuor
+11.8dBu,lineinputs(bothviainternaljumpers)
Phantom Power +48 VDC
Input CMRR >55dB@1kHz,unitygain
Interchannel Crosstalk >-90dB@1kHz,typical
Introduction•PerformanceData

6
Quick Start Guide
6408 216th Street SW |Mountlake Terrace, WA 98043 USA
T+1.425.778.7728 F+1.425.778.7727 |www.SymetrixAudio.com
Mechanical Data
Item Specifications Remarks
Space Required 1U (WDH: 48.02 cm x 22.15 cm x 4.37 cm / 18.91 in x
8.72 in x 1.72 in), depth is specified from front panel to
back of connectors.
Allow at least 1 inch additional clearance for rear panel connections. Additional
depth may be required depending upon your specific wiring and connections.
Electrical 100 – 240 VAC, 50/60 Hz, 25 Watts maximum. Nolinevoltageswitchingrequired.
Ventilation Maximumrecommendedambientoperatingtemperature
is 30 C / 86 F.
Ensure that the left and right equipment sides are unobstructed (5.08 cm, 2 in. mini-
mum clearance). The ventilation should not be impeded by covering the ventilation
openings with items such as newspapers, tablecloths, curtains, etc.
Weight 8.15 lbs. (3.70 kg)
Front Panel
Item Description Comments
MENU / UP / DOWN Momentarypushbuttons •PressMENUwhileonthehomeoridlescreentocyclethroughmenusprogramed
into the front panel control interface.
•PressMENUafteradjustingaparametertoconfirmyourselection(asinPresets)or
to cycle to the next menu.
•PressandHoldMENUforatleast5secondstoenterorexittheSystemMenu.
•PresstheUPbuttontoadjustaparameterUP.
•PresstheDOWNbuttontoadjustaparameterDOWN.
Mic/Line Inputs Twelve(12)Bi-colorLEDs Illuminategreentoindicatesignalpresent(>-26dBu),amberbetween+5and+22.5
dBuandredtoindicateclipping(>+22.5dBu)oninputs1through12.
Outputs Eight(8)Bi-colorLEDs Illuminategreentoindicatesignalpresent(>-26dBu),amberbetween+5and+23
dBuandredtoindicateclipping(>+23dBu)onoutputs1through8.
Power GreenLED Illuminates to indicate the device is powered on.
Network Bi-colorLED Illuminates green to indicate a network (Ethernet) activity, amber to indicate acquisi-
tion of a network address in DHCP mode.
ARC GreenLED Illuminates to indicate ARC port (RS-485) connection.
MechanicalData•FrontPanel

7
Integrator Series Room Combine 788
Rear Panel
Item Description Comments
Power Input IEC 3 prong jack Accepts power from detachable IEC power cable (100-240 VAC, 50-60 Hz, 25 Watts
max). Connect only to a grounded power outlet.
EXTERNAL CONTROL
INPUTS 1 through 4
Four (4) 3-pin Phoenix Allows real-time control of any volume using standard 10k Ohm linear potentiometers
or mutes, presets and combines using standard contact closures, relays or air wall
sensorsprovidingadryclosure.Mayalsobeusedforemergencysystemintegration.
Purpose configured by the External Control Wizard. Each connection accommodates
one potentiometer or two switches. Uses standard shielded twisted pair cabling.
ARC RJ45 jack Distributes power and RS-485 data to one or more ARC devices. Uses standard
straight-through UTP CAT5 cabling.
Warning! Refer to the RJ45 Warning for compatibility information.
RS-485 One (1) 3-pin Euroblock Connects to an ARC-PS, ARC Wall Panel or other Symetrix-manufactured RS-485
controller,wiredinparallel(AtoA,BtoBandGNDtoGND)usingshieldedtwisted
pair cabling.
Port Settings: 38.4 kbaud, 8 data bits, 1 stop bit, no parity, no flow control.
Ethernet RJ45 jack Communications interface for the 788 application running on the host PC as
wellas3rdpartycontrolforsystemssuchasAMXorCrestron.Usesstandard
straight-through UTP CAT5 cabling. Features auto-crossover sensing for direct
device-to-device connections.
RS-232 FemaleDB9 Serial communications interface for a 3rd party accessory controller. Wired straight-
through, only pins 2, 3 and 5 are required.
Port Settings: 57.6 kbaud (default), 8 data bits, 1 stop bit, no parity, no flow control.
Outputs Eight (8) 3-pin Phoenix connectors Eight (8) balanced analog line level audio outputs, individually software-selectable
levelsof-10dBVor+4dBu(default).
Background Music Inputs
(BGM)
Four (4) 3-pin Phoenix connectors Four (4) balanced analog audio inputs, nominal input level set via internal jumpers at
-10dBVor+4dBu(default).
Mic/Line Inputs Eight (8) 3-pin Phoenix connectors Eight (8) balanced analog audio inputs with software selectable +48 VDC phantom
powerandMic/Lineinputmode.Miclevelgainsetviainternaljumpersat+20dBor
+40dB(default)or+50dB.
Note:Input8maybeswitchedinternallytotheARCAudioinput.Modeisconfigured
byMic/Lineinput#8’sinputpanelinthesoftware.
Rear Panel

8
Quick Start Guide
6408 216th Street SW |Mountlake Terrace, WA 98043 USA
T+1.425.778.7728 F+1.425.778.7727 |www.SymetrixAudio.com
Power
POWER INPUT Connect the IEC connector end of the supplied AC cord
to the receptacle on the rear of the 788. Connect the AC
connector end of the supplied AC cord to an AC power
source that is of the correct voltage and frequency (100-240
VAC, 50-60 Hz). Use only the power cord and connector
specified for the product and your operating locale.
Whenthe788ispoweredupcorrectly,thePOWERLEDon
the front of the unit will be lit solid green.
External Control
EXT CTRL 1 — 4 Using standard shielded twisted pair terminated with a
Phoenix connector on one end, you may connect up to two
contactclosuresoronepotentiometertoeachEXTERNAL
CONTROLinput.CongurationoftheEXTERNALCONTROL
inputs is done with the External Control Wizard. These ports
may also be used to integrate with an alarm or emergency
system.
Ethernet
RJ45 Connector Using a standard straight-through CAT5 cable terminated
withRJ45connectors,connectthe788’sETHERNETport
to either your computer’s Ethernet port or to an existing
Ethernetnetwork.YoumaywishtoreviewtheNetwork
Configuration section for more information.
When the 788 has a physical network connection, the
amber“link”LEDontheETHERNETconnectorwillbelit
solid.
Whenthereisnetworkcommunication,thegreen“activity”LEDonthe
ETHERNETconnectorandtheNETWORKLEDonthefrontoftheunitwill
flash accordingly.
NOTE: The 788’s Ethernet port will automatically sense a device-to-device
connection so that a standard straight-through Ethernet cable may always
be used. A cross-over cable is not required.
ARC
ARC Using a standard straight-through CAT5 cable terminated
with RJ45 connectors or standard shielded twisted pair
terminated with a Euroblock on one end, connect your ARC
Wall Panels to either the ARC or RS-485 ports according to
theguidelinesintheARCNetworkDesignsection.
When an ARC Wall Panel network is connected to the 788,
thegreenARCLEDonthefrontoftheunitwillbelitsolid
green.
WARNING: When designing an ARC network, one must be careful
not to double power any ARCs. If all pins on the CAT5 connections are
used, power can travel over the CAT5 cable and reach any ARC on that
particular chain. Power over CAT5 could potentially come from the ARC
that is powered locally and then daisy-chained via CAT5 to other ARCs or
directly from a particular ARC’s terminal block connections. In general, we
recommend using only one type of power connection on
the ARCs, either the RJ45s (with CAT5 cable) or the terminal blocks
but not both.
CAUTION: DONOTplugtheRJ45connectorsofanARCWallPanelinto
anyRJ45connectorlabeled“ETHERNET”,“COBRALINK”or“SYMLINK”.
Refer to the RJ45 Warning for compatibility information.
Hardware Connections

9
Integrator Series Room Combine 788
Accessory Communications
RS-232 Using a standard RS-232 cable wired straight-through, terminated on one end with
afemaleDB9connectorandamaleDB9connectorontheother,connectthemale
end to the 788 and the female end to an available RS-232 port on your controlling
device.
Port settings: 57.6 kbaud (default), 8 data bits, 1 stop bit, no parity, no flow control.
NOTE: Default settings can be changed via the Room Combine 788 software
application. Refer to Accessory Port Settings for details.
Outputs
Using standard mic/line cables terminated on one end with
Phoenix connectors and appropriate connectors for your
destination devices on the other end, connect the Phoenix
ends into the OUTPUTS of the 788 and the opposite ends
into your destination device’s inputs. These outputs are +4
dBubalancedlineleveloutputsbydefault.Ifyouneedan
unbalanced output, see the analog audio wiring diagrams in
the Audio Wiring Reference.
NOTE: Wiring the outputs to an unbalanced cable will
typicallyresultinanoutputlevelthatis6dBlowerthanthe
output level achieved using a balanced cable. If wiring to an
unbalanced destination, you may need to change the 788’s output level.
RefertotheOUTPUTLEVELSETwithintheLIMITERmodulefoundinthe
OUTPUT DSP section of the software.
Background Music Inputs (BGM)
Using standard mic/line cables terminated on one end with
Phoenix connectors and appropriate connectors for your line
sources on the other end, connect the Phoenix ends into the
BGMINPUTSofthe788andtheoppositeendsintoyour
source devices’ outputs. Refer to the Audio Wiring Reference
for more information.
NOTE: Wiring the inputs to an unbalanced cable will typically
resultinaninputlevelthatis6dBlowerthantheinputlevelachievedusing
a balanced cable. If wiring to an unbalanced source, you may need to
adjust the 788’s input level. The nominal input level for the line inputs is set
to+4dBuatthefactory.Thisshouldbeadequateformostsituations,even
for unbalanced inputs. However if more gain is required, internal jumpers
allowfor+11.8dBofgaineffectivelymakingthenominalinputlevel-10
dBV.
Hardware Connections

10
Quick Start Guide
6408 216th Street SW |Mountlake Terrace, WA 98043 USA
T+1.425.778.7728 F+1.425.778.7727 |www.SymetrixAudio.com
MIC/LINE INPUTS
Using standard mic/line cables terminated
on one end with Phoenix connectors and
appropriate connectors for your mic/line
sources on the other end, connect the
PhoenixendsintotheMIC/LINEINPUTS
of the 788 and the opposite ends into your
source devices’ outputs. Refer to the Audio
Wiring Reference for more information.
NOTE: Wiring the inputs to an unbalanced
cable will typically result in an input level that
is6dBlowerthantheinputlevelachieved
using a balanced cable. If wiring to an unbalanced source, you may need
toadjustthe788’sinputlevel.ToswitchbetweenMicandLinelevelinput,
refertotheINPUTtabwithintheMIC/LINEINPUTSDSPsection.Coarse
micpre-ampgainissetto+40dBatthefactory.Thisshouldbeadequate
formostmics.However,internaljumpersallowforsettingsof+50dBand
+20dB.
INTERNAL LEVEL JUMPERS
Atthefactory,coarsemicpre-ampgainissetto+40dBandthelineinputs
aresetforanominalinputlevelof+4dBu.Thisshouldbeadequatefor
most mics and balanced line level sources. However, internal jumpers allow
forsettingsof+50dBand+20dBonthemicinputsand+11.8dBofgain
onthelineinputseffectivelymakingthenominalinputlevel-10dBV.
Refer to the diagrams below to locate the jumpers on the 788’s I/O board.
To access the jumpers, you will need to remove the top cover of the 788.
+50 dB
+40 dB
OPEN: +20 dB
+11.8 dB
OPEN: +0 dB
+11.8 dB
Line Level Jumpers
OPEN: +0 dB
+50 dB
+40 dB
OPEN: +20 dB
Mic Level Jumpers
Hardware Connections

11
Integrator Series Room Combine 788
Page
Station
Mic/Line 8
48v
ARC Audio Input
8 Band
Feedback
Fighter
Loudspeaker Manager
Delay HPF LPF Inv.Limiter
Output 1
Gain Set
-10/+4
8 Band
Parametric
EQ
Loudspeaker Manager
Delay HPF LPF Inv.Limiter
Output 2
Gain Set
-10/+4
8 Band
Parametric
EQ
Loudspeaker Manager
Delay HPF LPF Inv.Limiter
Output 3
Gain Set
-10/+4
8 Band
Parametric
EQ
Loudspeaker Manager
Delay HPF LPF Inv.Limiter
Output 4
Gain Set
-10/+4
8 Band
Parametric
EQ
Loudspeaker Manager
Delay HPF LPF Inv. Limiter
Output 5
Gain Set
-10/+4
8 Band
Parametric
EQ
Loudspeaker Manager
Delay HPF LPF Inv. Limiter
Output 6
Gain Set
-10/+4
8 Band
Parametric
EQ
Loudspeaker Manager
Delay HPF LPF Inv.Limiter
Output 7
Gain Set
-10/+4
8 Band
Parametric
EQ
Loudspeaker Manager
Delay HPF LPF Inv.Limiter
Output 8
Gain Set
-10/+4
8 Band
Parametric
EQ
Digi Trim
Mic/Line 1
48v
8 Band
Feedback
Fighter
Invert Noise
Gen
British
EQ Comp
Digi Trim
Mic/Line 2
48v
8 Band
Feedback
Fighter
Noise
Gen
British
EQ Comp
Digi Trim
Mic/Line 3
48v
8 Band
Feedback
Fighter
Noise
Gen
British
EQ Comp
Digi Trim
Mic/Line 4
48v
8 Band
Feedback
Fighter
Noise
Gen Comp
Digi Trim
Mic/Line 5
48v
8 Band
Feedback
Fighter
Noise
Gen
British
EQ
Digi Trim
Mic/Line 6
48v
8 Band
Feedback
Fighter
Noise
Gen
British
EQ Comp
Mic/Line 7
48v
8 Band
Feedback
Fighter
Noise
Gen
British
EQ Comp
Noise
Gen
British
EQ Comp
Digi Trim
BGM 1 (9)
Invert Noise
Gen
British
EQ AGC
Digi Trim
BGM 2 (10)
Invert Noise
Gen
British
EQ AGC
Digi Trim
BGM 3 (11)
Invert Noise
Gen
British
EQ AGC
Digi Trim
BGM 4 (12)
Invert Noise
Gen
British
EQ AGC
Digi Trim
Ch.Fader
Mic/
Line
Invert
Mic/
Line
Invert
Mic/
Line
Invert
Mic/
Line
Invert
Mic/
Line
Invert
Mic/
Line
Invert
Mic/
Line
Invert
Mic/
Line
Digi Trim
British
EQ
Comp
Ch.Fader
Ch.Fader
Ch.Fader
Ch.Fader
Ch.Fader
Ch.Fader
Ch.Fader
Ch.Fader
Ch.Fader
Ch.Fader
Ch.Fader
Emergency
Mute Note 1
Note 1 :
Can be controlled via external analog control input.
Paging
Mic
Routing
Room Vol.
Room Vol.
Room Vol.
Room Vol.
Room Vol.
Room Vol.
Room Vol.
Room Vol.
Room
Combining
& BMG
Selection
Auto
Mixing
1
2
3
4
5
6
7
8
1
2
3
4
5
6
7
8
9
10
11
12
1
2
3
4
5
6
7
8
1
2
3
4
5
6
7
8
1
2
3
4
5
6
7
8
9
1
2
3
4
5
6
7
8
1
2
3
4
5
6
7
8
1
2
3
4
5
6
7
8
1
2
3
4
5
6
7
8
Ducker
Side Chain
Ducker
Side Chain
Ducker
Side Chain
Ducker
Side Chain
Ducker
Side Chain
Ducker
Side Chain
Ducker
Side Chain
Ducker
Side Chain
1
ARC
MIC 8
Mute
Mute
Mute
Mute
Mute
Mute
Mute
Mute
Mute
Mute
Mute
Mute
788 Signal Flow

12
Quick Start Guide
6408 216th Street SW |Mountlake Terrace, WA 98043 USA
T+1.425.778.7728 F+1.425.778.7727 |www.SymetrixAudio.com
Page
Station
Mic/Line 8
48v
ARC Audio Input
8 Band
Feedback
Fighter
Loudspeaker Manager
Delay HPF LPF Inv.Limiter
Output 1
Gain Set
-10/+4
8 Band
Parametric
EQ
Loudspeaker Manager
Delay HPF LPF Inv.Limiter
Output 2
Gain Set
-10/+4
8 Band
Parametric
EQ
Loudspeaker Manager
Delay HPF LPF Inv.Limiter
Output 3
Gain Set
-10/+4
8 Band
Parametric
EQ
Loudspeaker Manager
Delay HPF LPF Inv.Limiter
Output 4
Gain Set
-10/+4
8 Band
Parametric
EQ
Loudspeaker Manager
Delay HPF LPF Inv. Limiter
Output 5
Gain Set
-10/+4
8 Band
Parametric
EQ
Loudspeaker Manager
Delay HPF LPF Inv. Limiter
Output 6
Gain Set
-10/+4
8 Band
Parametric
EQ
Loudspeaker Manager
Delay HPF LPF Inv.Limiter
Output 7
Gain Set
-10/+4
8 Band
Parametric
EQ
Loudspeaker Manager
Delay HPF LPF Inv.Limiter
Output 8
Gain Set
-10/+4
8 Band
Parametric
EQ
Digi Trim
Mic/Line 1
48v
8 Band
Feedback
Fighter
Invert Noise
Gen
British
EQ Comp
Digi Trim
Mic/Line 2
48v
8 Band
Feedback
Fighter
Noise
Gen
British
EQ Comp
Digi Trim
Mic/Line 3
48v
8 Band
Feedback
Fighter
Noise
Gen
British
EQ Comp
Digi Trim
Mic/Line 4
48v
8 Band
Feedback
Fighter
Noise
Gen Comp
Digi Trim
Mic/Line 5
48v
8 Band
Feedback
Fighter
Noise
Gen
British
EQ
Digi Trim
Mic/Line 6
48v
8 Band
Feedback
Fighter
Noise
Gen
British
EQ Comp
Mic/Line 7
48v
8 Band
Feedback
Fighter
Noise
Gen
British
EQ Comp
Noise
Gen
British
EQ Comp
Digi Trim
BGM 1 (9)
Invert Noise
Gen
British
EQ AGC
Digi Trim
BGM 2 (10)
Invert Noise
Gen
British
EQ AGC
Digi Trim
BGM 3 (11)
Invert Noise
Gen
British
EQ AGC
Digi Trim
BGM 4 (12)
Invert Noise
Gen
British
EQ AGC
Digi Trim
Ch.Fader
Mic/
Line
Invert
Mic/
Line
Invert
Mic/
Line
Invert
Mic/
Line
Invert
Mic/
Line
Invert
Mic/
Line
Invert
Mic/
Line
Invert
Mic/
Line
Digi Trim
British
EQ
Comp
Ch.Fader
Ch.Fader
Ch.Fader
Ch.Fader
Ch.Fader
Ch.Fader
Ch.Fader
Ch.Fader
Ch.Fader
Ch.Fader
Ch.Fader
Emergency
Mute Note 1
Note 1 :
Can be controlled via external analog control input.
Paging
Mic
Routing
Room Vol.
Room Vol.
Room Vol.
Room Vol.
Room Vol.
Room Vol.
Room Vol.
Room Vol.
Room
Combining
& BMG
Selection
Auto
Mixing
1
2
3
4
5
6
7
8
1
2
3
4
5
6
7
8
9
10
11
12
1
2
3
4
5
6
7
8
1
2
3
4
5
6
7
8
1
2
3
4
5
6
7
8
9
1
2
3
4
5
6
7
8
1
2
3
4
5
6
7
8
1
2
3
4
5
6
7
8
1
2
3
4
5
6
7
8
Ducker
Side Chain
Ducker
Side Chain
Ducker
Side Chain
Ducker
Side Chain
Ducker
Side Chain
Ducker
Side Chain
Ducker
Side Chain
Ducker
Side Chain
1
ARC
MIC 8
Mute
Mute
Mute
Mute
Mute
Mute
Mute
Mute
Mute
Mute
Mute
Mute
788 Signal Flow

13
Integrator Series Room Combine 788
Page
Station
Mic/Line 8
48v
ARC Audio Input
8 Band
Feedback
Fighter
Loudspeaker Manager
Delay HPF LPF Inv.Limiter
Output 1
Gain Set
-10/+4
8 Band
Parametric
EQ
Loudspeaker Manager
Delay HPF LPF Inv.Limiter
Output 2
Gain Set
-10/+4
8 Band
Parametric
EQ
Loudspeaker Manager
Delay HPF LPF Inv.Limiter
Output 3
Gain Set
-10/+4
8 Band
Parametric
EQ
Loudspeaker Manager
Delay HPF LPF Inv.Limiter
Output 4
Gain Set
-10/+4
8 Band
Parametric
EQ
Loudspeaker Manager
Delay HPF LPF Inv. Limiter
Output 5
Gain Set
-10/+4
8 Band
Parametric
EQ
Loudspeaker Manager
Delay HPF LPF Inv. Limiter
Output 6
Gain Set
-10/+4
8 Band
Parametric
EQ
Loudspeaker Manager
Delay HPF LPF Inv.Limiter
Output 7
Gain Set
-10/+4
8 Band
Parametric
EQ
Loudspeaker Manager
Delay HPF LPF Inv.Limiter
Output 8
Gain Set
-10/+4
8 Band
Parametric
EQ
Digi Trim
Mic/Line 1
48v
8 Band
Feedback
Fighter
Invert Noise
Gen
British
EQ Comp
Digi Trim
Mic/Line 2
48v
8 Band
Feedback
Fighter
Noise
Gen
British
EQ Comp
Digi Trim
Mic/Line 3
48v
8 Band
Feedback
Fighter
Noise
Gen
British
EQ Comp
Digi Trim
Mic/Line 4
48v
8 Band
Feedback
Fighter
Noise
Gen Comp
Digi Trim
Mic/Line 5
48v
8 Band
Feedback
Fighter
Noise
Gen
British
EQ
Digi Trim
Mic/Line 6
48v
8 Band
Feedback
Fighter
Noise
Gen
British
EQ Comp
Mic/Line 7
48v
8 Band
Feedback
Fighter
Noise
Gen
British
EQ Comp
Noise
Gen
British
EQ Comp
Digi Trim
BGM 1 (9)
Invert Noise
Gen
British
EQ AGC
Digi Trim
BGM 2 (10)
Invert Noise
Gen
British
EQ AGC
Digi Trim
BGM 3 (11)
Invert Noise
Gen
British
EQ AGC
Digi Trim
BGM 4 (12)
Invert Noise
Gen
British
EQ AGC
Digi Trim
Ch.Fader
Mic/
Line
Invert
Mic/
Line
Invert
Mic/
Line
Invert
Mic/
Line
Invert
Mic/
Line
Invert
Mic/
Line
Invert
Mic/
Line
Invert
Mic/
Line
Digi Trim
British
EQ
Comp
Ch.Fader
Ch.Fader
Ch.Fader
Ch.Fader
Ch.Fader
Ch.Fader
Ch.Fader
Ch.Fader
Ch.Fader
Ch.Fader
Ch.Fader
Emergency
Mute Note 1
Note 1 :
Can be controlled via external analog control input.
Paging
Mic
Routing
Room Vol.
Room Vol.
Room Vol.
Room Vol.
Room Vol.
Room Vol.
Room Vol.
Room Vol.
Room
Combining
& BMG
Selection
Auto
Mixing
1
2
3
4
5
6
7
8
1
2
3
4
5
6
7
8
9
10
11
12
1
2
3
4
5
6
7
8
1
2
3
4
5
6
7
8
1
2
3
4
5
6
7
8
9
1
2
3
4
5
6
7
8
1
2
3
4
5
6
7
8
1
2
3
4
5
6
7
8
1
2
3
4
5
6
7
8
Ducker
Side Chain
Ducker
Side Chain
Ducker
Side Chain
Ducker
Side Chain
Ducker
Side Chain
Ducker
Side Chain
Ducker
Side Chain
Ducker
Side Chain
1
ARC
MIC 8
Mute
Mute
Mute
Mute
Mute
Mute
Mute
Mute
Mute
Mute
Mute
Mute
788 Signal Flow

14
Quick Start Guide
6408 216th Street SW |Mountlake Terrace, WA 98043 USA
T+1.425.778.7728 F+1.425.778.7727 |www.SymetrixAudio.com

15
Integrator Series Room Combine 788
XLR Male Plug [balanced]
Pin 2
Pin 3
Pin 1
Pin 2 = (+) Plus
Pin 3 = (–) Minus
Pin 1 = Ground
XLR Female Plug [balanced]
Pin 2 = (+) Plus
Pin 3 = (–) Minus
Pin 1 = Ground
Pin 2
Pin 3
Pin 1
Terminal Strip [balanced] TRS 1/4" Plug [balanced]
Tip = (+) Plus
Ring = (–) Minus
Sleeve = Ground
Euroblock [balanced]
NOTE: Detachable Euroblock
and Terminal Strip connectors
are designed for use with bare
wire. Do not tin stranded wires
before inserting them into the
connectors.
Special Case: Female XLR
connectors will
ALWAYS be used coming
from the OUTPUT of a
device.
Male connecters plug into
the INPUT of a device.
Balanced Connections
Any of these connectors can appear on either side of
a balanced connection.
NOTE:InthecaseofanXLRconnector,theFemaleattaches
toanoutput,whiletheMaleattachestoaninput.
Unbalanced Connections
The RCA connector and the 1/4” TS connector are unbalanced connectors, wired with a single strand shielded wire and can
be placed on either end of an unbalanced connection
TS 1/4" Plug [unbalanced]
Tip = (+) Plus
Sleeve = (-) Minus and Ground
RCA Plug [unbalanced]
Sleeve = (-) Minus and Ground
Tip = (+) Plus
1
!
IMPORTANT NOTICE 1
!
The wiring diagrams on these pages are included for
information purposes only.
Symetrix can not anticipate every connector type on
non-Symetrix products. It is the user’s responsibility
to determine what connection is needed.
In addition, Symetrix accepts no responsibility for
injury or damage caused by user created wiring.
Wiring Reference

16
Quick Start Guide
6408 216th Street SW |Mountlake Terrace, WA 98043 USA
T+1.425.778.7728 F+1.425.778.7727 |www.SymetrixAudio.com
Unbalanced Connections:
Unbalanced out to balanced in
The RCA connector and the 1/4” TS connector are
unbalanced connectors. However, the wiring differs
depending on if they are sending to, or receiving from a
balanced connector.
In this example, the unbalanced connector is sending signal
to a balanced connector. When wiring this connection,
use a shielded twisted pair cable. The balanced side wires
the same as a standard, balanced connection. On the
unbalanced side, you wire the white (minus) wire together
with the ground. This provides some common mode
rejection at the balanced input.
Unbalanced Connections:
Balanced out to unbalanced in
When your output requires a balanced connector, but you
are sending signal to an unbalanced input, the rules change.
Use a single strand shielded wire. Wire only to the plus and
ground terminals of what would typically be the balanced
connector.
XLR Male Plug [balanced]
TS 1/4" Plug [unbalanced out to balanced in]
TRS 1/4" Plug [balanced]
Euroblock [balanced]
Tip = (+) Plus
Sleeve = (-) Minus and Ground
RCA Plug [unbalanced out to balanced in]
Sleeve = (-) Minus and Ground
Tip = (+) Plus
Terminal Strip [balanced]
TS 1/4" Plug [balanced out to unbalanced in]
Tip = (+) Plus
Sleeve = Ground
RCA Plug [balanced out to unbalanced in]
Sleeve = Ground
Tip = (+) Plus
Euroblock [unbalanced] Terminal Strip [unbalanced]
XLR Female Plug [unbalanced]
Pin 2 = (+) Plus
Pin 3 = Unused
Pin 1 = Ground
Pin 2
Pin 3
Pin 1
TRS 1/4" Plug [balanced] Tip = (+) Plus
Ring = Unused
Sleeve = Ground
Wiring Reference

17
Integrator Series Room Combine 788
Network Configuration
TThe 788 is setup and controlled by a host computer via
Ethernet. This requires the host computer to be connected
to the 788 directly via a standard CAT5 Ethernet cable,
indirectly via an Ethernet switch, or via an existing Ethernet
network.
The primary difference between the three methods of
connection is that in the first two, the 788 software
application assumes there is no DHCP server or other
network infrastructure in place. It assumes the 788 is using
a self-generated IP address and adjusts its connection steps
appropriately. In the third method, it is assumed that a DHCP
server and/or router with DHCP server are already present
on the existing network so the 788 may already have
obtained an IP address. Consult your network administrator
if in doubt.
General Notes
1. The 788 boots up with DHCP enabled by default. This
means that as soon as you connect it to a network, it will
look for a DHCP server in order to obtain an IP address. If
a DHCP server is present, the 788 will get its IP address
from it. This process may take several minutes. With your
PC attached to the same network and thus getting its IP
address from the same DHCP server, all will be ready to
go.
2. If your network does not have a DHCP server, the 788
will not be able to obtain an IP address. While waiting,
the 788 will default to a private IP address in the range
of 169.254.x.x where x.x is the last four alphanumeric
charactersofthe788’sMACaddress.The788’sMAC
address can be found on a sticker on the bottom of the
788 or within the front panel System menu. When there is
no DHCP server present to assign IP addresses to either
the 788 or your PC, you may need to configure your PC
with a static IP in the range of 169.254.x.x with a Subnet
Maskof255.255.0.0inordertocommunicatewiththe
788 in a direct connect mode. However, if your PC is
using the default network settings, it should also have
automatically self-assigned a similar private IP address
in the range of 169.254.x.x, and if this is the case, you
should be able to connect to the 788 directly. Even if the
PC’s default settings have been changed, the 788 will try
to establish communications by setting up appropriate
routing table entries to reach devices with 169.254.x.x
addresses.
3. In the case of the first two methods (direct connection
and indirect connection), the 788 software will attempt
to set-up appropriate routing table entries for a seamless
connection regardless of the IP addresses of your PC
and 788. However, under Windows® Vista, administrative
privileges are required to allow the 788 software to
modify the routing table. For best results, launch the 788
software while logged in as an administrator, or choose
to run the software as an administrator. Note: To run
a program as the Administrator under Vista, right click
on the program’s icon or shortcut and choose “Run as
administrator”.
4. The 788 will display its current IP address, subnet
mask, and gateway as well as other useful information
onthefrontpaneldisplaywheninSystemMode.To
enterSystemMode,holddowntheMenubuttonfor5
seconds. Then the up and down arrow keys can be used
to move between various displays. This information may
be useful for troubleshooting.
Network configuration of the 788:
Connecting to the 788 from a host computer on the
same LAN
Boththe788andthehostcomputerrequirethefollowing
3 items:
1. IP Address - The unique address of a node on a network.
2.SubnetMask-CongurationthatdeneswhichIP
Addresses are included in a particular subnet.
3. Default Gateway (optional) - The IP address of a device
that routes traffic from one subnet to another. (This is only
needed when the PC and 788 are on different subnets).
If you are putting the 788 on an existing network, a network
administrator will be able to provide the above information or
it may have been provided automatically by a DHCP server.
For security reasons, it is not recommended to put the 788
directly on the Internet. If you do, a network administrator
or your Internet Service Provider can provide the above
information.
788Networking

18
Quick Start Guide
6408 216th Street SW |Mountlake Terrace, WA 98043 USA
T+1.425.778.7728 F+1.425.778.7727 |www.SymetrixAudio.com
If you are on your own private network, directly or indirectly
connected to the 788, you may allow the 788 to choose
an automatic IP address or you may choose to to assign it
a static IP address. If you are building your own separate
network with static assigned addresses, you may consider
using an IP Address from one of the ”Private-Use” networks
noted in RFC-1918:
1. 172.16.0.0/12 = IP Addresses 172.16.0.1 through
172.31.254.254andaSubnetMaskof255.240.0.0
2. 192.168.0.0/16 = IP Addresses 192.168.0.1 through
192.168.254.254andaSubnetMaskof255.255.0.0
3. 10.0.0.0/8 = IP Addresses 10.0.0.1 through
10.254.254.254andaSubnetMaskof255.255.0.0
Connecting to the 788 through a Firewall/VPN
We have successfully tested control of a 788 through a
rewallandVPN,butareunabletoguaranteeperformance
of these types of connections at this time. Configuration
instructionsarespecictoeachrewallandVPN,
so specifics are not available. Additionally, wireless
communications are also not guaranteed, though have also
been successfully tested.
Configuring your computer for a network
connection: Windows®XP
1. Select “Start->Control Panel”.
2.Openthe“NetworkConnections”ControlPanel.
3.Rightclickonyour“LocalAreaConnection”andselect
””Properties”.
4. Under “This connection uses the following items”, select
“Internet Protocol (TCP/IP)” and press “Properties”.
788Networking
Router/Firewall
IP: 10.0.0.1
Switch
Host Computer & PC LAN
IP: 10.0.0.3
SM: 255.255.0.0
GW: 10.0.0.1
Room Combine 788
IP: 10.0.0.2
SM: 255.255.0.0
GW: 10.0.0.1
Ethernet
Ethernet
to Internet

19
Integrator Series Room Combine 788
5. On the “General” tab, you may select “Use the following
IP address” to enter in the appropriate information if using
staticassignedaddresses.(DNSserverisnotrequiredfor
connection to a 788). Otherwise, leave set to “Obtain an
IP address automatically” if using DHCP.
6.PressOKtosaveand“Close”toexitoutofthe“Local
Area Connection Properties”.
Configuring your computer for a network
connection: Windows®Vista
1. Select “Start->Control Panel”.
2.Select“NetworkandInternet”.
3.Openthe“NetworkandSharingCenter”.
4.Choose“Managenetworkconnections”ontheleft.
5. Right-click the desired connection and choose
“Properties”.
788Networking

20
Quick Start Guide
6408 216th Street SW |Mountlake Terrace, WA 98043 USA
T+1.425.778.7728 F+1.425.778.7727 |www.SymetrixAudio.com
6.
Under “This connection uses the following items”, select
“Internet Protocol Version 4 (TCP/IPv4)” and press
“Properties”.
7. On the “General” tab, you may select “Use the following
IPv4 address” to enter in the appropriate information
ifusingstaticassignedaddresses.(DNSserverisnot
required for connection to a 788). Otherwise, leave set
to “Obtain an IPv4 address automatically” if using DHCP.
Press OK to close.
8. Repeat steps 6 and 7 for “Internet Protocol Version 6
(TCP/IPv6)” if on an IPv6 network. Consult your IT staff if
you are unsure.
9.PressOKtosaveand“Close”toexitoutofthe“Local
Area Connection Properties”.
For more information about configuring the host computer,
visit http://www.microsoft.com.
Note: Typically, only Admins or users belonging to the
NetworkCongurationOperatorsgroupcanalternetworking
configurations in Windows Vista.
Once you have completed the setup of your network and
any network hardware/interfaces, you may install the 788
software or launch the software if you have already installed
it, then run the Connection Wizard.
788Networking
Table of contents
Other Symetrix Recording Equipment manuals

Symetrix
Symetrix 6100 User manual

Symetrix
Symetrix 528 User manual

Symetrix
Symetrix 402 User manual

Symetrix
Symetrix 610 User manual

Symetrix
Symetrix 308 User manual

Symetrix
Symetrix SX208 User manual

Symetrix
Symetrix Prism 8x8 User manual

Symetrix
Symetrix SymNet Express 8x8 User manual

Symetrix
Symetrix 422 User manual

Symetrix
Symetrix SymNet Audio Matrix ARC-PS User manual