manuals.online logo
Brands
  1. Home
  2. •
  3. Brands
  4. •
  5. Symmons
  6. •
  7. Plumbing Product
  8. •
  9. Symmons SLS-5512 Series User manual

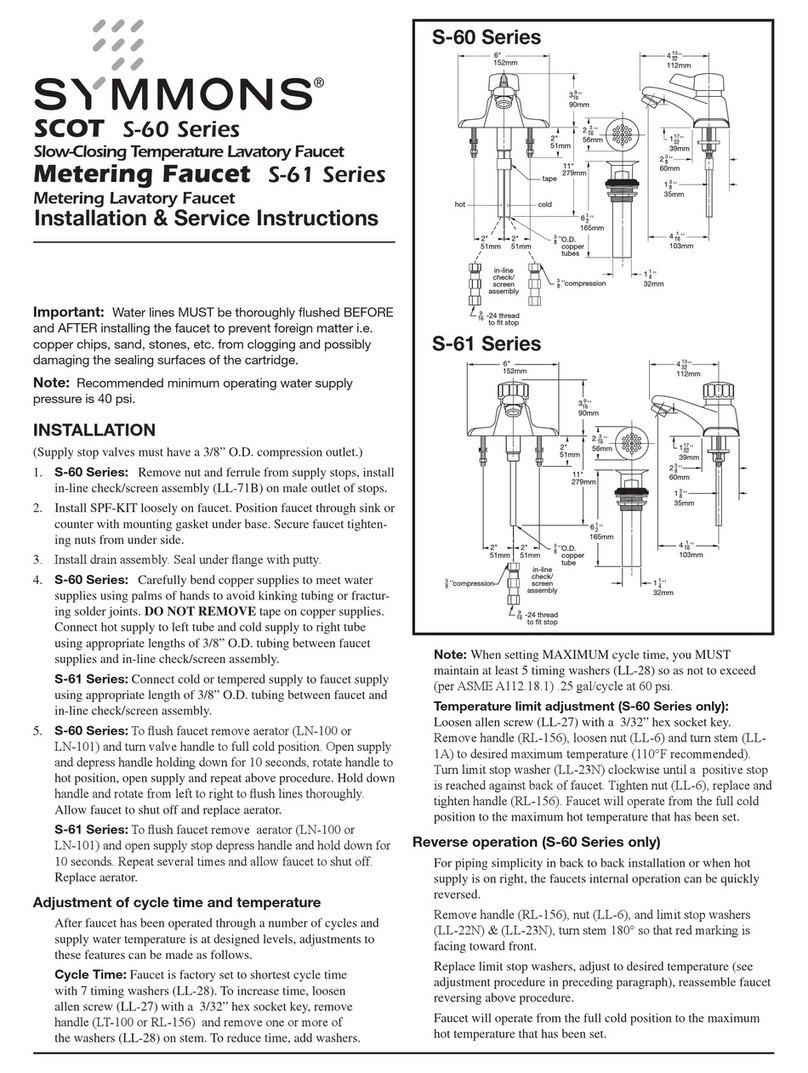
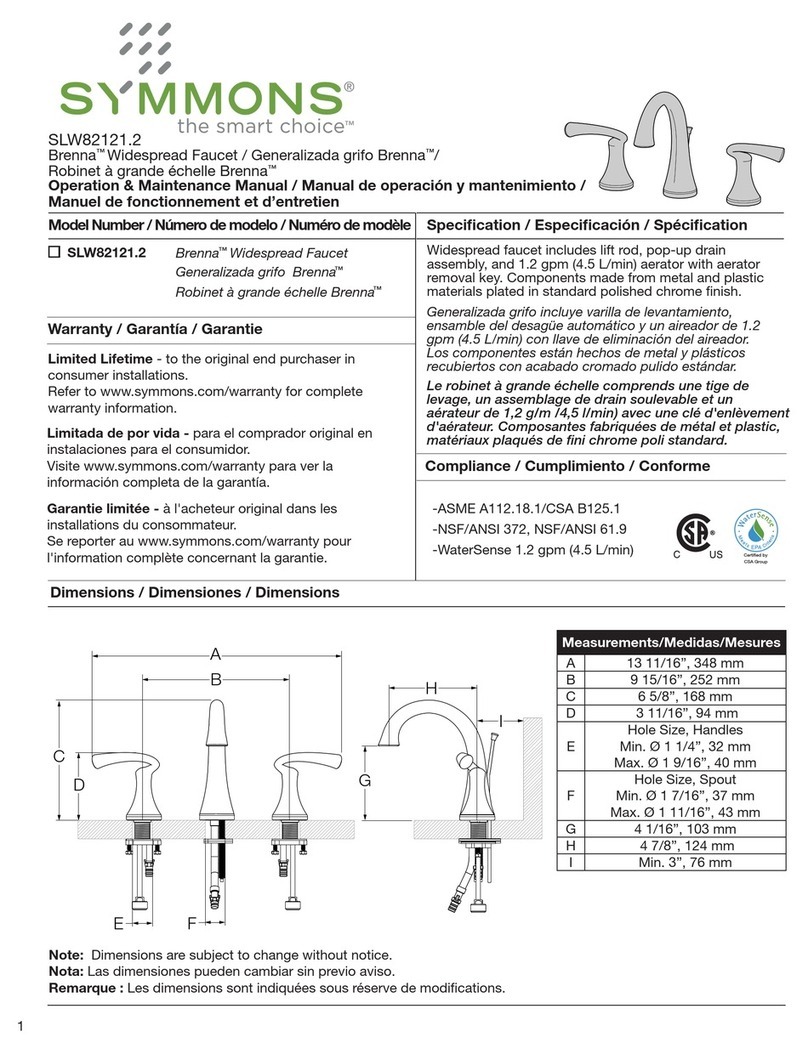
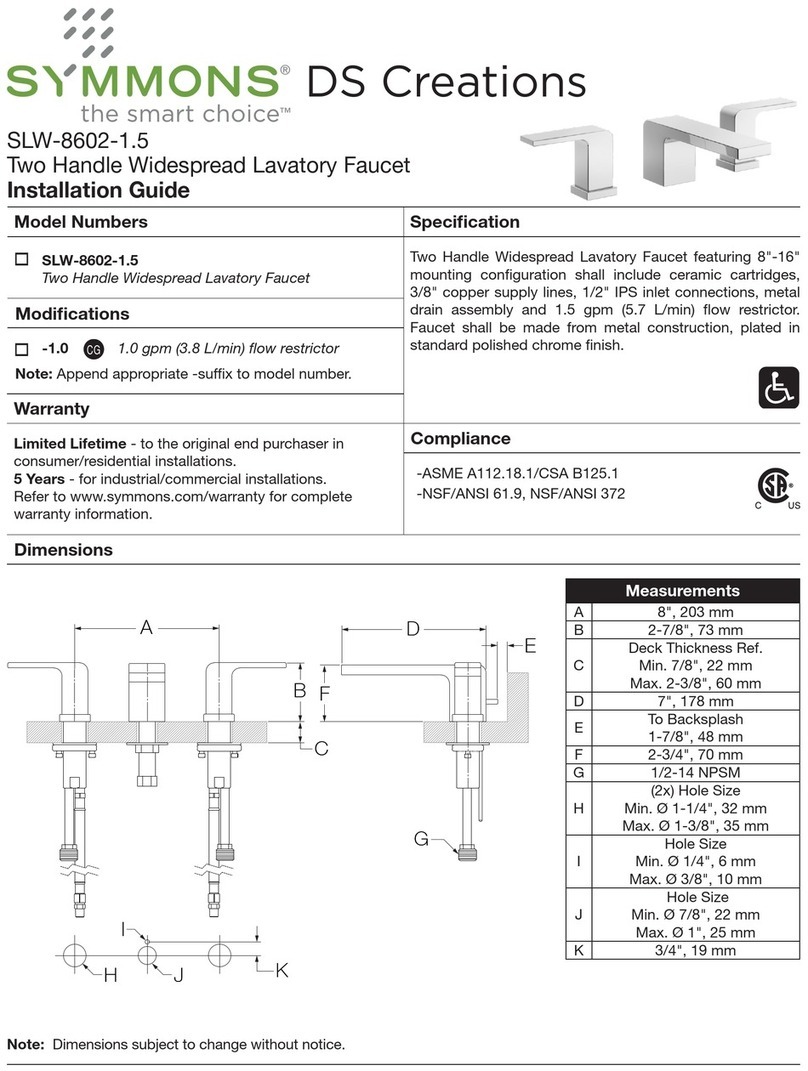
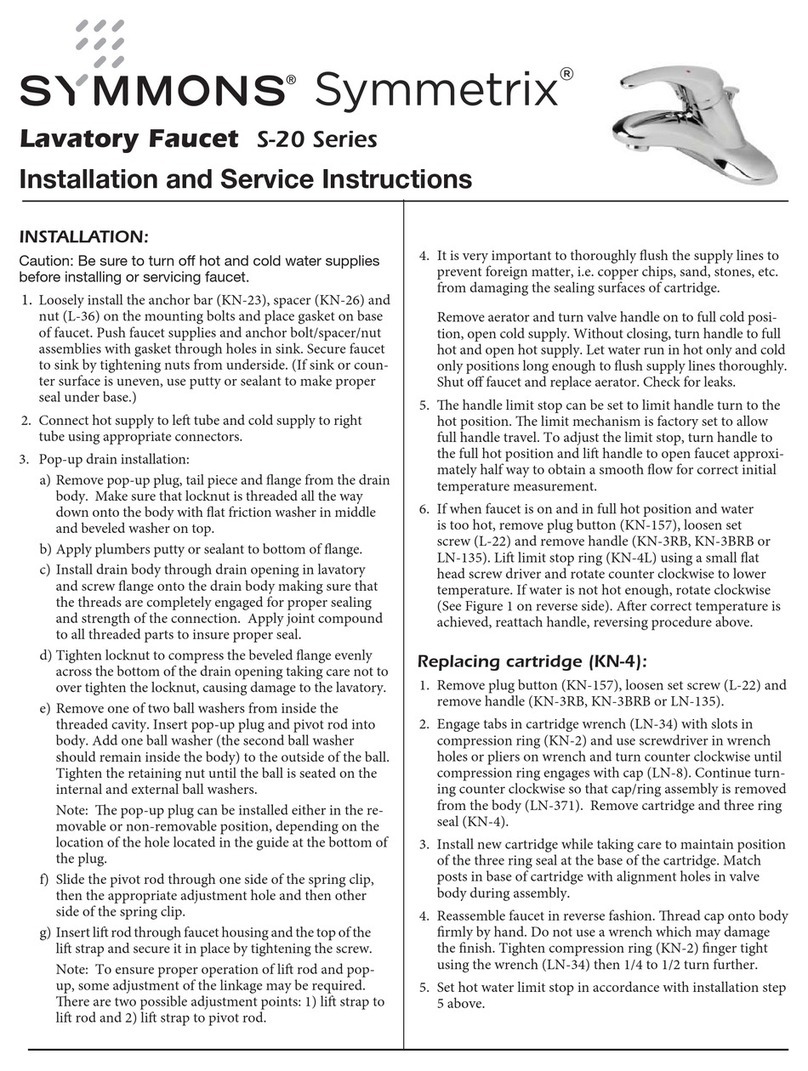
Symmons SLS-5512 Series User manual

1
You may need/Usted puede necesitar/
Aticles dont vous pouvez avoir besion
CAUTION-TIPS FOR REMOVAL
OF OLD FAUCET:
Always turn off water supply before
removing existing faucet or replacing any
part of the faucet. Open the faucet handle
to relieve water pressure and ensure that
water is completely shut off.
CARE INSTRUCTIONS:
To preserve the finish of your faucet, apply
non-abrasive wax. Any cleaners should be
rinsed off immediately. Do not use abrasive
cleaners on the faucet.
PRECAUCIÓN-CONSEJOS PARA
CAMBIAR LA LLAVE MEZCLADORA.
Siempre CIERRE la toma de agua antes
de quitar la llave existente o desmontar la
válavula. Abra la llave para liberar la presión,
yasegúrese de que esté bien cerrada
el agua.
INSTRUCCIONES DE CUIDADO
Para conservar el acabado que cubre
las partes metálicas de su llave mezcladora,
aplique cera que no sea abrasive,como una
cera para autos. Si usa algún tipo de
limpiador,deberá enjuagarlo inmediatamente.
Los abrasivos suaves son aceptables en
acabados platinum y LifeShine.
ATTENTION-SUGGESTIONS POUR
ENLEVER L'ANCIEN ROBIENT:
Toujours couper l'alimentation en
eau avant d'enlever ou de démonter
le robinet.Ouvrir le robinet pour libérer
la pression d'eau et pour s'assurer que
l'alimentation en eau a bien t coup e.
DIRECTIVES D'ENTRETINE
Pour pr server le fini des pièces
m talliques du robinet,appliquer une
cire non abrasive comme une cire à
votiure.Rincer imm diatement le robinet
apr s l'avoir nettoy avec un agent
nettoyant. Les finis platinum et LifeShine
peuvent être nettoy s à l'aide de produits
abrasifs doux.
English Español Français
HELP LINE
Si necesita ayuda para la instalación,
piezas de repuesto o tiene alguna
pregunta relacionada con nuestra
garatía,por favor llame a nuestros
asesores de producto al:
(800)796-6667,(781)848-2250
LĺNEA DE AYUDA Pour obtenir de l'aide pour l'installation,
le replacement de pièces ou pour toute
question concemant notre garantie,
appeler un de nos spécialistes
des produits:
(800)796-6667,(781)848-2250
SERVICE À LA CLIENTÈLE
Document #ZV-1066
Rev:E
Need Help?
Symmons customer service:
(800) 796-6667, (781) 848-2250
customerserv[email protected]
Mon - Fri 7:30 am - 7:00 pm EST
www.symmons.com/service for
Technical help, product information,
and warranty policy
Model SLS-5512 Serie
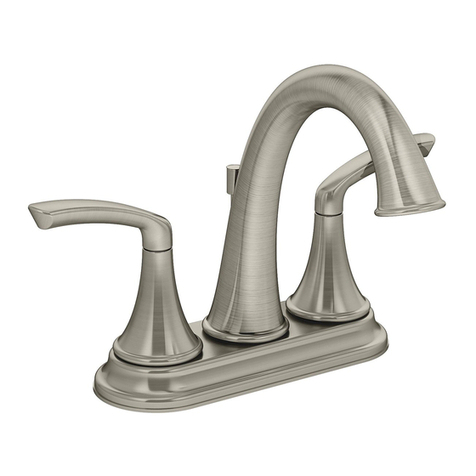
SINGLE HANDLE LAVATORY FAUCET
Model SLS-5512 Series
MEZCLADORA MONOMANDO PARA LAVABO
ROBINET DE LAVABO À POIGN ÉE UNIQUE
Model SLS-5512 Série
Model SLS-5510 Series
Model SLS-5510 Serie
Model SLS-5510 Série
Wrench
Llave
Clé ajustable
Goggles
Anteojos Protectores
Lunettes de sécurité
(2) 1/2 in Supply Lines
2 Líneas de Suministro
(2) Tuyaux d'alimentation
Sealant Tape
Cinta Selladora
Ruban d'étanchéité
Basin Wrench
Llave para Instalar Grifos
Clé pour lavabo
Plumber's Putty
Masilla para Tuberías
Mastic de plombier
Allen Wrench 3/32"
Llave Allen 3/32"
Clé Allen 3/32 po
é é é
é
é
é
é é
é
2
12
Make connections to water lines. When waterway is copper tube
water inlet assy,use 1/2" IPS faucet connections (1)or use the supplied
coupling nuts (3) with 3/8"O.D.ball-nose risers (2).When waterway is
stainless steel braided hose water inlet assy, first use 9/16'' and 1/2''
connections(4) to connect the hose,use 1/2" IPS faucetconnections (1)
or use the supplied coupling nuts (3) with 3/8"O.D.ball-noserisers (2).
Use wrenches to tighten connections. Donotovertighten.
Reliez le robinet aux conduites d'eau à l'aide de raccords de 1/2 po
IPS (1) ou des crous de raccord (3) fournis et de colonnes montantes
bout sphérique d'un diamètre extérieur de 3/8 po (2). Serrez les
raccords à l'aide d'une clé. Ne serrez pas excessivement.
Haga las conexiones de las líneas de suministro de agua.Use
conexiones para grifo IPS de 1/2'' (1) o las tuercas de acoplamiento
suministradas (3) con elevadores de punta redondeada de 3/8" de
diámetro exterior (2). Utilice llaves para apretar las conexiones. No
apriete demasiado.
1
2
3
Shut off water supplies. Screw metal thread rods upwards into body
of faucet. Use cross-slots in body of faucet for screw driver. Place new
faucet through holes in top of sink. From under sink slide washers
onto threaded. Secure with washers and nuts .
Corte el suministro de agua. Atornille las barras metálicas roscadas
en el cuerpo del grifo. Utilice un destornillador en forma de cruz para
el cuerpo del grifo. Coloque el grifo nuevo a través de los orificios en
la parte superior del lavabo. Desde la parte inferior, deslice las
arandelas hacia las barras roscadas. Asegure con arandelas y
tuercas .
Coupez l'alimentation en eau. Vissez verticalement les tiges filetées
en métal dans le corps du robinet. Utilisez un tournevis cruciforme
dans le corps du robinet. Insérez le nouveau robinet dans les trous
prévus à cet effet sur le dessus du lavabo. Sous le lavabo, glissez les
rondelles sur les tiges filetées et fixez-les à l'aide de rondelles et
d'écrous .
Document #ZV-1066
Rev:E
34
Instale el Ensamble de Desagüe Automático. Quite el tapón (1), y la
brida (2). Atornille la tuerca (3) completamente haciaabajo.Empuje
el empaque (4) hacia abajo.
Install Pop-up Assembly. Remove tailpipe(5), apply teflon tape to threads at
the top of tailpipe(5),secure tailpipe to the body.Thenremovestopper(1)
and flange (2) . Screw nut (3) all the way down. Pushgasket (4) down.
Installez le renvoi mécanique. Enlevez la bonde(1)et la collerette
(2). Vissez l' crou (3) à fond. Faites glisser le joint (4) vers le bas.
gasket
4
3
4
2
1
55
3
4
2
1
Apply plumber putty to the underside of flange (1). Insert body (2) into
sink. Screw flange onto body. Pivot hole (3) must face the back of the
sink. Tighten nut/gasket (4), do not over tighten.
Aplique masilla para tuberías en el lado inferior del reborde (1). Insert
el cuerpo (2) en el lavabo. Atornille el reborde en el cuerpo. El orificio
del pivote (3) debe mirar hacia
Appliquez le mastic de plombier sur le dessous de la bride (1).
Insérez le corps (2) dans l’évier. Fixez la bride au corps. Le trou du
pivot (3) doit être orienté vers l’arrièr.
é
é
à
3
7
56
Remove pivot nut (1). Install horizontal rod (2) and stopper (3) as
removable (4) or non-removable (5). Hand tighten pivot nut(1).
Attach horizontal rod to strap (6) using clip (7).
Enlevez l'écrou de pivot (1). Installez la tige horizontale (2) et la
bonde (3) pour qu'elle soit amovible (4) ou non amovible (5). Serrez
l'écrou de pivot à la main. Fixez la tige horizontale au
feuillard (6) à l'aide de l'agrafe (7).
Quite la tuerca del pivote (1). Instale la barra horizontal (2) y el
tapón (3) como desmontable (4)o fijo (5). Apriete a mano la
tuerca del pivote. Una la barra horizontal (1)a la barra chata (6)
utilizando el gancho (7).
Introduisez la tirette (1) dans le robinet et le feuillard (2). Serrez la vis
Introduzca la barre de alzar (1) a través de la llave y dentro en la
barra chata (2). Apriete el tornillo (3).
Insert lift rod (1) through faucet and into strap (2). Tighten screw (3).
Importante: Una vez que termine la instalación,quite el aireador. Abra
el suministro de agua y deje correr agua fría y caliente durante al
menos un minuto cada una. Mientras el agua corre, controle que no
haya pérdidas. Reemplace el aireador.
Important: Une fois l'installation terminée, enlevez l'aérateur. Ouvrez
l'alimentation d'eau et laissez couler l'eau chaude et l'eau froide au
moins une minute chacune. Pendant que l'eau coule, vérifiez s'il y a
des fuites. Reposez l'aérateur.
Important: After installation is completed, remove aerator. Turn on
water supply and allow both hot and cold water to run for at least one
minute each. While water is running, check for leaks. Replace aerator.
Document #ZV-1066
Rev:E
13
2
3
7
2
1
6
5
4
(3).
4
Maintenance:
If faucet leaks underneath handle or Water does not completely shut off: Replace
cartridge.
Entretien :
S'il y a une fuite sous la poign ée ou si le robinet ne se ferme pas compl ètement:
Remplacez la cartouche.
Mantenimiento :
Si hay una filtración debajo de la llave o el Agua no se corta por completo:
Reemplace el cartucho.
Document #ZV-1066
Rev:E
5
* Specify Finish (-STN, -SBZ)
Especifíque el Acabado (-STN, -SBZ)
Précisez le Fini (-STN, -SBZ)
Document #ZV-1066
Rev:E
RL-044* Lift Rod
RL-154LR*
Pop-up Drain
Less Rod
Model SLS-5512-BH Series
SLS-5510-BH Series
Model SLS-5512 Series
LN-
F
F
LN-01934* Optional 4” Deck Plate includes Mounting Hardware
RL-041* Handle
RL-042 Cartridge
RL-040A
Mounting Hardware
333-KIT
LR-102-1.5-KIT
LR-102-0.5
(2.2 gpm)
(1.5 gpm)
(0.5 gpm)
Aerator and Wrench
Aerator and Wrench
Aerator and Wrench
RL-007 Braided Hoses

This manual suits for next models

1

Other Symmons Plumbing Product manuals
Symmons S-71 Series User manual

Symmons

Symmons S-71 Series User manual

Symmons S-4700-TRM Manual

Symmons

Symmons S-4700-TRM Manual

Symmons Duro 361SH Manual

Symmons

Symmons Duro 361SH Manual

Symmons Symmetrix SLS-2012 Series Reference guide

Symmons

Symmons Symmetrix SLS-2012 Series Reference guide

Symmons Symmetrix S-20 Series Quick guide

Symmons

Symmons Symmetrix S-20 Series Quick guide

Symmons TA-10-EXT-KIT-RP User manual

Symmons

Symmons TA-10-EXT-KIT-RP User manual

Symmons Allura S-4701-TRM Manual

Symmons

Symmons Allura S-4701-TRM Manual

Symmons Identity Trim Series Installation instructions

Symmons

Symmons Identity Trim Series Installation instructions

Symmons Dia SK3510PD Manual

Symmons

Symmons Dia SK3510PD Manual

Symmons Elm S-5504-TRM Manual

Symmons

Symmons Elm S-5504-TRM Manual

Symmons identity 6700 Manual

Symmons

Symmons identity 6700 Manual

Symmons Allura SRT-4770 Quick guide

Symmons

Symmons Allura SRT-4770 Quick guide

Symmons Origins S-9601P-RP Manual

Symmons

Symmons Origins S-9601P-RP Manual

Symmons Allura S-244-2-LAM-RP Quick guide

Symmons

Symmons Allura S-244-2-LAM-RP Quick guide

Symmons Identity SLC6712PP Manual

Symmons

Symmons Identity SLC6712PP Manual

Symmons Symmetrix S-249 Series Quick guide

Symmons

Symmons Symmetrix S-249 Series Quick guide

Symmons Naru 413RH Manual

Symmons

Symmons Naru 413RH Manual

Symmons P-26 User manual

Symmons

Symmons P-26 User manual

Symmons SCOT S-60 Series Installation and maintenance instructions
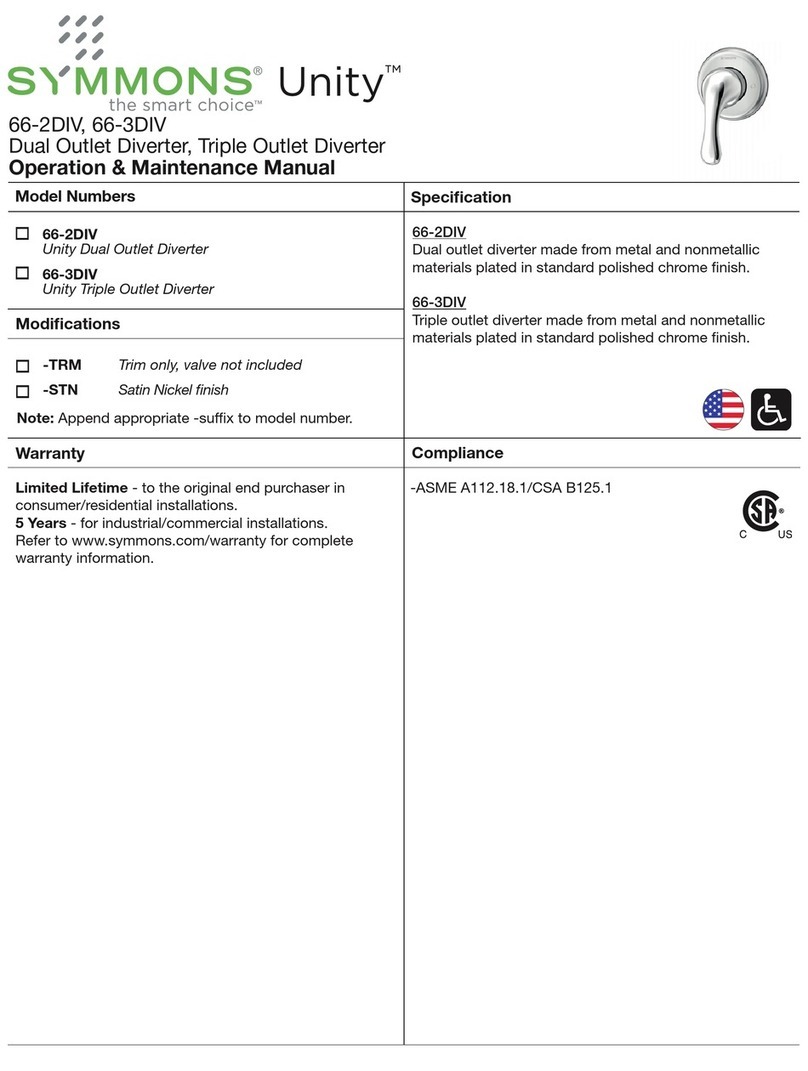
Symmons

Symmons SCOT S-60 Series Installation and maintenance instructions

Symmons Duro Trim Series Installation instructions

Symmons

Symmons Duro Trim Series Installation instructions

Symmons Origins Trim Series Installation instructions

Symmons

Symmons Origins Trim Series Installation instructions

Symmons 0142-06-L/HDHSB-SS-TRM User manual

Symmons

Symmons 0142-06-L/HDHSB-SS-TRM User manual

Symmons Origins 96-2DIV-PLR Manual

Symmons

Symmons Origins 96-2DIV-PLR Manual

Symmons Origins SK248 Series Manual

Symmons

Symmons Origins SK248 Series Manual

Popular Plumbing Product manuals by other brands

BELLOSTA revivre 654111 quick start guide

BELLOSTA

BELLOSTA revivre 654111 quick start guide

Franke ACXT2001 Installation and operating instructions

Franke

Franke ACXT2001 Installation and operating instructions

Conel FLOW CUT BOX Installation and operation instruction

Conel

Conel FLOW CUT BOX Installation and operation instruction

Triton DENE CONCENTRIC Mini Mixer Installation and operating instructions

Triton

Triton DENE CONCENTRIC Mini Mixer Installation and operating instructions

KWC DIVO-ARCO 10.041.991 Specifications

KWC

KWC DIVO-ARCO 10.041.991 Specifications

BELLOSTA vogue light 3705/1 Installation instruction

BELLOSTA

BELLOSTA vogue light 3705/1 Installation instruction

Hans Grohe Axor Citterio 39927 1 Series Installation instructions / warranty

Hans Grohe

Hans Grohe Axor Citterio 39927 1 Series Installation instructions / warranty

Zenith FlushMaster Solo 42214 Installation and maintenance instructions

Zenith

Zenith FlushMaster Solo 42214 Installation and maintenance instructions

Stylish ST-03 installation guide

Stylish

Stylish ST-03 installation guide

Dundalk LeisureCraft Cedar Barrel Sauna Assembly instructions

Dundalk LeisureCraft

Dundalk LeisureCraft Cedar Barrel Sauna Assembly instructions

Hans Grohe RainSelect 15384 Series Instructions for use/assembly instructions

Hans Grohe

Hans Grohe RainSelect 15384 Series Instructions for use/assembly instructions

KWC DOMO 10.061.144.000 Specification sheet

KWC

KWC DOMO 10.061.144.000 Specification sheet

Black & Decker Price Pfister 15-HF manual

Black & Decker

Black & Decker Price Pfister 15-HF manual

Hans Grohe Shower Select 15765007 Instructions for use/assembly instructions

Hans Grohe

Hans Grohe Shower Select 15765007 Instructions for use/assembly instructions

Axor 10211XX1 Specification sheet

Axor

Axor 10211XX1 Specification sheet

Hans Grohe iBoxPlug 1D-D40 25022180 Instructions for use/assembly instructions

Hans Grohe

Hans Grohe iBoxPlug 1D-D40 25022180 Instructions for use/assembly instructions

CRISTINA CRICS703 installation instructions

CRISTINA

CRISTINA CRICS703 installation instructions

Pfister Solita F-049-SO Quick installation guide

Pfister

Pfister Solita F-049-SO Quick installation guide

manuals.online logo
manuals.online logoBrands
  • About & Mission
  • Contact us
  • Privacy Policy
  • Terms and Conditions

Copyright 2025 Manuals.Online. All Rights Reserved.