manuals.online logo
Brands
  1. Home
  2. •
  3. Brands
  4. •
  5. System Build
  6. •
  7. Indoor Furnishing
  8. •
  9. System Build 9643015EBLP User manual

System Build 9643015EBLP User manual

WARNING ADVERTENCIA
Unit can tip over causing severe injury
or death.
Anchor unit to stud or wall.
DO NOT allow children to climb on unit.
Put heavy items on lower shelves or drawers.
Read and follow all assembly instructions.
Este mueble puede caerse por encima
causando daño serio o la muerte
Anolar el mueble a un espárrago muro.
NO dejar que los niños suben por encima del mueble.
Poner los articulos mas pesados en los tableros o cajones inferiores.
Leer y sequir todos de los instucciones para el montaje.
STOP
ALTO
DO NOT RETURN PRODUCT TO THE STORE
NO REGRESAS ESTA PRODUCTO A LA TIENDA
Individual stores do not stock parts.
Las tiendas no tiene partes.
If a part is missing or damaged, please visit our website or call our toll-free customer
service line. We will gladly ship your replacement parts FREE of charge.
Si las partes están perdidas o dañadas Por favor visite nuestra página de Internet o
llame a nuestra línea de teléfono gratis de Servicio al Cliente. Nosotros le enviaremos
sus repuestos sin cargo adicional, serán totalmente gratis.
Need Parts or
Assistance?
Nesacitas partes o
Asistancia?
WWW.SYSTEMBUILD.COM/PARTS
or call toll free:
o llame a nuestra línea gratis: 1-866-452-4081
For prompt, reliable service; please have your assembly manual ready.
Para servicio mas rapido y reliable por favor tenga esta manual listo.
-KEEP FOR REFERENCE- -GUARDAR PARA REFERENCIA-
B349643015EBLP
4
9643015EBLP
Please Recycle
Recicle Por Favor
Assembly will require 2 people.
La Asamblea requerirá 2 personas.
Date of Purchase ___ / ___ / ___
Lot Number:
This instruction booklet contains IMPORTANT safety
information. Please read and keep for future
reference.
B349643015EBLP
4
3 /16
www.systembuild.com
PARTS - PIEZAS
Parts List
DESCRIPTION
PART NUMBER
QTY
ITEM
LEFT UPPER PANEL / PANEL IZQUIERDO
SUPERIOR
396430150111A
RIGHT UPPER PANEL / PANEL DERECHO
SUPERIOR
396430150211B
LEFT LOWER PANEL / PANEL IZQUIERDO
INFERIOR
396430150311C
RIGHT LOWER PANEL / PANEL DERECHO
INFERIOR
396430150411D
PARTITION / PARTICIÓN
396430150502
E
TOP / CIME
396430150601F
FIXED SHELF / ESTANTE FIJO
396430150701
G
LOWER SHELF / ESTANTE INFERIOR396430150802
H
ADJUSTABLE SHELF / ESTANTE AJUSTABLE396430150902I
UPPER BACK PANEL / PANEL TRASERO
SUPERIOR
K9643015101J
LOWER BACK PANEL / PANEL TRASERO
INFERIOR
K9643015201K
This piece is paperboard construction. It is not made from wood but is required for the assembly of your unit.
Esto pedazo son la construcción del cartón. Ello no son hecho de madera, pero se requlere para la asamblea
de su unidad.
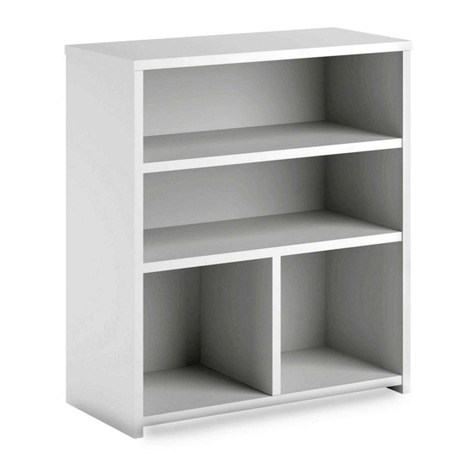
Parts shown are the wood parts for your bookcase. Please note, some parts are labeled with a sticker and some parts have a letter
stamped on a raw edge.
Piezas mostradas son las piezas de madera para su librería. Nota: algunas partes están marcadas con una etiqueta y algunas partes
tienen una letra impresa en un borde.
H
J
K
F
G
B
D
A
C
I
I
H
E
E
B349643015EBLP
4
4 /16
www.systembuild.com
PARTS - PIEZAS
x
48
#A21520
compression dowel
clavija de compresion
x8 50
#A21110
nail
clavo
cabeza plano 1 3/4"
1 3/4" flat head
x
#A13410
68
x
54
#A21660
wood dowel
pasador de madera
x
10 1
#A84050
safety bracket kit
juego del soporte de seguridad
x
9 10
#A244015
cam cover
tapa de tornillo
10a
10b
10d
x
#A80250
shelf support
soporte de tablero
7 8
Caution: If using a power drill or power screwdriver for screwing, please be aware to slow down and stop when screw is tight.
Failure to do so may result in stripping the screw.
Precaución: Si usa un taladro electrónico o un destornillador eléctrico para atornillar, por favor asegúrese que deje de atornillar
cuando el tonillos este apretado. Fallar hacer esto puede causar barrer el tornillo.
x
#A22620
cam lock
cerradura de leva
1 16
x
cam bolt
#A22610
perno de leva
28
x
3
4
double cam bolt
#A22680
perno doble leva
2
3
½ turn to fully
lock.
½ se vuelven a
totalmente
cerradura.
4
Tighten to fully seat. Do not over
tighten.
Apriétese a totalmente asiento. No
haga encima de apriétese.
Proper orientation of cam.
La orientación apropiada de leva.
1
This illustration shows how the CAM fastening system works.
Esta ilustración muestra el sistema de fijación de leva y como funciona.
Lock
Apretar
10c
1
B349643015EBLP
4
5 /16
www.systembuild.com
x
46
unfinished surface
superficie inacabado
x
10 1
10b
10a
Note: You will have 2 lower shelves (H), only 1 lower
shelf (H) will get a cam bolt (2).
Nota: Usted tendrá 2 estantes inferiores (H), sólo 1
estante inferior (H) conseguirá un perno leva (2).
x2
1
2
10a
10b
4
4
4
Finished Edge
Borde Acabado
Finished Edge
Borde Acabado
Finished Edge
Borde Acabado
Approx.
7/16"
4
x
1 6
Refer to page 4 for cam lock & cam bolt procedure if needed.
Consulte la página 4 para la cerradura de la leva y
procedimiento del perno de leva si es necesario.
H
F
G
x
22
1
2
B349643015EBLP
4
6 /16
www.systembuild.com
x
54
x
34
2
1
1
Inset two cam locks (1) into each panel. Inset two double cam bolts (3) and two wood dowels (5) into panels (A&B). Pess panels (A&C)
and panels (B&D) together and turn the cam locks (1) clockwise to lock in place. Attach three cam bolts (2) to the left and right lower
panels (C&D) as shown.
Inserte dos cerraduras de leva (1) en cada panel. Inserte dos pernos de doble leva (3) y dos clavijas (5) de madera en paneles (A&B).
PESS paneles (A & C) y paneles juntos (B & D) y gire hacia la derecha para bloquearlo en su lugar las trabas de leva (1). Instale tres
tornillos de la leva (2) los paneles izquierdos y derecho inferiores (C & D) como se muestra.
3
3
5
5
2
Finished Edge
Borde Acabado
Finished Edge
Borde Acabado
x
1 8
D
A
C
B
Refer to page 4 for cam lock & cam bolt
procedure if needed.
Consulte la página 4 para la cerradura
de la leva y procedimiento del perno de
leva si es necesario.
x
26
long leg of bolt
3
B349643015EBLP
4
7 /16
www.systembuild.com
Approx.
7/16"
4
x
42
1
4
x2
Finished Edge
Borde Acabado
x
12
E
Refer to page 4 for cam lock & cam bolt procedure if needed.
Consulte la página 4 para la cerradura de la leva y
procedimiento del perno de leva si es necesario.
4
B349643015EBLP
4
8 /16
www.systembuild.com
x
62
6
Finished Edge
Borde Acabado
This will be the lower shelf (H) that has a cam
bolt (2) attached to it.
Este será el estante inferior (H) que tiene un
perno de leva (2) unido a él.
H
G
E
Refer to page 4 for cam lock & cam bolt procedure if needed.
Consulte la página 4 para la cerradura de la leva y
procedimiento del perno de leva si es necesario.
UNLOCK LOCK
APRETAR
DESAPRETAR
5
B349643015EBLP
4
9 /16
www.systembuild.com
6
x
62
This will be the lower shelf (H) that does not
have a cam bolt (2) attached to it.
Este será el estante inferior (H) que no tiene
un perno de leva (2) unido a él.
Finished Edge
Borde Acabado
H
G
H
E
E
Refer to page 4 for cam lock & cam bolt procedure if needed.
Consulte la página 4 para la cerradura de la leva y
procedimiento del perno de leva si es necesario.
UNLOCK LOCK
APRETAR
DESAPRETAR
6
B349643015EBLP
4
10 /16
www.systembuild.com
Finished Edge
Borde Acabado
Finished Edge
Borde Acabado
Assembled component from step 2.
Componente montado en el paso 2.
Refer to page 4 for cam lock & cam bolt procedure if needed.
Consulte la página 4 para la cerradura de la leva y
procedimiento del perno de leva si es necesario.
H
G
C
A
H
UNLOCK LOCK
APRETAR
DESAPRETAR
7
B349643015EBLP
4
11 /16
www.systembuild.com
Finished Edge
Borde Acabado
Assembled component from step 2.
Componente montado en el paso 2.
Refer to page 4 for cam lock & cam bolt procedure if needed.
Consulte la página 4 para la cerradura de la leva y
procedimiento del perno de leva si es necesario.
H
GD
B
C
A
H
UNLOCK LOCK
APRETAR
DESAPRETAR
8
B349643015EBLP
4
12 /16
www.systembuild.com
x
64
6
Finished Surface
Superficie Acabado
Finished Edge
Borde Acabado
H
F
G
D
B
C
A
H
9
B349643015EBLP
4
13 /16
www.systembuild.com
Attached upper back panel first. Flush the bottom edge of the upper back panel with the bottom edge of the fixed shelf as shown. Align squarely and nail (8) straight
down into three back edges as shown. You will not nail along the bottom edge of the upper back panel. Position the bottom back panel as shown. Flush the bottom
edge of the of the lower back panel with the bottom edge of the lower fixed shelf. Align squarely and nail straight down into back edges as shown.
Panel trasero superior unir primero. Alinee el borde trasero del panel trasero superior con el borde inferior del estante fijo como se muestra. Alinee en ángulo recto y
clave tornillo (8) la llanura recta en tres bordes traseros como se muestra. Usted no clavará a lo largo del borde inferior del panel trasero superior. Coloque el panel de la
parte inferior trasero como se muestra. Alinee la parte inferior del borde del panel con el borde inferior más bajo con el borde inferior del estante fijo más bajo. Alinear
perpendicularmente y clavar directamente hacia abajo en bordes posteriores como se muestra.
product collapse, and/or serious injury.
S’il-vous-plaît assurez-vous que les PANNEAUX
ARRIÈRES sont attachés solidement. Tous les clous
doivent être enfoncés perpendiculairement et solidement
dans les parties. Sinon le meuble peut devenir instable,
s’effondrer subitement et/ou causer des blessures graves.
tightened firmly. Failure to do so could cause instability,
All nails must be driven into the parts straight and
Please make sure that the Backs are attached securely.
AVERTISSEMENT
WARNING
raw surface
superficie cruda
raw surface
superficie cruda
2nd
1st
8 x 50
8
NOTICE: You will need the help of another person to hold the back panels while nailing into place.
Nota: Necesitará la ayuda de otra persona para sujetar los paneles posteriores mientras clavado en
su lugar.
(1)
Carefully place unit on its front side.
Con cuidado, coloque la unidad sobre su parte frontal.
IMPORTANT!
THE BACK PANEL IS A STRUCTURAL PART OF THIS UNIT AND MUST BE INSTALLED PROPERLY.
IMPORTANTE!
El panel trasero es
una parte
estructural de
esta unidad y
debe ser instalado correctamente
.
(2)
Assure that the unit is square.
Distance from corner to corner must
be equal as shown.
Asegura que el unidad es
cuadrada.
Distancia de esquina a esquina debe
ser igual como se muestra por favor.
H
D
B
J
K
(3)
K
J
10
B349643015EBLP
4
14 /16
www.systembuild.com
Option 1;
Securely screw (10c) into solid area of the wall as shown.
Opción 1;
Firmemente el tornillo (10c) en el área sólida de la pared como mostrado.
Option 2:
Drill a 3/16" diameter hole (5mm) in the wallboard. Tap the wall
anchor(10d) into the hole until it is flush. Fasten the wall bracket (10a) to
the wall anchor (10d) with the screw (10c).
Opcion 2:
Taladre un agujero de 3/16" de diámetro (5mm) en la pared. Golpea la
ancla de pared (10d) en el agujero hasta que sea parejo. Abroche la
escuadra de pared (10a) al la ancla de la pared (10d) con el tornillo (10c).
stud
montante
wallboard
muro
hole
agujero
x
10 1
x
9 10
10d
10c
10d
10a
9
7
9
x
7 8
Option 1
Option 2
I
I
10c
B349643015EBLP
4
15 /16
www.systembuild.com
0 lbs.
0 kg.
MAXIMUM LOADS – CARGA MAXIMA
This unit has been designed to support the maximum
loads shown. Exceeding these load limits could cause
sagging, instability, product collapse, and/or serious
injury.
Esta unidad ha sido diseñada para soportar la carga
máxima anotada. El exceder estos límites puede
causar inestabilidad, colapsarse y/o causar serias
lesiones.
35 lbs.
15.8 kg.
15 lbs.
6.8 kg.
Warning:
Risk of injury to person - do not place a television on this
furniture. This furniture is not approved for use with a
television.
Advertencia:
Riesgo de que una persona se lesione - no poner la
televisión en este mueble.
Este mueble no está aprobado para usarlo con una
televisión.
15 lbs.
6.8 kg.
15 lbs.
6.8 kg. 15 lbs.
6.8 kg.
35 lbs.
15.8 kg.
35 lbs.
15.8 kg.
B349643015EBLP
4
16 /16
www.systembuild.com
Certificate of Conformity
1. This certificate applies to the Dorel Home Furnishings, Inc. product identified by this instruction manual.
2. This certificate applies to compliance of this product with the CPSC Ban on Lead-Containing Paint (16 CFR 1303).
3. This product is distributed by: Dorel Home Furnishings, Inc.
410 East First Street South
Wright City, MO 63390
636-745-3351
4. Site of Manufacture:
□ Dowagiac MI
5. See front page of instruction manual for date of manufacture.

Other System Build Indoor Furnishing manuals
System Build 7393012P User manual

System Build

System Build 7393012P User manual

System Build 9878207EBL User manual

System Build

System Build 9878207EBL User manual

System Build 8129408COM User manual

System Build

System Build 8129408COM User manual

System Build 6945335COM User manual

System Build

System Build 6945335COM User manual

System Build 9695500COM User manual

System Build

System Build 9695500COM User manual

System Build EVOLUTION 7531396COM User manual

System Build

System Build EVOLUTION 7531396COM User manual

System Build 1117412COM User manual

System Build

System Build 1117412COM User manual

System Build 9786015COM User manual

System Build

System Build 9786015COM User manual

System Build 4067335COM User manual

System Build

System Build 4067335COM User manual

System Build Evolution 2513408COM User manual

System Build

System Build Evolution 2513408COM User manual

System Build 7922414COM User manual

System Build

System Build 7922414COM User manual

System Build 6421403COM User manual

System Build

System Build 6421403COM User manual

System Build 7369401PCOM User manual

System Build

System Build 7369401PCOM User manual

System Build 7533396COM User manual

System Build

System Build 7533396COM User manual

System Build 7014500COM User manual

System Build

System Build 7014500COM User manual

System Build 7391015P User manual

System Build

System Build 7391015P User manual

System Build 7149401PCOM User manual

System Build

System Build 7149401PCOM User manual

System Build 7074015COM User manual

System Build

System Build 7074015COM User manual

System Build 3268335COM User manual

System Build

System Build 3268335COM User manual

System Build 6383337COM User manual

System Build

System Build 6383337COM User manual

System Build 1346403COM User manual

System Build

System Build 1346403COM User manual

System Build 4787335COM User manual

System Build

System Build 4787335COM User manual

System Build 3402335COM User manual

System Build

System Build 3402335COM User manual

System Build 7923403COM User manual

System Build

System Build 7923403COM User manual

Popular Indoor Furnishing manuals by other brands

Ruck MOON Instructions for use

Ruck

Ruck MOON Instructions for use

Ditalia Móveis BA-105 Assembly manual

Ditalia Móveis

Ditalia Móveis BA-105 Assembly manual

Qdos Stair Mounting Kit installation guide

Qdos

Qdos Stair Mounting Kit installation guide

Ryvyr ARAS L-ARAS-38MBK installation instructions

Ryvyr

Ryvyr ARAS L-ARAS-38MBK installation instructions

DIR 6113 instruction manual

DIR

DIR 6113 instruction manual

IKEA BERGSHULT manual

IKEA

IKEA BERGSHULT manual

Rauch M0003 Assembly instructions

Rauch

Rauch M0003 Assembly instructions

FITUEYES DS210003WB Assembly instructions

FITUEYES

FITUEYES DS210003WB Assembly instructions

Westwood Design Meadowdale Convertible Crib Toddler Guard... Assembly instructions

Westwood Design

Westwood Design Meadowdale Convertible Crib Toddler Guard... Assembly instructions

Walker Edison W70FPSC Assembly instructions

Walker Edison

Walker Edison W70FPSC Assembly instructions

Costway JV10856 manual

Costway

Costway JV10856 manual

Aquaglide FULL DECK 15.0 owner's manual

Aquaglide

Aquaglide FULL DECK 15.0 owner's manual

Snap-On KRA2403 Assembly instructions

Snap-On

Snap-On KRA2403 Assembly instructions

HABAU 2854 Assembly instructions

HABAU

HABAU 2854 Assembly instructions

Modus Furniture TARYN 9Y13P5BD Assembly instructions

Modus Furniture

Modus Furniture TARYN 9Y13P5BD Assembly instructions

Otto SIENA 23M manual

Otto

Otto SIENA 23M manual

VERTBAUDET 70501-0888 Assembly instructions

VERTBAUDET

VERTBAUDET 70501-0888 Assembly instructions

HOMCOM 713-080V91 Assembly instruction

HOMCOM

HOMCOM 713-080V91 Assembly instruction

manuals.online logo
manuals.online logoBrands
  • About & Mission
  • Contact us
  • Privacy Policy
  • Terms and Conditions

Copyright 2025 Manuals.Online. All Rights Reserved.