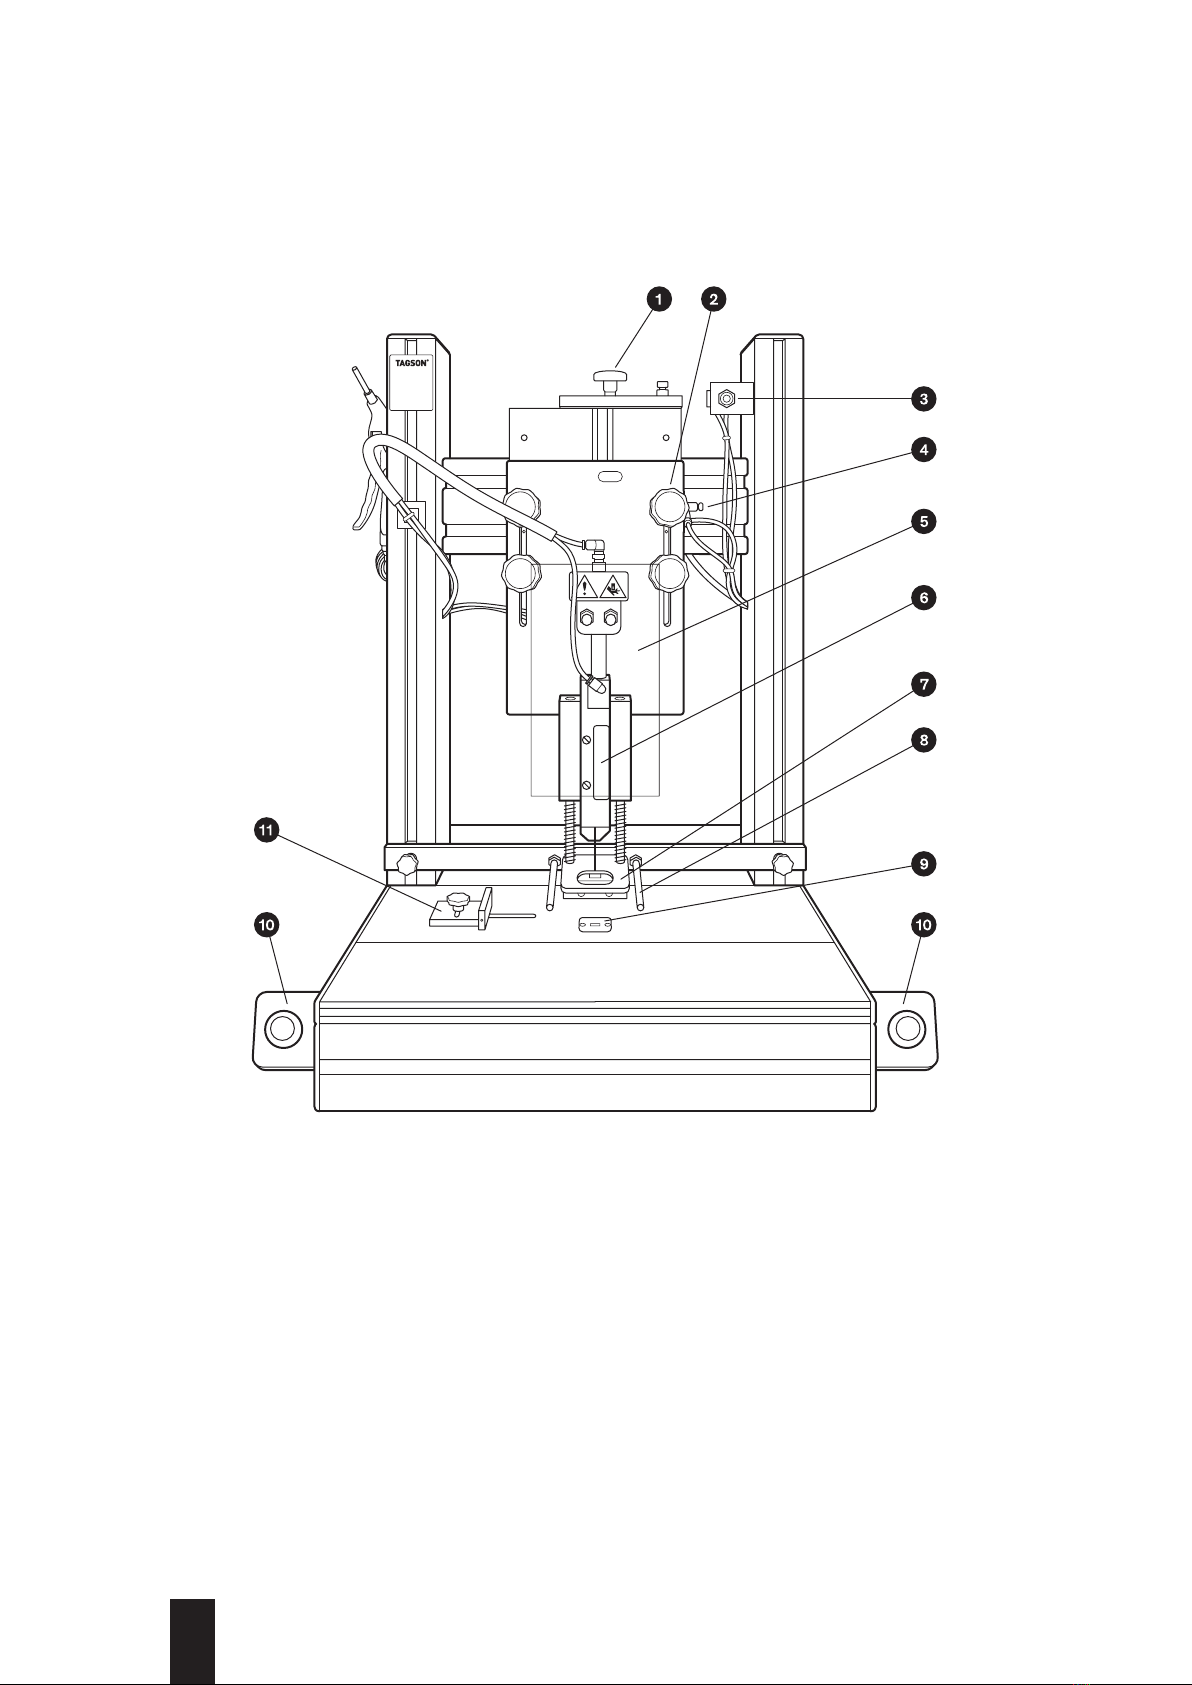
NOTE: Machine has an ejector rod switch in the front right upper corner. By pressing and
holding the switch, you will activate the ejector rod. Holding the switch with one hand, one may
safely remove the fastener clip from the module with the other hand.
3. CHOOSING PROPER LENGTH FASTENERS
The proper stroke length usually depends on the clearance needed to load the items under the
SPU’s needle. Please note that the shorter the stroke, the faster the cycle time.
All units should be connected to a filter/regulator to protect and control the SPU.
The thickness of the items to be fastened when compressed must never exceed the working length
of the needle which is used. The spoon opening in the needle must penetrate the items in order for
the fastener to toggle during insertion.
WARNING! Under no circumstances should the dual anti-tie down hand switch be
altered or replaced with a foot pedal or other actuation device.
4. STARTING
Before starting, the following steps should be double checked:
→ Air supply: filter regulator on the machine must be 80psi (6 bar).
→ Needle position: the lowest point must be about 0.5 cm below the needle plate.
→ Clear the working area.
CAUTION: Always wear protective glasses to prevent eye injuries.
How it works:
To complete the operation, machine has 3 cycles:
CYCLE A: by pressing and holding the finger switches , module goes down
CYCLE B: when the module is at its lowest position, the machine activates the ejector rod
CYCLE C: by releasing the finger switches , module goes up
NOTE: to activate the cycle A, press finger switches with both hands at the same time.
Starting to operate the machine:
→ Load the fasteners
→ Press switch for ejector rod a few times to make sure the module ejects the
fasteners properly
→ Insert the socks below the ski foot
→ Adjust height card holder and socks guides
→ With both hands press the finger switches and hold them in place
→ While holding switches, the module will go down to its final position and eject the
fastener trough the socks
→ Release the switches to lift the module to its upper position
→ Remove the socks from the working area
10