manuals.online logo
Brands
  1. Home
  2. •
  3. Brands
  4. •
  5. Tait
  6. •
  7. Portable Radio
  8. •
  9. Tait TM9100 User manual

Tait TM9100 User manual

401-00007-00 www.taitworld.com
TM9100 mobiles
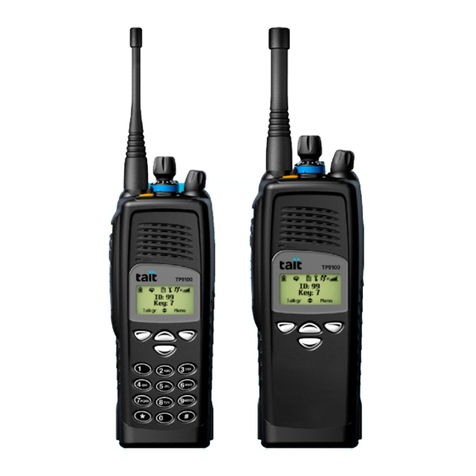
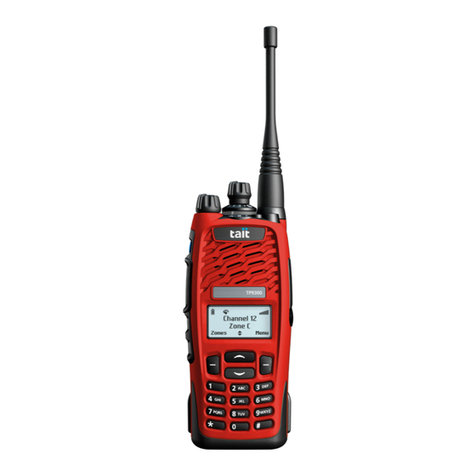
TP9100 portables
TM9100 and TP9100 User’s Guides
Insert Sheet
1 Introduction
This insert sheet contains information about
enhancements to the operation of TM9100 mobiles and
TP9100 portables. The topics covered in this
document are:
■additional compliance information (TP9100 only)
■using encryption
■voting operation.
2 Additions to “For your safety” chapter (TP9100 only)
The following compliance information has been added.
USA public safety bands (764–776MHz and 794–806MHz)
Part 90 R of the FCC Title 47 of the Code of Federal Regulations (CFR) deals with the use
of frequencies in the 764 to 776MHz and 794 to 806MHz bands.
Low-power channels
This radio complies with §90.531 (b) (3) and §90.531 (b) (4) of 47 CFR. These sections
state that only low-power transmission is permitted on the following channels:
■Regional Planning channels, as defined in §90.531 (b) (3).
■Itinerant channels, as defined in §90.531 (b) (4).
Use of encryption
This radio complies with §90.553 (a) of 47 CFR. This states that:
■Encryption is not permitted on the nationwide Interoperability calling channels.
■These channels are defined in §90.531 (b) (1) (ii).
■Radios using encryption must have a readily accessible switch or control to allow the radio
user to disable encryption.
2TM9100 and TP9100 User’s Guides
© Tait Electronics Limited December 2005
3 Additions to “Safeguarding you and your radio” chapter
About encryption
Note: This feature is available for digital and
dual-mode channels only.
Your radio may be programmed to use
encryption to make your communications
completely private. You may be able to turn
encryption on and off and change the
encryption key that your radio uses when
you make a call.
The radio receiving your call must have the
same encryption key in order to decode
your encrypted call.
The encryption symbol remains in
the display while encryption is turned on.
Turning encryption on and off
Using the Main menu
To turn encryption on and off using the
Main menu:
1. Press Menu and select
Security>Encryption.
2. Scroll to On (or Off) and press Select.
The message Encryption activated (or
Encryption deactivated) appears in
the display.
Using a function key
To turn encryption on and off using a
function key programmed for encryption.
1. Press the function key to turn
encryption on.
The message Encryption activated appears
in the display.
2. Press the function key again to turn
encryption off.
The message Encryption deactivated
appears in the display.
Using the 3-way selector (TP9100 only)
To turn encryption on and off when the
3-way selector is programmed for encryption:
1. Turn the 3-way selector to either posi-
tion A or B.
The message Encryption activated appears
in the display.
2. Turn the 3-way selector to position C to
turn encryption off.
The message Encryption deactivated
appears in the display.
Making an encrypted call
1. Select the required channel and group.
2. Check that encryption is on (the encryp-
tion symbol
is showing in the display).
3. Check that the channel is free (green
LED is off).
4. Press and hold the PTT key to transmit.
The name of the encryption key that
your radio is using for the transmission
may appear briefly:
While you are transmitting, the LED
glows red and the transmit symbol
appears in the display.
Receiving an encrypted call
When you receive an encrypted call, your
radio unmutes and you can hear clear speech
if the received call is encrypted with a key
that matches a key stored in your radio.
The name of the encryption key used in the
transmission may appear briefly:
If the key required to decode the call is not
present in your radio, then the radio
remains muted.
TM9100 and TP9100 User’s Guides 3
© Tait Electronics Limited December 2005
‘Proper Key Detect’ feature
Your radio may be programmed so that you
can only hear the encrypted call if the key
used to encrypt the call matches the
encryption key that currently encrypts
your transmissions.
In this case, your radio remains muted even
if the received call is encrypted with a key
that matches another key stored in
your radio.
For example, you are encrypting your
transmissions using encryption key 7.
Although key 1 and key 2 are also stored in
your radio, your radio has been
programmed so that only calls encrypted
using key 7 unmute the radio.
Changing your radio’s encryption key
You may be able to use the Change All
menu to change the encryption key that
encrypts your transmissions.
Note: Once you change the encryption key,
it may also automatically update the
encryption keys used to encrypt calls on
other channels.
You can use the Preset Keys menu to change
the encryption keys back to the default
encryption key for each channel.
Using the Change All menu
To change the encryption key using the
Change All menu:
1. Press Menu and select Security >
Change All. A list of all the encryption
keys stored in your radio appears.
2. Scroll to the key you want and
press Select.
The message Global Key Selected appears
in the display.
Using the Preset Keys menu
To change to the default encryption key for
each channel:
1. Press Menu and select Security >
Preset Keys.
The message Select Preset Keys? appears in
the display:
2. Press OK and the message Preset Key
Selected appears in the display.
Removing encryption keys from
your radio
It may be possible for you to delete
encryption keys from your radio.
Note: When emergency mode is activated or
when your radio is immobilized (‘inhibited’),
your encryption keys may be automatically
deleted from your radio.
To delete an encryption key:
1. Press Menu and select Security > Advanced
> Zeroize Key.
2. Scroll to the key you want and
press Select.
The message Single Key Zeroized appears
in the display.
To delete all encryption keys:
1. Press Menu and select Security > Advanced
> Zeroize All.
The message Zeroize All Keys? appears in
the display:
2. Press OK and the message All Keys
Zeroized appears in the display.
4TM9100 and TP9100 User’s Guides
© Tait Electronics Limited December 2005
4 Additions to “Listening to channel traffic” chapter
Using your radio in different
repeater areas
Your radio may have a group of channels
programmed as a voting group. The
channels in the voting group all carry the
same traffic, but from different repeaters. As
your radio moves in and out of different
repeater coverage areas, the best
communication channel is automatically
selected for you to use.
This channel is known as the ‘home’
channel, and is the channel you make and
receive calls on until another channel is
voted the home channel. While voting is
active, the LED glows amber and the
scanning symbol appears in the display.
Selecting a voting group
A group is collection of channels that are
grouped together for either voting or
scanning. Select a voting group either by using
a function key or by using the main menu.
On TP9100 portables, you may be able to
use the 16-way channel selector (refer to
your user’s guide for details).
Using a function key
Press the function key to select and activate
a preset voting group.
The programmed group name may now
appear in the display.
The LED glows amber (TM9100 mobiles
only) and the scanning symbol appears in
the display.
Using the Main menu
You may be able to select a voting group
using the Main menu:
1. Press Menu and select Channels.
2. Scroll to the group you want and
press Select.
The LED glows amber and the scanning
symbol appears in the display.
Suspending a channel from a
voting group
You may be able to use the function key
programmed for ‘nuisance delete’ to
temporarily remove one of the channels
from the voting group, if the radio is
continually stopping on an undesired
channel (for instance, if there is interference)
while voting.
To remove a channel from a voting group:
1. Wait until the radio has stopped on the
channel that you want to remove from
the voting group.
2. Press the function key programmed for
nuisance delete.
If the channel has been successfully been
removed, the message Channel deleted
from group appears in the display.
The channel remains removed from the
voting group until you either select
another voting group or the radio is
turned off and then on again.
Note: The function key programmed to
activate a voting group may be programmed
so that a short key press activates voting and
a long key press activates nuisance delete.
5 More Information
Refer to your radio provider for more information about this product.

Other manuals for TM9100

8

This manual suits for next models

1

Other Tait Portable Radio manuals

Tait Orca 5010 User manual

Tait

Tait Orca 5010 User manual

Tait TP9300 User manual

Tait

Tait TP9300 User manual

Tait 5011 User manual

Tait

Tait 5011 User manual

Tait TP9400 Series P25 User manual

Tait

Tait TP9400 Series P25 User manual

Tait TP9100 Series P25 User manual

Tait

Tait TP9100 Series P25 User manual

Tait TP9100 User manual

Tait

Tait TP9100 User manual

Tait TP9600 User manual

Tait

Tait TP9600 User manual

Tait TP8135 User manual

Tait

Tait TP8135 User manual

Tait Orca 5035 User manual

Tait

Tait Orca 5035 User manual

Tait TP8110 User manual

Tait

Tait TP8110 User manual

Tait TP9100 Use and care manual

Tait

Tait TP9100 Use and care manual

Tait TP9300 User manual

Tait

Tait TP9300 User manual

Tait TP9300 User manual

Tait

Tait TP9300 User manual

Tait TP9160 User manual

Tait

Tait TP9160 User manual

Tait Orca 5000 User manual

Tait

Tait Orca 5000 User manual

Tait TP9300 Series DMR User manual

Tait

Tait TP9300 Series DMR User manual

Tait orca User manual

Tait

Tait orca User manual

Tait Orca 5030 User manual

Tait

Tait Orca 5030 User manual

Tait Orca series User manual

Tait

Tait Orca series User manual

Tait TP8110 User manual

Tait

Tait TP8110 User manual

Tait TP9400 User manual

Tait

Tait TP9400 User manual

Tait TP9100 User manual

Tait

Tait TP9100 User manual

Tait TP8115 User manual

Tait

Tait TP8115 User manual

Tait TP9100 User manual

Tait

Tait TP9100 User manual

Popular Portable Radio manuals by other brands

Trevi RA 764 user guide

Trevi

Trevi RA 764 user guide

Motorola GP338 user guide

Motorola

Motorola GP338 user guide

Philips AE6545 brochure

Philips

Philips AE6545 brochure

Motorola RADIUS GP300 manual

Motorola

Motorola RADIUS GP300 manual

LENCO PDR-03 instruction manual

LENCO

LENCO PDR-03 instruction manual

Motorola ASTRO APX 1000 Series Quick reference card

Motorola

Motorola ASTRO APX 1000 Series Quick reference card

Grundig PRIMA BOY 100 user manual

Grundig

Grundig PRIMA BOY 100 user manual

Ansoko ASK-888S user manual

Ansoko

Ansoko ASK-888S user manual

Philips DA9011/02 user manual

Philips

Philips DA9011/02 user manual

Hytera PD982 manual

Hytera

Hytera PD982 manual

Hytera TC-780 user manual

Hytera

Hytera TC-780 user manual

Sony ICF-303 operating instructions

Sony

Sony ICF-303 operating instructions

Roberts Analogue World Radio R9968 user guide

Roberts

Roberts Analogue World Radio R9968 user guide

Hytera PD702i owner's manual

Hytera

Hytera PD702i owner's manual

Motorola ASTRO APX 4000XH Series Quick reference card

Motorola

Motorola ASTRO APX 4000XH Series Quick reference card

Simoco SDP650 Brief user's guide

Simoco

Simoco SDP650 Brief user's guide

Vitek VT-3581 Manual instruction

Vitek

Vitek VT-3581 Manual instruction

Excera EP8100 U2 user manual

Excera

Excera EP8100 U2 user manual

manuals.online logo
manuals.online logoBrands
  • About & Mission
  • Contact us
  • Privacy Policy
  • Terms and Conditions

Copyright 2025 Manuals.Online. All Rights Reserved.