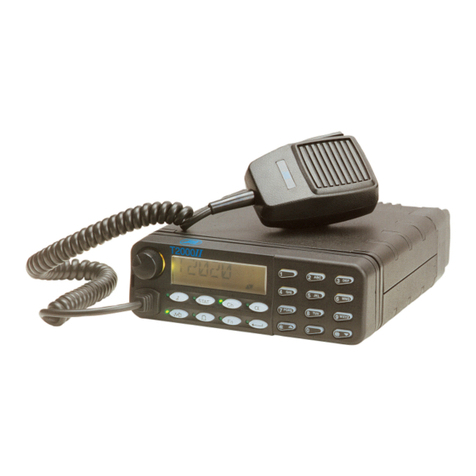
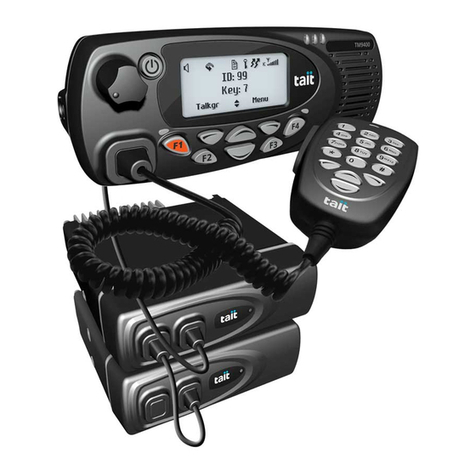
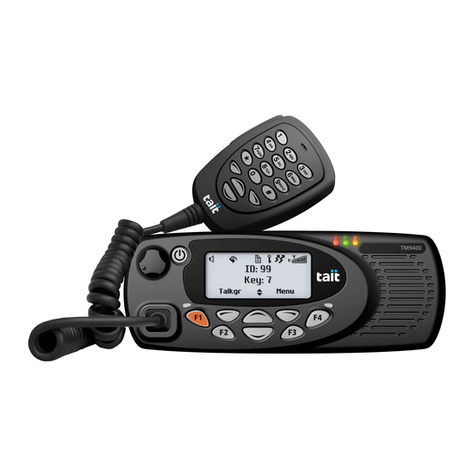
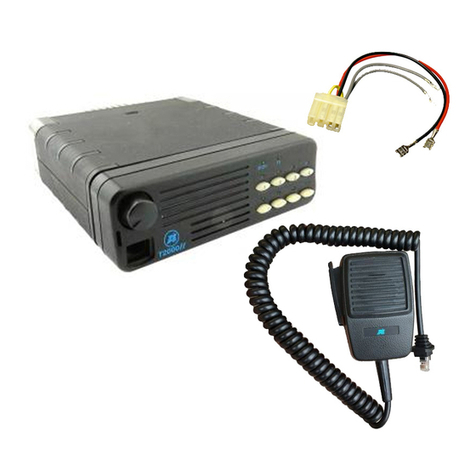
Tait T2020 Series II User manual

Operator’s Manual
T2020 Series II
T2020II


1
TAIT ELECTRONICS LIMITED
Software licence agreement
ThislegaldocumentisanAgreementbetweenyou, (the“Licencee”)andTaitElectronicsLimited(“Tait”). By opening this product packageand/or using the product you
agree to be bound by the terms of this Agreement.If you do not agree to the terms of this Agreement, do not open the product package and immediately return the
unopened product package toTait. If you open the product package that will be deemed to be acceptance of the terms of this licence agreement.
Licence
In consideration of the payment of the Licence Fee which forms part of the price you paid for products you acquired fromTait or its subsidiary or agent (the “products”)
and our willingness to be bound by the terms of this agreement, Tait grants to you as Licencee the non-exclusive right to use the copy of a Tait software program
included in the products, (the“Software”).
In particular the Licencee may use the program on a single machine and if the software is supplied on a diskette, the licensee may:
(a) Copy the program into any machine readable or printed form for backup purposes in support of your use of the program on the single machine
(Certain programs, however, may include mechanisms to limit or inhibit copying. They are marked “copy protected”), provided the copyright notice
must be reproduced and included on any such copy of the Software.
(b) Merge it into another program for your use on the single machine. (Any portion of this program merged into another program will continue to be
subject to the terms and conditions of this Agreement.);
The Licencee may not duplicate, modify, reverse compile or reverse assemble the Software in whole or part.
Title to software
Thisagreementdoesnot constitute acontractof saleinrelationto the Softwaresupplied to theLicencee. Notwithstanding theLicenceemay ownthe magnetic orother
physical media on which the Software was originally supplied, or has subsequently been recorded or fixed, it is a fundamental term of this Agreement that at all times
title and ownership of the Software, whether on the original media or otherwise, shall remain vested inTait or third parties who have granted licences to Tait.
Term and termination
ThisLicence shall be effectiveuntil terminated in accordance withthe provisionsofthis Agreement. The Licencee may terminate this Licence at any time by destroying
all copies of the Software and associated written materials. This Licence will be terminated automatically and without notice fromTait in the event that the Licencee
fails to comply with any term or condition of this Agreement. The Licencee agrees to destroy all copies of the Software and associated written materials in the event of
such termination.
Limited warranty
The Software is supplied by Tait and accepted by the Licencee “as is” without warranty of any kind either expressed or implied, including but not being limited to any
implied warranties as to merchantability or fitness for any particular purpose. The entire risk as to the quality and performance of the Software vests in the Licencee.
Should the Software prove to be defective, the Licencee (and not Licensor or any subsidiary or agent of the Licensor) shall assume the entire cost of all necessary
servicing, repair or correction.Tait does not warrant that the functions contained in the Software will meet the Licencee’s requirements or that the operation of the
Software will be uninterrupted or error free. HoweverTait warrants that the diskettes if any on which the Software is supplied to the Licencee shall be free from defects
in material and workmanship under normal use and service for a period of ninety (90) days from the date of delivery to the Licencee.
Exclusion of liability
Tait’s entire liability and the Licencee’s exclusive remedy shall be:
1. The replacement of any diskette not meeting Tait “limited warranty” and which is returned to Tait or an authorised agent or subsidiary of Tait with a
copy of the Licencee’s purchase receipt; or
2. If a diskette is supplied and if Tait is unable to deliver a replacement diskette which is free from defects in material or workmanship, the Licencee may
terminate this Agreement by returning the Software toTait.
3. In no circumstances shall Tait be under any liability to the Licencee, or any other person whatsoever, for any direct or consequential damage arising
out of or in connection with any use or inability of using the Software.
4. Tait warrants the operation of the Software only with the operating system for which it was designed. Use of the Software with an operating system
other than that for which it was designed may not be supported by Tait, unless otherwise expressly agreed by Tait.
General
The Licencee confirms that it shall comply with the provisions of law in relation to the Software.
Law and jurisdiction
This Agreement shall be subject to and construed in accordance with New Zealand law and disputes between the parties concerning the provisions hereof shall be
determinedbythe New Zealand CourtsofLaw. ProvidedhoweverTait mayatitselection bring proceedings for breach oftheterms hereof or for the enforcementof any
judgement in relation to a breach of the terms hereof in any jurisdictionTait considers fit for the purpose of ensuring compliance with the terms hereof or obtaining relief
for breach of the terms hereof.
No Dealings
The Licencee may not sublicense, assign or transfer the licence or the program except as expressly provided in this Agreement. Any attempt otherwise to sublicense,
assign or transfer any of the rights, duties or obligations hereunder is void.
No OtherTerms
The Licencee acknowledges that it has read this agreement, understand it and agree to be bound by its terms and conditions. The Licencee further agrees that this
is the complete and exclusive statement of the agreement between it and Tait in relation to the Software which supersedes any proposal or prior agreement, oral or
written and any other communications between the Licencee andTait relating to the Software.(LS-589)
2

3
Contents
Introduction ....................................................................................... 5
Safety Training Information........................................................... 6
WARNING ............................................................................. 6
Basic Operations .............................................................................. 7
Key functions................................................................................ 7
Indicators And Display Functions................................................. 8
Display Window ..................................................................... 9
Display Window Indicators ........................................... 10
Standard Operations ...................................................................... 10
Switching the Radio On and Off................................................. 10
Switching the Radio On....................................................... 10
Switching the Radio Off....................................................... 10
Selecting a Channel or a Group................................................. 10
Selecting a Channel ............................................................ 10
Selecting a Group ............................................................... 11
Receiving a Call ......................................................................... 11
Monitor Key ................................................................................ 11
Making a Call ............................................................................. 12
Transmit Timer..................................................................... 13
Economy Mode .......................................................................... 13
Scanning Channels .................................................................... 13
To Activate Scanning........................................................... 13
To Stop Scanning ................................................................ 14
Making a Call ...................................................................... 14
Using Selcall (Selcall Option Fitted) .......................................... 14
Making a Selcall Call........................................................... 14
Group Calls ......................................................................... 16
Receiving a Selcall Call ...................................................... 17
Advanced User Operations ............................................................ 19
Alphanumeric Entry Mode.......................................................... 19
RepeaterTalkaround .................................................................. 20
Sending DTMF Tones (DTMF Option Fitted) ............................ 21
User Programmable Scan .......................................................... 22
Call Queuing (Selcall Option Fitted).......................................... 23
Call Queue Not Empty ........................................................ 23
Accessing the Call Queue................................................... 23
Exiting the Call Queue ........................................................ 24
Queuing Calls ..................................................................... 24

4
Contents (continued)
Call Queue Full ................................................................... 24
Changing the Selcall Status Code (Selcall Option Fitted).......... 25
Diverting a Received Call (Selcall Option Fitted) ...................... 25
Activating Call Diversion Mode ........................................... 25
Exiting Call Diversion Mode ................................................ 26
Receiving a Call During Call Diversion ............................... 26
Making a Call to a Radio in Diversion Mode ....................... 27
Emergency Operation (Selcall Option Fitted) ........................... 27
Other Selcall Features ............................................................... 27
Altering User Options ................................................................. 28
Optional Accessories for theT2020
II
Radio ................................ 30
Appendix.......................................................................................... 31
Maintenance of your T2020
II ...............................................
31
Troubleshooting.......................................................................... 31
Despatcher Operation ................................................................ 31

5
3
6
9
PQRS
WXYZ
STAT
Ch
Fn
α
T2000
TX SCANBUSY WAIT
Introduction
TheTaitT2020
II
radio is a state-of-the-art mobile radio that provides outstanding communication flex-
ibility and a wide range of innovative features.The T2020
II
is microprocessor controlled so that it can
be configured to suit your personal needs and those of your fleet, for greater communication effective-
ness.
Call key
Status key
Microphone
socket
Auxiliary key
Monitor key
Channel key
Enter key
ON/OFF - Volume
knob
PTT key
Keypad
Display window
Scrolling available
indicator
Transmit indicator
Function key
Alphanumeric key
T2020
II
Control Head

6
SafetyTraining Information
Warning:
This product generates Radio Frequency energy during transmissions. It is classi-
fied as suitable for ‘Occupational Use Only’. It is not intended for general use in
uncontrolled environments.
It must only be used with authorised accessories and antennas.
The operator must ensure that the minimum safe distance between persons and
the antenna is maintained during transmissions.
Do not exceed a duty cycle ratio of 50% transmit mode to standby or receive modes.
The radio is in transmit mode when the PTT button on the microphone is pressed
or the ‘TX’indicator shows.
Safe distances from each antenna are as follows:
Switch the radio off at petrol filling stations.
T20X0-K27
T20X0-3XX
Product Minimum Safe DistanceAntenna Gain
(dBi) (metres) (inches)
4.5
2.15
5.15
0.82
0.63
0.88
32.4
24.6
34.8
Switch the radio off in the vicinity of explosive devices (such as in a quarry that
uses blasting techniques).
Use of a handheld microphone or a radio while in the act of driving could contra-
vene the legislation that applies in your country or state.Please check the vehicle
regulations in your own country.

7
Basic Operations
TheT2020
II
control head includes the following keys and indicators:
Key Functions
The keypad functions are as follows:
Call Used to activate the Selcall function, to enable you to make calls to other
users.
Status Used to select preprogrammed status messages to indicate your own
present status (such as ‘EN ROUTE’or ‘AT LUNCH’).
Channel Used to select a channel, a scan group, a number or a label associated
with the channel name, and to access the RepeaterTalkaround option.
Alphanumeric Used to turn on Alphanumeric mode.
Monitor Used to access to the signalling mute and RF squelch control of your
receiver.
Auxiliary Used to control an auxiliary hardware option.
Function Used to customise the operation of your radio to suit your own require-
ments.
Enter Used to complete dialling entries. (Used for channel entry, Selcall calls,
DTMF dialling, alphanumeric entry and option selections.)
0 to 9 Used for dialling numbers when the indicator beside the Alphanumeric
() key is
not
illuminated.
[ABC] to [WXYZ] Used for entering letters when the indicator beside the Alphanumeric
() key is illuminated.
Star/Up If the‘’indicator is displayed in the display window, these keys are
used to scroll up and down through a list of choices.
Hash/Down If the ‘’indicator is not displayed in the display window, they act as
dialling keys for Selcall and DTMF dialling.
STAT
Ch
Fn

8
Indicators and Display Functions
●
Indicates that your radio has received a Selcall call. If the indicator is flash-
ing, your radio received a call which you were unable to answer.Your radio
may be programmed to display your caller's identity.
●
Indicates that your radio is ready for you to select a status code relating to
your current activity.You may use the Up and Down ( /) scroll
keys to choose a status code or description from a list.
●
Indicates that your radio is ready for you to enter information to enable it to
selecta newchannel.Youmay usethe UpandDown ( /)scroll
keys to choose from a list, the Alphanumeric ( ) key to enter a label,
or the number keys. If the indicator is flashing, the current channel is in
RepeaterTalkaround mode.
●
Indicates that you can enter information, such as a channel label, from the
keypad, using letters or numbers.
●
Ifthis indicatoris on continuously, thesignalling mute (ifactive)is open.This
may be because either the microphone is off-hook, or you have pressed the
Monitor ( )key.If theindicator iscontinuallyflashing, theMonitor key
has been pressed for long enough to open the RF squelch.
Note:
When the radio is operating normally, this indicator is off.
●
Indicates the state of the auxiliary options switch. Depending upon the pro-
grammed configuration of the auxiliary options switch, this indicator may be
either on continuously or off continuously, or may only come on while the
Auxiliary ( ) key is pressed down.
●
Indicates that you can change the user programmable options.The display
windowshowstheoptionlastviewed.Youmay usetheUpandDown(/
) scroll keys to move through the options, then select one with the
Enter ( ) key.
●
Indicates you have pressed the Enter ( ) key.
When these indicators are all off, the radio is in DTMF mode. It can now
transmit DTMF tones, entered via the keypad.
STAT
Ch
Fn
CALL, STATUS, CHAN-
NEL, ALPHANUMERIC &
FUNCTION indicators all
off

9
Display Window
TheLCD display windowprovidesyouwith directvisual accessto information andmessages aboutthe
status of your calls and your radio.
Display Window Indicators
BUSY
Busy
- This appears whenever there is activity on you current channel.If the
signalling mute on your radio is closed (see the function), you may
not hear the traffic until you lift your microphone off-hook.
TX
Transmit
- Your radio is transmitting. This message is displayed when you
press the PTT key.It should also come on briefly when your radio makes a
Selcall or DTMF call.
SCAN
Scan
- Your radio is sampling each of a group of channels for any activity.
When it detects activity, it pauses on that channel for as long as the channel
carries traffic and then resume scanning.
WAIT
Wait
- The channel you are using is busy and your call has been deferred.
The radio gives you an alerting signal to indicate that the channel is now
free.
Scrolling available
- You are now able to use the Up and Down ( /
) scroll keys to move through a list of choices.Having found an ap-
propriate choice with the keys, push the Enter ( ) key to select.
STAT Ch
Fn
α
TX SCANBUSY
T2000
II
WAIT

10
Standard Operations
Switching the Radio On and Off
Switching the Radio On
Switch the radio on by rotating the volume knob clockwise to about one third of its maximum setting.
The control head display then shows a power-up message.
When first switched on, the radio resumes operation on the same channel as when it was last switched
off.
Press and hold the Monitor ( ) key until the indicator flashes. The radio then emits two short
tones.Depress the key briefly to return the radio to the quiet state.The radio then emits a short tone.
You may need to finally set the volume level when you receive your first call.
Switching the Radio Off
Switch the radio off by rotating the volume knob anticlockwise, to its primary position.
The T2020
II
retains some settings that are used when it is switched on again.
Selecting a Channel or a Group
Selecting a Channel
When first switched on, the radio resumes operation on the same channel as when it was last switched
off.
To check the current channel:
●
Select Channel mode by pressing the Channel (
Ch
) key, and the current channel name
appears in the display window.
To select a new channel:
●
Press the Up and Down ( /) scroll keys on the keypad to move through the list of the
available channels, until the display shows the identity of the required channel, or
●
Use the numeric keypad to enter a new channel number, then press the Enter ( ) key, or
●
Use the alphanumeric keypad to enter an alphanumeric label, then press the Enter ( ) key
to initiate the call.

11
STAT
Ch
Fn
α
BUSY
T2000
Selecting a Group
A group is simply a collection of channels grouped together for scanning or voting.Select a group the
same way as a channel.
Receiving a Call
The T2020
II
remains muted until another user makes a call. Listen for your call-sign when you hear
activity, and reply promptly by identifying yourself (for example‘Mobile-9 receiving’).
The BUSY indicator in the display appears whenever there is any activity on the channel.Your radio
may only unmute the speaker for some of this activity, depending on which signalling options are fitted
to your radio.Consult yourTait dealer about the signalling options available.
Using the Monitor Key
The Monitor ( ) key enables you to monitor a channel for other users, regardless of the muting
controls programmed into your radio.There are three types of muting control which may screen your
calls:
RF squelch
Permits reception only if the radio's signals exceed a preset threshold.This
ensures that only intelligible signals are audible.
CTCSS or DCS mute
Permits receptiononlyif asignal carries aninaudibletone orcode specificto
your fleet or group.
Selcall mute
Permits reception only if the signal carries a special audible tone sequence
at the beginning of the transmission.
Note:
The RF Squelch is always programmed to operate in your radio, but the CTCSS, DCS or
Selcall mutes are optional, depending on the way your radio is programmed.

12
The Monitor key may beprogrammed tooverride oneor moreof themutes.Occasionally,youmayfind
the message you are receiving is still intelligible, but is being cut off periodically by the RF squelch.In
this case, you can force the radio to leave the RF squelch open continuously.
The most common configuration is as follows:
●
Press the Monitor key briefly (less than one second) to override CTCSS/DCS or Selcall signal-
lingmute.(Ifhookswitch monitoring isprogrammed,lifting themicrophone off-hookhas thesame
effect.)
●
To also override the RF squelch, hold the Monitor key for more than one second, until the radio
sounds two short tones,
beep beep,
and the MONITOR indicator flashes.Press again to restore.
YourT2020
II
maybefittedwiththeability tohush (mute) anotherdevice,suchasa carstereo,so that your
speech is clearly audible to other users when you transmit a call.Consult your Tait dealer to see if this
facility is active on your radio.
Making a Call
Select the desired channel, as previously described, for the party you wish to contact. If the BUSY
indicatoris on, thechannel isbusyand you mustwait until itis free,before proceeding.If youattempt to
transmit anyway, the WAIT indicator appears in the display, and your attempt is deferred. The radio
sounds an alerting tone as soon as the channel becomes free.
●
Lift the microphone off-hook and listen to check that no-one else is using the channel.You may
also have to press the Monitor ( ) key briefly, depending on the options fitted to your radio.
●
Hold the microphone about 5cm from your mouth and press the Press-To-Talk (PTT) key,
located on the side of the microphone (see Figure 1).Speak clearly into the microphone, iden-
tifying yourself by your call sign, and the person you wish to contact (for example -‘Mobile-9 to
Base’). Release the PTT key when you have finished talking (see Figure 2).
Figure 1 Figure 2

13
Transmit Timer
Your T2020
II
is fitted with a preprogrammed timer to limit the maximum length of transmissions.
When the time limit is reached, the radio sounds a three tone warning, and transmission is termi-
nated.
Economy Mode
The T2020
II
incorporates an Economy mode which conserves battery power by turning off some
internal circuitry, and dimming the control head back-lighting.This occurs after a predetermined period
of inactivity.
When Economy mode is active, the display backlighting dims or switches off.
Operating any of the control head controls, or the PTT key, restores the radio to full activity immedi-
ately.
Scanning Channels
YourT2020
II
can be programmed with the scanning facility, which enables it to sequentially monitor a
number of channels, pausing its search when it detects activity on a channel.To change the channels
included in your scan group, refer to‘User Programmable Scan’.
To Activate Scanning
Set the radio scanning through a list of preprogrammed channels, as follows:
●
Ensure the microphone is placed on its hook. (Your radio may be programmed to scan when-
ever the microphone is off-hook. Consult your Tait dealer for more information on this feature.)
●
Select the appropriate scan group in the same way as selecting a channel (see ‘Selecting a
Channel’).The SCAN indicator appears in the display window, and scanning commences.
STAT Ch
Fn
α
SCAN
T2000
II

14
The T2020
II
now repeatedly scans through all programmed channels, searching for activity. When
activity is detected on a channel, the scan is halted, and the display window shows the active channel’s
name. (If signalling options are active in the radio, only activity with valid signalling tones halts the
scanning.) The radio pauses and unmutes on that channel, as long as the traffic remains, and the
SCAN indicator flashes.Scanning resumes after a short delay, once the traffic disappears.
You may change channel if you wish, but this cancels Scan mode.Otherwise, converse in the normal
manner and, when finished, place the microphone back on its hook to restart the scan.
To Stop Scanning
Scan mode is cancelled by selecting any non-scanning channel.The SCAN indicator then disappears
from the display window.
Making a Call
If you wish to make a call when the radio is in Scan mode, you may lift the microphone off-hook at any
timeto suspendscanning.If theradio hashalted scanningto monitorthe trafficon achannel,it remains
on that channel when you lift the microphone off-hook. If the radio has found no traffic (i.e. has not
halted), it reverts to the preprogrammed home-channel.
Using Selcall (Selcall Option Fitted)
By using Selective Calling (Selcall), you can make calls to specific individuals or groups, on particular
channels.To use Selcall, yourT2020
II
must be fitted with a Selcall module, and each channel prepro-
grammed to provide its own Selcall identity.
Making a Selcall Call
Call another party using Selcall, as follows:
1.Check that the radio is on the correct channel and that the channel is clear before attempting to
make the call.
2.Select the appropriate channel for the party you wish to contact (see‘Selecting a Channel’).
3.If your radio is programmed with the ability to make a‘one touch’call to one other user (usually
your base or despatcher), press the Call ( ) key for about one second.The TX indicator
appears in the display briefly, and your radio sounds a short
beep
as the call is transmitted.

15
Last number called
1st digit of the new number
2nd digit of the new number
3rd digit of the new number
4th digit of the new number
Call placed
Current channel
Press key Characters displayed Explanation
7
PQRS
3
DEF
5JKL
5
JKL
1
TX
5th digit of the new number
4.If your radio is programmed with the ability to call other users with Selcall on your channel, press
the Call ( ) key briefly to activate Selcall mode.Use your keypad to enter the call code for
the other user.Each digit appears in the display as it is entered.When you have entered all of the
digits, press the Enter ( ) key or the Star ( ) key, to send the call.
Example:
You wish to call another user on the current channel (REGION 2), with the number 37515.
The sequence of keystrokes, and the corresponding display characters that appear, is as follows:
5.When theparty youcalled replies, liftthe microphoneoff-hook andpress thePTT keyto converse.

16
STAT
Ch
Fn
α
T2000II
6.After the call is sent, you may hear an acknowledging tone,
beep
, or series of tones from the other
user’s radio, indicating that your call has been received.If you do not hear a tone, either the other
user'sradiois incapableofgenerating theacknowledgingtone,orit isoff,orthey areoutof range
of your call.
Your T2020
II
may be programmed to display the status of the called unit, as follows:
Status displayed Explanation
‘-NO ACK-’No acknowledge sequence was detected.
‘NO STAT’An acknowledge sequence was detected but no status information was de-
coded.
Status message An acknowledge sequence was detected and the decoded status number
can be identified.
Status number An acknowledge sequence was detected and the decoded status number
cannot be identified.
If any control head activity is detected before any of the above messages are displayed, the acknowl-
edge sequence is no longer expected, and messages will therefore no longer be displayed.
Group Calls
If you wish to call a group of other users, you may do so by dialling the digits common to all members of
the group and then using the # character as a substitute for all the remaining digits.If you are not sure
whether this facility has been programmed into your radio, consult yourTait dealer.

17
STAT
Ch
Fn
α
T2000
II
7
PQRS
3
DEF
TX
Press key Characters displayed Explanation
Current channel
Last number called
1st digit of the new number
2nd digit of the new number
Group wild card character
Call placed to all 37??? users
Example:
You wish to call a group of users on the current channel (REGION2) with numbers which all
beginwith 37,and havethree moredigits.After you have selectedchannelREGION2,the sequenceof
keystrokes, and the corresponding display characters that appear, is as follows:
When the group call has been sent, there is no acknowledging tone from any of the other users.Wait a
fewsecondsafter theTX indicator inthedisplaywindowdisappearsand thenbroadcast yourmessage.
Phraseyourmessageinsuch awaythatit requiresno acknowledgement,since theother userscannot
all reply at once.
Receiving a Selcall Call
When you receive a Selcall call, the CALL indicator flashes and a ringing tone (similar to that of a
telephone) sounds from the speaker.
Note:
Your T2020
II
may be programmed to display the call-
er’s identity when you receive a call. Consult your Tait
dealer for more information on this feature.
●
To answer the call, lift the microphone off-hook and identify
yourself. As soon as you operate the PTT key, the ringing
tone stops.
●
Ifyoudonotanswerthecallwithinashorttime,theringingtone
stops. The radio may then switch on another alerting device
(e.g.the horn in your car) to attract your attention.

18
●
YourT2020
II
may be programmedto queueincoming calls.If thisfeatureis enabled, thecaller’s
identity is put in the queue after the ringing stops.All other call indicators are cleared when the
received call has been queued.(Refer to the section‘Call Queuing’for more information.)
●
If the call was not queued and you are still unable to answer the call, the radio indicates that a call
was received in your absence by leaving the CALL indicator flashing.
●
Ifyoudo notwish toanswera call,the ringing may becancelled atanytime by pressinganyof the
control head keys.(The function associated with the key you press will not be invoked.) Note that
ifthecaller’sidentitywasdisplayedandthe callwasstillnotanswered, pressingtheEnter ( )
key clears the call and initiates an immediate call-back to the caller.
●
If you are one of the recipients of a group call, your radio only sounds a single sequence of the
ringing tone,
burr burr
.The caller then broadcasts a message to all members of your group.
Other manuals for T2020 Series II
1
This manual suits for next models
1
Table of contents
Other Tait Radio manuals

Tait
Tait TM9100 Original instructions

Tait
Tait TM9155R User manual

Tait
Tait TM9155 User manual

Tait
Tait TM9100 Series P25 User manual

Tait
Tait T2000 Series User manual

Tait
Tait T8000 Quick start guide

Tait
Tait TM9315 User manual

Tait
Tait TM8100 mobiles User manual

Tait
Tait TM8235 User manual

Tait
Tait TM9100 User manual

Tait
Tait TOP Operation manual

Tait
Tait TM8100 mobiles User manual

Tait
Tait TM9356 User manual

Tait
Tait TM8105 User manual

Tait
Tait TM8200 mobiles User manual

Tait
Tait Orca 5020 User manual

Tait
Tait TP9100 Installation and operating manual

Tait
Tait TM2210 User manual

Tait
Tait TM8200 mobiles User manual

Tait
Tait TM8250 User manual