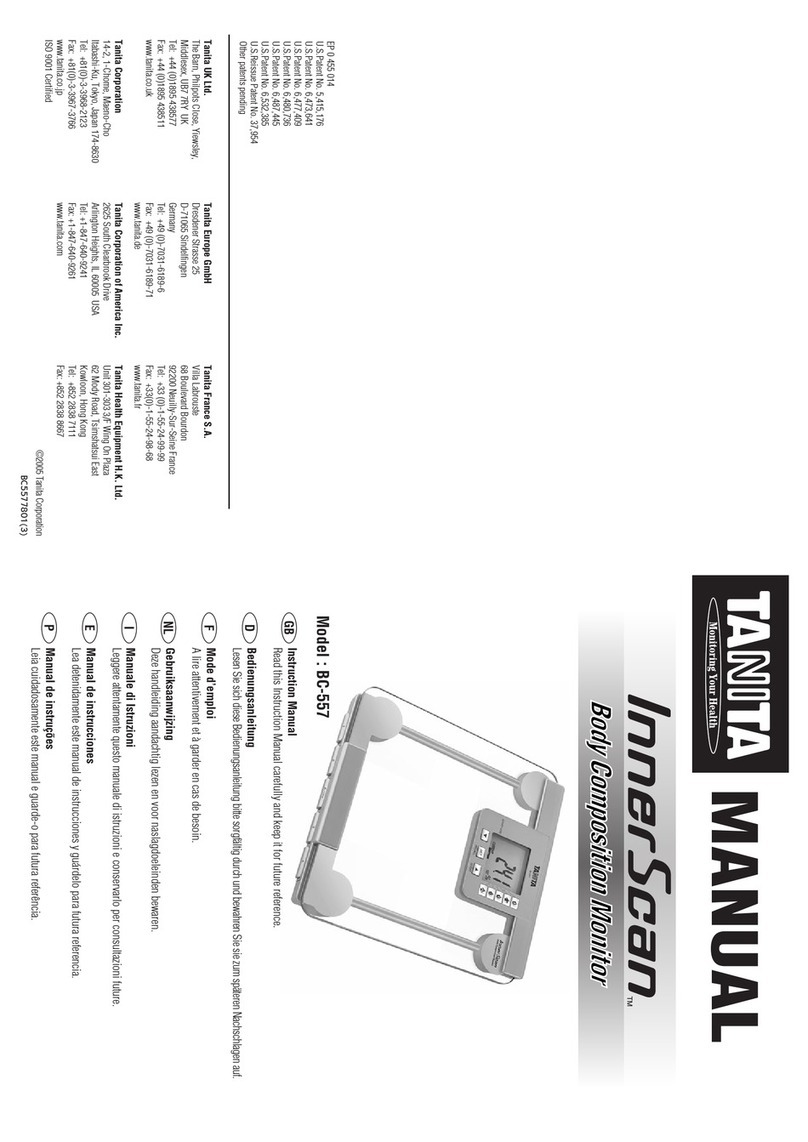
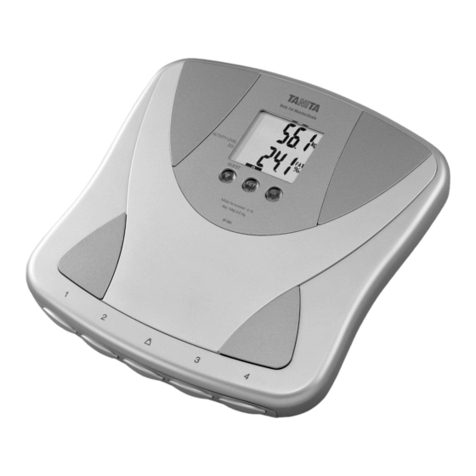
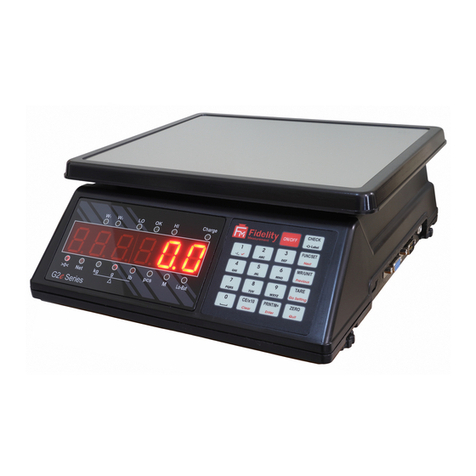
Tanita KD-191 User manual

KD1917621(0)1206FA
Digital Scale
KD-191
Instruction Manual
Instruction Manual
Read this Instruction Manual carefully and keep it for future reference.
電子秤使用手冊
請仔細閱讀本說明手冊,並妥善保存以作為日後的參考。
คู่มือการใช้งานเครื่องชั่งน้ำหนักดิจิตอล
กรุณาศึกษาคู่มือการใช้งานอย่างละเอียด และจัดเก็บเพื่อใช้อ้างอิงในอนาคต
Petunjuk Manual
Silahkan membaca Manual Instruksi ini dengan seksama dan simpan untuk referensi
mendatang.
EN
ZH
TH
ID

1
EN
◆Battery placement
◆Hook Hanger This scale can be hung on a hook for convenience.
When not
using the hook
hanger, press
it into the scale
until it clicks for
storage.
Insert 2דAAA” “R03”
or “24F” batteries as
indicated.
Do not hang the scale in a location where it can swing,
drop easily, or in an otherwise unstable place. Doing so
may damage the scale or cause injury due to the scale
colliding with another object or dropping from the hook.
Also, do not use a suction pad hook, double-sided tape
hook, or weak magnet hook. Such hooks may not be able
to support the weight of the scale, causing it to fall.
A
B
C
D
E
F
G
H
I
click click
A Lock
B Clear cover
C Tray
D OFF button
E Display
F ON/TARE button
G Hook hanger
H Battery compartment
I Lid (Battery compartment)
Name of parts
Important
How to use
Use the unit on a rm, at surface.
1. The scale is a precision instrument. Do not dismantle the scale and avoid strong vibrations or shocks.
2. Keep away from direct sunlight and heating appliances, eg. oven.
3. When moving the scale to a new location, where the temperature differs from the previous location by more
than 10°C (50°F), leave the scale in the new location for at least 2 hours before using it.
4. Wipe the scale clean with a damp cloth.
5. Avoid using chemicals to prevent creating a hazard.
6. If the scale is not to be used for a long period of time, remove the batteries.

2
EN
• The power doesn’t turn on.
Insert 2 new size AAA (“R03” or “24F” ) batteries. Be sure that the polarity of the batteries is set
properly.
• “Err6” or “Err7” appears on the display.
The scale needs to be repaired. Please contact your retailer.
Press ON/TARE. Place a bowl on
the tray.
Press ON/TARE
to subtract the
weight of the
bowl.
Place the
material to be
weighed.
After removing the bowl, the display will
show a negative reading or “-----”. Press
the ON/TARE button to return the display
to “0”. Press OFF to turn off.
oz
g
g
oz
g
oz
g
oz
g
oz
g
oz
g
oz
g
◆Weighing/TARE function If the weight of the item(s) exceeds the scale’s capacity, “EEEE” will appear on the
display. Make sure you place item(s) in the center of the tray.
◆Mode change
◆Automatic power off
◆Battery replacement
When the power is ON, press OFF button while pressing ON/TARE button, select the
proper mode. (for the g/oz version)
The scale is designed with an auto power-off function for energy efficiency. If the same
reading is displayed for more than 10 minutes the scale will automatically turn off.
If “Lo” appears in the display when attempting to weigh, replace the battery. (following
previous instructions)
Trouble shooting
Specification
g version g/oz version
Capacity 3000 g 3000 g/105 oz
Minimum graduation 1 g 1 g/0.05 oz
◆Inserting photographs or patterns etc.
Unlock the lock. Remove the clear
cover.
Place the
photograph
or pattern on
the tray in line
with the guides
(points).
Align the clear
cover with the
bottom of the
tray, and gently
place the clear
cover back on
the tray.
Lock the lock.
Double-sided tape can be used to hold
the photograph or pattern in place.
To cover the entire surface of the tray
with a photograph or pattern, cut the
photograph or pattern to the same size
as the paper that was included with the
scale. (max. 5 in × 4.7 in)
g version
oz version

3
ZH
◆更換電池
◆掛鉤 本磅秤可懸掛在鈎子上以方便利用。
當不使用掛鉤
時,可將掛鉤
壓入磅秤內存
放。
如圖所示放入兩顆
「AAA」、「R03」或
「24F」電池。
請勿將磅秤懸掛於會搖擺、容易掉落、或不穩定的地
方。其原因在於磅秤會與其它物體碰撞或自掛鉤上掉
落而可能損及磅秤或造成受傷。此外,也不要使用黏
有吸力墊或雙面膠帶的掛鉤、或弱磁性的掛鉤。這類
掛鉤可能無法支撐磅秤的重量而使磅秤掉落。
A
B
C
D
E
F
G
H
I
click click
A 鎖定裝置
B 透明護蓋
C 托盤
D OFF鈕
E 顯示幕
F ON/TARE鈕
G掛鈎
H 電池盒
I 蓋 (電池盒)
零件名稱
重要
使用方式
請在平穩地方使用。
1. 此為精密衡器,請勿嘗試拆開及強烈搖擺或撞擊。
2. 避免陽光直接照射,並遠離發熱電器如電爐。
3. 如此電子秤需移往不同地方使用,而溫差多於攝氏 10 度 ( 華氏 50 度 )。 請先擺放 2 小時,然後才使用。
4. 可用濕毛巾清潔。
5. 避免使用化學清潔劑。
6. 如長時間不使用,請移除電池。

4
ZH
•無法啟動電源
裝入兩顆新的 AAA (「R03」或「24F」) 電池。確定正確安裝電池的極性。
•畫面上出現「Err6」或「Err7」
磅秤需要修理。請連繫您的零售商。
壓下 ON/TARE。 將碗放置在托
盤上。
按下 ON/TARE
按鈕以扣除碗的
重量。
放上需要秤重的
材料。
將碗移開後,顯示幕會顯示負數讀
值或「----」。壓下ON/TARE按鈕使
顯示幕回復為「0」。按下OFF按鈕
完成關機。
oz
g
g
oz
g
oz
g
oz
g
oz
g
oz
g
oz
g
◆秤重/容器重量功能 倘若物件重量超過磅秤容量時,畫面上就會出現「EEEE」。請確定您將物件放置
在托盤中央。
◆模式的變更
◆自動關閉電源
◆更換電池
壓下ON/TARE按鈕。當需要變更模式時,可同時壓下ON/TARE按鈕和OFF按鈕,然後選
擇適當的模式。(適用於克 / 盎司的情況)
本磅秤設計了自動關閉電源功能以達到節能目的。倘若顯示相同讀數超過 10 分鐘
時,就會自動關閉磅秤電源。
倘若要秤重時畫面上出現「Lo」的話,就應更換電池。(參照先前的說明)
故障排除
規格
g ( 克 ) 版本 g/oz ( 克 / 安士 ) 版本
最大秤量 3000g 3000g/105oz
最小讀數 1g 1g/0.05oz
◆插入照片或圖案等。
解開鎖定裝置。 翻起透明護蓋。 將照片或圖案放
置在托盤上以對
齊導引裝置
(點)。
將透明護蓋對齊
托盤底部,然
後輕輕將透明
護蓋覆蓋在托
盤上。
關上鎖定裝置。
可利用雙面膠帶將照片或圖案固定
在適當位置。
以照片或圖案蓋住托盤的整個表
面,將照片或圖案裁切成包含磅秤
之紙張一樣的大小 (最大尺寸 5 in
× 4.7 in)。
g (克) 版本
oz (安士) 版本

5
TH
◆ การเปลี่ยนแบตเตอรี่
◆ ตะขอ เครื่องชั่งนี้สามารถนำไปแขวนไว้ได้เพื่อความสะดวกในการใช้งาน
เมื่อไม่ใช้งานตะขอ
ดันตะขอ
เพื่อพับเก็บในช่องเก็บ
ด้านหลัง ตามภาพ
ใส่แบตเตอรี่ “AAA” “R03” หรือ
“24F”x2 ตามที่ระบุไว้
ไม่แขวนเครื่องชั่งไว้ในที่ที่สามารถแกว่งได้ ตกได้ง่าย หรือที่ที่ไม่มั่นคง ซึ่งอา
จก่อให้เกิดการชำรุดหรือเสียหายจากการตกหล่นหรือการปะทะกับ
วัตถุอื่น และไม่ควรแขวนเครื่องชั่งโดยการใช้แผ่นเกี่ยว เทปกาวสองหน้าหรื
อแม่เหล็กที่ไม่มีความแข็งแรงเพียงพอ เนื่องจากวัสดุดังกล่าวอาจไม่
สามารถรับน้ำหนักของเครื่องได้ และอาจทำให้เครื่องชั่งตกหล่นลงมาได้
A
B
C
D
E
F
G
H
I
click click
A ตัวล็อค
B ฝาปิดใส
C ถาด
D ปุ่มปิด
E ช่องแสดงผล
F ปุ่ม ON/TARE
G ตะขอเกี่ยว
H ช่องใส่แบตเตอรี่
I ฝาปิด (ช่องใส่แบตเตอรี่)
ส่วนประกอบ
สำคัญ
วิธีการใช้
วางเครื่องชั่งน้ำหนัก บนพื้นราบที่มีความแข็งแรง
1. เพื่อให้เครื่องชั่งน้ำหนักแม่นยำ ไม่ควรถอดชิ้นส่วนประกอบของเครื่องชั่ง และหลีกเลี่ยงการสั่นสะเทือนหรือแรงกระแทก
2. เก็บเครื่องชั่งให้พ้นจากแดดโดยตรง และเครื่องใช้ไฟฟ้าหรืออุปกรณ์ที่ให้ความร้อน เช่นเตาอบ
3. เมื่อย้ายเครื่องชั่งน้ำหนักจากที่ที่มีแสงแดดและร้อนจนเกินไป ไปยังที่ใหม่ ซึ่งมีอุณหภมิต่ำกว่า 10 องศาเซลเซียส (50 องศาฟาเรนไฮซ์ )
ควรทิ้งเครื่องชั่งน้ำหนัก ไว้ 2 ชั่วโมง ก่อนใช้งานอีกครั้ง
4. เช็ดทำความสะอาดเครื่องชั่งด้วยผ้าชุบน้ำหมาดๆ
5. เพื่อไม่ให้เกิดอันตราย หลีกเลี่ยงการใช้สารเครมีกับเครื่องชั่งน้ำหนัก
6. หากไม่ได้ใช้เครื่องชั่งน้ำหนักเป็นเวลานาน ควรถอนแบตเตอรี่ออก

6
TH
• หากไม่สามารถเปิดเครื่องได้
เปลี่ยนแบตเตอรี่ใหม่ 2 ก้อน ขนาด AAA (“R03” หรือ “24F”) , ตรวจสอบขั้วของแบตเตอรี่ว่าถูกต้องหรือไม่
•หากปรากฏ“Err6”หรือ“Err7”
ติดต่อผู้แทนจำหน่าย หรือศูนย์บริการ
กดปุ่ม ON/TARE วางภาชนะลงบนถาด กดปุ่ม ON/TARE
เพื่อหักลบน้ำหนักขอ
งภาชนะออก
วางวัสดุลงเพื่อชั่งน้ำห
นัก
หลังจากนำภาชนะออกจากถาดชั่งน้ำหนัก ช่อง
แสดงผลจะแสดงค่าติดลบหรือ“----” กดปุ่ม ON/
TARE เพื่อให้ช่องแสดงผลกลับสู่ “0” กดปุ่ม OFF
เพื่อปิดเครื่อง
oz
g
g
oz
g
oz
g
oz
g
oz
g
oz
g
oz
g
◆ การชั่งน้ำหนัก/ฟังก์ชันTare กรณีชั่งน้ำหนักสิ่งของเกินกว่า พิกัดน้ำหนักสูงสุดของเครื่องชั่ง จะแสดงสัญลักษณ์ “EEEE”
วางสิ่งของที่จะชั่งไว้ตรงกลางถาด
◆ เปลี่ยนโหมดการทำงาน
◆ ปิดอัตโนมัติ
◆ การเปลี่ยนแบตเตอรี่
กดปุ่ม ON/TARE เมื่อต้องการเปลี่ยนโหมดการทำงาน, กดปุ่ม ON/TARE และกดปุ่ม OFF พร้อมกัน, และเลือกรู
ปแบบการทำงานที่เหมาะสม (สำหรับเลือกเวอร์ชั่น g/oz (กรัม/ออนซ์)
เครื่องชั่งออกแบบมาพร้อมกับฟังก์ชันการปิดอัตโนมัติ เพื่อประสิทธิภาพในการใช้พลังงาน หากเครื่องชั่งน้ำหนัก
อ่านค่าน้ำหนักเพียงค่าเดียวและไม่มีการชั่งน้ำหนักอื่นอีก เครื่องชั่งน้ำหนักจะปิดเองโดยอัตโนมัติิ
เปลี่ยนแบตเตอรี่เมื่อหน้าจอปรากฏ “Lo” ( ตามรายละเอียดการเปลี่ยนแบตเตอรี่หน้าแรก)
การแก้ไขปัญหา
คุณสมบัติ
เวอร์ชั่นกรัม เวอร์ชั่น กรัม/ออนซ์
ชั่งน้ำหนักสูงสุด 3000 กรัม 3000กรัม / 105ออนซ์
ความละเอียดต่ำสุด 1 กรัม 1 กรัม / 0.05ออนซ์
◆ ใส่รูปภาพหรือรูปลวดลายเป็นต้น
ปลดล็อคตัวล็อค ถอดฝาใส วางรูปภาพหรือรูปลวด
ลายลงบนถาดให้ตรงจุ
ด
จัดวางฝาปิดใสให้เ
ข้ากับด้านล่างของ
ถาดชั่งน้ำหนักก่อน
และจึงค่อยๆ
ประกบฝาใสกลับลง
บนถาด
ล็อคตัวล็อค
สามารถใช้เทปสองหน้าในการยึดรูปภาพหรือรูปลว
ดลายต่างๆให้อยู่กับที่ หากต้องการให้รูปภาพหรือ
รูปลวดลายปิดบริเวณถาดทั้งหมด ให้ตัดรูปหรือลว
ดลายนั้นๆให้มีขนาดเท่ากับกระดาษที่มาพร้อมกับเ
ครื่องชั่ง (สูงสุด 5 นิ้ว x 4.7นิ้ว)
เวอร์ชั่นกรัม
เวอร์ชั่นออนซ์

7
ID
◆Penggantian baterai
◆Kait Penggantung Timbangan ini dapat digantung dengan kaitan untuk kenyamanan.
Ketika tidak
menggunakan
kait penggantung,
tekan kait ke
dalam timbangan
untuk disimpan.
Masukan 2× baterai
“AAA” “R03” atau “24F”
seperti yang dijelaskan.
Jangan menggantung timbangan di tempat yang dapat
menyebabkan timbangan terayun, mudah jatuh, atau
tidak stabil. Hal tersebut dapat merusak timbangan atau
menyebabkan kecelakaan akibat terbenturnya timbangan
dengan barang lain atau terjatuhnya timbangan dari
kait penggantung. Jangan menggunakan kait mangkuk
penyedot, kait selotip dua sisi, atau kait bermagnet
lemah. Kait-kait seperti itu tidak kuat menahan berat
timbangan, menyebabkan jatuh.
A
B
C
D
E
F
G
H
I
click click
A Kunci
B Tutup transparan
C Baki
D Tombol OFF
E Layar LCD
F Tombol ON/TARE
G Kait Penggantung
H Tempat Baterai
I Tutupan tempat baterai
Nama bagian
Penting
Cara penggunaan
Gunakan alat di ruangan dan permukaan yang datar.
1. Timbangan jangan dibongkar, hindari getaran atau guncangan keras.
2. Jauhkan dari sinar matahari dan suhu panas.
3. Jika memindahkan timbangan ke tempat lain dengan perbedaan suhu lebih dari 10°C (50°F), diamkan
timbangan minimal 2 jam sebelum digunakan.
4. Bersihkan timabnagan dengan kain kembab.
5. Hindari penggunaan dengan bahan kimia untuk menghindari bahaya.
6. Jika timbangan tidak digunakan dalam jangka waktu lama, lepaskan baterai.

8
ID
• Timbangan tidak bisa menyala.
Masukan 2 baterai baru ukuran AAA (“RO3 atau “24F” ). Pastikan baterai terpasang dengan polaritas
yang benar.
• “Err6” or “Err7” muncul di layar.
Timbangan perlu diperbaiki. Silahkan menghubungi toko retail tempat Anda membeli timbangan.
Tekan ON/TARE. Letakkan cawan
di atas nampan.
Tekan ON/
TARE untuk
mengurangi berat
dari cawan.
Letakkan bahan
yang akan
ditimbang.
Setelah memindahkan mangkuk, tampilan
akan menunjukkan bacaan negatif atau
“---“. Tekan tombol ON/TARE untuk
mengembalikan tampilan ke “0”. Tekan
OFF untuk mematikan timbangan.
oz
g
g
oz
g
oz
g
oz
g
oz
g
oz
g
oz
g
◆Fungsi Menimbang/mentara Jika berat barang yang ditimbang melebihi kapasitas timbangan, “EEEE” akan
muncul di layar. Pastikan Anda meletakkan barang yang ditimbang di tengah
baki timbangan.
◆Ganti mode
◆Auto Power OFF
◆Penggantian baterai
Tekan ON/TARE. Ketika perlu mengganti mode, tekan tombol ON/TARE dan OFF
bersamaan, dan pilih mode yang sesuai (untuk versi g/ons)
Timaban di desain dengan fungsi auto Power off untuk efisiensi energi. Jika tampilan
yang sama tidak berubah dalam 10 menit, timbangan akan otomatis OFF.
Timaban di desain dengan fungsi auto Power off untuk efisiensi energi. Jika tampilan
yang sama tidak berubah dalam 10 menit, timbangan akan otomatis OFF.
Pemecahan masalah
Spesifikasi
Versi g Versi g/oz
Kapasitas 3000 g 3000 g/105 oz
Gradiasi minimum 1 g 1 g/0.05 oz
◆Memasukkan foto atau pola, dll.
Membuka kunci. Pindahkan tutup
transparan.
Letakkan foto
atau pola di
nampan searah
dengan panduan
(titik-titik) yang
ada.
Sesuaikan tutup
transparan
dengan bagian
bawah dari
nampan, dan
letakkan tutup
transparan
kembali di atas
nampan dengan
hati-hati.
Kunci
Perekat dua sisi dapat digunakan
untuk menempelkan foto atau pola.
Untuk menutup seluruh permukaan
nampan dengan foto atau pola, potong
foto atau pola dengan ukuran yang
sama dengan kertas yang disertakan
dengan timbangan. (maks. 5 inci x
4,7 inci)
Versi g
Versi oz

Notice: These marks can be found on contaminant-containing Batteries:
Pb Pb = Battery contains lead,
Cd Cd = Battery contains cadmium,
Hg Hg = Battery contains mercury.
Not allowed to mix batteries with consumer waste!
As a consumer you are legally bound to return used or discharged batteries. You can deposit your old
batteries at public collection points in your town, or wherever the corresponding batteries are sold
and specically marked collecting boxes have been set up. In case of scrapping the apparatus, the
batteries should be removed from it and deposited at the collection points as well.
注意:含有污染物的電池上可以找到這些標記:
鉛 鉛 = 電池含有鉛,
鎘 鎘 = 電池含有鎘,
汞 汞 = 電池含有汞。
不得與用戶廢棄的電池混合!
作為用戶你在法律上有義務歸還使用過的或是漏電的電池。可以把你的舊電池保存在你所在城市的公共
收集點,或在任何有關的電池銷售點,以及已經建立的有特別記號的收集箱。在準備廢棄儀器的情況下,
電池應該被移除,並且同樣存放在收集點。
หมายเหตุ : สามารถพบสารปนเปื้อนในแบตเตอรี่ :
Pb Pb = แบตเตอรี่ประกอบด้วยตะกั่ว
Cd Cd = แบตเตอรี่ประกอบด้วยแคดเมี่ยม
HgHg = แบตเตอรี่ประกอบด้วยปรอท
ไม่ควรทิ้งแบตเตอรี่ที่ใช้แล้วรวมกับขยะประเภทอื่นๆ
ควรทำเครื่องหมายที่หน้ากล่องสำหรับเก็บแบตเตอรี่ที่หมดอายุและต้องการทิ้ง
Perhatian: Tanda ini dapat ditemukan pada baterai yang mengandung :
Pb Pb = Baterai mengandung lead,
Cd Cd = Baterai mengandung cadium,
Hg Hg = Baterai mengandung mercury.
Tidak diizinkan untuk mencampur baterai dengan limbah konsumen
Sebagai konsumen Anda secara hukum terikat untuk mengembalikan baterai yang digunakan atau
habis.
Anda bisa menitipkan baterai lama Anda pada titik-titik pengumpulan publik di kota Anda.
ZH
TH
IN
EN

© 2012 TANITA Corporation. All Rights Reserved.
TANITA Corporation of America Inc.
2625 South Clearbrook Drive
Arlington Heights, IL 60005 USA.
Tel: +1-847-640-9241
Fax: +1-847-640-9261
www.tanita.com
Representative
TANITA Europe B.V.
Hoogoorddreef 56-E
1101 BE Amsterdam
The Netherlands
Tel: +31-20- 560 -2970
Fax: +31-20 -560-2988
www.tanita.eu
TANITA Health Equipment H.K. Ltd.
Unit 301-303 3/F Wing On Plaza,
62 Mody Road, Tsimshatsui East,
Kowloon, Hong Kong
Tel: +852-2834-3917
Fax: +852-2838-8667
www.tanita.asia
TANITA India Private Limited
A-502, Mittal Commercia,
Off. M. V. Road (Andheri Kurla Road),
Marol, Andheri - East,
Mumbai 400 059
TEL: +91 22 3192 6107
FAX: +91 22 2859 9143
www.tanita.in
TANITA (Shanghai) Trading Co, Ltd.
Room 8005, 887 Huai Hai Zhong Lu, Shanghai
The People’s Republic of China
Tel: +86-21-6474-9803
Fax: +86-21-6474-7901
www.tanita.com.cn
Manufacturer
TANITA Corporation
1-14-2, Maeno-Cho, Itabashi-ku,
Tokyo, Japan 174-8630
Tel : +81(0)-3-3968-7048
Fax : +81(0)-3-3968-2661
www.tanita.co.jp
ISO 9001 Certified
EN
This device features radio interference supression in compliance with valid EC Regulation
2004/108/EC.
ZH
該設備具有根據歐盟 2004/108/EC 規定的抑制無線電干擾作用
TH
อุปกรณ์นี้มีสัญญาณรบกวนคลื่นวิทยุ ในการระงับปฏิบัติตามกฏระเบียบที่ถูกต้อง 2004/108/EC
IN
Perangkat ini memiliki peredam interferensi radio sesuai dengan Peraturan 2004/108/EC yang
berlaku.
Table of contents
Other Tanita Scale manuals

Tanita
Tanita AP-101 User manual

Tanita
Tanita BF-623 User manual

Tanita
Tanita RD-901 innerScan Dual User manual

Tanita
Tanita BC-1000 User manual

Tanita
Tanita KD-407 User manual

Tanita
Tanita UM-030 User manual

Tanita
Tanita BC-732 User manual

Tanita
Tanita WB-380 User manual

Tanita
Tanita KD-400 User manual

Tanita
Tanita InnerScan BC-557 User manual

Tanita
Tanita KD-191F User manual
Tanita
Tanita BF-662 User manual

Tanita
Tanita InnerScan Pro BC-1500PRO User manual

Tanita
Tanita 4521 User manual

Tanita
Tanita KD-403 User manual

Tanita
Tanita BD-585 User manual

Tanita
Tanita Ironman InnerScan BC-549 plus User manual

Tanita
Tanita BF-574 User manual

Tanita
Tanita BF-684W User manual

Tanita
Tanita InnerScan UM-073 User manual