manuals.online logo
Brands
  1. Home
  2. •
  3. Brands
  4. •
  5. Tarptent
  6. •
  7. Tent
  8. •
  9. Tarptent Rainshadow 3 Manual

Tarptent Rainshadow 3 Manual

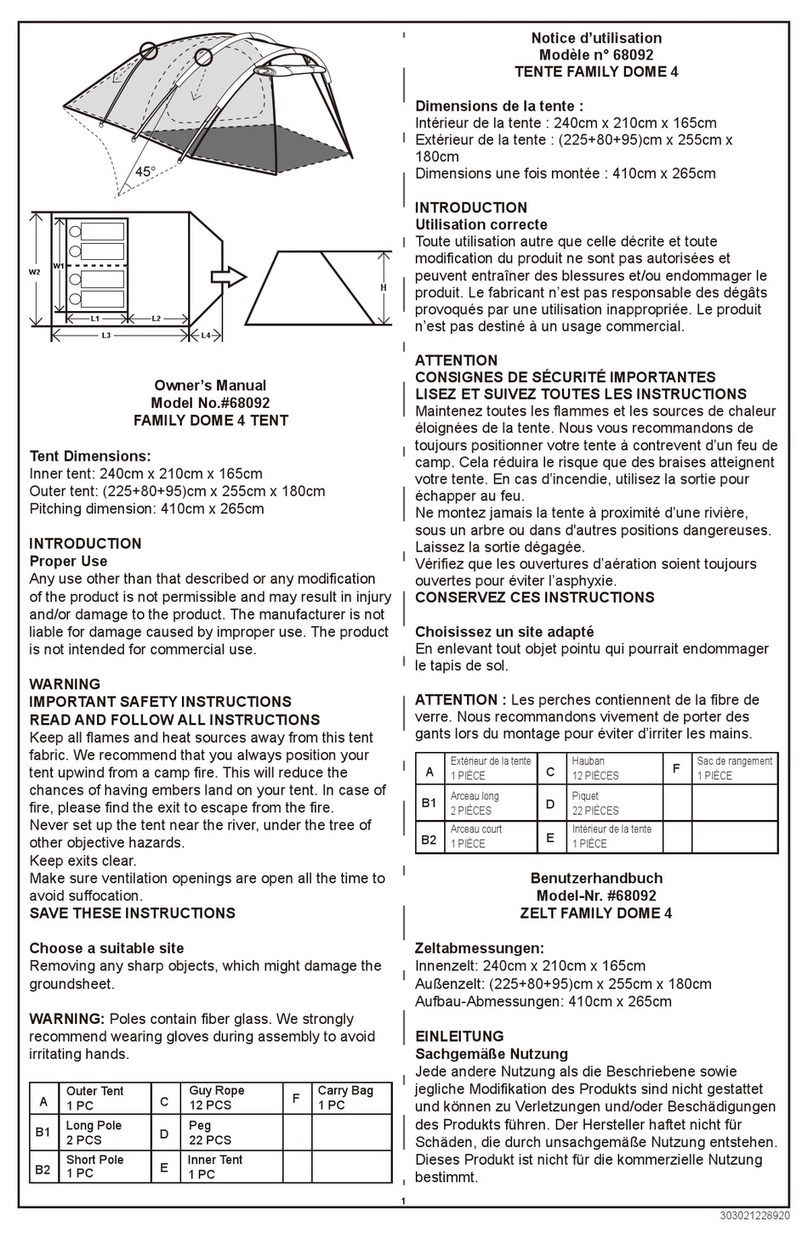
5. Now pull the rear edge fabric back from the arch,
centering it against the arch pole tension. Insert a
treking pole or substitute pole into the rear grommet
(or O-ring with adjustment strap) such that the
grommet is about 34in / 86cm above ground. Stake
guyline to ground using the line tightener to achieve
high tension. If using our substitute pole, place a
at rock under the pole end to prevent sinking.
6. Now stake bottom corners, looping the cording
around the stake as shown. The guylines should
angle slightly out from each corner. Use the line
tighteners to achieve high tension. Adjust the
front arch positioning and tension, and restake as
necessary to ensure ridgeline and sidewalls are
taut.
7. Adjust tension all the way around the Rainshadow 3 using the tighteners
(pull cord end to tighten; lift lever to loosen).
Entry/Exit
Entry and exit are through the zippered vestibule door and interior mesh
zippered door. Use the tiebacks to open and secure the vestibule door. The mesh
door unzips on both sides and secures up high via a tieback loop and clip.
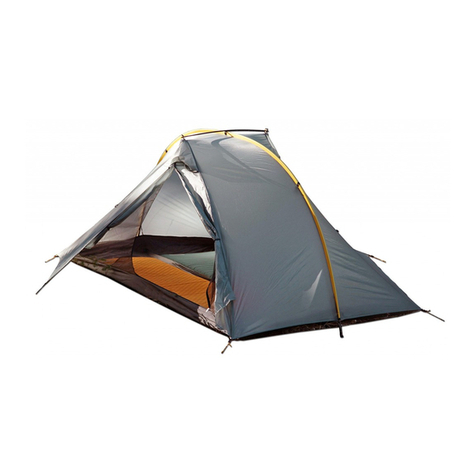
Tarptent Rainshadow 3 Basic Setup
Basic setup is very easy. It will take about 2 minutes once you get the hang of it.
For additional photos, see the Raindshadow 3 product page on tarptent.com
1. Spread canopy on ground, black oor side down. Remove stakes from stake
bag and have ready.
2. Assemble arch pole. Pole length is 128in / 3.25 m.
3. Locate the yellow sleeve and thread a pole where the sleeve opens. Push
the pole through the sleeve and insert the pole tip into grommet. Pull the
fabric to slide the sleeve across the pole and insert the pole tip into the
remaining grommet. Tighten straps as needed.
4. Now lift the arch and align it vertically. Stake through ring at bottom of
vestibule edge as shown below. Be sure to relax the tension strap to allow
plenty of room for tightening. Repeat at other edge.
Adjust tension with line tighteners
ring
tension
The vestibule also detaches from the stakes.
Unclip the buckle, rolls the fabric back, and tie
back against the sleeve. Use the arch tension
straps to maintain a taut pitch when the vestibule
is detached.
For full end-to-end ventilation, open and roll back the interior end storm ap.
Other features
There are interior pockets at each front corner. Rear oor lifters ensure
protection from splash and keep sleeping bag feet from touching a wall.
Seam-sealing
Please refer to the seam-sealing instructional video here:
https://www.youtube.com/tarptent
You can also nd a link from the Rainshadow 3 product page on tarptent.com.
Seams over your living space must be sealed with a silicone-based sealer. An
inexpensive product is GE Silicone II clear sealer, available at most hardware
stores in a squeeze tube. In a well-ventilated location, squirt about 3 table-
spoons into a tuna can and mix in about 3 tablespoons mineral spirits (paint
thinner) or Coleman fuel/white gas. The silicone will dissolve and form a semi-
viscous solution. Set up the tent and seal all seams over the living space as well
as the oor seam on the inside. Paint the solution on with a small foam brush
or rolled up paper towel for easy, smooth application. Add more mineral spirits
and stir if the solution gets too thick or you start to run out.
Condensation and Sag
Please watch our how-to-minimize condensation video here:
https://www.youtube.com/tarptent
Ventilation and fabric warmth are your best defenses against condensation.
Keep the netting open if at all possible and try to set up where it’s breezy. Keep
the beaks open (or at least partially rolled up). Camp under trees where its
warmer and set up out of river valleys and lake basins where it’s cool and damp.
Nylon stretches (and sags) when the humidity goes up. This happens as night is
falling and/or when it starts to rain. Use the line tighteners to tighten the fabric.
Key points to consider
• It’s a good idea to paint lines of silicone on the oor—slightly thicker
mixture than for the roof—to form an anti-skid mat.
• Push, rather than pull, the poles through the sleeves to prevent separation.
• The tent is made of strong, lightweight, and ammable fabric. Treat it
accordingly. It will resist much stress but neither ame nor abrasion.
Thank you for your purchase and we sincerely hope that you enjoy your
Tarptent. Feedback is always welcome.
Tarptent
12213 Koswyn Ct.
Nevada City, CA 95959 USA
e-mail: [email protected]
ph: 650-587-1548
Other Tarptent Tent manuals

Tarptent Rainbow Manual

Tarptent

Tarptent Rainbow Manual

Tarptent MoTrail Manual

Tarptent

Tarptent MoTrail Manual

Tarptent Aeon Li User manual

Tarptent

Tarptent Aeon Li User manual

Tarptent StratoSpire Li User manual

Tarptent

Tarptent StratoSpire Li User manual

Tarptent Saddle 2 Manual

Tarptent

Tarptent Saddle 2 Manual

Tarptent Bowfin 2 User manual

Tarptent

Tarptent Bowfin 2 User manual

Tarptent Cloudburst 3 Manual

Tarptent

Tarptent Cloudburst 3 Manual

Tarptent ProTrail Manual

Tarptent

Tarptent ProTrail Manual

Tarptent Scarp 1 User manual

Tarptent

Tarptent Scarp 1 User manual

Tarptent Double Rainbow Manual

Tarptent

Tarptent Double Rainbow Manual

Tarptent Notch User manual

Tarptent

Tarptent Notch User manual

Tarptent Notch Li User manual

Tarptent

Tarptent Notch Li User manual

Tarptent Cloudburst 3 Manual

Tarptent

Tarptent Cloudburst 3 Manual

Popular Tent manuals by other brands

Bohemian Travel Gear 30166 user manual

Bohemian Travel Gear

Bohemian Travel Gear 30166 user manual

paramondo Faltpavillon Quick and Easy installation instructions

paramondo

paramondo Faltpavillon Quick and Easy installation instructions

Konifera BW13000 instructions

Konifera

Konifera BW13000 instructions

Snugpak JOURNEY DUO Assembly instructions

Snugpak

Snugpak JOURNEY DUO Assembly instructions

E-Z UP Vantage instructions

E-Z UP

E-Z UP Vantage instructions

East Cover SSL202012H Assembly instructions

East Cover

East Cover SSL202012H Assembly instructions

Alpkit VISO instruction manual

Alpkit

Alpkit VISO instruction manual

Palram Nancy 2050 manual

Palram

Palram Nancy 2050 manual

Campvalley 30595 Instructions for use

Campvalley

Campvalley 30595 Instructions for use

Vaude POWER LIZARD SUL 1-2P user manual

Vaude

Vaude POWER LIZARD SUL 1-2P user manual

Outsunny 84C-262 Assembly & instruction manual

Outsunny

Outsunny 84C-262 Assembly & instruction manual

Khyam Michigan Erection Instructions

Khyam

Khyam Michigan Erection Instructions

Coleman TACOMA 9277-139 instructions

Coleman

Coleman TACOMA 9277-139 instructions

qeedo Quick Pine 3 instructions

qeedo

qeedo Quick Pine 3 instructions

MSW Motor Technics MSW-TC-S user manual

MSW Motor Technics

MSW Motor Technics MSW-TC-S user manual

Eureka Apex XT Assembly instructions

Eureka

Eureka Apex XT Assembly instructions

Sojag E999-5156096 Assembly manual

Sojag

Sojag E999-5156096 Assembly manual

AMERICANA PERGOLA Assembly instructions

AMERICANA

AMERICANA PERGOLA Assembly instructions

manuals.online logo
manuals.online logoBrands
  • About & Mission
  • Contact us
  • Privacy Policy
  • Terms and Conditions

Copyright 2025 Manuals.Online. All Rights Reserved.