tayco Hanna Series User manual


This manual suits for next models
8
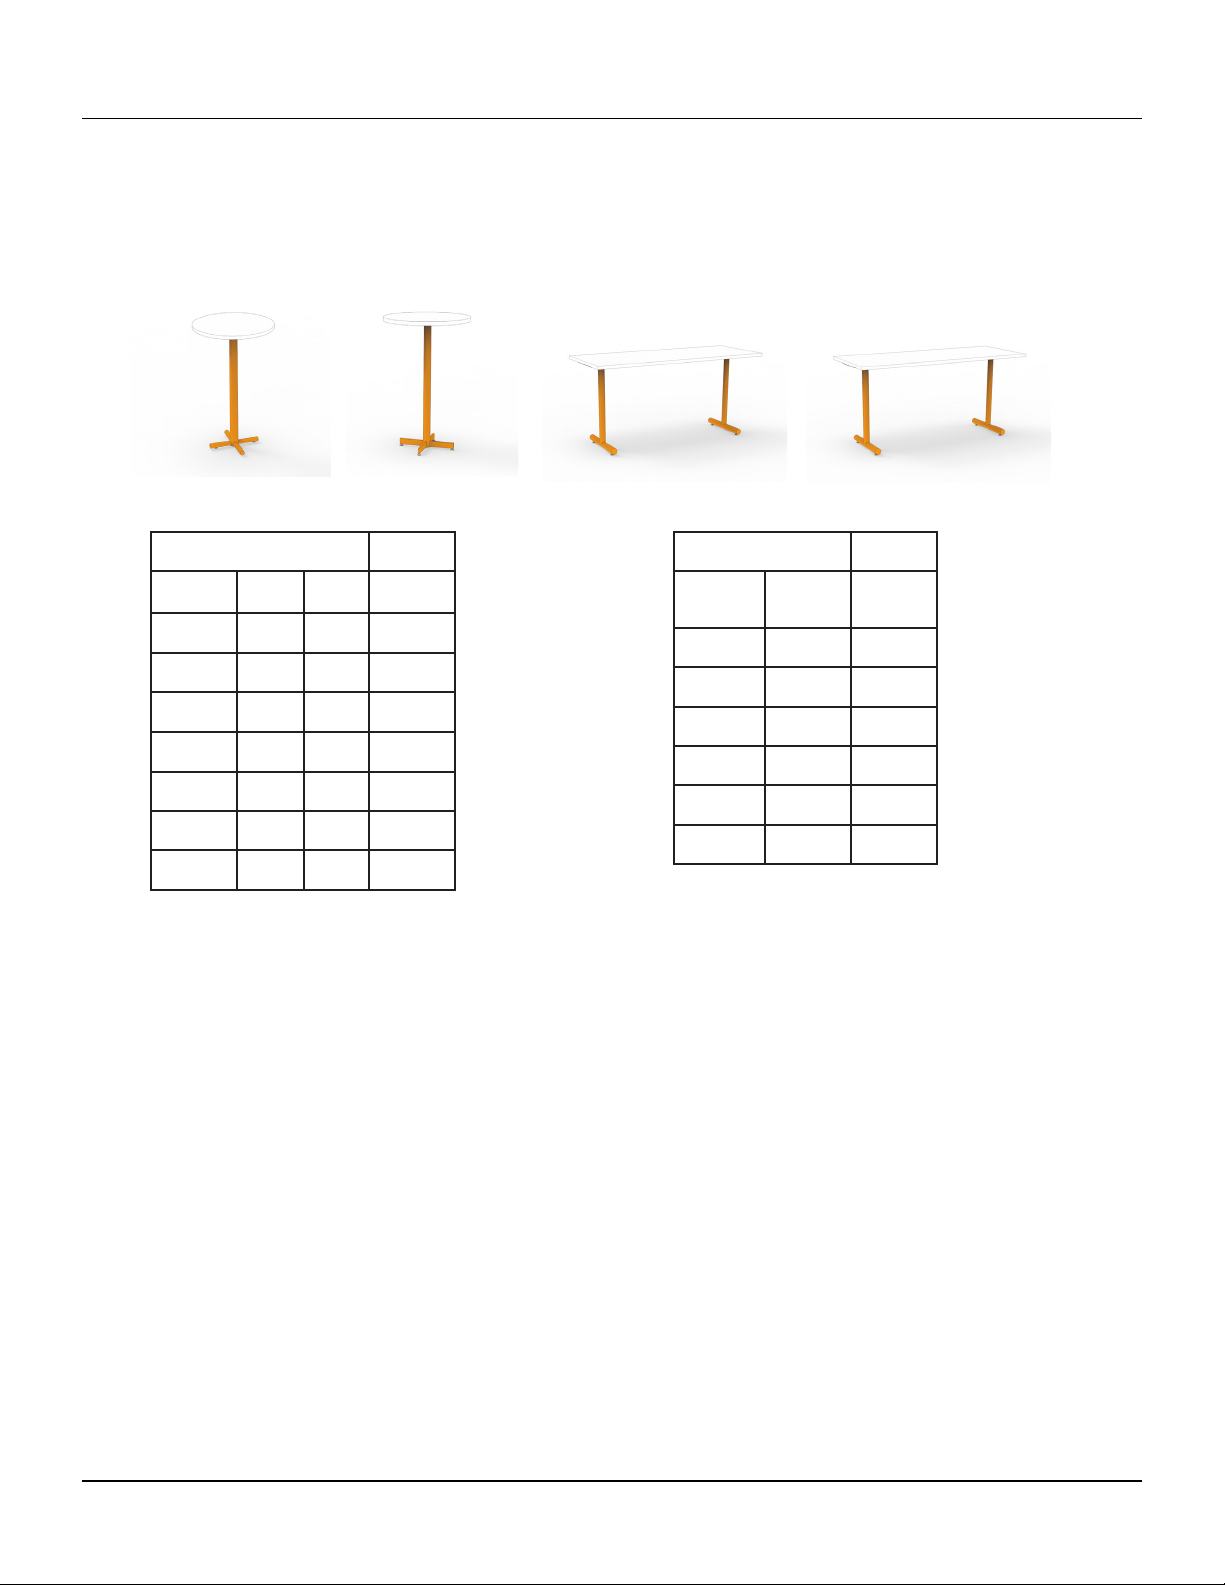
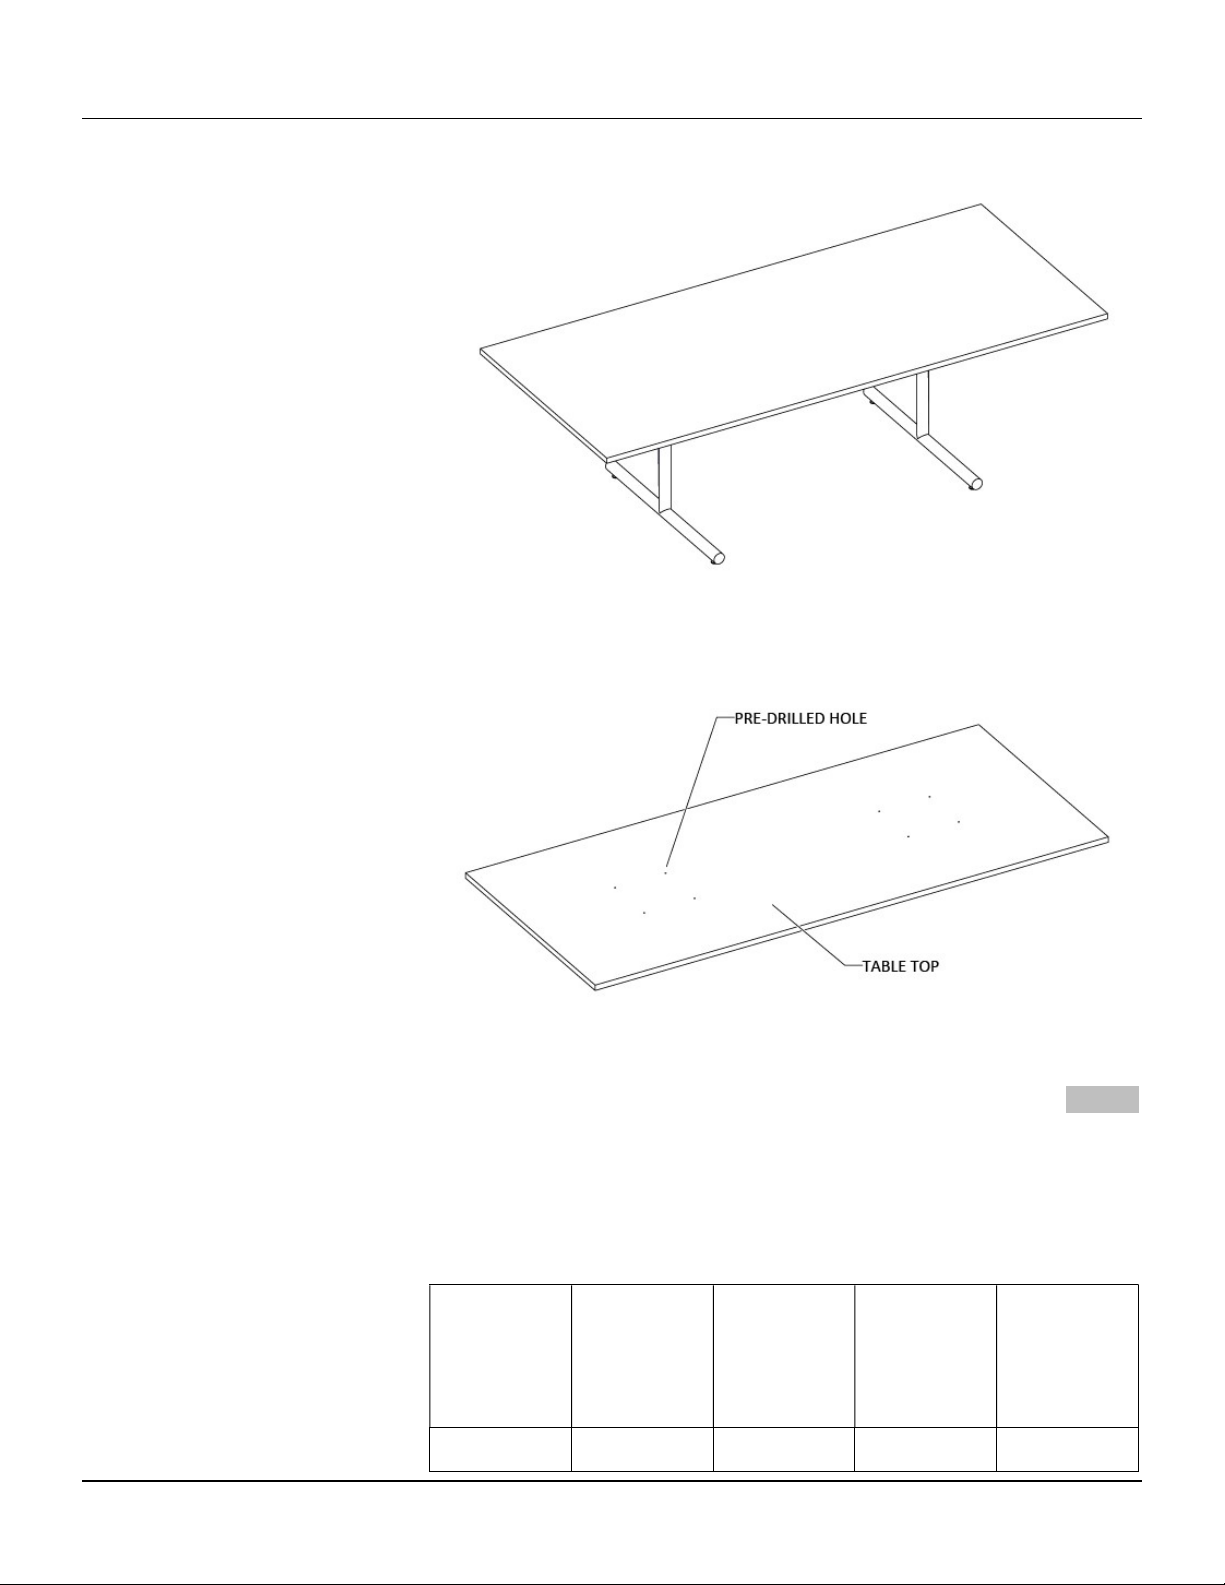
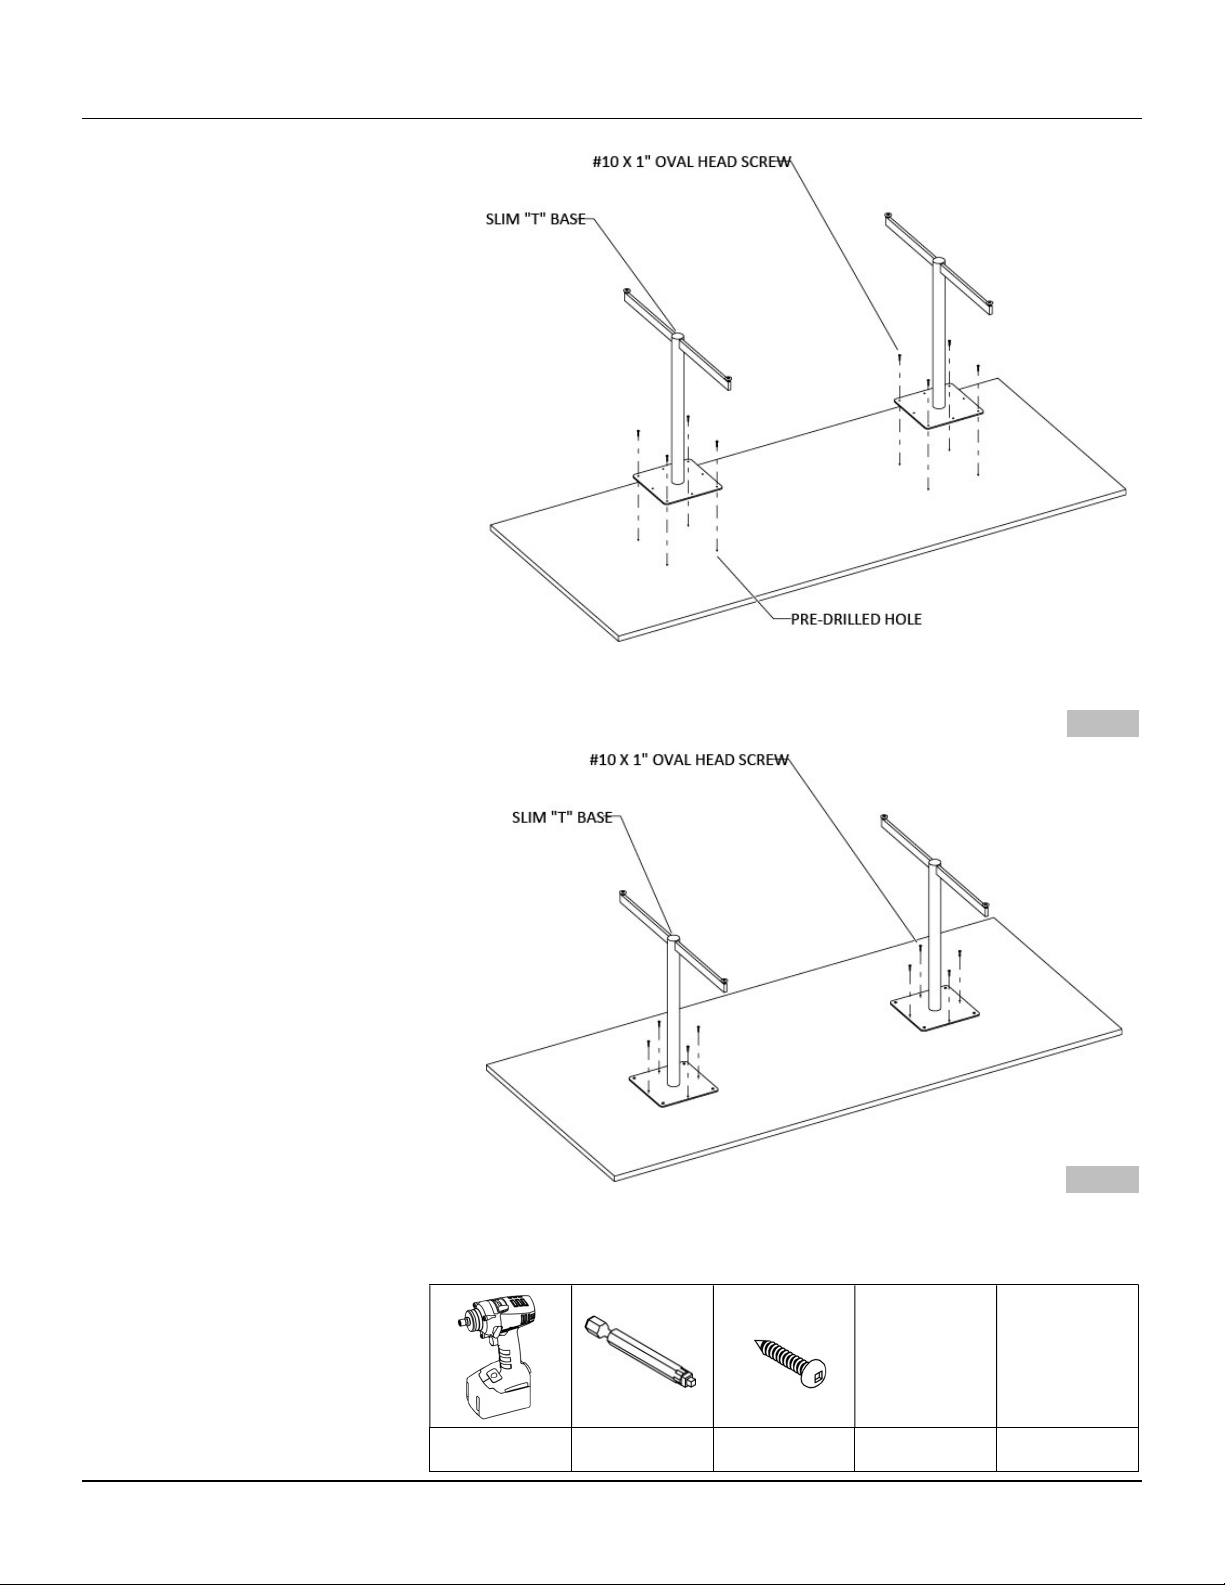
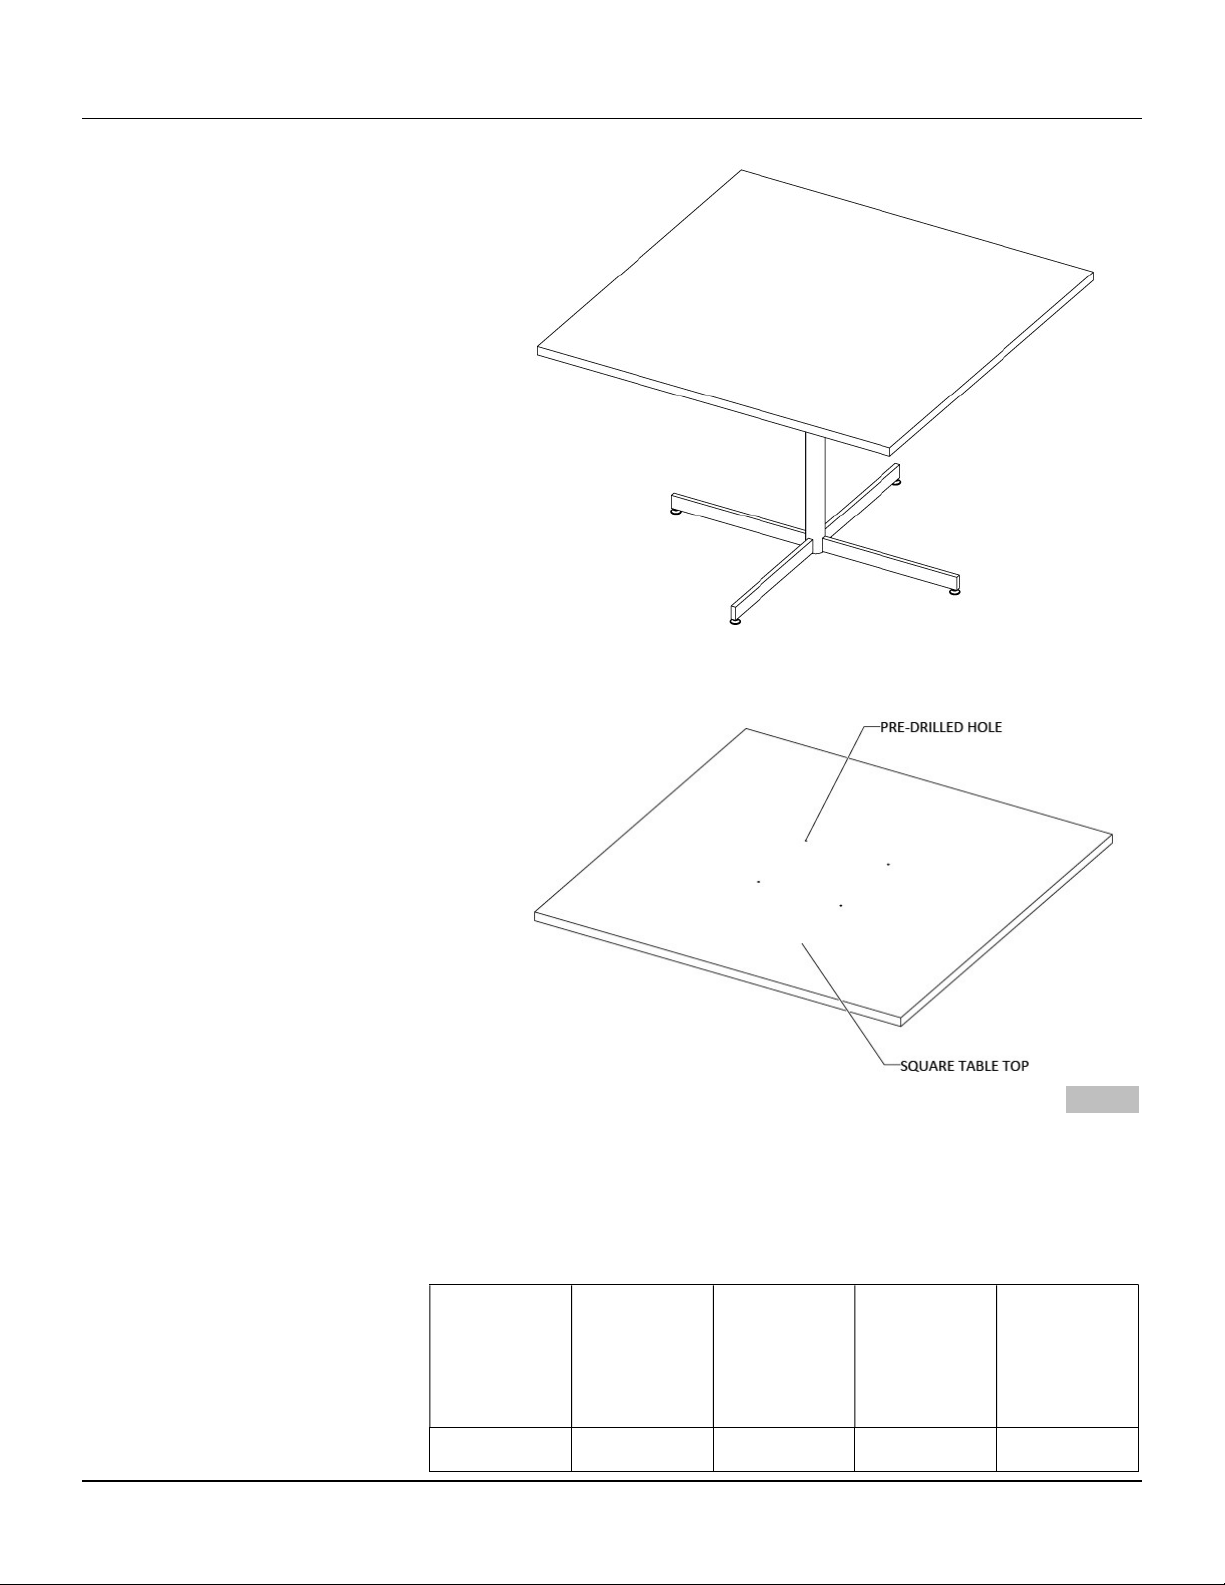
Table of contents
Other tayco Indoor Furnishing manuals

tayco
tayco Kip User manual

tayco
tayco Norris Series User manual

tayco
tayco Up User manual

tayco
tayco Switch User manual

tayco
tayco Metro User manual

tayco
tayco Halifax User manual

tayco
tayco Halifax User manual

tayco
tayco Height Adjustable Tables User manual

tayco
tayco The Shield Series User manual

tayco
tayco Scene User manual

Popular Indoor Furnishing manuals by other brands

Classic Brands
Classic Brands 124-047-1050 Owner's manual & assembly instructions

FourStarGroup
FourStarGroup 11213619 manual

Wilding Wallbeds
Wilding Wallbeds Sierra Instruction booklet

Alvin
Alvin CraftMaster CM40-3-WBR Assembly instructions

IKEA
IKEA KARLBY 903.694.23 manual

Honey Can Do
Honey Can Do WRD-01898 manual


Office Star Products
Office Star Products pro-line II 90662 operating instructions

Cube
Cube UP 6000 Series Assembly manual

JR Home
JR Home IF-TB242 Assembly instructions

Early Childhood Resources
Early Childhood Resources ELR-0631 manual

BRW
BRW SYSTEM BRW mnw/18/6 Fitting-Up Instruction

FourStarGroup
FourStarGroup 11224539V quick start guide