Teac HD-P2 User manual

HD-P2
Portable Stereo Audio Recorder
Effective : February, 2006 S-0148
CONTENTS
1. Specifications ・・・・・・・・・・・・・・・・・・・・・・・・・・・・・2
2. Test Mode・・・・・・・・・・・・・・・・・・・・・・・・・・・・・・・・6
3. Updating and Some Setting Procedures ・・・・・・・・・・・8
4. Warning Messages ・・・・・・・・・・・・・・・・・・・・・・・・10
5. Disassembly ・・・・・・・・・・・・・・・・・・・・・・・・・・・・・11
6. Block Diagram ・・・・・・・・・・・・・・・・・・・・・・・・・・・・13
7. Level Diagram ・・・・・・・・・・・・・・・・・・・・・・・・・・・・14
8. Exploded View and Parts List ・・・・・・・・・・・・・・・・・15
9. PC Boards and Parts List ・・・・・・・・・・・・・・・・・・・・18
10. Included Accessories ・・・・・・・・・・・・・・・・・・・・・・23
目次
1.仕様・・・・・・・・・・・・・・・・・・・・・・・・・・・・・・・・・・・・・・・・・2
2.テストモードと緊急時操作 ・・・・・・・・・・・・・・・・・・・・・・・・6
3.アップデートの方法とその他の各種設定 ・・・・・・・・・・・・・・・8
4.警告メッセージ ・・・・・・・・・・・・・・・・・・・・・・・・・・・・・・・10
5.分解の手順・・・・・・・・・・・・・・・・・・・・・・・・・・・・・・・・・・・11
6.ブロックダイアグラム ・・・・・・・・・・・・・・・・・・・・・・・・・・13
7.レベルダイアグラム ・・・・・・・・・・・・・・・・・・・・・・・・・・・・14
8.分解図とパーツリスト ・・・・・・・・・・・・・・・・・・・・・・・・・・15
9.基板図とパーツリスト ・・・・・・・・・・・・・・・・・・・・・・・・・・18
10.付属品・・・・・・・・・・・・・・・・・・・・・・・・・・・・・・・・・・・・・23
SERVICE MANUAL
»
All manuals and user guides at all-guides.com
all-guides.com

−2−
1. SPECIFICATIONS
仕様
TASCAM HD-P2
Specifications
Recording Media: Compact Flash, Microdrive
File Format: BWF Broadcast Wave File (FAT16/FAT32)
Recording time: 24 minutes (256 MB Compact Flash,
Fs=44.1 kHz 16 bit stereo)
Operating time: 5 Hours
Sample Rates: 44.1/48/88.2/96/176.4/192 kHz
Sample Clock refs: S/PDIF, Video (NTSC or PAL), LTC,
WORD
Quantization: 16/24 bit
Pre-record buffer: Up to 10 seconds
Time code types: 23.976,24,25,29,29.97 DF/NDF,
30 DF/NDF
Frequency response
Nominal level: 20 Hz to 20 kHz ±1.0 dB
(44.1 kHz/48 kHz)
MIC to LINE OUT: 20 to 40 kHz 0.5 dB/–4.0 dB
(88.2 kHz/96 kHz)
40 to 80 kHz 0.5 dB/–20 dB (176.4
kHz/192 kHz)
Noise level Trim Max (22 Hz to 22 kHz):
Up to –55 dBu MIC to LINE OUT
Dynamic Range (44.1kHz, 22k LPF, A-weighted):
105dB MIC to LINE OUT
THD+N(MAX LEVEL at 1kHz)
THD+N (MAX LEVEL at 1 kHz):
Up to 0.01% MIC to LINE OUT
TRIM MIN: Up to 0.01% 22 kLPF
Crosstalk at 1 kHz: Over 80 dB MIC to Monitor Out
Delay: 44.1 kHz 1.5 msec
192 kHz 0.7 mesc
Limiter: Attach time Up to 25 usec
Release time Up to 50 msec
Low Cut: High pass 100 Hz cut off –18 dB/OCT
定格
記録メディア: コンパクトフラッシュ、マイクロ
ドライブ
記録フォーマット: BWF(BroadcastWaveFile)
(FAT32/FAT16)
録音時間: 24分(256MBコンパクトフ
ラッシュカード使用、Fs=44.1
kHz、16bitStereo時)
動作時間(バッテリー電源時):
5時間(マイク入力信号録音時、
単3形アルカリ8本)
ビット長: 16、24ビット
サンプリング周波数: 44.1、48、88.2、96、
176.4、192kHz
外部クロック: S/PDIFデジタル、ビデオ
(NTSCまたはPAL)、
SMPTE/EBUタイムコード、
ワード
フレームレート: 23.976、24、25、29.97DF、
29.97NDF、30DF、30NDF
プリレコード時間: 5〜 10秒(サンプリング周波
数に依存)
電気的性能
周波数特性(MIC入力〜 LINEOUT、規定レベル):
20〜 20,000Hz、± 1.0dB
(44.1kHz/48kHz)
20〜 40,000Hz、+ 0.5dB/−4.0dB
(88.2kHz/96kHz)
20〜 80,000Hz、+ 0.5dB/−20dB
(176.4kHz/192kHz)
ノイズレベル(トリム最大、22〜 22,000Hz、MIC入
力〜 LINEOUT): − 55dBu以下
ダイナミックレンジ(MIC入力〜 LINEOUT、44.1kHz、
22kLPF、A-weighted):
105dB
THD+ N(MIC入力〜 LINEOUT、最大レベル、トリ
ム最小、1kHz、22kLPF):
0.01%以下
クロストーク(1kHz、MIC入力〜 LINEOUT):
− 80dB以上
電気的仕様
ディレイ: 1.5msec(44.1kHz)
0.7msec(192kHz)
リミッター:
アタックタイム: 25マイクロ秒以下
リリースタイム: 最大50ミリ秒
ローカットフィルター:100Hzカットオフ、−18dB/
オクターブ
ファントム電源: + 48V、10mA
All manuals and user guides at all-guides.com

−3−
TASCAM HD-P2
Phantom Power: +48 Volt, 10 mA
Input/Output Connectors
Analog I/O
MIC Input
Connector: XLR–3–31 type
Input Impedance: 1.3 k1Balance
Mic Input Level: –60 dBu (Trim Max) to –13.8 dBu (Trim Min)
Internal Mic level: –60 dBu (Trim Max) to –13.8 dBu (Trim Min)
Headroom: 16dB/23 dB (with limiter)
Maximum Gain: 46.2 dB
Pad: 20 dB
LINE Input
Connector: RCA Pin type
Input Impedance: 10 k1
Input Level: –46.2 dBV (Trim Max) to 0 dBu (Trim Min)
Headroom: 10 dB
Maximum Gain: 46.2 dB
LINE Output
Connector: RCA Pin type
Input Impedance: 100 1
Input Level: –10 dBV
Head Room: +16 dBV
Headphone Output
Connector: 6 TRS PHONE jack (Tip: L, Ring: R, Sleeve:
GND)
Output Power: 55 mW+55 mW (32 1)
Speaker
Output: 500 mW (16 1)
Digital I/O
COAXIAL INPUT/OUTPUT
Connector: RCA Pin type
Input Impedance: 75 1
Format: IEC60958 (S/PDIF)
アナログ入出力仕様
MIC/LINE入力(バランス)
コネクター: XLR-3-31
(1:GND、2:HOT、3:COLD)
入力インピーダンス: 1.3kΩ
入力レベル: − 60dBu(トリム最大)〜
−13.8dBu(トリム最小)
ヘッドルーム: 16dB(リミッターOFF時)
23dB(リミッターON時)
最大ゲイン: 46.2dB
パッド: 20dB
内蔵マイク
入力レベル: − 60dBu(トリム最大)〜
−13.8dBu(トリム最小)
LINEIN入力(アンバランス)
コネクター: RCAピンジャック
入力インピーダンス: 10kΩ
入力レベル: − 46.2dBV(トリム最大)〜
0dBV(トリム最小)
ヘッドルーム: 10dB
最大ゲイン: 46.2dB
LINEOUT出力(アンバランス)
コネクター: RCAピンジャック
出力インピーダンス: 100Ω
規定出力レベル: − 10dBV
最大出力レベル: + 16dBV
PHONES出力(ステレオ)
コネクター: 6φ三極ホンジャック
負荷インピーダンス: 32Ω
出力: 55mW+ 55mW
最大出力レベル: + 4.7dBu(1%歪み時)
内蔵スピーカー
出力パワー: 500mW
インピーダンス: 16Ω
デジタル入出力仕様
DIGITALIN入力
コネクター: RCAピンジャック
入力インピーダンス: 75Ω
信号フォーマット: IEC60958(S/PDIF)
ビット長: 24ビット
DIGITALOUT出力
コネクター: RCAピンジャック
出力インピーダンス: 75Ω
信号フォーマット: IEC60958(S/PDIF)
ビット長: 24ビット
All manuals and user guides at all-guides.com

−4−
TASCAM HD-P2
Quantization: 24 bit
Other Inputs
LTC INPUT
Connector: XLR–3–31
Input Impedance: 75 1
VIDEO INPUT
Connector: BNC
Input Impedance: 75 1
KEYBOARD
Connector: PS/2
FIREWIRE
Connector: IEEE.1394 (6 Pin)
Format: IEEE.1394 (Asynchoronous)
Baud Rate: 400 Mbps
Display
LCD: 240x160 dots with backlight
Power
AC ADAPTOR
Input: USA/Canada 120 V AC, 60 Hz
Europe/U.K. 230 V AC, 50 Hz
Australia 240 V AC, 50 Hz
Output: DC12 V
Rash Current: 600 mA
Power Consumption: 6 W (CompactFlash)
Battery: 8 x AA type dry cell (NiMH recommended)
Operating temperature:
0° to 35° C
Dimensions (w x d x h):
260 x 196 x 65
Weight: 1.2 kg (without the batteries)
Compatible Operating Systems:
Windows XP and Macintosh OSX ~10.3
その他の入出力
TIMECODEIN入力
コネクター: XLR-3-31
(1:GND、2:HOT、3:COLD)
入力インピーダンス: 75Ω
CLOCKIN/VIDEOREF入力
コネクター: BNC
入力インピーダンス: 75Ω
KEYBOARD
コネクター: PS/2
FireWire
コネクター: IEEE1394(6ピン)
フォーマット: IEEE1394(非同期)
ボーレート: 400Mbps
DISPLAY
LCD: 240×160ドット(バックライト)
一般仕様
ACアダプター
電源: 100VAC、50/60Hz
出力: DC12V
ラッシュ電流: 600mA
消費電力: 6W(コンパクトフラッシュ使用時)
バッテリー: 単三乾電池(アルカリ、ニッケル
水素、ニッカド)8本使用
動作温度: 0℃〜 35℃
外形寸法(幅×奥行×高さ):
260× 196× 65mm
重量: 1.2kg(本体のみ)
付属品: ACアダプター、IEEE1394ケー
ブル(2m、6ピン− 6ピン)、シ
ョルダーストラップ、取扱説明書、
リファレンスカード
対応OS: WindowsXP、MacintoshOSX
(10.3以上)
All manuals and user guides at all-guides.com

−5−
TASCAM HD-P2
外形寸法図
Dimensional drawing
All manuals and user guides at all-guides.com

−6−
2. TEST MODE
テストモードと緊急時操作
TASCAM HD-P2
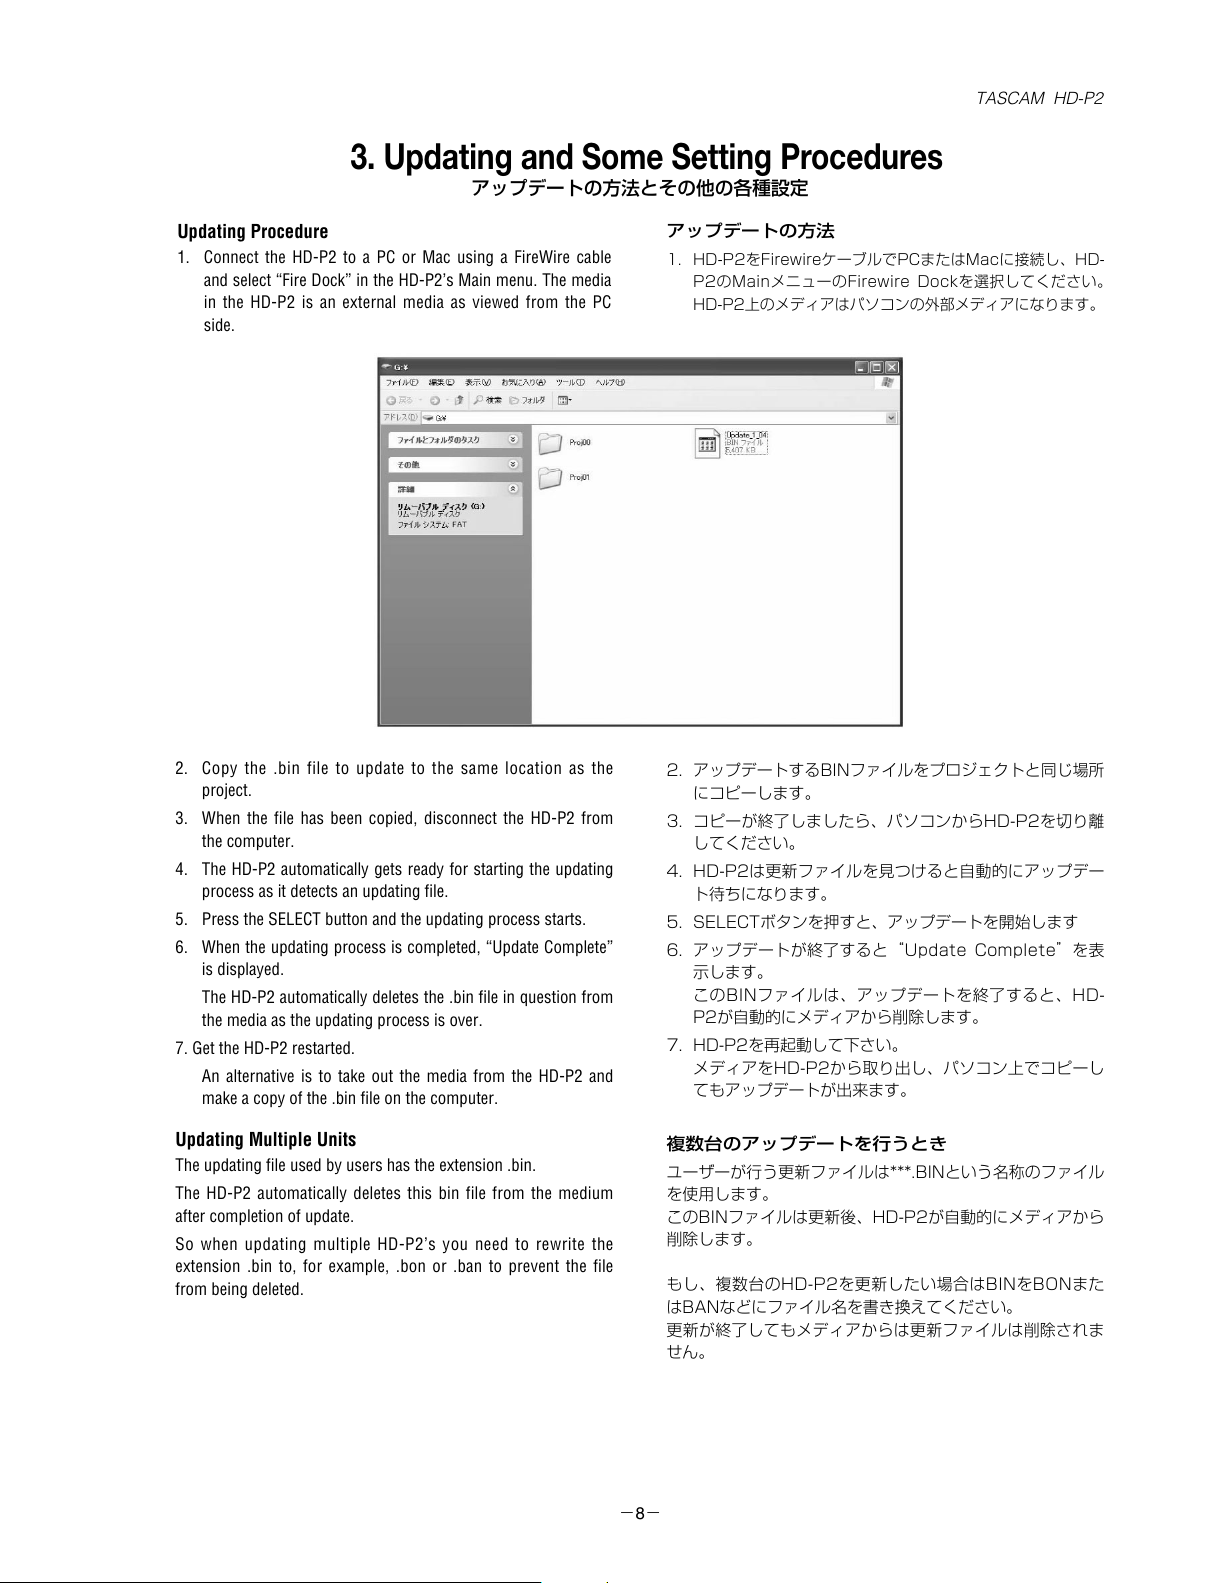
Selecting Test Mode allows you to perform check operations of
the encoder, LCD and keys, and also to get into self-diagnostics.
1. Switch on the power and press the DISPLAY and PLAY
buttons at the same time.
The TIMECODE, PAUSE and REC LEDs blink and as you
release your fingers from the buttons the PAUSE LED lights
solid to indicate the test mode is engaged.
2. Press the PLAY button and the unit switches into a check
mode that allows you to perform check operations of the
encoder and LCD.
As you rotate the encoder, a bar moves up and down on the
LCD. Also, as you rotate the encoder rightwards, the
TIMECODE, PAUSE and REC LEDs light in sequence to
indicate the direction in which the encoder is rotated.
Rotating the encoder leftwards, these LEDs light in reverse
order.
3. Press the PLAY button again and the unit switches in a check
mode that allows you to perform check operations of the
keys.
Press the following keys, in the indicated order.
PAUSE∑REC∑HOLD∑MARKER∑LOCATE R∑LOCATE L
∑RETAKE∑TIMECODE∑REW∑F.FWD∑STOP∑PLAY∑
DISPLAY∑PROJECT∑MENU∑CANCEL∑SELECT
If any of the above buttons is out of order, the REC LED
blinks.
4. Once the check operations of the keys are over, the PAUSE
LED blinks and the self-diagnostics starts.
The self-diagnostics checks the internal clock, the memory
access, and the system clock.
When nothing goes wrong, the TIMECODE LED blinks.
If something goes wrong, the REC LED blinks.
5. To quit test mode, unplug the AC adapter or forcibly switch
off the power.
テストモードでは、エンコーダーの動作確認、LCDの動作確
認、キーの動作確認、及び自己診断を行います。
1, 電源の投入と一緒に、DISPLAYボタンとPLAYボタン
を押してください。
TIMECODE LED、PAUSE LED、RECLEDが点滅し、
手を離すとPAUSE LEDが点灯して、テストモードに入
ったことを表わします。
2, PLAYボタンを押すと、エンコーダーとLCDの動作確認
モードに入ります。
エンコーダーを回すと、LCD上のバーが上下に移動しま
す。
また、エンコーダーを右に回すと、TIMECODE LED、
PAUSELED、RECLEDが順番に点灯してエンコーダー
の回転方向を示します。逆に回すと、LEDは逆に順番で
点灯します。
3, 再度、PLAYボタンを押すと、キーの動作確認モードに
入ります。
下記の順番でキーを押して、確認します。
PAUSE∑REC∑HOLD∑MARKER∑LOCATE R∑
LOCATE L∑RETAKE∑TIMECODE∑REW∑
F.FWD∑STOP∑PLAY∑DISPLAY∑PROJECT∑
MENU∑CANCEL∑SELECT
キーの動作に異常があった場合はREC LEDが点滅しま
す。
4, キーの動作確認が終了すると、PAUSE LEDが点滅し、
自己診断が始まります。
自己診断では、内部クロック、メモリーアクセス、シス
テムクロック確認を行います。
正常な場合はTIMECODELEDが点滅します。
異常があった場合はRECLEDが点滅します。
5, テストモードを終了するには、ACアダプターを抜くか、
強制終了を行います。
All manuals and user guides at all-guides.com
all-guides.com

−7−
TASCAM HD-P2
Emergency Boot-up
If the update failed because problems occurred in the updating
process, you can use the boot program to get the unit restarted.
1. Switch on the power and press the PROJECT and STOP
buttons at the same time.
The boot program gets the unit started.
Remember, the starting firmware is in the flash ROM and the
same version as shipped.
2. Once the unit restarted, try updating the firmware again.
3. Upon completion of the update, restart the unit in the normal
way.
Forcible Shutdown
If trouble is produced and you cannot switch off the unit, press
and hold down the POWER switch for 10 seconds.
About FAT 16 & FAT 32
The HD-P2 operates under Windows CE.
Windows CE formats media of up to 2 GB in FAT 16.
Media of higher capacity are formatted in FAT 32.
Te HD-P2 is optimized for FAT 16 although it operates with FAT-
32 media, too.
To let the HD-P2 operate with FAT 32, you need to use high-
speed transfer media.
緊急起動の方法
ファームウェアの更新中にトラブルが発生して、更新できな
かった場合等にBootプログラムから本機を起動することが
できます。
1, 電源の投入と一緒に、PROJECTボタンとSTOPボタン
を押してください。
Bootプログラムからの起動が実行されます。
但し、この起動ファームウェアはFLASH ROMに書かれ
ている出荷時の古いバージョンになっています。
2, 起動したら、再度、ファームウェアの更新を行ってくだ
さい。
3, 更新終了後は、通常の電源投入方法で再起動させてくだ
さい。
強制終了の方法
なんらかのトラブルで電源がオフできない場合は、POWER
SWを10秒間押し続けてください。
強制終了を行います。
FAT16&32について
HD-P2はWindowsCE上で動作しています。
Windows CEは2GBまでのメディアをFAT16でフォーマ
ットします。
それ以上のメディアについてはFAT32でフォーマットを行
います。
HD-P2はFAT32のメディアでも動作しますが、FAT16で
最適化されています。
FAT32で動作させる場合は、高速転送のメディアが必要で
す。
All manuals and user guides at all-guides.com

−8−
3. Updating and Some Setting Procedures
アップデートの方法とその他の各種設定
TASCAM HD-P2
Updating Procedure
1. Connect the HD-P2 to a PC or Mac using a FireWire cable
and select “Fire Dock” in the HD-P2’s Main menu. The media
in the HD-P2 is an external media as viewed from the PC
side.
アップデートの方法
1. HD-P2をFirewireケーブルでPCまたはMacに接続し、HD-
P2のMainメニューのFirewire Dockを選択してください。
HD-P2上のメディアはパソコンの外部メディアになります。
2. アップデートするBINファイルをプロジェクトと同じ場所
にコピーします。
3. コピーが終了しましたら、パソコンからHD-P2を切り離
してください。
4. HD-P2は更新ファイルを見つけると自動的にアップデー
ト待ちになります。
5. SELECTボタンを押すと、アップデートを開始します
6. アップデートが終了するとUpdate Completeを表
示します。
このBINファイルは、アップデートを終了すると、HD-
P2が自動的にメディアから削除します。
7. HD-P2を再起動して下さい。
メディアをHD-P2から取り出し、パソコン上でコピーし
てもアップデートが出来ます。
複数台のアップデートを行うとき
ユーザーが行う更新ファイルは***.BINという名称のファイル
を使用します。
このBINファイルは更新後、HD-P2が自動的にメディアから
削除します。
もし、複数台のHD-P2を更新したい場合はBINをBONまた
はBANなどにファイル名を書き換えてください。
更新が終了してもメディアからは更新ファイルは削除されま
せん。
2. Copy the .bin file to update to the same location as the
project.
3. When the file has been copied, disconnect the HD-P2 from
the computer.
4. The HD-P2 automatically gets ready for starting the updating
process as it detects an updating file.
5. Press the SELECT button and the updating process starts.
6. When the updating process is completed, “Update Complete”
is displayed.
The HD-P2 automatically deletes the .bin file in question from
the media as the updating process is over.
7. Get the HD-P2 restarted.
An alternative is to take out the media from the HD-P2 and
make a copy of the .bin file on the computer.
Updating Multiple Units
The updating file used by users has the extension .bin.
The HD-P2 automatically deletes this bin file from the medium
after completion of update.
So when updating multiple HD-P2’s you need to rewrite the
extension .bin to, for example, .bon or .ban to prevent the file
from being deleted.
All manuals and user guides at all-guides.com

−9−
TASCAM HD-P2
Back to Factory Defaults
To reset the HD-P2 back to factory defaults, select System ∑
Default Project Settings ∑Reset Settings to Factory Defaults in
the menu.
Clearing Project Numbers
All Project numbers are cleared from memory when you select
System ∑Default Project Settings ∑Reset Project Counter in
the HD-P2’s menu.
Newly created Projects are numbered starting with 0.
Fragmentation in media
As you delete and create data on the HD-P2 over and over, data
in the media in use are fragmented, and this may cause the
media speed to slow down. We recommend formatting your
media regularly.
Note on Microdrive
The microdrive is a hard disk. So there is a chance that it might
be damaged due to shock or vibration.
There was also a case where playback with the HD-P2’s speakers
set to maximum volume resulted in damage to the microdrive.
ReadMe 1.02 includes Note for users.
FireWire Connection
There are rarely chances where the HD-P2 might not identify
media as you connect the HD-P2 to and disconnect it from a PC
or Mac over and over. If this is the case, turn the HD-P2 off and
turn it back on.
工場出荷時設定への戻し方
HD-P2のSystem∑Default Project Settings∑Reset
Settings to Factory Dafualts メニューを選択すると工
場出荷時の設定に戻ります。
Project番号のクリア方法
HD-P2のSystem∑Default Project Settings∑Reset
Project Counter メニューを選択するとProject番号はク
リアされます。
新規作成されるProjectは0から作成されます。
メディアのデフラグについて
HD-P2で使用されるメディアはファイルの削除や作成で、
メディアにデフラグ(隙間)が発生します。
このデフラグによりメディアスピードが遅くなることがあり
ます。
常にフォーマットをすることをお勧めします。
マイクロドライブについて
マイクロドライブはハードディスクです。衝撃や振動により
破損する恐れがあります。
また、HD-P2のスピーカーを最大にした状態での再生でマ
イクロドライブに損傷を与えたこともありました。ユーザー
への注意はReadMe1.02で記載されています。
Firewire接続について
HD-P2をPCまたはMacにFirewireでの接続を繰り返して行
っていると、まれにHD-P2がメディアを認識できなること
が発生します。その場合は、HD-P2の電源を再度投入して
ください。
All manuals and user guides at all-guides.com

−10−
4. Warning Messages
警告メッセージ
TASCAM HD-P2
This message might be displayed during playback or recording.
This warns you that the media in use is too slow in speed,
prompting you to use a higher speed media.
This message will appear during recording, warning you that the
media space is running out. You need then to replace the media
with a new one or format the media in use.
This message will appear when you try switching off the power
during recording or playback, prompting you to stop recording
or playback before switching off the power.
再生または録音中に以下のメッセージが表示されることがあ
ります。
これは、使用しているメディアのスピードが間に合わない場
合に表示されます。高速なメディアを使用してください。
録音中にメディア容量がなくなると以下のメッセージが表示
されます。
新しいメディアに交換するか、またはフォーマットを行って
ください。
録音中または再生中に電源を切ろうとすると以下のメッセー
ジが表示されます。
録音または再生を停止させてから、電源を切ってください。
All manuals and user guides at all-guides.com

−11−
5. Disassembly
分解の手順
TASCAM HD-P2
1. Remove the bottom chassis.
To do this, remove 8 screws.
Pay attention to the battery cable on the bottom chassis.
1.ボトムシャーシを外す
8個のネジを外してください。
ボトムシャーシにはバッテリーケーブルがありますので注意
してください。
2.トップシャーシを外す
10個のネジを外してください。
トップシャーシにはスピーカーケーブルがありますので注意
してください。
3.フロントシャーシを外す
7個のネジを外してください。
フロントシャーシにはINPUTケーブルとMONITORケーブ
ルがありますので注意してください。
2. Remove the top chassis.
To do this, remove 10 screws.
Pay attention to the speaker cable on the top chassis.
3. Remove the front chassis.
To do this, remove 7 screws.
Pay attention to the INPUT and MONITOR cables on the front
chassis.
All manuals and user guides at all-guides.com
all-guides.com

−12−
TASCAM HD-P2
4.PCB,AMPを外す。
2個のネジを外してください。
PCB,AMPに接続されている全てのケーブルを外してくださ
い。
また、右側のサイドシャーシも外してください。
5.PCB,MAINを外す。
10個のネジを外してください。
PCB,MAINに接続されている全てのケーブルを外してくだ
さい。
また、両側のサイドシャーシも外してください。
5. Remove the MAIN PCB.
To do this, remove 10 screws.
Remove all the cables connected to the MAIN PCB.
Remove the left and right side chassis’s, too.
4. Remove the AMP PCB.
To do this, remove 2 screws.
Remove all the cables connected to the AMP PCB.
Remove the right side chassis, too.
All manuals and user guides at all-guides.com

−13−
6. BLOCK DIAGRAM
ブロックダイアブラム
TASCAM HD-P2
All manuals and user guides at all-guides.com

−14−
7. LEVEL DIAGRAM
レベルダイアグラム
TASCAM HD-P2
All manuals and user guides at all-guides.com

8. EXPLODED VIEWS AND PARTS LIST
EXPLODED VIEW-1
−15−
分解図とパーツリスト
TASCAM HD-P2
All manuals and user guides at all-guides.com

EXPLODED VIEW-1
REF.NO. PARTSNO. DESCRIPTION REMARKS
1- 1 M02221200D TOP PANEL,HD-P2 G
1- 2 M02222000A BUTTON,TOP(B) HD-P2 G
1- 3 M02221900B BUTTON,TOP(A) HD-P2 G
1- 4 Y00294100A SP ASSY,SP-AMP HDP2
1- 5 M02222300B KNOB,SLIDE TOP HD-P2 G
1- 6 M02222700A KNOB,JOG D35 HD-P2 G
1- 7 M01393910A POLYEST SHEET,JOG BLACK G
1- 8 M02222800A HOLDER,TOP HD-P2 G
1- 9 Y00294300A MIC ASSY,MIC-MAIN HDP2
E01086800A HARN ASSY,MIC-MAIN HDP2
3E038410 MIC CONDENSER,EM-100 G
M0226290 HOLDER,RUBBER MIC G
1- 10 M02222200B KNOB,SLIDE POWER HD-P2 G
1- 11 M02246000C HOLDER,POWER HD-P2 G
1- 12 M02308700A SHIELD COVER,HP HD-P2 G
1- 13 E01087500A HARN ASSY,MAIN-LCD HDP2
1- 14 E95246100A PCB ASSY,MAIN HDP2......................................................PCB ASSY,MAIN HDP2(Refer to page 18,19)
1- 15 M02223200B SHIELD PLATE,(A)HD-P2 G
1- 16 Y00293800A MIC ASSY,MICL-AMPL HDP2
E01086000A HARN ASSY,MICL-AMPL HDP2
E0110640 JACK,MIC NC3FD-L-1
1- 17 M02221500C SIDE PANEL,(L)HD-P2 G
1- 18 M0224150 NUT,NRJ-NUT-B
1- 19 M02223500A BRACKET,SIDE(L) HD-P2 GG
1- 20 E95246700A PCB ASSY,LCD HDP2.......................................................GATHER PCBA,ANALOG(Refer to page 20)
1- 21 M02222900A HOLDER,LCD HD-P2 G
1- 22 M02224000A CUSHION,LCD HD-P2 G
1- 23 3E038390 LCD,EW24H00FLWP*A1
1- 24 M02223400A SHIELD COVER,LCD HD-P2 G
1- 25 M02221000B CHASSIS,MAIN HD-P2 G
1- 26 M02223600B BRACKET,SIDE(R) HD-P2 G
1- 27 M02221600C SIDE PANEL,(R)HD-P2 G
1- 28 Y00293900A MIC ASSY,MICR-AMPR HDP2
E01086100A HARN ASSY,MICR-AMPR HDP2
E0110640 JACK,MIC NC3FD-L-1
1- 29 M02308500A PLATE,SIDE HD-P2 G
1- 30 E95246600A PCB ASSY,PANEL HDP2....................................................GATHER PCBA,ANALOG(Refer to page 20)
1- 31 M02222100A KNOB,SLIDE HOLD HD-P2 G
1- 32 M02221700A BUTTON,FRONT(A)HD-P2 G
1- 33 M02223000A LENS,LED(A) HD-P2 G
1- 34 M02221800B BUTTON,FRONT(B)HD-P2 G
1- 35 M02223100A LENS,LED(B) HD-P2 G
1- 36 M02223800A PLATE,HOOK HD-P2 G
1- 37 E95246500A PCB ASSY,MONITOR HDP2...............................................GATHER PCBA,ANALOG(Refer to page 20)
1- 38 E95246400A PCB ASSY,INPUT HDP2 ....................................................GATHER PCBA,ANALOG(Refer to page 20)
1- 39 M02221100C FRONT PANEL,HD-P2 G
1- 40 M02222400A KNOB,D16 HD-P2 G
1- 41 M02246300A WINDOW,HD-P2 G
1- 42 M02222500A KNOB,REC(L)HD-P2 G
1- 43 M02246100B RING,RUBBER HD-P2 G
−16−
TASCAM HD-P2
All manuals and user guides at all-guides.com
all-guides.com

EXPLODED VIEW-1
REF.NO. PARTSNO. DESCRIPTION REMARKS
1- 44 M02222600A KNOB,REC(R)HD-P2 G
1- 45 M02329600A RING,VR HD-P2 G
1- 46 M02223300B SHIELD PLATE,(B)HD-P2 G
1- 47 E95246300A PCB ASSY,AMP HDP2.............................................................GATHER PCBA,ANALOG(Refer to page 20)
1- 48 M02302400A SHEET,BOTTOM HD-P2 G
1- 49 Y00294200A BATT ASSY,BATT-AMP HDP2
E01086600B HARN ASSY,BATT-AMP HDP2
3E038400 HOLDER,BH381-1D
1- 50 M02287300A LICENSE SEAL,WINCE
1- 51 M02221400A COVER,BOTTOM HD-P2 G
1- 52 M02221300C BOTTOM PANEL,HD-P2 G
1- 53 M02246200A FOOT,D7 HD-P2 G
1- 54 3E026350G BATTERY,CR2032 BULK G
1- 61 B00173506A SCREW,MPAR 1.7*6FZB G
1- 62 B00199108A SCREW,BPP 2.6*8 FZB G
1- 63 B00245414A SCREW,FPB 3*14FNI G
1- 64 B00171406A SCREW,BP 3*6 FZB G
1- 65 B00199708A SCREW,BPB 3*8 FZB G
1- 66 B00198912A SCREW,BPP 2.6*12FZC G
1- 67 B00208408A SCREW,FPP 2.6*8 FZC G
1- 68 B00245200B SCREW,HOOK 3*8FZB G
1- 69 B00198808A SCREW,BPP 2*8 FZC G
1- 70 B00199612A SCREW,BPB 2.6*12FZB G
1- 71 B00208010A SCREW,BPBR 3*10FZB G
−17−
TASCAM HD-P2
All manuals and user guides at all-guides.com

9. PC BOARDS AND PARTS LIST
−18−
基板図とパーツリスト
TASCAM HD-P2
MAIN PCB ASSY (SIDE A)
All manuals and user guides at all-guides.com

−19−
TASCAM HD-P2
MAIN PCB ASSY (SIDE B)
All manuals and user guides at all-guides.com

−20−
TASCAM HD-P2
GATHER PCB ASSY, ANALOG (SIDE A)
GATHER PCB ASSY, ANALOG (SIDE B)
All manuals and user guides at all-guides.com
Table of contents
Other Teac Measuring Instrument manuals
Popular Measuring Instrument manuals by other brands

Siemens
Siemens SITRANS F US SONOFLO SONO 3000 instructions

WATANABE ELECTRIC INDUSTRY
WATANABE ELECTRIC INDUSTRY A7000 Series Operation manual

Valeport
Valeport fastCTD operating manual

Reer
Reer LAD4 manual

DGC
DGC DC-3000 Series instruction manual

Dwyer Instruments
Dwyer Instruments MFS2-3 Installation and operating instructions