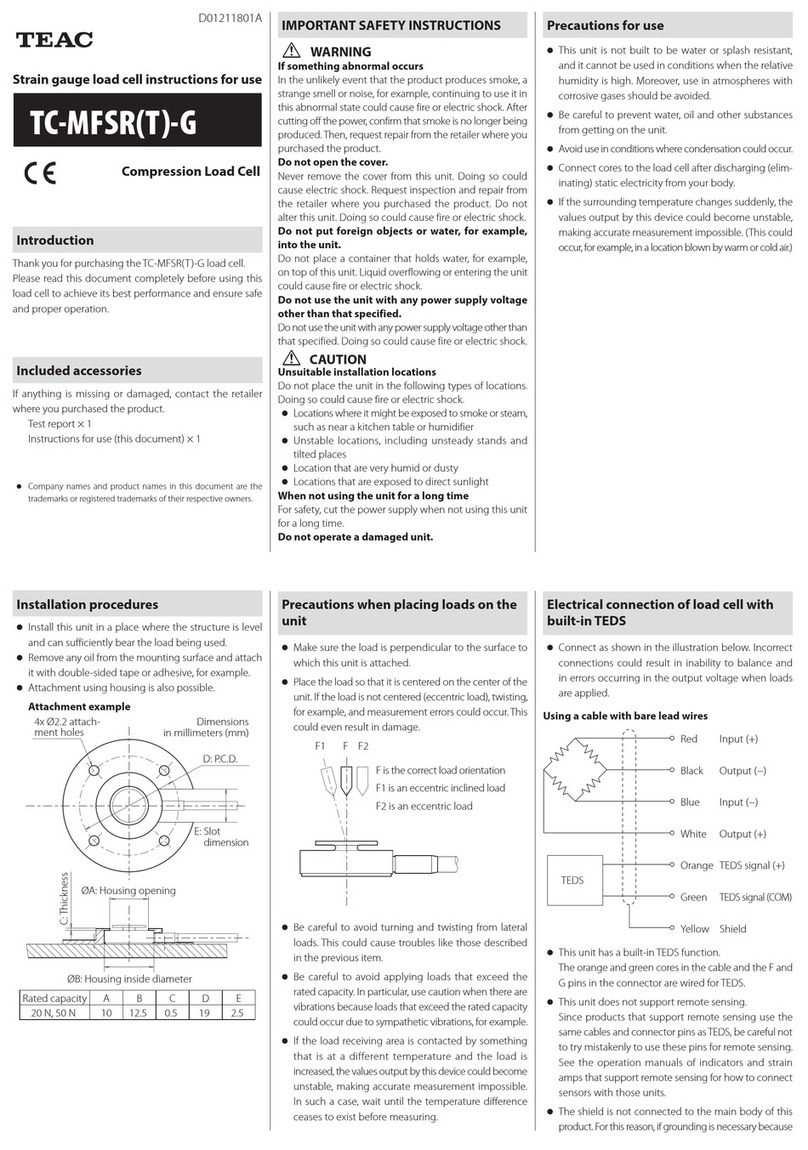
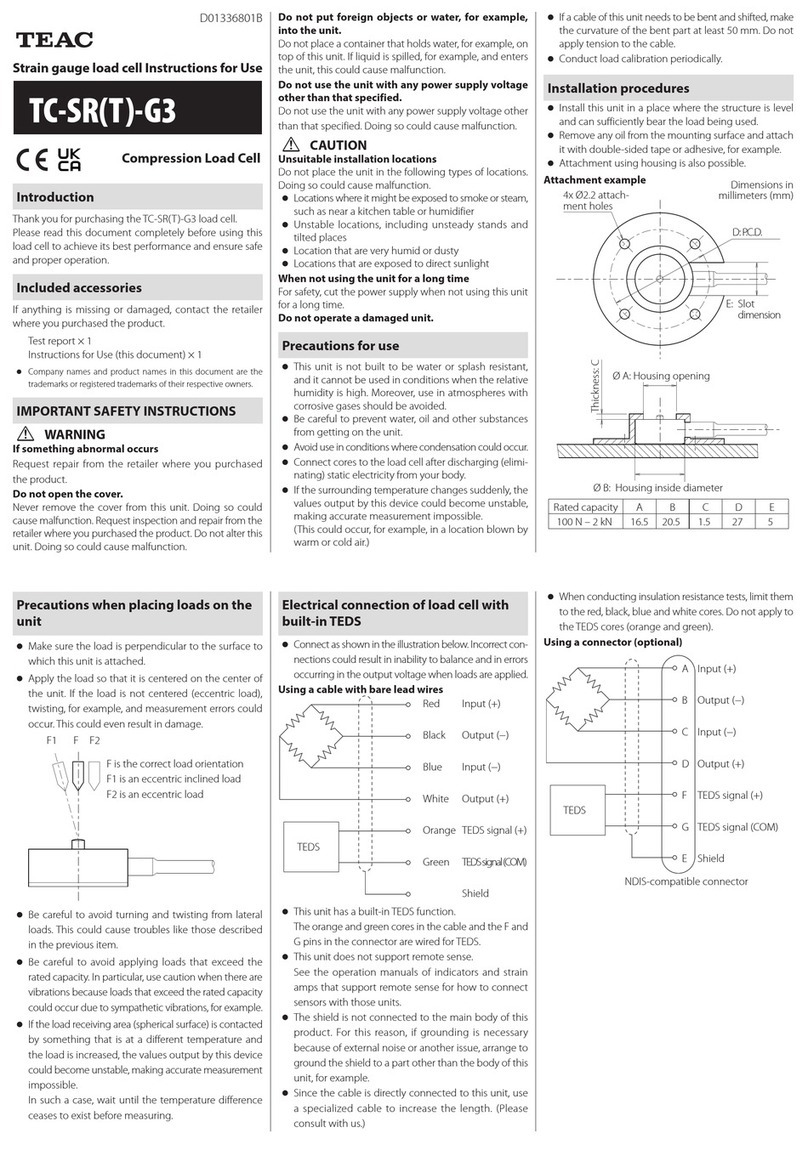
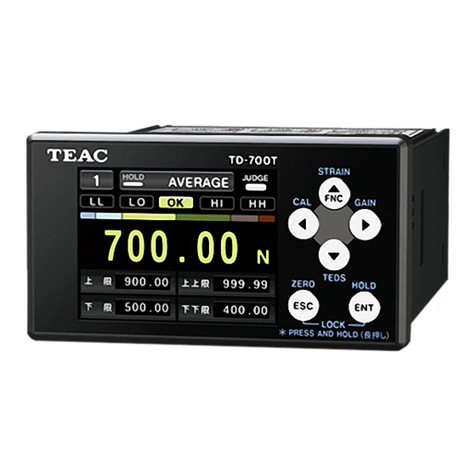
Teac TD-280T User manual

DIGITAL TRANSDUCER INDICATOR
TD-280T
OPERATION MANUAL
Please read this book carefully before using this product
TEAC CORPORATION September, 2011 D01137400B

- 1 -
Introduction
Thank you very much for purchasing TD-280T digital indicator unit.
To ensure optimum performance and proper and safe operation, please read this book carefully and understand it
thoroughly before using the instrument.
Information and data about this product, contained in this book, are simply for reference purposes; the Company
does not guarantee any intellectual property rights or any other rights of a third party regarding this information or
data. Accordingly, the Company does not bear any responsibility for infringement of the intellectual property rights
of a third party, and any problems incurred by the use of the products listed herein.
●Company names and product names in this document are the trademarks or registered trademarks of their respective
owners.

- 2 -
For Your Safety
This document describes the safety instructions for the operation of the TD-280T. Before operating the product,
read this document carefully to familiarize yourself with the product.
Warning
Follow the instructions below to avoid risk of serious personal injury and death.
Never use beyond the rated specifications as there is a danger of property damage, injury, fire or electrical shock.
Never use in flammable gaseous environments including the following locations as there is a danger of explosion.
•Locations subject to corrosive or flammable gases
•Locations subject to water, oil or chemical splash
If the product malfunctions (any smoke, odor or noise is present), stop operating the product immediately and unplug
the power cord as there is a danger of fire or electrical shock.
Never attempt to disassemble the product.
Carefully check connections and wiring before applying power.
Be sure to ground the product (with ground resistance of 100 Ωor less).
The electric shock protection class of this product is Class I. The product must be grounded to the protective ground
terminal for protection against electric shock.
To allow the operator to immediately shut off the power to the product, install a switch or circuit breaker that complies
with both IEC60947-1 and IEC60947-3 requirements near the product. The switch or breaker installed must also
indicate that it functions to shut off the power to the TD-280T.
Double insulation or reinforced insulation must be provided between the TD-280T and an external device connected to
it and between the external device and its power source.
Caution
Follow the instructions below to avoid risk of personal injury or property damage.
Disconnect the power cord when performing the following.
•Attaching or detaching optional connectors
•Wiring or connecting cables to terminal blocks
•Connecting the ground line
Wait for at least five seconds between turning on and off.
Never touch the rear panel or connectors while the product is turned on.
When connecting to the signal I/O connector, check the signal name and the pin assignment to prevent a false
connection. Be sure to shut off the power to the product as well when making a connection.
Use a shielded cable when connecting to a load-cell, external I/O or option.
Take adequate measures when operating in the following locations.
•Near a power line
•Where a strong electric or magnetic field is present
•Where static electricity or noise such as from a relay is generated
Do not install under the following environments.
•Locations subject to temperatures exceeding the specified temperature and humidity ranges
•Locations with high salt or iron content
•Locations under direct vibration or shock
•Outdoor, or locations with an altitude of higher than 2,000 m
Do not operate a damaged unit.
The TD-280T is classified as an open-type (built-in) device and must be installed inside a control panel.
If the top cover and the panel are dirty, wipe them with a soft cloth lightly dampened with a solution of a neutral
detergent and water, and then wipe them again with a damp, well wrung-out cloth. DO NOT use a chemically treated
dust cloth, paint thinner, or other flammable solvents. Using any of them could damage the coating of the product.
If the product is used in a manner unintended by the manufacturer, the product safety may be adversely affected.
- 3 -
Repair of failures
This product has passed exhaustive inspections before being shipped from the factory.
Broken or defective TD-280T shall be repaired or replaced in accordance with the service standards set out by
TEAC. In any case, our liability for damages resulting from any defect or deficiencies in TD-280T shall be limited
to repair or replacement of TD-280T.
However, this shall not apply to cases in which the manufacturer is liable under the product liability law.
TEAC Corporation
1-47 Ochiai, Tama-shi, Tokyo 206-8530 Japan
Measurement Products Sales Section, Information System Sales Department,
Information Products Division
Phone: +081-42-356-9161 , Fax: +081-42-356-9185
Web site http://www.teac.co.jp/industry/measurement/index.html

- 4 -
Contents
1. NAMES OF PARTS AND FUNCTIONS ···································· - 11 -
1-1 Front Panel ········································································· - 11 -
1-1-1 Digital Display Screen (TOP Screen) ················································ - 11 -
1-1-2 Graph Display Screen ····························································· - 14 -
1-1-3 Display of Operation Panel························································· - 15 -
1-2 Rear Panel ·········································································· - 16 -
1-2-1 Protective Ground Terminal························································ - 16 -
1-2-2 Shield Terminal (SHIELD) ·························································· - 16 -
1-2-3 Option Slot ······································································· - 16 -
1-2-4 AC power Source Input Terminal (AC IN) ············································ - 16 -
1-2-5 Sensor Signal Input Connector····················································· - 17 -
1-2-6 Control Signal Input/Output Connector ············································· - 18 -
1-2-7 Input Signal Timing ······························································· - 20 -
2. CONNECTION ························································· - 21 -
2-1 Connecting Strain Gauge Sensor······················································ - 21 -
2-2 Connecting TEDS Memory···························································· - 21 -
2-3 Connecting Voltage Output (V-OUT) ··················································· - 22 -
2-4 Connecting Displacement Sensor ····················································· - 22 -
2-5 Connecting Control Signal Input/Output ··············································· - 25 -
2-5-1 Connecting External Output························································ - 25 -
2-5-2 Connecting External Input ························································· - 25 -
3. SETTING MODE CONFIGURATION ······································- 26 -
3-1 Screen Configuration ································································ - 26 -

- 5 -
3-2 Hierarchy of Setting Screens ························································· - 27 -
TOP Settings HI LO Limit
Detail settings Meas. display (COMMON) Graph range
Grid settings Grid settings
Strain display
Graph horizontal axis Graph data select
Analysis settings
WORK settings Operating condition 1 Measuring start
Measuring stop
Hold Select, settings
Criterion select, set
Measuring time
Meas. display
Operating condition 16
Sensor calibration Load sensor 1, 2 Equiv. input cal.
Real load calibration
TEDS calibration
Load unit
Zero adjustment
Load BV select
DIGITAL OFFSET SETTIN
Displacement sensor Voltage cal
Pulse cal
Displacement unit
Meas. time (COMMON)
Sensor settings Load sensor Load minimum scale
Load zero limit
Analog filter
Digital filter
Const. judge settings
LOAD COL. SETTING
Displacement sensor Voltage disp. sensor
Pulse disp. Sensor
CF CF auto storing CF Overwrite setting
CF file name
CF remaining alert CF remaining alert
Decimation
CF Save settings
CF Load settings
System settings 1,2 LCD settings
Backlight off timer Backlight off timer
IN/OUT check IN check
Out check
System initialize
Clock settings
System information
Option (Available only when the opti
Buzzer settings
Key lock select
Judgment NG output
System reboot
Work Input settings Manual WORK Select
························································································ - 27 -

- 6 -
4. CALIBRATION OF SENSOR ·············································- 28 -
4-1 Calibration of Load ·································································· - 28 -
4-2 Before Calibration ··································································· - 29 -
4-3 Sensor Calibration ··································································· - 29 -
4-3-1 Calibrating Load Sensor ··························································· - 29 -
4-3-1-1 Equivalent Input Calibration ···················································· - 30 -
4-3-1-2 Real Load Calibration ·························································· - 30 -
4-3-1-3 TEDS Calibration ······························································ - 31 -
4-3-1-4 Selecting Load Unit ···························································· - 33 -
4-3-1-5 Adjusting Zero Point ··························································· - 33 -
4-3-1-6 Selecting BV (Bridge Voltage)··················································· - 33 -
4-3-1-7 Setting Digital Offset (Tare) ····················································· - 34 -
4-3-2 Setting Displacement Sensor ······················································ - 34 -
4-3-2-1 Setting Voltage Output Displacement Sensor ···································· - 34 -
4-3-2-2 Setting Pulse Output Displacement Sensor ······································ - 36 -
4-3-2-3 Setting Displacement Unit ······················································ - 37 -
4-3-3 Setting Measuring Time ··························································· - 38 -
5. SENSOR SETTINGS ···················································· - 39 -
5-1 Load Sensor Settings ································································ - 39 -
5-1-1 Minimum Scale Settings ··························································· - 39 -
5-1-2 Zero Limit Settings ································································ - 40 -
5-1-3 Analog Filter Settings ····························································· - 40 -
5-1-4 Digital Filter Settings ······························································ - 40 -
5-1-5 Constant Judge Settings ·························································· - 40 -
5-1-6 Load Value Color Display Settings·················································· - 41 -
5-2 Displacement Sensor Settings ························································ - 41 -
5-2-1 Voltage Displacement Sensor Settings·············································· - 41 -

- 7 -
5-2-1-1 Analog Filter Settings ·························································· - 42 -
5-2-1-2 Digital Filter Settings ··························································· - 42 -
5-2-2 Pulse Displacement Sensor Settings ··············································· - 42 -
5-2-2-1 Digital Filter Settings ··························································· - 42 -
5-2-2-2 Type Settings·································································· - 43 -
6. MEASUREMENT DISPLAY SETTINGS···································· - 44 -
6-1 Graph Range Settings································································ - 44 -
6-2 Grid Settings ········································································ - 44 -
6-3 Strain Display ······································································· - 45 -
6-4 Graph Display ······································································· - 45 -
6-5 Analysis Settings ···································································· - 46 -
7. WORK SETTINGS ······················································ - 48 -
7-1 Setting Work and Switching to a Different Work ········································ - 48 -
7-2 Various Settings for Each Work ······················································· - 48 -
7-2-1 Measuring Start Condition Settings················································· - 49 -
7-2-2 Measuring Stop Condition Settings ················································· - 49 -
7-2-3 Measuring Time Settings ·························································· - 52 -
7-2-4 Setting Hold Conditions ··························································· - 52 -
7-2-4-1 Sample Hold··································································· - 54 -
7-2-4-2 Peak Hold ····································································· - 55 -
7-2-4-3 Inflection Point Hold ··························································· - 56 -
7-2-4-4 Maximum/Minimum Value Hold ················································· - 58 -
7-2-4-5 Displacement Peak Hold························································ - 60 -
7-2-4-6 Displacement Hold ····························································· - 61 -
7-2-4-7 Displacement Sample Hold ····················································· - 63 -
7-2-4-8 Multiple Hold ·································································· - 64 -

- 8 -
7-2-4-9 Inflection Point Trigger Peak Hold ··············································· - 66 -
7-2-4-10 Many-Point Hold ······························································ - 69 -
7-2-5 Setting the Limits ································································· - 71 -
7-2-5-1 Setting the Load Limits························································· - 72 -
7-2-5-2 Setting Displacement Limits ···················································· - 74 -
7-2-5-3 Multiple-zone Limit Value Settings ·············································· - 75 -
7-2-5-4 Special Judgment Output······················································· - 79 -
7-2-6 Measuring Display Settings ························································ - 80 -
7-2-6-1 Measuring Display Settings from the Graph Screen ······························· - 80 -
8. CF (COMPACT FLASH) SETTINGS ······································ - 81 -
8-1 Auto Store and Capture Settings ······················································ - 81 -
8-2 Filename Settings ··································································· - 82 -
8-3 Remaining Alert and Limit Settings···················································· - 83 -
8-4 Decimation·········································································· - 84 -
8-5 Saving a Setup File ·································································· - 84 -
8-6 Loading a Setup File ································································· - 85 -
8-7 Installing and Removing a CF Card···················································· - 86 -
8-8 File Erase and Format································································ - 87 -
8-9 Recorded Data Format ······························································· - 87 -
9. SYSTEM SETTINGS ···················································· - 88 -
9-1 LCD Settings ········································································ - 88 -
9-2 IN/OUT (IN/OUT check) ······························································· - 88 -
9-3 Initializing Settings ·································································· - 89 -

- 9 -
9-4 Backlight Off Timer Settings ·························································· - 90 -
9-5 Clock Settings······································································· - 90 -
9-6 System Information ·································································· - 90 -
9-7 Buzzer Settings······································································ - 91 -
9-8 LANG (言語)········································································· - 91 -
9-9 Key Lock Select ····································································· - 91 -
9-10 Judgment NG Output ······························································· - 92 -
9-11 Reboot ············································································ - 92 -
10. SETTINGS WHEN AN OPTIONAL BOARD IS INSTALLED ················· - 93 -
10-1 Setting D/A Converter······························································· - 93 -
10-1-1 DA Output Adjustment ··························································· - 94 -
10-1-2 Output Test······································································ - 94 -
10-1-3 Voltage and Current Output Connections ·········································· - 95 -
10-1-4 Resolution ······································································ - 95 -
10-1-5 D/A Output Error ································································· - 95 -
10-2 Setting RS-232C Interface ··························································· - 96 -
10-2-1 Baud Rate Settings······························································· - 96 -
10-2-2 Flow Control Setting ····························································· - 96 -
10-2-3 Parity Settings ··································································· - 97 -
10-2-4 Communication Specifications···················································· - 97 -
10-2-5 Communication Format ·························································· - 99 -
10-2-6 Control Commands ······························································ - 99 -
11. OVERSCALE/ERROR DISPLAYS ······································ - 104 -
11-1 Errors Related to Load Sensor ······················································ - 104 -

- 10 -
11-2 Errors Related to Displacement Sensor ·············································· - 105 -
11-3 Errors During Load Sensor Calibration ·············································· - 106 -
12. HARDWARE INSTALLATION·········································· - 107 -
13. SPECIFICATIONS ···················································· - 108 -
14. DIMENSIONS ························································ - 111 -

- 11 -
1. Names of Parts and Functions
1-1 Front Panel
1-1-1 Digital Display Screen (TOP Screen)
Power Lamp : Turns on when power is supplied.
HI-HI/LO-LO limit values : Indicates the settings of HI-HI/LO-LO limit values.
HI/LO limit values : Indicates the settings of HI/LO limit values.
Status display : Indicates the operational state of this indicator.
Status Description
STOP Indicates that measurement is stopped.
RDY Indicates that the system is waiting for the measuring start conditions (if set) to
be met.
REC Indicates that measurement is started.
Hold display : Gives a display as shown below when a hold condition is met during measurement.
Hold setting Display
Sample HOLD
Peak PEAK
Displacement peak DISP. PK
Power Lamp
HI-HI/LO-LO limit values
HI/LO limit values
Judgment result
Judgment result detail button
Reset button
Start button
CF card slot
Digital zero (load) button
Setting button
Work display
Change view button
Measured
value display
Status display
Time display
Hold display
Adjust displacement button

- 12 -
Judgment result :If you set the judgment function, a measured value is judged to display the result.
Judgment settings Display Description
None Judgment is not performed.
H The measured value is larger than the HI limit value.
OK The measured value is within the HI and LO limit values.
L The measured value is smaller than the LO limit value.
Load: HI/LO limits
NG Failed to hold data.
HH The measured value is larger than the HI-HI limit value.
H The measured value is larger than the HI limit value.
OK The measured value is within the HI and LO limit values.
L The measured value is smaller than the LO limit value.
LL The measured value is smaller than the LO-LO limit value.
Load: HI/LO limits,
HI-HI/LO-LO limits
NG Failed to hold data.
H The measured value is larger than the HI limit value.
OK The measured value is within the HI and LO limit values.
L The measured value is smaller than the LO limit value.
Displacement: HI/LO limits
NG Failed to hold data.
Special judgment Display Description
Failed to detect an inflection point. HL
The load value of the point of inflection is less than
minimum load value.
Analysis range is outside measurement data.
Inflection-point trigger peak
LL
The load value satisfied a condition of the measurement
end without surpassing an analysis start level.
HL Both HI and LO are detected. Many
LL Hold position is beyond measurement data.
OK Measured value is within the set zone. Multiple zone
NG Measured value is outside the set zone.
Judgment result detail button : Displays details of the comparison result.
Example of “Judgment
result detail” screen

- 13 -
Measured value display : Indicates a load value that the indicator receives.
Reset button : Stop measurement; and also to clear measured data, hold values, and judgment
results.
Start button : Starts measurement.
Work display : Indicates a selected work number. A number followed by the letter “M” indicates that
the number is manually set.
Time display : Usually, indicates measuring time. However, hold time is indicated when peak hold or
external sample hold is set.
Change view button : Changes the view to the graphic screen.
Setting button : Navigates you to the settings screen, from which you can perform various settings.
Selecting this button clears measured data, hold values, and judgment results.
Digital zero (load) button : Sets an input load value as digital zero.
Adjust displacement button : Adjusts displacement (voltage or pulse) input to a predetermined adjustment-value. To
set an asjustiment value, access the following screens.
◇ For voltage displacement:
“SETTINGS”→“DETAIL SET”→“SENSOR CAL.”→“DISP.” (horizontal
axis)→”DISP.VOLT”→“SETTINGS”→”DISP.ADJUST”
◇ For pulse displacement:
“SETTINGS”→“DETAIL SET”→“SENSOR CAL.”→“DISP.” (horizontal
axis)→”DISP.PULSE”→“SETTINGS”→”DISP.ADJUST”
CF card slot : When you insert the CF card to or remove it from the indicator, pull the cover toward
you to open it.

- 14 -
1-1-2 Graph Display Screen
Start button : Starts or stops measurement.
Cursor button : Displays a cursor. You can move the cursor, display a cursor value, and scale up or
down the waveform. Also you can scale up or down the horizontal axis with a cursor
position centered.
Graph range : Indicates a predetermined graph range. Graph is plotted within this graph range.
Load HI-HI limit value: Indicates the settings of the load HI-HI limit value.
Load HI limit value : Indicates the settings of the load HI limit value.
Judged load value : Indicates a load value which was judged and time, when a load judgment function is
set.
Load LO limit value : Indicates the settings of the load LO limit value.
Load LO-LO limit value: Indicates the settings of the load LO-LO limit value.
Change view button : Changes the view to the digital display screen (TOP screen).
Change measuring display : Enables you to change measuring display (axis, scale, grid, etc).
Measuring time : Indicates measuring time.
Load value display : Indicates a load value that the indicator receives.
Displacement HI limit value : Indicates the settings of the displacement HI limit value.
Judged displacement value : Indicates a displacement value which was judged and a load value, when a
displacement judgment function is set.
Displacement LO limit value: Indicates the settings of the displacement LO limit value.
Displacement display: Indicates a displacement value which this indicator receives.
Example of screen
(Horizontal axis: Time)
Example of screen
(Horizontal axis: Displacement)
Change view button
Load HI-HI limit value
Load HI limit value
Load value display
Measuring time display
Judged load value
Start button
Load LO limit value
Load LO-LO limit value
Graph range
Graph range
Disp. display
Disp. LO limit value
Judged disp. value
Disp. HI limit value
Change measuring display
Change measuring
Display
Cursor button

- 15 -
1-1-3 Display of Operation Panel
TD-280T is equipped with the touch panel LCD display for initializing sensors or performing various operations.
On this panel, the setting selection display, the strain display, the graph display, or other can be selected.
Note:
Use your finger to push the touch panel lightly. Do not push
the touch panel using a firm object or a sharp-tipped object.
Otherwise, the touch panel might be damaged.
Do not push more than one location of the touch panel at a
time. If you do so, TD-280T may not recognize your operation
correctly.
Caution
Settings screen Strain screen Load sensor calibration screen

- 16 -
1-2 Rear Panel
1-2-1 Protective Ground Terminal
This is a protective ground terminal screw. Be sure to ground the protective ground terminal to prevent electric
shocks and failures due to static electricity.
1-2-2 Shield Terminal (SHIELD)
This is a frame ground terminal.
1-2-3 Option Slot
Either of the following options can be mounted (Factory pre-installed option).
・ D/A converter
・ RS-232C interface
1-2-4 AC power Source Input Terminal (AC IN)
The AC power input voltage is 100–240 V AC.
For power supply connection, use power wires that are 0.326 to 2.081 mm2in cross-sectional area (22 to 14
AWG).
Connect those wires to the terminal block by using crimp connectors (for M4, 8.5 mm or less in width).
・Power cord wire colors (for the provided AC power cord)
L : Black
N : White
FG : Green/yellow (protective ground)
・The provided AC power cord is only intended for use within Japan, rated for 10 A at 125 V AC. If you want to
use the TD-280T at a voltage exceeding the specified voltage or overseas, be sure to use another AC power
cord that is more appropriate for your operating
・The frequency is 50 / 60 Hz.
AC電源入力端子
保護接地端子
シールド端子
センサ信号入力
コネクタ
制御信号入出 力 オプ ション
コネクタ スペース
SERIAL NO.
MADE IN MALAYSIA
AC power source input terminal
Shield terminal
Protective ground terminal
Sensor signal input connector
Control signal input/output connector Option slot
黒
白
緑
Black
Green/Yellow
White

- 17 -
1-2-5 Sensor Signal Input Connector
Strip about 5 mm of insulation off each signal wire and
lightly twist the bare wire to fit the terminal hole.
Use a mini screwdriver to connect the wires.
Applicable wire is 1.5φor less (AWG 28 – 16).
Pull the connected cable lightly and check that the cable is
securely clamped.
In particular, make sure that the sensors are firmly
connected.
Compatible connector
Phoenix Contact (supplied with this instrument)
MC 1.5/12-STF-5.08
1, 2: TEDS Sensor Data Input
A TEDS sensor has an NDI-7P output, and so a TEDS
conversion cable is used for connection.
1・・・・・ + (Orange)
2・・・・・ COM (Green)
3-6: Terminal for connecting a strain gauge sensor.
3・・・・・・ +EXC (Red A)
4・・・・・・ -SIG (Black B)
5・・・・・・ -EXC (Blue C)
6・・・・・・ +SIG (White D)
7, 8: Terminal for outputting a voltage proportional to the sensor input.
Output voltage is approx. 1 V per 1 mV/V sensor input.
7・・・・・・ Voltage output (0 to approx. ±3 V)
8・・・・・・ COM
9-11: Input/output terminals for a voltage-output displacement sensor.
Power supply and input terminals for a voltage-output displacement sensor.
If you do not use a displacement sensor, there is no need to connect these terminals.
9・・・・・ +12 V OUT (displacement-sensor power supply: MAX 250 mA)
10・・・・・ STROKE IN (0 to ±10 V)
11・・・・・ COM
12: F.G (Frame Ground)
Terminal for connecting the shield (outer sheath) of a load sensor or displacement sensor.
1TEDS
2GND
3 +EXC (A)
4 -SIG (B)
5 -EXC (C)
6 +SIG (D)
7 V-OUT
8COM
9 +12V OUT
10 STROKE IN
11 COM
12 F.G
緩む
締める
約5mm
AWG16~28
tightening
loosening
Approx. 5 mm
AWG16-28
Pin No. 9, 11 (+12 V OUT) of the sensor signal input connector
and pin No. A7, A8 (displacement-sensor power supply +5 V) of
the control signal input/output connector cannot be used together
at once.
Caution

- 18 -
1-2-6 Control Signal Input/Output Connector
Compatible Connector: Fujitsu Connector FCN-361J032-AU
Cover FCN-360C032-B
Signal Name and Function
A1 : Load Digital Zero Performs digital zero for a load value on the ON edge.
However, the digital zero function is not available if the current load value exceeds the
“zero limit setting” when the “zero balance” value of a load sensor calibration is set as
zero.
A2 : Displacement Position Adjustment
Presets a value of “Displacement Position Adjustment” (set by selecting “SENSOR
CAL.”→”DISP.”(horizontal axis)→”DISP.VOLT/DISP.PULSE” to the counter
(Default: 0.0 mm) on the ON edge.
A3 : Measurement Start/Stop
Typically, measurement is ready on the ON edge and measurement is terminated on
the OFF edge.
An actual measurement is started based on the conditions for starting/stopping the
measurement which are set on a work-by-work basis.
A measurement can be started based on either (1) the start signal or (2) a combination
of the start signal and load values.
A measurement can be stopped in the same fashion.
A4 : Hold Command (Displacement)
Functions as a displacement value hold timing contact signal. During “Displacement
Sample Hold,” holds and judges the displacement value at the ON timing.
However, when a signal makes an ON-OFF-ON transition, the displacement value is
held at the first ON timing of the measurement.
Indication of load and displacement values is also held, but the waveform (data)
continues to be displayed.
Pin
No.
In/Out Signal Name Pin
No.
In/Out Signal Name
A1 IN Load Digital Zero B1 IN Work Select 1
A2 IN Displacement Position Adjustment
(Preset)
B2 IN Work Select 2
A3 IN Measurement Start/Stop B3 IN Work Select 3
A4 IN Hold Command (Displacement) B4 IN Work Select 4
A5 IN Hold Command (Load) B5 IN External Judgment Reset
A6 IN Reset B6 -Signal COM
A7 Out Displacement-Sensor Power
Supply (+5 V)
B7 -Signal COM
A8 -Displacement-Sensor Power
Supply (COM)
B8 -Signal COM
A9 Out LL B9 -Signal COM
A10 Out LO B10 IN Differential Pulse Output
Displacement Sensor: Phase A-
A11 Out GO B11 IN Differential Pulse Output
Displacement Sensor: Phase B-
A12 Out HI B12 Out Judgment Completed
A13 Out
Load
HH B13 Out Measurement Completed
A14 Out LO B14 Out Load Normal
A15 Out GO B15 IN Differential Pulse Output
Displacement Sensor: Phase A+
A16 Out
Judgment
Output
Disp.
HI B16 IN Differential Pulse Output
Displacement Sensor: Phase B+

- 19 -
A5 : Hold Command (Load)
Functions as a load value hold timing contact signal. During “Sample Hold”, holds
and determines the load value at the ON timing.
However, when a signal makes an ON-OFF-ON transition, the load value is held at the
first ON timing of the measurement.
Indication of load values is also held, but the waveform (data) continues to be
displayed.
A6 : Reset Used to abort all the current operations, regardless of whether they completed
successfully or not, and discard the measurement data, if errors or other abnormal
conditions occur.
The indicator will return back to the state it was when last powered on (The settings are
retained).
A7 : Displacement-Sensor Power Supply
+5 V output terminal of displacement-sensor power supply (Maximum: 500 mA)
A8 : Displacement-Sensor Power Supply (COM)
COM terminal of displacement-sensor power supply
A9 (LL) : Load Judgment Output
A10 (LO) Compares a load value held in each hold mode with the load judgment values to
A11 (GO) produce a NO/GO result, during measurement.
A12 (HI)
A13 (HH)
A14 (LO) : Displacement Judgment Output
A15 (GO) Compares a displacement position value when a load values is held in each hold mode
A16 (HI) with the displacement judgment values to produce a NO/GO result.
B1: (Work Select 1) External entry of a work number. It is necessary to set this entry prior to A3
B2 (Work Select 2) “Measurement Start/Stop.”
B3 (Work Select 3) Note that this entry is available only if “SETTINGS”→”WORK INPUT”→”EXT INPUT”
B4 (Work Select 4) is chosen.
B5 : External Judgment Reset
Resets a Load Judgment Output (A9, A10, A11, A12, A13, A14, A15, A16).
Resets the load judgment output of a hold value and switches to continuous judgment
output when continuous judgment is “enabled.”
Hold and judgment indications in the screen remain unaffected.
B6,B7,B8,B9 : Signal COM
COM (common) terminal for input/output signals.
B12 : Judgment Completed
Available in a Hold mode which uniquely determines a load hold point, such as Sample
Hold. Turns ON when the Hold mode is completed. Turns OFF when a new
measurement start/stop signal is received.
B13 : Measurement Completed
Turns ON when measurement is completed and data is stored in CF.
Now ready for a new measurement.
Pin No. 9, 11 (+12 V OUT) of the sensor signal input connector and pin
No. A7, A8 (displacement-sensor power supply +5 V) of the control
signal input/output connector cannot be used together at once.
Caution
Table of contents
Other Teac Measuring Instrument manuals
Popular Measuring Instrument manuals by other brands

Linegrip
Linegrip lineScale 3 quick start guide

Siemens
Siemens SIPART PS100 operating instructions

PCB Piezotronics
PCB Piezotronics IMI SENSORS ICP M603C91 Installation and operating manual

PCB Piezotronics
PCB Piezotronics Modally Tuned TLD086D05 Installation and operating manual

Elcontrol
Elcontrol VIP MK3 user manual

T4W
T4W TW-6s Operation manual