Team Kalorik TKG WM 10 User manual

Copies of the I/B. Please reproduce them without any
changes except under special instruction from Team
International BELGIUM. The pages must be reproduced
and folded in order to obtain a booklet A5 (+/- 148.5 mm
width x 210 mm height). When folding, make sure you
keep the good numbering when you turn the pages of
the I/B. Don’t change the page numbering. Keep the
language integrity.
Fax +32 2 359 95 50
Waffeleisen
Waffle maker
Gaufrier
Wafelijzer
Gofrerera
Maquina de Wafles
Stampo per cialde
Wafelnica
Aparat pentru gaufre
TKG WM 10
230V~ 50Hz 920W
I/B Version
080514
Ï
Front cover page (first page)
Assembly page 1/32

Copies of the I/B. Please reproduce them without any
changes except under special instruction from Team
International BELGIUM. The pages must be reproduced
and folded in order to obtain a booklet A5 (+/- 148.5 mm
width x 210 mm height). When folding, make sure you
keep the good numbering when you turn the pages of
the I/B. Don’t change the page numbering. Keep the
language integrity.
Fax +32 2 359 95 50
WICHTIGE SICHERHEITSVORSCHRIFTEN
Lesen Sie aufmerksam die Gebrauchsanleitung, bevor Sie Ihr Gerät benutzen.
Wichtig: Personen (einschließlich Kinder), die aufgrund ihrer physischen, sensorischen oder
geistigen Fähigkeiten oder ihrer Unerfahrenheit oder Unkenntnis nicht in der Lage sind, das
Gerät sicher zu benutzen, sollten dieses Gerät nicht ohne Aufsicht oder Anweisung durch eine
verantwortliche Person benutzen. Kinder sollten beaufsichtigt werden, um sicherzustellen, dass
sie nicht mit dem Gerät spielen.
Kontrollieren Sie, ob die Netzspannung mit der auf dem Gerät vermerkten Spannung
übereinstimmt, bevor Sie das Gerät benutzen.
Lassen Sie Ihr Gerät niemals beim Gebrauch unbeaufsichtigt.
Überprüfen Sie regelmäßig, dass die Anschlussleitung nicht beschädigt ist. Bei
Beschädigung der Anschlussleitung oder des Gerätes, letzteres nicht benutzen, sondern
von einem Fachmann (*) überprüfen bzw. reparieren lassen. Eine beschädigte
Anschlussleitung muss von einem Fachmann (*) ausgewechselt werden.
Benutzen Sie das Gerät nur zu Haushaltszwecken, wie in der Bedienungsanleitung
angegeben.
Tauchen Sie das Gerät niemals in Wasser oder andere Flüssigkeiten, weder zum Reinigen,
noch zu einem anderen Zweck. Geben Sie das Gerät niemals in die Spülmaschine.
Benutzen Sie das Gerät nicht in der Nähe einer Wärmequelle.
Entfernen Sie den Stecker aus der Steckdose, bevor Sie das Gerät reinigen.
Benutzen Sie das Gerät nicht im Freien und bewahren Sie es an einem trockenen Platz auf.
Benutzen Sie nur Zubehör, welches vom Lieferanten empfohlen wurde. Anderes Zubehör
stellt eine Gefahr für den Benutzer dar und das Gerät könnte dadurch beschädigt
werden.
Ziehen Sie niemals an der Anschlussleitung, um das Gerät zu bewegen. Achten Sie darauf,
dass die Anschlussleitung nicht irgendwo hängen bleibt und dies zum Fall des Gerätes
führen könnte. Wickeln Sie die Anschlussleitung nicht um das Gerät oder knicken Sie diese
nicht.
Stellen Sie das Gerät auf einen Tisch oder auf eine ebene Fläche damit es nicht umfällt.
Achten Sie darauf, dass das Gerät vollständig erkaltet ist, bevor Sie es reinigen oder
wegräumen.
Achten Sie darauf, dass die Anschlussleitung nicht mit den heißen Teilen des Gerätes in
Kontakt kommt.
Während des Gebrauchs können zugängliche Teile des Gerätes eine sehr hohe
Temperatur erreichen. Berühren Sie diese heißen Teile nicht.
Achten Sie darauf, dass die heißen Teile während des Backvorganges nicht mit leicht
entflammbarem Material, wie Gardinen, Tischdecken, usw. in Berührung kommen.
Brandgefahr!
Achten Sie darauf, dass die Beschichtung nicht abgekratzt wird, da ansonsten kleine Teile
der Beschichtung in die Nahrung gelangen. Benutzen Sie einen Holzspatel oder einen
wärmebeständigen Plastikspatel, um die Nahrung aus dem Gerät zu nehmen.
Ziehen Sie den Stecker aus der Steckdose, wenn das Gerät nicht benutzt wird.
Bereiten Sie nur Nahrungsmittel zu, die zum Backen und zum Verzehr geeignet sind.
Ihr Gerät darf niemals über eine externe Zeitschaltuhr oder irgendein anderes, separates
Fernbedienungssystem eingeschaltet werden.
(*) Fachmann: anerkannter Kundendienst des Lieferanten oder des Importeurs, der für derartige
Reparaturen zuständig ist. Für eventuelle Reparaturen wenden Sie sich bitte an diesen
Kundendienst.
2 TKG WM 10 - 080514
Assembly page 2/32

Copies of the I/B. Please reproduce them without any
changes except under special instruction from Team
International BELGIUM. The pages must be reproduced
and folded in order to obtain a booklet A5 (+/- 148.5 mm
width x 210 mm height). When folding, make sure you
keep the good numbering when you turn the pages of
the I/B. Don’t change the page numbering. Keep the
language integrity.
Fax +32 2 359 95 50
INBETRIEBNAHME
•Vor dem ersten Gebrauch sind die Platten mit einem feuchten Tuch zu reinigen.
•Schließen Sie das Gerät und stecken Sie den Stecker in die Steckdose. Die rote
Kontrollleuchte wird aufleuchten und anzeigen dass das Gerät ans Stromnetz
angeschlossen ist.
•Betätigen Sie die Taste ON/OFF um das Vorwärmen anfangen zu lassen. Die Vorwärmzeit
« 4:30 » erscheint im Display.
•Während des ersten Gebrauchs entwickelt die Antihaft-Beschichtung Qualm. Dieser
Rauch ist NICHT schädlich und wird nach kurzer Zeit verschwinden.
•Die grüne Kontrollleuchte wird aufleuchten und 4 Tonsignale ertönen, sobald das
Vorwärmen sich geendet hat.
•Öffnen Sie das aufgeheizte Gerät indem Sie den runden Griff nach Ihnen hinzuziehen und
dann den Griff, der mit dem Deckel und mit der oberen Backplatte verbunden ist,
hochheben. Fetten Sie dann die Backflächen leicht ein mit Butter, Margarine oder
Speiseöl.
•Füllen Sie den Waffelteig in die Mitte des Waffelautomaten und schließen Sie den Deckel.
Drücken Sie den Deckel einen Moment fest herunter, damit sich der Teig gleichmäßig
verteilt. Füllen Sie nicht zuviel Teig ein, dieser läuft ansonsten an den Seiten heraus.
•Betätigen Sie die Taste COLOR/CRISP um die Backzeit einzustellen. Sie können wählen
zwischen 12 Einstellungen: 2:30 – 2:30+crisp – 3:30 – 3:30+crisp – 4:30 – 4:30+crisp – 5:00 –
5:00+crisp – 5:30 – 5:30+crisp – 6:00 – 6:00+crisp. Die Backzeit erscheint im Display. Achtung:
Falls Sie eine Einstellung mit der Funktion « crisp » wählen (um die Waffeln knusprig zu
backen), leuchtet der Lichteffekt rund um die Taste COLOR/CRISP auf.
•Betätigen Sie die Taste START/RESET, damit der Backprozess anfängt. Die grüne
Kontrollleuchte erlischt und der Countdown der Backzeit fängt an.
•Drehen Sie während des Backprozesses das Gerät von Zeit zu Zeit um, indem Sie den
runden Griff nach vorne drücken und im Uhrzeigersinn drehen, damit sich der Teig
gleichmäßig verteilt und die beiden Seiten der Waffeln gleichmäßig gebacken und
gebräunt werden.
•Wenn die Backzeit verstrichen ist, ertönen 3 lange Tonsignale und leuchtet die grüne
Kontrollleuchte wieder auf. Die gewählte Einstellung erscheint aufs neue im Display.
•Wenn die Waffel fertig ist, nehmen Sie diese bitte mit einem Holz- oder Kunststoffspachtel
heraus. Benutzen Sie keine scharfen oder spitzen Metallgegenstände, da ansonsten die
Beschichtung der Backfläche beschädigt werden kann.
•Achtung! Während des Gebrauches werden die Backplatten heiß. Berühren Sie diese
nicht!
•Falls Sie noch mehr Waffeln backen wollen, betätigen Sie die Taste START/RESET um
Waffeln zu backen mit derselben Backzeit wie vorher, oder betätigen Sie die Taste
COLOR/CRISP um eine andere Backzeit einzustellen bevor Sie die Taste START/RESET
betätigen.
•Nach Beendigung des Backens betätigen Sie die Taste ON/OFF um das Gerät
auszuschalten, ziehen Sie den Netzstecker und lassen Sie das Gerät auf, damit die
Backplatten abkühlen können.
WAFFELREZEPTE
SANDWAFFELN
200 g Butter
200 g Zucker
4 Eier
1 geriebene Zitronenschale
Salz
200 g Weizenmehl
HEFEWAFFELN
25 g Hefe
¼ l Milch
125 g Butter
50 g Zucker
6 Eier
1 geriebene Zitronenschale
Salz
375 g Weizenmehl
3 TKG WM 10 - 080514
Assembly page 3/32

Copies of the I/B. Please reproduce them without any
changes except under special instruction from Team
International BELGIUM. The pages must be reproduced
and folded in order to obtain a booklet A5 (+/- 148.5 mm
width x 210 mm height). When folding, make sure you
keep the good numbering when you turn the pages of
the I/B. Don’t change the page numbering. Keep the
language integrity.
Fax +32 2 359 95 50
EINFACHE WAFFELN MIT BACKPULVER 1 Esslöffel Rum
125 g Butter 1 Päckchen Vanillezucker
150 g Zucker ½ Päckchen Backpulver
1 geriebene Zitronenschale ca. 150-200 ml Wasser (keine Milch)
Salz
APFELWAFFELN
3 Eier
¼ l Milch 150 g Margarine oder Butter
250 g Mehl 200 g Zucker
1 Teelöffel Backpulver 4 Eier
½ Teelöffel Salz
KNUSPRIGE WAFFELN 250 g Mondamin (Stärkemehl)
200 g Margarine 1 gestr. Teelöffel Backpulver
150 g Zucker 1 gestr. Teelöffel Zimt
4 Eier 1 Messerspitze geriebene Nelken
350 g Mehl 2 in kleine Würfel geschnittene Äpfel
PFLEGEHINWEISE
•Gerät vom Netz trennen und das Gerät und die Platten abkühlen lassen bevor sie
gereinigt werden.
•Wischen Sie die Außenseite mit einem feuchten Tuch ab, und vergewissern Sie sich dass
keine Feuchtigkeit, Öl oder Fett in das Gerät dringt.
•Wischen Sie die Backplatten mit einem weichen Tuch oder mit Küchenpapier.
•Niemals mit metallenen Gegenständen reinigen oder Schleif- und Scheuermittel
verwenden.
•Um die untere Backplatte zu reinigen, öffnen Sie das Waffeleisen und ziehen Sie die
Backplatte anhand des kleinen Griffes aus dem Gerät. Reinigen Sie die Backplatte mit
Wasser, trocknen Sie sie ab und stellen Sie sie zurück, indem Sie den Halterungsstift ins dazu
vorgesehene Loch schieben und dann auf den kleinen Griff drücken, bis er einrastet.
•Um die obere Backplatte zu reinigen, öffnen Sie das Waffeleisen und schieben Sie den
Entriegelungsknopf, der sich genau über der Platte befindet, nach oben. Die Backplatte
lockert sich und wird nur vom Halterungsstift an seinem Platz gehalten. Nehmen Sie die
Backplatte ab, reinigen Sie sie mit Wasser und trocknen Sie sie ab. Um sie zurückzustellen,
gehen Sie in umgekehrter Reihenfolge vor.
•Sie können die Auffangschale (unter dem Waffeleisen) abnehmen und mit Wasser
reinigen.
•Tauchen Sie das Gerät nicht in Wasser oder andere Flüssigkeiten.
UMWELTSCHUTZ – RICHTLINIE 2002/96/EG
Zum Schutz unserer Umwelt und unserer Gesundheit sind Elektro- und Elektronik-Altgeräte nach
bestimmten Regeln zu entsorgen. Dies fordert den Einsatz sowohl des Herstellers bzw.
Lieferanten als auch des Verbrauchers.
Aus diesem Grund darf dieses Gerät, wie das Symbol auf dem Typenschild bzw. auf der
Verpackung zeigt, nicht in den unsortierten Restmüll gegeben werden. Der Verbraucher hat
das Recht, dieses Gerät über kommunale Sammelstellen zu entsorgen; von dort aus wird die
spezifische Behandlung, Verwertung bzw. das Recycling gem. den Erfordernissen der Richtlinie
sichergestellt.
4 TKG WM 10 - 080514
Assembly page 4/32

Copies of the I/B. Please reproduce them without any
changes except under special instruction from Team
International BELGIUM. The pages must be reproduced
and folded in order to obtain a booklet A5 (+/- 148.5 mm
width x 210 mm height). When folding, make sure you
keep the good numbering when you turn the pages of
the I/B. Don’t change the page numbering. Keep the
language integrity.
Fax +32 2 359 95 50
IMPORTANT SAFEGUARDS
Please read these instructions carefully before using the appliance.
Important: People (including children) who are not able to use the appliance in a safe way,
due to their physical, sensorial or mental capacity or their lack of experience or knowledge,
must never use the appliance except if they are supervised by a person responsible for their
safety or if they previously received instructions concerning the safe use of the appliance.
Close supervision is necessary to prevent children from using the appliance as a toy.
Check that your mains voltage corresponds to that stated on the appliance.
Never leave the appliance unsupervised when in use.
From time to time check the appliance for damages. Never use the appliance if cord or
appliance shows any signs of damage but have it checked and repaired by a competent
qualified service(*). Should the cord be damaged, it must be replaced by a competent
qualified service (*).
Only use the appliance for domestic purposes and in the way indicated in these
instructions.
Never immerse the appliance in water or any other liquid for any reason whatsoever.
Never place it into the dishwasher.
Never use the appliance near hot surfaces.
Before cleaning, always unplug the appliance from the power supply.
Never use the appliance outside and always place it in a dry environment.
Never use accessories which are not recommended by the producer. They could
constitute a danger to the user and risk to damage the appliance.
Never move the appliance by pulling the cord. Make sure the cord cannot get caught in
any way. Do not wind the cord around the appliance and do not bend it.
Stand the appliance on a table or flat surface.
Make sure the appliance has cooled down before cleaning and storing it.
Make sure the cord never comes into contact with the hot parts of the appliance.
The temperature of the accessible surfaces may be very high when the appliance is in
use. Make sure not to touch these hot parts of the appliance.
Make sure the appliance never comes into contact with inflammable materials, such as
curtains, cloth, etc…when it is in use, as a fire might occur.
Be careful not to scratch the special coating of the cooking plates, as you might get little
pieces of this coating into the food. Use a classical wooden spatula or a heat resistant
plastic one.
Always unplug the appliance when it is not in use.
Only use the appliance for food that is supposed to be cooked.
Your appliance must never be switched on through an external timer or any kind of
separate remote control system.
(*) Competent qualified electrician: after sales department of the producer or importer or any
person who is qualified, approved and competent to perform this kind of repairs in order to
avoid all danger. In any case you should return the appliance to this electrician.
5 TKG WM 10 - 080514
Assembly page 5/32

Copies of the I/B. Please reproduce them without any
changes except under special instruction from Team
International BELGIUM. The pages must be reproduced
and folded in order to obtain a booklet A5 (+/- 148.5 mm
width x 210 mm height). When folding, make sure you
keep the good numbering when you turn the pages of
the I/B. Don’t change the page numbering. Keep the
language integrity.
Fax +32 2 359 95 50
USE
•Before first use, wipe the baking plates with a damp cloth to remove all packaging
residues.
•Close the appliance and plug it into the electrical outlet. The red pilot light will come on to
indicate that the appliance is connected to the mains.
•Press the ON/OFF key to start preheating. Preheating time « 4:30 » is displayed.
•Leave the appliance closed during preheating in order to avoid a waste of energy. A
smell might occur when using the appliance for the first time. This will disappear after a
short while.
•When preheating has finished, the green pilot light comes on and you will hear 4 beeps.
•Open the appliance by pulling the round handle towards you and raising the handle
which is connected to the lid and the upper baking plate. Then lightly brush the baking
plates with butter, margarine or cooking oil.
•Pour dough evenly onto the middle of the bottom baking plate but not all the way to the
edges. Press the lid down in order to spread the dough evenly on the baking plates. Do
not overfill as dough might come out of the appliance.
•Press the COLOR/CRISP key to set the baking time. You can choose between 12 settings:
2:30 – 2:30+crisp – 3:30 – 3:30+crisp – 4:30 – 4:30+crisp – 5:00 – 5:00+crisp – 5:30 – 5:30+crisp –
6:00 – 6:00+crisp. The display shows the baking time. Note: If you choose a setting with the
« crisp » function (to make the waffles crispier), the ring of light around the COLOR/CRISP
key will light up.
•Press the START/RESET key to start baking. The green ready light goes out and the
countdown of the baking time begins.
•During the baking process, turn the appliance upside down from time to time by pushing
the round handle towards the waffle maker and turning clockwise in order to spread the
dough evenly and to bake and brown both sides of the waffles evenly.
•When the baking time has elapsed, 3 long beeps will sound and the green ready light
comes on again. The display shows again the setting that you have chosen.
•Remove the waffles with a plastic or wooden spatula. Never use metal or scratching
objects, as these might damage the non-stick coating.
•During use the baking plates become very hot. Be careful not to get burnt.
•If you want to bake more waffles, press the START/RESET key to bake waffles with the same
baking time as before or press the COLOR/CRISP key to set a new baking time before you
press the START/RESET key.
•When you have finished baking, press the ON/OFF key, then unplug the appliance and
leave it open so that the baking plates can cool down.
WAFFLE RECIPES
SHORTBREAD WAFFLES
200 g butter
200 g sugar
4 eggs
twist of lemon
200 g plain flour
YEAST WAFFLES
25 g yeast
¼ l milk
125 g butter
50 g sugar
6 eggs
twist of lemon
pinch of salt
375 g plain flour
TRADITIONAL WAFFLES
125 g butter
150 g sugar
twist of lemon
pinch of salt
3 eggs
¼ l milk
250 g plain flour
1 tsp baking powder
6 TKG WM 10 - 080514
Assembly page 6/32

Copies of the I/B. Please reproduce them without any
changes except under special instruction from Team
International BELGIUM. The pages must be reproduced
and folded in order to obtain a booklet A5 (+/- 148.5 mm
width x 210 mm height). When folding, make sure you
keep the good numbering when you turn the pages of
the I/B. Don’t change the page numbering. Keep the
language integrity.
Fax +32 2 359 95 50
CRISP WAFFLES APPLE WAFFLES
200 g butter 150 g butter
150 g sugar 200 g sugar
4 eggs 4 eggs
350 g plain flour 1 tsp baking powder
1 dsp rum 250 g plain flour
few drops vanilla essence pinch of salt
150-200 ml water (not milk) small pinch of ground cloves
1 tsp cinnamon
2 apples peeled and diced
CLEANING
•Before cleaning, unplug and wait for the appliance to cool down.
•Wipe the outside with only a slightly moistened cloth ensuring that no moisture, oil or
grease enters the cooling slots.
•Wipe the inside and the edges of the plate with a paper towel or a soft cloth.
•Do not clean the inside or outside with any abrasive scouring pad or steel wool as this will
damage the finish.
•To clean the bottom baking plate, open the waffle maker and use the small handle to pull
the baking plate out. Clean it with water, dry it off and put it back by sliding the pin into
the foreseen notch and then pressing the small handle until it clicks into place.
•To clean the upper baking plate, open the waffle maker and slide the release button just
above the plate upwards; the plate loosens and is held only by its pin. Take the plate off,
clean it with water and dry it off. To put it back, proceed in reverse order.
•You can take off the collecting tray (situated under the waffle maker) to clean it with
water.
•Do not immerse in water or any other liquid.
PROTECTION OF THE ENVIRONMENT– DIRECTIVE 2002/96/EC
In order to preserve our environment and protect human health, the waste electrical and
electronic equipment should be disposed of in accordance with specific rules with the
implication of both suppliers and users. For this reason, as indicated by the symbol on the
rating label or on the packaging, your appliance should not be disposed of as unsorted
municipal waste. The user has the right to bring it to a municipal collection point performing
waste recovery by means of reuse, recycling or use for other applications in accordance with
the directive.
7 TKG WM 10 - 080514
Assembly page 7/32

Copies of the I/B. Please reproduce them without any
changes except under special instruction from Team
International BELGIUM. The pages must be reproduced
and folded in order to obtain a booklet A5 (+/- 148.5 mm
width x 210 mm height). When folding, make sure you
keep the good numbering when you turn the pages of
the I/B. Don’t change the page numbering. Keep the
language integrity.
Fax +32 2 359 95 50
POUR VOTRE SECURITE
Lisez attentivement cette notice avant toute utilisation.
Important : Votre appareil n’est pas prévu pour être utilisé par des personnes ( y compris les
enfants ) dont les capacités physiques, sensorielles ou mentales sont réduites, ou des personnes
dénuées d’expérience ou de connaissance, sauf si elles ont pu bénéficier, par l’intermédiaire
d’une personne responsable de leur sécurité, d’une surveillance ou d’instructions préalables
concernant son utilisation en toute sécurité.
Il convient de surveiller les enfants pour s’assurer qu’ils ne jouent pas avec l’appareil.
Avant d'utiliser l'appareil, vérifiez que la tension du réseau correspond bien à celle de
l'appareil.
Ne laissez jamais votre appareil sans surveillance lorsque celui-ci est en fonctionnement ou
sous tension.
Vérifiez régulièrement l’état de votre appareil et s’il est endommagé de quelque façon que
ce soit, ne l'utilisez pas mais faites-le vérifier et réparer par un service qualifié compétent(*). Si
le cordon d’alimentation est endommagé, il doit être obligatoirement remplacé par un
service qualifié compétent(*).
Utilisez l'appareil uniquement pour des usages domestiques et de la manière indiquée
dans la notice.
Ne plongez jamais l'appareil dans l'eau ou dans tout autre liquide ni pour son nettoyage ni
pour toute autre raison. Ne le mettez jamais au lave-vaisselle.
N'utilisez pas l'appareil près de sources de chaleur.
La prise doit être débranchée avant de nettoyer l'appareil.
Veillez à ne pas utiliser l'appareil à l'extérieur et entreposez-le dans un endroit sec.
Ne pas utiliser des accessoires non recommandés par le fabricant, cela peut présenter un
danger pour l’utilisateur et risque d’endommager l’appareil.
Ne déplacez jamais l’appareil en tirant sur le câble. Veillez à ce que le cordon
d’alimentation ne puisse être accidentellement accroché et ce, afin d’éviter toute chute
de l’appareil. Evitez d’enrouler le cordon autour de l’appareil et ne le tordez pas.
Posez cet appareil sur une table ou un support suffisamment stable pour éviter sa chute.
Veuillez laisser refroidir votre appareil avant nettoyage et avant rangement.
Veillez à ce que le cordon n’entre pas en contact avec des surfaces chaudes de
l’appareil.
La température des surfaces accessibles peut être élevée lorsque l'appareil fonctionne.
Ne pas toucher ces surfaces mais faites usage des poignées.
Veillez à ce que l’appareil ne rentre pas en contact avec des matériaux facilement
inflammables comme les rideaux, les tissus,... lorsqu’il est en fonctionnement car le feu
pourrait se déclarer.
Veillez à ne pas griffer le revêtement spécial des plaques de cuisson car vous pourriez
alors retrouver des éclats du revêtement dans la nourriture. Utilisez une spatule en bois
classique ou en plastique spécialement étudié pour résister à la chaleur.
Débranchez votre appareil lorsqu’il n’est pas en utilisation.
Ne faites cuire que des aliments appropriés à la cuisson et propres à la consommation.
Votre appareil ne doit jamais être mis en fonctionnement par le biais d’une minuterie
extérieure ou d’un autre système de commande à distance séparé.
(*) Service qualifié compétent: Service après vente du fabricant ou de l'importateur ou une
personne qualifiée, reconnue et habilitée à faire ce genre de réparation afin d'éviter tout
danger. Dans tous les cas, veuillez retourner l'appareil auprès de ce service.
8 TKG WM 10 - 080514
Assembly page 8/32

Copies of the I/B. Please reproduce them without any
changes except under special instruction from Team
International BELGIUM. The pages must be reproduced
and folded in order to obtain a booklet A5 (+/- 148.5 mm
width x 210 mm height). When folding, make sure you
keep the good numbering when you turn the pages of
the I/B. Don’t change the page numbering. Keep the
language integrity.
Fax +32 2 359 95 50
MISE EN SERVICE
•Avant la première utilisation, frottez les plaques avec un chiffon légèrement humide pour
les nettoyer et ainsi éliminer les résidus d’emballage.
•Fermez votre appareil et branchez-le à une prise de courant. Le témoin lumineux rouge
s’allume indiquant que l’appareil est sous tension.
•Appuyez sur le bouton ON/OFF pour commencer le préchauffage. « 4:30 » s’affiche sur
l’écran.
•Pendant le préchauffage, l’appareil doit rester fermé afin d’éviter une perte de chaleur.
Lors de la première utilisation la couche anti-adhésive produira de la fumée. Celle-ci n'est
pas nocive et s’estompera rapidement.
•Lorsque le préchauffage est fini, le témoin lumineux vert s’allume et vous entendez 4 bips
sonores.
•Ouvrez l'appareil en tirant la poignée ronde vers vous et en soulevant cette poignée
reliée au couvercle et à la plaque supérieure. Ensuite enduisez légèrement les plaques de
cuisson de matière grasse telle que du beurre, de la margarine ou toute autre graisse de
cuisson.
•Déposez la pâte sur les plaques du bas de façon à ce qu’elle se répartisse équitablement
dans tous les interstices puis fermer l’appareil. Ne mettez pas trop de pâte sinon celle-ci
risque de déborder sur les côtés.
•Réglez la minuterie en appuyant sur le bouton COLOR/CRISP. Vous pouvez choisir entre les
12 positions suivantes : 2:30 – 2:30+crisp – 3:30 – 3:30+crisp – 4:30 – 4:30+crisp – 5:00 –
5:00+crisp – 5:30 – 5:30+crisp – 6:00 – 6:00+crisp. Le temps de cuisson s’affiche sur l’écran.
Remarque: quand vous choisissez un réglage avec la fonction « crisp » (« croustillant »), le
cercle de lumière autour du bouton COLOR/CRISP s’allumera.
•Appuyez sur le bouton START /RESET pour commencer la cuisson. Le témoin lumineux vert
s’éteint et le décompte du temps de cuisson réglé commence.
•Pendant la cuisson, tournez de temps en temps l’appareil en repoussant la poignée ronde
vers le gaufrier et en tournant ensuite dans le sens horlogique pour répartir la pâte
équitablement et pour faire cuire et dorer les deux côtés des gaufres uniformément.
•A la fin de la cuisson, 3 longs bips sonores retentiront et le témoin lumineux vert se
rallumera. Le réglage que vous avez choisi s’affiche de nouveau.
•Lorsque la gaufre est cuite, retirez-la de l’appareil à l’aide d’une spatule en bois ou en
plastique. N'utilisez pas d'objets métalliques car ils risqueraient d'endommager le
revêtement anti-adhésif des plaques.
•Attention, pendant l'utilisation, les plaques deviennent chaudes. Faites attention de ne pas
vous brûler.
•Si vous voulez cuire encore des gaufres, appuyez sur le bouton START/RESET pour faire des
gaufres avec le même temps de cuisson ou réglez le temps de cuisson à l’aide du bouton
COLOR/CRISP avant d’appuyer sur le bouton START/RESET.
•Lorsque vous avez terminé d’utiliser l’appareil, appuyez sur le bouton ON/OFF,
débranchez l’appareil et laissez-le ouvert afin que les plaques puissent refroidir.
RECETTES
GAUFRES SABLEES
200 g de beurre
200 g de sucre
4 œufs
1 zeste de citron
200 g de farine
GAUFRES À LEVURE
25 g de levure de bière
¼ l de lait
125 g de beurre
50 g de sucre
6 œufs
1 zeste de citron
sel
375 g de farine
9 TKG WM 10 - 080514
Assembly page 9/32

Copies of the I/B. Please reproduce them without any
changes except under special instruction from Team
International BELGIUM. The pages must be reproduced
and folded in order to obtain a booklet A5 (+/- 148.5 mm
width x 210 mm height). When folding, make sure you
keep the good numbering when you turn the pages of
the I/B. Don’t change the page numbering. Keep the
language integrity.
Fax +32 2 359 95 50
GAUFRES TRADITIONNELLES 1 sachet de sucre vanillé
125 g de beurre 1 sachet de levure
150 g de sucre 150-200 ml d’eau (pas de lait)
1 zeste de citron
GAUFRES AUX POMMES
sel
3 œufs 150 g de beurre
¼ l de lait 250 g de sucre
250 g de farine 4 œufs
1 c. à c. de levure ½ c. à c. de sel
250 g de maïzena
GAUFRES CROUSTILLANTES 1 c. à c. de levure
200 g de beurre 1 petite pincée de clous de girofle moulus
150 g de sucre 1 pincée de cannelle
4 œufs 2 pommes épluchées et coupées en petits
cubes
350 g de farine
1 c. à s. de rhum
NETTOYAGE
•Veuillez retirer la fiche de la prise de courant et attendre que l’appareil et les plaques
refroidissent totalement avant de les nettoyer.
•Essuyez l’intérieur et les angles de l’appareil à l’aide de papier absorbant ou d’un chiffon
doux.
•Essuyez l’extérieur de l’appareil à l’aide d’un chiffon légèrement humide, en vous assurant
que l'humidité, l’huile ou la graisse ne s’infiltre pas dans les aérations de refroidissement de
l’appareil.
•Ne nettoyez jamais votre appareil (extérieur et intérieur) à l’aide de produits abrasifs car
cela abîmerait le revêtement.
•Pour nettoyer la plaque inférieure, ouvrez l’appareil et retirer la plaque en la tirant vers le
haut par la petite poignée. Nettoyez-la à l’eau, séchez-la et remettez-la en insérant
d’abord l’ergot dans l’orifice prévu à cet effet et en appuyant alors sur la petite poignée
jusqu’au déclic de verrouillage.
•Pour nettoyer la plaque supérieure, ouvrez le gaufrier et remontez le bouton situé juste au-
dessus de cette plaque; celle-ci se détache tout en restant maintenue par son ergot.
Tirez-la et nettoyez-la à l’eau. Apres l’avoir séchée, remettez-la en procédant
inversement.
•Vous pouvez retirer le plateau récupérateur (situé sous le gaufrier) pour le nettoyer à
l’eau.
•N'immergez pas l'appareil dans l'eau ou tout autre liquide.
PROTECTION DE L’ENVIRONNEMENT – DIRECTIVE 2002/96/CE
Afin de préserver notre environnement et notre santé, l’élimination en fin de vie des appareils
électriques et électroniques doit se faire selon des règles bien précises et nécessite
l’implication de chacun, qu’il soit fournisseur ou utilisateur. C’est pour cette raison que votre
appareil, tel que le signale le symbole apposé sur sa plaque signalétique ou sur
l'emballage, ne doit en aucun cas être jeté dans une poubelle publique ou privée destinée
aux ordures ménagères. L'utilisateur a le droit de déposer l'appareil dans des lieux publics de
collecte procédant à un tri sélectif des déchets pour être soit recyclé, soit réutilisé pour
d’autres applications conformément à la directive.
10 TKG WM 10 - 080514
Assembly page 10/32

Copies of the I/B. Please reproduce them without any
changes except under special instruction from Team
International BELGIUM. The pages must be reproduced
and folded in order to obtain a booklet A5 (+/- 148.5 mm
width x 210 mm height). When folding, make sure you
keep the good numbering when you turn the pages of
the I/B. Don’t change the page numbering. Keep the
language integrity.
Fax +32 2 359 95 50
BELANGRIJKE VEILIGHEIDSVOORSCHRIFTEN
Lees de gebruiksaanwijzing aandachtig alvorens u uw toestel gebruikt.
Belangrijk: Personen (kinderen inbegrepen) die wegens hun fysieke, sensoriële of mentale
capaciteiten, of wegens hun gebrek aan ervaring of kennis, het toestel niet veilig kunnen
gebruiken, mogen dit toestel niet zonder toezicht of instructies van een verantwoordelijke
persoon gebruiken. Hou kinderen goed in het oog om te vermijden dat ze met het toestel
spelen.
Controleer of de netspanning overeenkomt met deze van het toestel vooraleer u het
gebruikt.
Laat uw toestel tijdens het gebruik nooit zonder toezicht.
Controleer regelmatig of het snoer niet beschadigd is. Gebruik het toestel niet indien het
snoer of het toestel zelf enige beschadiging zouden vertonen maar laat het nakijken en
herstellen door een bekwame gekwalificeerde dienst (*). Een beschadigd snoer dient te
worden vervangen door een bekwame gekwalificeerde dienst (*).
Gebruik het toestel enkel voor huishoudelijk gebruik en op de wijze zoals vermeld in de
gebruiksaanwijzing.
Dompel het toestel nooit onder in water of in enige andere vloeistof, noch om het te
reinigen, noch om welke andere reden ook. Steek het nooit in een afwasmachine.
Gebruik het toestel niet in de nabijheid van warmtebronnen.
Verwijder de stekker uit het stopcontact vooraleer u het toestel reinigt.
Gebruik het toestel niet buiten en berg het op in een droge plaats.
Gebruik geen accessoires die niet door de fabrikant aanbevolen werden. Dit kan
gevaarlijk zijn voor de gebruiker en het toestel beschadigen.
Trek nooit aan het snoer om het toestel te verplaatsen. Zorg dat het elektriciteitssnoer
nergens kan achterhaken en daardoor de val van het toestel veroorzaken. Draai het
snoer niet rond het toestel en plooi het niet.
Zet het toestel op een tafel of op een voldoende stabiel oppervlak zodat het niet valt.
Wacht tot het toestel volledig is afgekoeld alvorens het te reinigen of op te bergen.
Zorg dat het snoer niet in aanraking komt met de warme onderdelen van het toestel.
Wanneer het toestel in werking is, kunnen toegankelijke delen ervan een zeer hoge
temperatuur bereiken. Raak deze warme onderdelen niet aan.
Zorg ervoor dat de warme onderdelen van het toestel tijdens het gebruik niet in aanraking
komen met gemakkelijk ontvlambare materialen, zoals gordijnen, een tafelkleed,… en
dergelijke vermits deze in brand zouden kunnen vliegen.
Let erop dat u de speciale bekleding van de bakplaten niet schramt, vermits u hiervan
stukjes in uw voedsel zou kunnen vinden. Gebruik een klassieke houten spatel of een
warmtebestendige plastiek spatel.
Trek de stekker uit het stopcontact als het toestel niet werkt.
Kook enkel etenswaren geschikt om te koken en voor consumptie.
Uw toestel mag nooit worden aangezet door middel van een externe timer of een
separaat systeem met afstandsbediening.
(*) Bekwame gekwalificeerde dienst: klantendienst van de fabrikant of de invoerder, die
erkend en bevoegd is om dergelijke herstellingen te doen zodat elk gevaar vermeden wordt.
Gelieve het toestel bij problemen naar deze dienst terug te brengen.
11 TKG WM 10 - 080514
Assembly page 11/32

Copies of the I/B. Please reproduce them without any
changes except under special instruction from Team
International BELGIUM. The pages must be reproduced
and folded in order to obtain a booklet A5 (+/- 148.5 mm
width x 210 mm height). When folding, make sure you
keep the good numbering when you turn the pages of
the I/B. Don’t change the page numbering. Keep the
language integrity.
Fax +32 2 359 95 50
GEBRUIKSAANWIJZING
•Reinig vóór het eerste gebruik de bovenzijde van de bakplaten met een vochtige doek
en wrijf deze daarna droog.
•Sluit het toestel en steek de stekker in het stopcontact. Het rode controlelampje zal gaan
branden om aan te geven dat het toestel op het stroomnet is aangesloten.
•Druk op de toets ON/OFF om de voorverwarming te starten. De voorverwamingstijd
« 4:30 » verschijnt op het scherm.
•Laat het toestel dicht tijdens de voorverwarming om energieverspilling te vermijden.
Tijdens het eerste gebruik zal de antiaanbaklaag gaan roken. Deze rook is NIET schadelijk
en zal snel verdwijnen.
•Het groene controlelampje zal gaan branden en 4 pieptonen zullen luiden wanneer de
voorverwaming beëindigd is.
•Open het toestel door de ronde hendel naar u toe te trekken en op te tillen. De hendel is
verbonden met het deksel en de bovenste bakplaat. Vet daarna de bakplaten in met
boter, olie of margarine zonder de randen in te vetten.
•Giet deeg op de onderste bakplaat. Leg niet te veel deeg, anders zou het langs de
zijkanten uit het toestel kunnen lopen. Druk het deksel een kort ogenblik naar beneden
om het deeg gelijkmatig over de bakplaten te verdelen.
•Druk op de toets COLOR/CRISP om de baktijd in te stellen. U kan kiezen tussen 12
verschillende standen: 2:30 – 2:30+crisp – 3:30 – 3:30+crisp – 4:30 – 4:30+crisp – 5:00 –
5:00+crisp – 5:30 – 5:30+crisp – 6:00 – 6:00+crisp. Het display toont de baktijd. Opmerking:
als u een stand kiest met de functie « crisp » (om de wafels krokanter te bakken), dan licht
de lichtcirkel rond de toets COLOR/CRISP op.
•Druk op de toets START/RESET om het bakken te beginnen. Het groene controlelampje
gaat uit en de aftelling van de baktijd begint.
•Draai het toestel tijdens het bakken van tijd tot tijd om door het ronde handvat naar het
wafelijzer toe te drukken en in wijzerzin te draaien om zo het deeg gelijkmatig te verdelen
en beide zijden van de wafels gelijkmatig te bakken en bruinen.
•Wanneer de baktijd afgelopen is, luiden 3 lange pieptonen en licht het groene
controlelampje weer op. Het display toont opnieuw de stand die u gekozen hebt.
•Wanneer de wafels gebakken zijn, open dan het deksel en gebruik een houten of
hittebestendige plastic spatel om de wafels uit het apparaat te halen. Gebruik nooit
scherpe of metalen voorwerpen daar deze de antiaanbaklaag van de bakplaten zouden
kunnen beschadigen.
•Opgelet! Wanneer het toestel in gebruik is, worden de bakplaten heel warm. Let erop dat
u zich niet verbrandt.
•Als u meer wafels wilt bakken, druk dan op de toets START/RESET om wafels te bakken op
dezelfde stand als voorheen of druk op de toets COLOR/CRISP om een nieuwe stand te
kiezen voor u op de toets START/RESET drukt.
•Wanneer het bakken beëindigd is, druk dan op de toets ON/OFF om het toestel uit te
schakelen, trek het snoer uit het stopcontact en laat het wafelijzer open liggen om af te
koelen.
WAFELRECEPTEN
ZANDWAFELS
200 g boter
200 g suiker
4 eieren
1 geraspte citroenschil
200 g tarwebloem
GISTWAFELS
25 g gist
¼ l melk
125 g boter
50 g suiker
6 eieren
1 geraspte citroenschil
zout
375 g tarwebloem
12 TKG WM 10 - 080514
Assembly page 12/32

Copies of the I/B. Please reproduce them without any
changes except under special instruction from Team
International BELGIUM. The pages must be reproduced
and folded in order to obtain a booklet A5 (+/- 148.5 mm
width x 210 mm height). When folding, make sure you
keep the good numbering when you turn the pages of
the I/B. Don’t change the page numbering. Keep the
language integrity.
Fax +32 2 359 95 50
GEWONE WAFELS MET BAKPOEDER APPELWAFELS
125 g boter 150 g margarine
150 g suiker 200 g suiker
1 geraspte citroenschil 4 eieren
zout ½ theelepeltje zout
3 eieren 250 g zetmeel (Mondamin)
¼ l melk 1 afgestreken theelepel bakpoeder
250 g bloem 1 snuifje gemalen kruidnagel
1 theelepeltje bakpoeder 2 in kleine blokjes gesneden appels
KROKANTE WAFELS
200 g margarine
150 g suiker
4 eieren
350 g bloem
1 eetlepel rum
1 pakje vanillesuiker
1 pakje bakpoeder
ca. 150-200 ml water (geen melk)
REINIGING
•Haal de stekker uit het stopcontact. Laat het apparaat en de bakplaten eerst afkoelen.
•Reinig de buitenkant met een zachte, vochtige doek. Let erop, dat er geen vocht of olie
via de koelspleten naar binnen sijpelt.
•Veeg de bakplaten schoon met een zachte doek of een stuk keukenpapier.
•Gebruik nooit schuurmiddelen of scherpe of ijzeren voorwerpen (bv. staalwol) om het
toestel te reinigen, omdat u anders de antiaanbaklaag ernstig beschadigt.
•Om de onderste bakplaat grondig te reinigen opent u het wafelijzer en trekt u aan het
kleine handvat om de bakplaat af te nemen. Maak de bakplaat schoon met water,
droog ze af en zet ze terug door het blokje achteraan de bakplaat in de daartoe
voorziene opening in het toestel te schuiven en dan op het kleine handvat te drukken tot
het vastklikt.
•Om de bovenste bakplaat grondig te reinigen opent u het wafelijzer en schuift u de
ontgrendelingsknop die zich net boven de bakplaat bevindt naar omhoog. De plaat
komt los en wordt enkel door het bevestigingsblokje op haar plaats gehouden. Neem de
plaat af, maak ze schoon met water en droog ze af. Om ze terug te zetten handelt u in
omgekeerde volgorde.
•U kunt de opvangschaal (die zich onder het wafelijzer bevindt) afnemen om ze met water
schoon te maken.
•Dompel het toestel niet onder in water of andere vloeistoffen.
MILIEUBESCHERMING – RICHTLIJN 2002/96/EG
Om ons milieu en onze gezondheid te beschermen, moet afgedankte elektrische en
elektronische apparatuur in overeenstemming met welbepaalde regels weggegooid worden.
Dit vergt zowel de inzet van de leveranciers als van de gebruikers. Daarom mag uw apparaat,
zoals op het typeplaatje of op de verpakking aangegeven door het symbool , niet met
het gewone huisvuil weggegooid worden. De gebruiker heeft het recht het toestel naar een
gemeentelijk centrum van gescheiden inzameling te brengen waar het overeenkomstig de
richtlijn hergebruikt, gerecycleerd of voor andere doeleinden gebruikt zal worden.
13 TKG WM 10 - 080514
Assembly page 13/32

Copies of the I/B. Please reproduce them without any
changes except under special instruction from Team
International BELGIUM. The pages must be reproduced
and folded in order to obtain a booklet A5 (+/- 148.5 mm
width x 210 mm height). When folding, make sure you
keep the good numbering when you turn the pages of
the I/B. Don’t change the page numbering. Keep the
language integrity.
Fax +32 2 359 95 50
CONSEJOS DE SEGURIDAD
Lea detenidamente el modo de empleo antes de utilizar el aparato.
Importante: Las personas (incluidos niños) con incapacidades físicas, sensoriales o mentales, o
sin experiencia o conocimiento nunca deben utilizar el aparato, salvo si están bajo la
vigilancia de una persona responsable de su seguridad o si recibieron previamente
instrucciones con respecto al uso seguro del aparato.
Es necesario vigilar a los niños para que no jueguen con el aparato.
Antes de utilizar el aparato, compruebe que el voltaje de la red eléctrica coincide con el
aparato.
No deje nunca su aparato sin vigilancia cuando esté en marcha.
Compruebe de vez en cuando que el aparato no esté dañado. No utilice su aparato sí el
cable o el aparato están dañados por el motivo que sea. Cualquier reparación debe ser
realizada por un servicio técnico cualificado(*).Si el cable está dañado, debe ser
reemplazado por un servicio cualificado competente(*).
Utilice el aparato solamente para usos domésticos y de la manera indicada en el modo de
empleo.
No sumerja nunca el aparato en el agua o en cualquier otro líquido ni para su limpieza ni
por cualquier otra razón. No lo introduzca nunca en el lavavajillas.
No utilice el aparato cerca de fuentes de calor.
La clavija eléctrica debe ser desenchufada antes de limpiar el aparato.
Procure no utilizar el aparato en el exterior y colóquelo en un sitio seco.
No utilice accesorios no recomendados por el fabricante, ello puede entrañar un riesgo
para el usuario y puede dañar el aparato.
No mueva nunca el aparato estirando del cable. Procure que el cable no se enganche
en algún saliente, a fin de evitar posibles caídas del mismo. Evite enrollar el cable
alrededor del aparato y no lo tuerza.
Coloque el aparato sobre una mesa o soporte estable para evitar su caída.
Deje enfriar el aparato antes de limpiarlo o guardarlo.
Procure que el cable no entre en contacto con las superficies calientes del aparato
No toque las superficies calientes del aparato, utilice las asas.
Vigile que cuando el aparato esté en marcha no entre en contacto con materias
fácilmente. inflamables como cortinas, tejidos, etc., ya que podría provocar un incendio.
Procure no rallar el revestimiento especial de las placas de cocción, ya que en caso
contrario podría encontrar partículas del revestimiento en la comida. Utilice una espátula
de madera o plástico resistente al calor.
Desenchufe el aparato cuando no lo utilice.
No cocine nada mas que alimentos apropiados a la cocción y al consumo.
Su aparato nunca debe ser puesto en marcha mediante un minutero externo o un
sistema de mando a distancia separado.
(*) Servicio técnico cualificado. Servicio técnico del fabricante o importador o de una
persona cualificada, reconocida y habilitada a fin de evitar cualquier peligro. En cualquier
caso devuelva el aparato al servicio técnico.
14 TKG WM 10 - 080514
Assembly page 14/32

Copies of the I/B. Please reproduce them without any
changes except under special instruction from Team
International BELGIUM. The pages must be reproduced
and folded in order to obtain a booklet A5 (+/- 148.5 mm
width x 210 mm height). When folding, make sure you
keep the good numbering when you turn the pages of
the I/B. Don’t change the page numbering. Keep the
language integrity.
Fax +32 2 359 95 50
MODO DE EMPLEO
•Cuando utilice el aparato por primera vez, pase un paño humedecido en las placas para
limpiar y eliminar los residuos del embalaje.
•Cierre su aparato y enchúfelo en una toma eléctrica. El testigo luminoso rojo se enciende
para indicar que el aparato está bajo tensión.
•Presione el botón ON/OFF para empezar el precalentamiento. “4:30” aparece en la
pantalla.
•Durante el precalentamiento, el aparato tiene que estar cerrado para evitar una
perdición de calor. La primera vez que se enchufa, hace humo y huele. Esto es normal,
puesto que en su fabricación se pueden haber adherido grasas que se estén quemando.
•El testigo luminoso verde se encenderá cuando el precalentamiento esté terminado y
oirá 4 bips.
•Abra el aparato tirando el asa redonda hacia usted y levantando esta asa unida con la
tapa y la placa superior. Luego unte ligeramente las placas de cocción con grasa como
mantequilla, margarina u otra grasa de cocción.
•Eche la masa en las placas inferiores pero no en los lados y cierre el aparato. Comprueba
que la mezcla esté repartida de manera uniforme. No ponga demasiado mezcla para
que no salga por los lados.
•Ajuste el temporizador presionando el botón COLOR/CRISP. Puede elegir entre las 12
posiciones siguientes : 2:30 – 2:30+crisp – 3:30 – 3:30+crisp – 4:30 – 4:30+crisp – 5:00 –
5:00+crisp – 5:30 – 5:30+crisp – 6:00 – 6:00+crisp. El tiempo de cocción aparece en la
pantalla. Nota : cuando selecciona un ajuste con la función « crisp » (« crujiente »), el
círculo de luz alrededor del botón COLOR/CRISP se encenderá.
•Presione el botón START /RESET para empezar la cocción. El testigo luminoso verde se
apaga y el descuento del tiempo de cocción empieza.
•Durante la cocción, gire de vez en cuando el aparato empujando la asa redonda hasta
la gofrerera y luego girando en el sentido de las agujas del reloj para repartir la masa de
manera uniforme y para cocer y dorar ambos lados de los gofres uniformemente.
•Al final de la cocción, se oirán 3 largos bips sonoros y el testigo luminoso verde se
encenderá de nuevo. El ajuste elegido aparece de nuevo en la pantalla.
•Quite los barquillos con la ayuda de una espátula de madera o plástico resistente al
calor. Nunca utilice un cuchillo en metal puesto que este estropearía el recubrimiento
anti adhesivo.
•Atención: Durante la utilización, las placas se calientan. Téngalo en cuenta para evitar
quemaduras.
•Si quiere seguir cociendo gofres, presione el botón START/RESET para hacer gofres con el
mismo tiempo de cocción o ajuste el tiempo de cocción con el botón COLOR/CRISP
antes de presionar el botón START/RESET.
•Cuando haya terminado, presione el botón ON/OFF, desenchufe el aparato y mantenga
las placas abiertas para que se enfríen.
RECETAS ACONSEJADES
BARQUILLOS DULCES Y CRUJIENTES
200 grs de mantequilla
200 grs de azúcar
4 huevos
raspadura de limón
200 grs de harina
BARQUILLOS A LA LEVADURA
25 grs de levadura de cerveza
¼ de litro de leche
125 grs de mantequilla
50 grs de azúcar
6 huevos
raspadura de limón
sal
375 grs de harina
15 TKG WM 10 - 080514
Assembly page 15/32

Copies of the I/B. Please reproduce them without any
changes except under special instruction from Team
International BELGIUM. The pages must be reproduced
and folded in order to obtain a booklet A5 (+/- 148.5 mm
width x 210 mm height). When folding, make sure you
keep the good numbering when you turn the pages of
the I/B. Don’t change the page numbering. Keep the
language integrity.
Fax +32 2 359 95 50
BARQUILLOS TRADITIONALES BARQUILLOS DE MANZANA
125 grs de mantequilla 150 grs de harina
150 grs de azúcar 200 grs de azúcar
raspadura de limón 4 huevos
3 huevos ½ cucharadita (de las de café) de sal
¼ litro de lecho 250 grs de maizena
250 grs de harina 1 cucharada de clavos de girasol molidos
1 cucharadita (de las de café) de
levadura
1 pizca de canela
2 manzanas peladas y cortadas a
pequeños cubos
BARQUILLOS CRUJIENTES
200 grs de mantequilla
150 grs de azúcar
4 huevos
350 grs de harina
1 cucharada de ron
1 saquito de azúcar-vainilla
150-200 ml de agua (leche no)
LIMPIEZA
•Tras el empleo y antes de su limpieza, desenchufe el aparato y déjelo enfriar.
•Limpie su interior y las esquinas del aparato con la ayuda de un papel de cocina
absorbente o un paño suave.
•Limpie el exterior del aparato con la ayuda de un paño ligeramente humedecido,
asegurándose de que no haya humedad, aceite o grasa que se infiltre en las aeraciones
que enfrían el aparato.
•Nunca limpie ni el interior ni el exterior con productos abrasivos ya que estos estropean el
esmalte y el recubrimiento anti adhesivo.
•Para limpiar la placa inferior, abra el aparato y retire la placa tirándola hacia arriba
gracias a la pequeña asa. Límpiela con agua, séquela y póngala de nuevo insertando
primero la uña en el orificio previsto a este fin y presionando la pequeña asa hasta el clic
de desbloqueo.
•Para limpiar la placa superior, abre el gofrerero y remonte el botón ubicado justo por
encima de esta placa; ésta se destaca, siguiendo siendo mantenida por su uña. Tírela y
límpiela con agua. Después de secarla, póngala de nuevo en su sitio haciendo lo
contrario.
•Puede retirar la placa colectora (ubicada bajo la gofrerera) para limpiarla con agua.
•Nunca introducir el aparato en el agua u otro liquido.
PROTECCIÓN DEL MEDIO AMBIENTE –DIRECTIVA 2002/96/CE
Para poder preservar nuestro medio ambiente y proteger la salud humana, los residuos
eléctricos y equipos electrónicos deberían ser destruidos de acuerdo con unas normas
especificas con la implicación de ambos proveedores y consumidores. Por esta razón, como
indica el símbolo en la placa de datos técnicos, su aparato no debería ser tirado en un
contenedor municipal sino que debería ser devuelto a la tienda, o dejado en un punto de
recolección para ser reciclado o usado para otras aplicaciones conforme a la directiva.
16 TKG WM 10 - 080514
Assembly page 16/32

Copies of the I/B. Please reproduce them without any
changes except under special instruction from Team
International BELGIUM. The pages must be reproduced
and folded in order to obtain a booklet A5 (+/- 148.5 mm
width x 210 mm height). When folding, make sure you
keep the good numbering when you turn the pages of
the I/B. Don’t change the page numbering. Keep the
language integrity.
Fax +32 2 359 95 50
PARA A SUA SEGURANÇA
Antes de utilizar o aparelho leia com sentido de responsabilidade as instruções de
funcionamento.
Importante: As pessoas (incluídas as crianças) com incapacidades físicas, sensoriais ou
mentais, ou sem experiência ou conhecimento não devem utilizar o aparelho excepto se
estiverem a ser vigiadas por uma pessoa responsável pela sua segurança ou se receberam
previamente instruções relativas ao uso seguro do aparelho.
Convém vigiar as crianças para que elas não brinquem com o aparelho.
Antes de ligar a ficha do cabo da alimentação à tomada eléctrica certifique-se que a
corrente eléctrica tem a potência igual à indicada na placa sinalética do aparelho.
Mantenha o aparelho sob vigilância quando em funcionamento.
Verifique com regularidade o estado do aparelho e em caso de danos leve-o a um
serviço técnico competente para o analisar e reparar(*). Se o cabo da alimentação
estiver danificado este tem de ser obrigatoriamente substituído pelo que deve levar o
aparelho a um serviço técnico competente(*).
O aparelho destina-se ao uso domestico e tem de respeitar as instruções de utilização.
O aparelho nunca deve ser mergulhado em líquidos nem ser lavado em maquinas de
lavar a louça.
Não ponha o aparelho próximo de fontes de calor.
O aparelho ao ser limpo tem de ter o cabo de alimentação retirado da tomada
fornecedora da corrente eléctrica.
O aparelho não deve ser utilizado fora de casa e deve ser guardado em locais secos.
Use sempre os acessórios recomendados pelo fabricante.
Não retire o cabo de alimentação da tomada puxando pelo mesmo pois danifica o
aparelho e pode provocar a queda do aparelho. Verifique se o cabo não se encontra
preso em alguma coisa. Nunca enrole o cabo à volta do aparelho.
O aparelho tem de trabalhar em cima de uma mesa ou numa superfície plana que evite
a sua queda.
A limpeza e arrumação são operações a fazer sempre com o aparelho desligado da
corrente eléctrica e em frio.
O cabo da alimentação não deve entrar em contacto com as partes quentes do
aparelho.
A temperatura das superfícies acessíveis pode ficar elevada quando o aparelho estiver a
funcionar. Não toque nestas superfícies.
Nunca ponha o aparelho em contacto com substâncias inflamáveis (tais como sejam os
cortinados) porque poderia provocar um fogo.
Tenha cuidado em não raspar o revestimento especial das placas, já que poderia
encontrar partes do revestimento nos alimentos. Utilize uma espátula de madeira ou de
plástico especialmente concebida para resistir ao calor.
Sempre que o aparelho não esteja a ser utilizado desligue-o da tomada fornecedora da
corrente eléctrica.
O aparelho apenas deve ser utilizado na preparação de alimentos adequados ao
mesmo.
O aparelho nunca deve ser ligado mediante um temporizador externo ou outro sistema
de comando a distância separado.
(*) Serviço técnico habilitado. Serviço técnico do fabricante ou importador duma pessoa
qualificada, reconhecida e habilitada para evitar qualquer perigo. Em qualquer caso devolva
o aparelho ao serviço técnico.
17 TKG WM 10 - 080514
Assembly page 17/32

Copies of the I/B. Please reproduce them without any
changes except under special instruction from Team
International BELGIUM. The pages must be reproduced
and folded in order to obtain a booklet A5 (+/- 148.5 mm
width x 210 mm height). When folding, make sure you
keep the good numbering when you turn the pages of
the I/B. Don’t change the page numbering. Keep the
language integrity.
Fax +32 2 359 95 50
MODO DE EMPREGO
•Antes da primeira utilização limpe as placas com um pano húmido para eliminar
resíduos tais como os da embalagem.
•Feche as placas e coloque a ficha do cabo da alimentação do aparelho na tomada
eléctrica. O sinalizador vermelho ascender-se-à indicando que o aparelho está a receber
corrente eléctrica.
•Prima o botão ON/OFF para aquecer as placas do aparelho. No ecrã aparece «4:30».
•Durante o aquecimento mantenha as placas fechadas para evitar a perda de calor. Na
primeira utilização do aparelho, pode surgir um ligeiro fumo ou cheiro «a novo»
proveniente da camada anti aderente das placas. Esta situação desaparece
gradualmente e rapidamente.
•Quando o aquecimento tiver terminado, o sinalizador luminoso verde ascender-se-à e
ouvirá 4 sons sonoros «bip».
•Levante a placa superior pela pega e mantenha-a levantada. Unte as placas com
margarina, manteiga ou azeite.
•Coloque a massa a meio da placa inferior de modo a tapar todas as ranhuras mas em
quantidade tal que não derrame. Feche a placa superior contra a placa inferior de
forma a que não haja derrame da massa.
•Prima o botão COLOR/CRISP para inserir o tempo de aquecimento desejado. Pode
escolher um dos 12 registos: 2:30 – 2:30+crisp – 3:30 – 3:30+crisp – 4:30 – 4:30+crisp – 5:00 –
5:00+crisp – 5:30 – 5:30+crisp – 6:00 – 6:00+crisp. No ecrã surge o tempo de aquecimento.
Note: Se a escolha se fizer utilizando a função « crisp » ( para fazer as wafles estaladiças),
o anel do sinalizador à volta do botão COLOR/CRISP acender-se-à.
•Prima o botão START/RESET para se iniciar o aquecimento. O sinalizador de cor verde
acender-se-à e começará a contagem decrescente do tempo de aquecimento.
•Durante o aquecimento, no sentido dos ponteiros do relógio, vá virando de tempos a
tempos a parte inferior para superior, utilizando a pega do aparelho de modo a que a
waffle tenha uma cozedura homogénea de ambos os lados.
•Quando o tempo da preparação da waffle terminar, ouvir-se-à 3 longos sons sonoros
«bip» e o sinalizador de cor verde voltará a acender. O ecrã voltará a mostar os registos
de aquecimento que pode escolher.
•Quando a wafle estiver pronta retire-a com a ajuda de uma espátula de madeira ou de
plástico apropriadas. Nunca utilize utensílios de metal pois podem danificar a camada
anti aderente das placas.
•Durante a cozedura as placas ficam muito quentes. Tenha cuidado em não se queimar.
•Se pretender continuar a fazer waffles nas condições anteriormente registadas prima o
botão START/RESET ou então prima o botão COLOR/CRISP se pretender um novo registo
para o aquecimento das placas e só depois é que prima o botão START/RESET.
•Quando tiver terminado de utilizar o seu aparelho, prima o botão ON/OFF para o
desligar, retire a ficha do cabo da alimentação da tomada eléctrica e com a placa
superior levantada deixe arrefecer as placas.
RECEITAS
Bolachas
200 g de manteiga
200 g d açúcar
4 ovos
1 pouco de limão
200 g de farina
Bolacha com fermento
25 g de fermento de cerveja
¼ l de leite
125 g de manteiga
50 g de açúcar
6 ovos
1 pouco de limão
sal
375 g de farinha
18 TKG WM 10 - 080514
Assembly page 18/32

Copies of the I/B. Please reproduce them without any
changes except under special instruction from Team
International BELGIUM. The pages must be reproduced
and folded in order to obtain a booklet A5 (+/- 148.5 mm
width x 210 mm height). When folding, make sure you
keep the good numbering when you turn the pages of
the I/B. Don’t change the page numbering. Keep the
language integrity.
Fax +32 2 359 95 50
Bolacha tradicional
125 g de manteiga
150 g de açúcar
1 pouco de limão
sal
3 ovos
¼ l de leite
250 g de farinha
1 c. café de fermento
Bolacha estaladiça
200 g de manteiga
150 g de açúcar
4 ovos
350 g de farinha
1 c. de sopa de Rum
açúcar sabor baunilha
fermento
150-200 ml de agua (não leite)
Bolacha de maçã
150 g de manteiga
200 g de açúcar
4 ovos
½ c. de café de sal
250 g de farinha maizena
1 c. de café de fermento
uma pintada de canela
2 maçãs descascadas e cortadas aos
cubos
LIMPEZA
•Antes de limpar o aparelho desligue-o, retire a ficha do cabo da alimentação da
tomada eléctrica, abra as placas e deixe-as arrefecer.
•Limpe o exterior do aparelho com a ajuda de um papel absorvente ou de um pano
macio sem nunca deixar que a gordura ou a humidade entre no interior do aparelho.
•Limpe as placas e as dobradiças com papel absorvente ou com um pano húmido não
abrasivo sem deixar que nenhuma humidade entre no interior do aparelho.
•Nunca limpe o aparelho com produtos abrasivos ou utensílios que danifiquem o
revestimento anti aderente das placas.
•Para limpar a placa inferior, abra as placas e retire-a pela pequena pega. Lave-a com
água. Depois de bem seca volte a colocá-la na posição correcta no alojamento em que
anteriormente se encontrava primindo a pequena pega até ouvir um pequeno click de
que se encontra bem alojada.
•Para limpar a placa superior, abra as placas e deslize o botão de fixação até ficar acima
do bordo; a placa liberta-se do alojamento. Retire-a, lave-a com água, seque-a muito
bem e volte a colocá-la correctamente no alojamento, procedendo de forma inversa.
•Pode retirar o aparador de resíduos, da parte inferior do aparelho, para limpar a
humidade que aí se tenha infiltrado por descuido ou a lavar com água.
•Nunca mergulhe o aparelho em água ou qualquer outro liquido.
PROTECÇÃO DO MEIO AMBIENTE – DIRECTIVA 2002/96/CE
Para a preservação do ambiente e da nossa saúde, a eliminação no fim da vida útil dos
aparelhos eléctricos e electrónicos, deve-se efectuar no cumprimento das legislações em
vigor e pela participação de todos quer sejam produtores ou utilizadores. É por esta razão
que o vosso aparelho tem na placa sinalética o símbolo , informando que em caso
algum o aparelho deve ser colocado no caixote do lixo camarário ou privado para que não
vá para as lixeiras comuns mas sim devolvido ao revendedor ou depositado nos locais
apropriados e identificados para a recolha destes aparelhos para que uma vez recolhidos
sejam reciclados, reutilizados ou lhe sejam dados outras aplicações.
19 TKG WM 10 - 080514
Assembly page 19/32

Copies of the I/B. Please reproduce them without any
changes except under special instruction from Team
International BELGIUM. The pages must be reproduced
and folded in order to obtain a booklet A5 (+/- 148.5 mm
width x 210 mm height). When folding, make sure you
keep the good numbering when you turn the pages of
the I/B. Don’t change the page numbering. Keep the
language integrity.
Fax +32 2 359 95 50
AVVERTENZE
Leggere attentamente le istruzioni prima di utilizzare l’apparecchio.
Importante: Le persone (inclusi i bambini) che non sono in grado di utilizzare l’apparecchio, sia
per incapacità fisiche, sensoriali o mentali, sia per mancanza di esperienza o di conoscenze,
non devono utilizzarlo, a meno che siano sorvegliati da una persona responsabile della loro
sicurezza o abbiano precedentemente ricevuto istruzioni relative all’uso sicuro
dell’apparecchio.
Sorvegliare i bambini affinchè non utilizzino l’apparecchio come un giocattolo.
Prima di mettere in funzione l’apparecchio, controllare che la tensione della rete elettrica
corrisponda a quella dell’apparecchio.
Non lasciare l’apparecchio incustodito durante il funzionamento.
Verificare regolarmente lo stato dell’apparecchio, qualora fosse danneggiato , farlo
controllare e riparare da un servizio qualificato(*).Il cavo, se danneggiato, deve essere
sostituito da un servizio qualificato(*).
Questo apparecchio dovrà essere destinato solo all’uso domestico e secondo le modalità
indicate in questo libretto d’istruzione.
Non immergere l’apparecchio e in nessun altro liquido, né per pulirlo né per qualsiasi altra
ragione. Non metterlo in lavastoviglie.
Non usare l’apparecchio in prossimità di fonti di calore.
Togliere la spina dalla presa di corrente prima di pulire e riporre l’apparecchio.
Non usare l’apparecchio all'aperto e riporlo in un luogo asciutto.
Non utilizzare accessori non consigliati dal produttore. Può essere pericoloso per l’utente e
danneggiare l’apparecchio stesso.
Non tirare il cavo per spostare l’apparecchio. Assicurarsi che il cavo non si impigli per
evitare eventuali cadute dell’apparecchio. Non avvolgere il cavo intorno
all’apparecchio e non attorcigliarlo.
Mettere l’apparecchio su un tavolo o su una superficie stabile affinchè non cada.
Lasciare raffreddare l’apparecchio prima di pulirlo o riporlo.
Assicurarsi che il cavo non entri in contatto con le parti calde dell’apparecchio.
La temperatura delle superfici accessibili potrebbe essere molto alta durante il
funzionamento dell'apparecchio, non toccare le parti calde. Servirsi sempre le maniglie.
Le parti calde dell’apparecchio non devono entrare in contatto con materiali facilmente
infiammabili, come tende, tovaglie ecc... in quanto possono causare incendi.
Non graffiare il rivestimento dei piani di cottura perché frammenti di questo potrebbero
finire negli alimenti. Usare una spatola di legno classica o di plastica termoresistente.
Togliere la spina dalla presa di corrente se l’apparecchio non è in funzione.
Cucinare soltanto alimenti destinati alla consumazione.
L’apparecchio non deve essere mai accesso tramite un timer esterno o un altro sistema
di comando a distanza separato.
(*) Servizio qualificato : Servizio Assistenza del produttore o dell'importatore o una persona
qualificata, riconosciuta ed autorizzata ad effettuare riparazioni, per evitare ogni pericolo,
rivolgersi a questo servizio.
20 TKG WM 10 - 080514
Assembly page 20/32
Table of contents
Languages:
Other Team Kalorik Waffle Maker manuals

Team Kalorik
Team Kalorik TKG WPM 1000 User manual

Team Kalorik
Team Kalorik TKG EWM 1001 User manual
Team Kalorik
Team Kalorik TKG WPM 1000 User manual
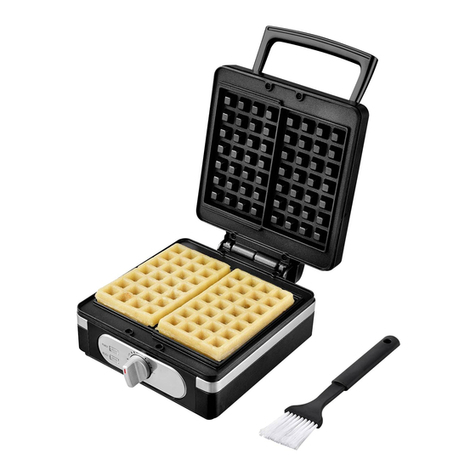
Team Kalorik
Team Kalorik TKG WM 1005 BK User manual
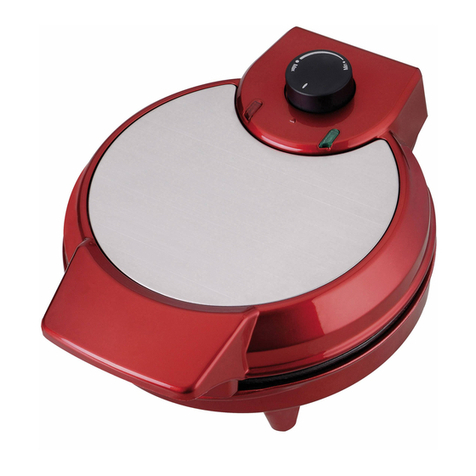
Team Kalorik
Team Kalorik TKG WM 1007 User manual
Team Kalorik
Team Kalorik TKG WM 1003 User manual
Team Kalorik
Team Kalorik TKG WM 1050 User manual
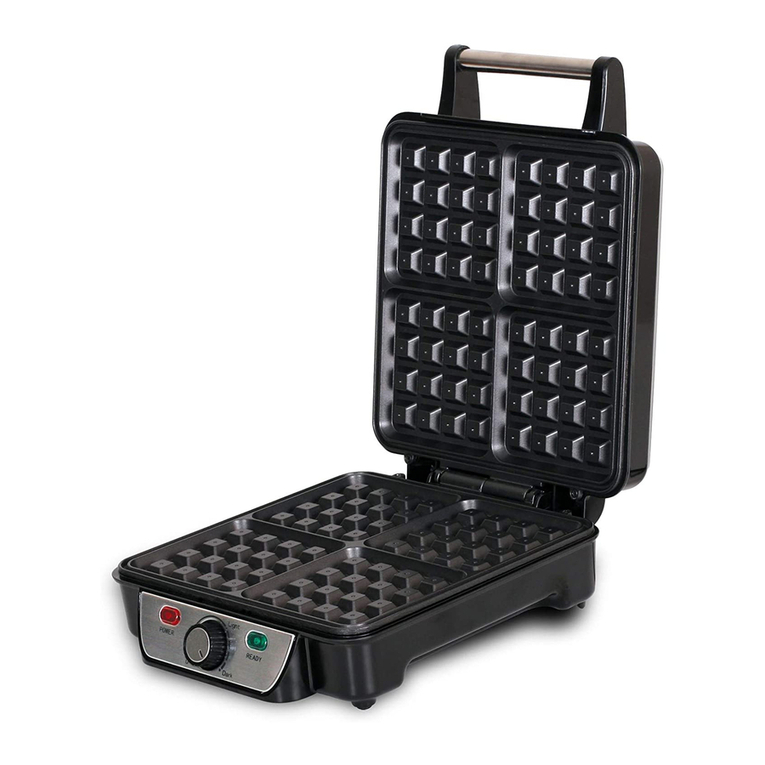
Team Kalorik
Team Kalorik TKG WM 1004 User manual
Team Kalorik
Team Kalorik TKG WM 1090 User manual
