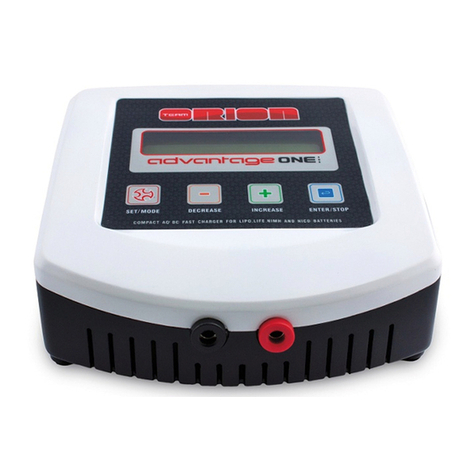
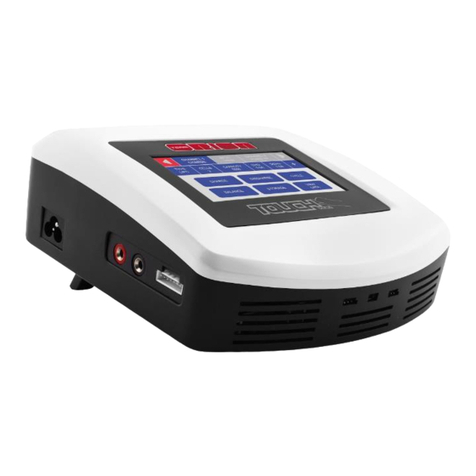
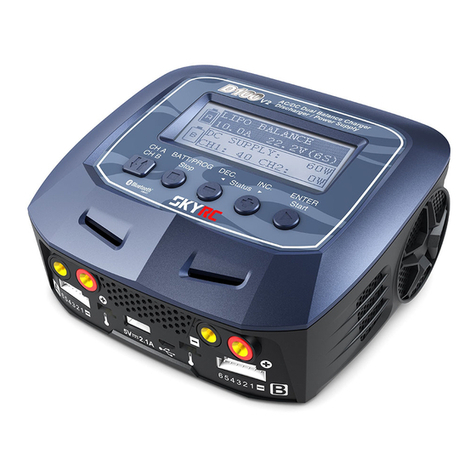
Team Orion Advantage Touch Instruction manual

QUICK START
MANUAL
Copyright 2012 © Team Orion. Please visit www.teamorion.com/touch for more information.
1
2
3
4
6
5
7
Find the technical specifications of
your battery and follow the assistant.
8Select the desired function
mode on the charger.
Connect the power
cord to the charger
Connect the power cord
to a mains power outlet
Connect the charge
cable compatible
with your battery
For LiPo, LiFe and LiIon batteries, connect
the balancing connector to the balance board
Connect the charge
cable to the battery
For LiPo, LiFe and
LiIon batteries, connect
the balancer board
to the charger
Type: LiPo/LiFe/LiIon/NiMH/NiCd/Pb
Cells: 1-6S (1.2-22.2V)
Capacity: XXXX mAh
Menu Language
You can change the menu language of your charger. Please visit
www.teamorion.com/touch to learn more.
Sie können die Menu-Sprache Ihres Ladegeräts ändern. Besuchen
Sie www.teamorion.com/touch für mehr Informationen.
Vous pouvez modifier la langue de l’interface de votre chargeur.
Rendez-vous sur www.teamorion.com/touch pour plus d’informations.
För att byta språk i menyer se information på:
www.teamorion.com/touch
充電器のメニュー言語を変更することができます。
詳しくは 、www.teamorion.com/touch をご覧ください。
Potete modificare la lingua del’interfaccia del caricabatterie. Visitate
il sito www.teamorion.com/touch per maggiori informazioni.
Deutsch: 1) Verbinden Sie das Hauptkabel mit dem Ladegerät. 2) Verbinden Sie das Kabel mit der
Netzsteckdose. 3) Finden Sie die folgenden Informationen auf Ihrem Akku und folgen Sie dem
Assistenten auf dem Bildschirm. 4) Verbinden Sie das Ladekabel mit dem Ladegerät. 5) Wenn Sie
einen LiPo, LiFe oder LiIon Akku haben, verbinden Sie auch das Balancing Board. 6) Schliessen Sie
den Akku an. 7) Schliessen Sie bei einem LiPo, LiFe oder LiIon Akku auch das Balancer-Kabel an.
8) Starten Sie die gewünschte Funktion auf dem Ladegerät.
Français: 1) Raccordez le cordon d’alimentation au chargeur. 2) Branchez la fiche du cordon dans
une prise de courant secteur. 3) Trouvez les données technique de votre batterie, puis utilisez
l’assistant. 4) Raccordez le câble de charge compatible avec la batterie. 5) Pour les batteries LiPo,
LiFe ou LiIon, raccordez la platine d’équilibrage. 6) Raccordez la batterie au câble de charge. 7) Pour
les batteries LiPo, LiFe ou LiIon, raccordez la fiche d’équilibrage. 8) Sélectionnez la fonction désirée.
Italiano: 1) Collegate il cavo di alimentazione al caricabatterie. 2) Collegate la spina del cavo in una
presa di corrente. 3) Trovate I dati tecnici della vostra batteria, e seguite l’assistente. 4) Collegate il
cavo di carica al caricabatterie. 5) Per le batterie LiPo, Life e LiIon, collegate la piastrina
al’caricabatterie. 6) Collegate la batteria al cavo di carica. 7) Per le batterie LiPo, Life e LiIon,
collegate la spina di bilanciamento alla piastrina. 8) Selezionate la funzione desiderata.
Svenska: 1) Anslut strömkabeln till laddaren. 2) Anslut strömkabeln till ett vägguttag. 3) Se batteriets
tekniska specifikationer och följ inställningsguiden. 4) Anslut batteriet med passande kontakt.
5) För LiPo, LiFe och LilOn batterier, anslut balanseringskortet till laddaren. 6) Anslut laddningskabeln
till batteriet. 7) För LiPo-LiFe och Lilon batterier. 8) Välj önskad funktion.
日本語:アドバンテージタッチチャージャーを使用する為に以下の8つの手順に従って下さい。|1. 電源コードを充
電器に接続する。|2. 電源コードをコンセントに接続する。| 3. 充電器の設定を行うためにバッテリースペックの
確認と画面上のアシスタントを確認してください。|4. バッテリーのコネクターと互換性のある充電ケーブルを充
電器に接続して下さい。|5. LiPo/LiFe/リチウムイオン電池の場合はバランサーボードを充電器に接続して下さい。
| 6. 充電ケーブルとバッテリーを接続して下さい。| 7. LiPo/LiFe/リチウムイオン電池の場合はバランサーコネクタ
ーをバランサーボードに接続して下さい。| 8. ファンクションモードを選択し充電器の使用を始めてください。
Follow these 8 simple steps to start using
your new advantage touch charger.

Copyright 2012 © Team Orion. Please visit www.teamorion.com/touch for more information.
BALANCING BOARD
HP/PQ
TP/FP
4S
XH
EH
HP/PQTP/FP
5S
XHEH HP/PQTP/FP
6S
XHEH
HP/PQTP/FP
3S
XHEH HP/PQTP/FP
2S
XHEH

TYPE
LIPO
1.0A
DISCHARGE CURRENT
ENTER
-
+
CHG
5.0A
DCHG
1.0A
CELLS
2+
CAPACITY
5000
TYPE
LIPO
LIPO
BATTERY TYPE
NIMH
LIFE NICD
LIION
PB
CHG
5.0A
DCHG
1.0A
CELLS
2+
CAPACITY
5000
See the separate quick instructions sheet for info on how to connect the
charger and battery.
1. Battery and Charger connection
The first time you start the charger, a setup assistant will help you setup your
charger. You can restart the assistant from the advanced setup screen.
You need to setup the proper parameters so that the charger can safely charge
your battery. Setup the charge parameters following the battery manufacturer
recommendations.
Once you have setup the proper parameters, you can charge your battery.
Make sure that the battery is properly connected to the charger, charge leads
and balancing connector (if available) and that the parameters are compatible
with your battery.
Make sure that the battery is properly connected to the charger, charge leads
and balancing connector (if available) and that the parameters are compatible
with your battery.
Press and hold the charge button, the battery check screen will be displayed. Press and hold the discharge button, the battery check screen will be displayed.
2. Charger Assistant
Buttons which are grayed out indicate that the particular function cannot be
used with the charger’s current setup.
4. Active and inactive Buttons
The buttons at the top of the screen indicate the current settings. Press each
button to setup the particular parameter. You need to adjust the parameters
according to your battery.
S1 Battery type NiMH, NiCd, LiPo, LiFe, LiIon or Pb
S2 Number of cells composing the battery, from 1 to 16
(1 to 6 for LiPo, LiFe, LiIon)
S3 Battery nominal capacity (setup by the user)
S4 Charge current (setup by user, actual value will be indicated during function)
S5 Discharge current (setup by user, actual value will be indicated
during function)
+ Use this key to enter the advanced setup screen.
The main buttons are used to select the various functions of the charger.
3. Main Screen
5. Adjusting the charger’s parameters 6. Charging a battery 7. Discharging a battery
www.teamorion.com Copyright 2012 © Team Orion
INSTRUCTION MANUAL
TYPE
LIPO
CHARGE DISCHARGE CYCLE
BALANCE STORAGE VIEW
DATA
CHG
5.0A
DCHG
1.0A
CELLS
2+
CAPACITY
5000
S1 S2 S3 S4 S5 +
TYPE
LIPO
2CELLS
7.4V
NUMBER OF CELLS
ENTER
-
+
CHG
5.0A
DCHG
1.0A
CELLS
2+
CAPACITY
5000
TYPE
LIPO
5000MAH
CAPACITY
ENTER
-
+
CHG
5.0A
DCHG
1.0A
CELLS
2+
CAPACITY
5000
TYPE
LIPO
5.0A
CHARGE CURRENT
ENTER
-
+
CHG
5.0A
DCHG
1.0A
CELLS
2+
CAPACITY
5000
TYPE
LIPO
CHG
5.0A
DCHG
1.0A
CELLS
2+
CAPACITY
5000
BATTERY CHECK...
< OK >
1) Connect the battery
1) Battery type
5) Discharge current
2) Press and hold CHARGE
3) Battery check
4) Charging screen
5) Charge Complete
TYPE
LIPO
CHARGE DISCHARGE CYCLE
BALANCE STORAGE VIEW
DATA
CHG
5.0A
DCHG
1.0A
CELLS
2+
CAPACITY
5000
TYPE
LIPO
BALANCING
STATUS GRAPHIC STOP
CHG
5.0A
DCHG
1.0A
CELLS
2+
CAPACITY
5000
CHARGING
TYPE
LIPO
BALANCING
STATUS GRAPHIC OK
CHG
5.0A
DCHG
1.0A
CELLS
2+
CAPACITY
5000
CHARGE COMPLETE: CC/CV
Once the charge is completed, the final charge data will be displayed. Once the discharge is completed, the final discharge data will be displayed.
The charger features a discharge function.
If no problems are detected, the charge screen will appear,
indicating the current status of the battery.
If no problems are detected, the discharge screen will appear,
indicating the current status of the battery.
• Never leave the charger unsupervised while it is powered on.
• Never let children operate the charger without supervision from an adult.
• Always setup the charger parameters according to the battery manufacturer specifications.
• Do not attempt to charge batteries which are not compatible with the charger.
• Do not exert excessive pressure on the touch screen.
• Do not expose to heat and direct sunlight.
• Do not expose to water or humidity.
• The charger and batteries can become hot during use. Take great care before handling them.
• Use the charger in a well ventilated area, away from people and electrically conductive or flammable materials.
• If the battery has suspicious reactions during the charge or discharge, such as overheating, venting or leaking,
immediately disconnect the battery and store it in a safe location, away from people and flammable materials.
Team Orion guarantees this product to be free from manufacturing and workmanship defects. The warranty does not cover
incorrect installation, components worn by use, or any other problem resulting from incorrect use or handling of the
product. No liability will be accepted for any damage resulting from the use of this product. By the act of connecting and
operating this product, the user accepts all resulting liability. Is considered incorrect use:
• Failure to follow instructions.
• Improper use of the product (abusive use, out of spec, etc.).
• Failure to adapt settings for proper function (improper connections, wrong gearing, installation, setup, etc.).
• Overload, overheating (desoldering, melting, etc.).
• Running in inadequate conditions (damage or rust from rain, humidity, etc.).
• Improper maintenance (presence of dirt, etc.).
• Disassembly, modification by the user (modifying original connectors, wires, components, etc.).
• Mechanical damage due to external causes.
WARNINGS
WARRANTY
TECHNICAL
SPECIFICATIONS
PACKAGING
CONTENT
TYPE
LIPO
CHARGE DISCHARGE CYCLE
BALANCE STORAGE VIEW
DATA
CHG
5.0A
DCHG
1.0A
CELLS
2+
CAPACITY
5000
TYPE
LIPO
CHG
5.0A
DCHG
1.0A
CELLS
2+
CAPACITY
5000
BATTERY CHECK...
< OK >
1) Connect the battery
2) Press and hold DISCHARGE
3) Battery check
4) Discharging screen
5) Discharge Complete
STOP
TYPE
LIPO
BALANCING
STATUS GRAPHIC
CHG
5.0A
DCHG
1.0A
CELLS
2+
CAPACITY
5000
DISCHARGING
TYPE
LIPO
BALANCING
STATUS GRAPHIC OK
CHG
5.0A
DCHG
1.0A
CELLS
2+
CAPACITY
5000
DISCHARGE COMPLETE: CUT-OFF
2) Number of cells
3) Capacity
4) Charge current
ENGLISH
• Advantage Touch charger with power cord
• 4-in-1 Balancing Board (XH, TP/FP, EH and HP/PQ)
• TRX, Deans, Tamiya, Crocodile Clips, BEC and
Futaba charging cables
• USB cable
• Instruction Manual
• Quick Start User Guide
Input Power:
11-18VDC / 100-240VAC
Charge Current:
0.1A to 5A (50W)
Discharge Current:
0.1A to 1A (5W)
Compatibility:
NiMH/NiCd 1-15 cells
LiPo/LiFe/LiIon 1-6 cells
Pb 2-20V
Dimensions:
L170xW158xH45mm
Weight:
662g

8. Cycling a battery 9. Battery balancing 10. Battery storage 11. View Data
12. Balancing status
13. Graphic screen
14. Advanced Setup (+)
TYPE
LIPO
CHARGE DISCHARGE CYCLE
BALANCE STORAGE VIEW
DATA
CHG
5.0A
DCHG
1.0A
CELLS
2+
CAPACITY
5000
1) Connect the battery
2) Press and hold CYCLE
3) Battery check
4) Cycle screen: Charging
5) Cycle screen: Discharging
TYPE
LIPO
BALANCING
STATUS GRAPHIC STOP
CHG
5.0A
DCHG
1.0A
CELLS
2+
CAPACITY
5000
CYCLING D->C (1/1): DISCHARGING
6) Cycle Complete
TYPE
LIPO
BALANCING
STATUS GRAPHIC OK
< >
CHG
5.0A
DCHG
1.0A
CELLS
2+
CAPACITY
5000
CYCLING COMPLETE (1/1): CUT-OFF
CYCLES
1
START
C->D
START
D->C
START
D->C->D
TYPE
LIPO
CHG
5.0A
DCHG
1.0A
CELLS
2+
CAPACITY
5000
BATTERY CHECK...
< OK >
-
+
TYPE
LIPO
BALANCING
STATUS GRAPHIC STOP
CHG
5.0A
DCHG
1.0A
CELLS
2+
CAPACITY
5000
CYCLING C->D (1/1): CHARGING
BATTERY CHECK...
< OK >
TYPE
LIPO
CHG
5.0A
DCHG
1.0A
CELLS
2+
CAPACITY
5000
1) Connect the battery
2) Press and hold BALANCE
3) Battery check
4) Balancing Status Screen
5) Balancing Screen
BALANCING STATUS
BACK START
TYPE
LIPO
CHG
5.0A
DCHG
1.0A
CELLS
2+
CAPACITY
5000
GAP
0.005V
VO LTA GE
15.262V
C1: 4.206V 1.1mΩ
C2: 4.145V 1.1mΩ
C3: -
C4: -
C5: -
C6: -
BALANCING
BACK
TYPE
LIPO
CHG
5.0A
DCHG
1.0A
CELLS
2+
CAPACITY
5000
GAP
0.005V
DURATION
7:03
C1: 4.206V 1.1mΩ
C2: 4.145V 1.1mΩ
C3: -
C4: -
C5: -
C6: -
6) Balancing Complete
BALANCING COMPLETE
BACK
TYPE
LIPO
CHG
5.0A
DCHG
1.0A
CELLS
2+
CAPACITY
5000
GAP
0.000V
DURATION
12:03
C1: 4.200V 1.1mΩ
C2: 4.200V 1.1mΩ
C3: -
C4: -
C5: -
C6: -
TYPE
LIPO
CHARGE DISCHARGE CYCLE
BALANCE STORAGE VIEW
DATA
CHG
5.0A
DCHG
1.0A
CELLS
2+
CAPACITY
5000
4) Storage screen: discharging
STOP
TYPE
LIPO
BALANCING
STATUS GRAPHIC
CHG
5.0A
DCHG
1.0A
CELLS
2+
CAPACITY
5000
STORAGE: DISCHARGING
6) Storage Complete
TYPE
LIPO
CHARGE DISCHARGE CYCLE
BALANCE STORAGE VIEW
DATA
CHG
5.0A
DCHG
1.0A
CELLS
2+
CAPACITY
5000
TYPE
LIPO
CHG
5.0A
DCHG
1.0A
CELLS
2+
CAPACITY
5000
BATTERY CHECK...
< OK >
1) Connect the battery
2) Press and hold STORAGE
3) Battery check
5) Storage screen: charging
TYPE
LIPO
BALANCING
STATUS GRAPHIC STOP
CHG
5.0A
DCHG
1.0A
CELLS
2+
CAPACITY
5000
STORAGE: CHARGING
TYPE
LIPO
CHG
5.0A
DCHG
1.0A
CELLS
2+
CAPACITY
5000
STORAGE COMPLETE: VOLTAGE
BALANCING
STATUS GRAPHIC OK
< >
TYPE
LIPO
CHARGE DISCHARGE CYCLE
BALANCE STORAGE VIEW
DATA
CHG
5.0A
DCHG
1.0A
CELLS
2+
CAPACITY
5000
BALANCING STATUS
BACK
TYPE
LIPO
CHG
5.0A
DCHG
1.0A
CELLS
2+
CAPACITY
5000
GAP
0.005V
VO LTA GE
15.262V
C1: 4.206V 1.1mΩ
C2: 4.145V 1.1mΩ
C3: -
C4: -
C5: -
C6: -
TYPE
LIPO
CHG
5.0A
DCHG
1.0A
CELLS
2+
CAPACITY
5000
DELTA PEAK
20mV
BALANCING
On
CHARGE
END VOLTAGE
3.2V
DISCHARGE
END VOLTAGE
2.8V
MAX.
TEMPERATURE
60°C
TRICKLE
CHARGE
OFF
MORE
HOME
ASSISTANT
START
V
T
Act Vol: 8.40V Act. Time: 000:51
HIDE
TYPE
LIPO
CHG
5.0A
DCHG
1.0A
CELLS
2+
CAPACITY
5000
BEEP
OFF
MELODY
1
LCD
CONTRAST
4
TYPE
LIPO
CHG
5.0A
DCHG
1.0A
CELLS
2+
CAPACITY
5000
BACK
FACTORY
RESET
HOME
SAFETY TIME
500min
TEMPERATURE
SCALE
C
Make sure that the battery is properly connected to the charger, charge leads
and balancing connector (if available) and that the parameters are compatible
with your battery.
Make sure that the battery is properly connected to the charger, charge
leads and balancing connector and that the parameters are compatible with
your battery. Make sure that the battery is properly connected to the charger, charge leads and
balancing connector (if available) and that the parameters are compatible with
your battery.
Press the view data
button to display the
final data from the last
function which has
been used.
When a LiPo, LiFe or
LiIon battery is
connected and while it
is charging or dischar-
ging, you can press the
balancing status
button to display the
current balance status
of the battery.
While the battery is
charging or dischar-
ging, you can press the
graphic button to
display a graphic
showing the voltage
curve of the battery
since the function was
started.
We recommend always
using the BALANCING
function for LiPo, LiFe
and LiIon batteries, the
balancing connector
must be connected if
balancing is on.
(!) Safety during char-
ging is diminished if
balancing is disabled.
Do not let batteries
connected to the
charger for extended
period of time if TRICKLE
CHARGE is enabled.
The SAFETY TIMER
works for all functions
of the charger.
Battery cycling will make charge/discharge cycles to your battery; this is useful
to restore its performance after long periods of storage for example. The cycling
function uses the same parameters as those that have been setup for charge or
discharge.
This function is meant for LiPo, LiFe or LiIon batteries. You can use this function
to check the current charge status of your batteries. If the battery is unbalanced
(uneven voltage between the cells) the charger will equalize the cell’s voltage.
This function will charge or discharge the battery to an optimal level to limit
potential damage to the battery due to storage. With LiPo/LiFe/LiIon batteries the
charger will either charge or discharge the battery so they reach the optimal
level. With NiMH/NiCd the charger will first discharge the battery and then
recharge it to 50% of the user adjusted capacity. The storage function uses the
same parameters as those that have been setup for charge or discharge.
After pressing and holding the cycle button and if no problems are detected a
new screen will be displayed where you can choose the number of cycle and
what type of cycle you want to make.
If no problems are detected, the status screen will appear, indicating the current
status of the battery.
If no problems are detected, the storage function will start. Discharge and then
charge mode for NiMH/NiCd . Charge or discharge mode for LiPo/LiFe/LiIon
depending on their charge level.
Press the charge-discharge, discharge-charge or discharge-charge-discharge
button to start the cycling.
If your battery is unbalanced you can start the balancing process by pressing
the start button.
Press and hold the balance button, the battery check screen will be displayed.
Press and hold the storage button, the battery check screen will be displayed.
The following screen gives you access to advanced parameters, only modify
these settings if you understand their purpose and implications.
Once the cycling is completed, the final discharge data will be displayed. Once the balance is completed, the final data will be displayed. Once the storage function is completed, the final data will be displayed.
The status screen will appear, indicating the current status of the battery.
Table of contents
Other Team Orion Batteries Charger manuals

Team Orion
Team Orion TWINSPEC advantage User manual

Team Orion
Team Orion Advantage ONE 1X6A User manual

Team Orion
Team Orion Advantage One User manual

Team Orion
Team Orion Advantage One 405 User manual

Team Orion
Team Orion D48 User manual

Team Orion
Team Orion advantage iq605 User manual

Team Orion
Team Orion ADVANTAGE TOUCH DUO V-MAX Instruction manual

Team Orion
Team Orion Advantage ONE 406 User manual

Team Orion
Team Orion Advantage One User manual

Team Orion
Team Orion ProSpec Advantage User manual