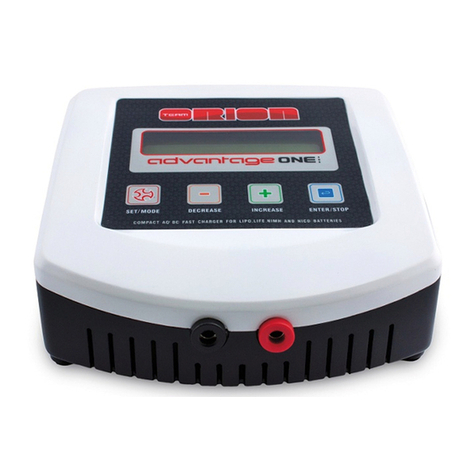
Team Orion Advantage One User manual

INSTRUCTION MANUAL
BEDIENUNGSANLEITUNG
MODE D‘EMPLOI
C
H
A
R
G
E
2
B
A
T
T
E
R
I
E
S
S
I
M
U
L
T
A
N
E
O
U
S
L
Y
2

Team Orion Advantage ONE Duo
2 - English
Thank you for choosing this Team Orion Advantage One
charger. This charger features the latest developments
in battery charging technology. It is compatible with the
most popular battery types and can use either an AC or
DC power source. Please read these instructions carefully
before using the charger.
All instructions, warranties and other collateral documents
are subject to change at the sole discretion of Team Orion.
aWARNING! Read the entire instruction manual
to become familiar with the features of the product
before operating. Failure to operate the product cor-
rectly can result in damage to the product, personal
property and cause serious injury. This is a sophis-
ticated hobby product. It must be operated with
caution and common sense and requires some basic
mechanical ability. Failure to operate this product
in a safe and responsible manner could result in
injury or damage to the product or other property.
This product is not intended for use by children
without direct adult supervision. Do not attempt
disassembly, use with incompatible components or
augment product in any way. This manual contains
instructions for safety, operation and maintenance.
It is essential to read and follow all the instructions
and warnings in the manual, prior to assembly,
setup or use, in order to operate correctly and avoid
damage or serious injury. Not for children under 14
years. This is not a toy.
SAFETY PRECAUTIONS AND WARNINGS
aWARNING! Failure to exercise caution while using
this product and comply with the following warnings
could result in product malfunction, electrical
issues, excessive heat, re and ultimately injury and
property damage. When charging batteries, the use
of a re retardant/proong bag or container (such as
a LIPO safety bag) is strongly recommended.
a
Never simultaneously connect the charger to an AC and
DC power source.
aNever connect the charger to an AC power source with
the DC power cord still connected to the charger.
a
Never leave the charger unattended while it is powered
on.
aNever allow children under 14 years of age to charge
batteries without the supervision of an adult.
a
Never charge the battery while it is inside the RC model.
a
Never attempt to charge dead, damaged or wet bat-
teries.
aNever attempt to charge a battery containing different
types of cells.
a
Never attempt to charge a battery if you don’t have
charge leads with compatible connectors.
aNever attempt to charge LiPo/LiFe batteries which are
ENGLISH

www.teamorion.com
English - 3
not equipped with a compatible balancing connector.
a
Never attempt to charge LiPo/LiFe batteries without
connecting their balancing connector to the charger.
aNever charge other types of batteries than 2 – 4S (6.6
– 14.8V) LiPo/LiFe or 1-10 cell (1.2 – 12V) NiMH/NiCd
batteries.
aNever charge batteries in extremely hot or cold places
or place in direct sunlight.
aNever charge batteries near ammable materials.
aNever charge batteries in the presence of humidity.
a
Never charge a battery if the cables have been pinched
or shorted.
aNever connect the charger if the power cable has been
pinched or shorted.
aNever obstruct the charger’s cooling vents.
aNever attempt to disassemble or modify the charger.
aNever use a damaged charger.
aNever drop the charger or batteries.
a
Always make sure you are using a stable power source.
aAlways disconnect the DC power cord before connec-
ting the charger to an AC power source.
a
Always connect the charger to the power source rst
and then connect the battery to the charger. Reverse
the sequence when disconnecting.
a
Always charge only rechargeable batteries designed for
use with this type of charger.
a
Always follow the battery manufacturer‘s charge recom-
mendations.
a
Always make sure you select the correct battery type
setting before charging the battery.
a
Always make sure you select the correct charge set-
tings, before charging the battery.
aAlways make sure you use charge leads equipped with
connectors compatible with those of the battery.
aAlways connect the charge lead to the charger before
connecting it to the battery. Reverse the sequence when
disconnecting
aAlways connect the battery balancing connector to the
charger when charging LiPo/LiFe batteries.
a
Always inspect the battery and charger for damage
before charging the battery.
a
Always keep the battery and charger away from any
material that could be affected by heat.
aAlways charge in a well-ventilated area.
a
Always monitor the charging area and have an ABC dry
chemical re extinguisher available at all times.
a
Always end the charging process if the battery becomes
hot to the touch or starts to change form (swell) during
the charge process.
a
Always disconnect the battery after charging and let the
charger cool between charges.
aAlways terminate all processes and contact an authori-
zed retailer or Team Orion if the product malfunctions.

Team Orion Advantage ONE Duo
4 - English
DECREASEDECREASE
--
INCREASEINCREASE
++
ENTER
START/STOP
ENTER
START/STOP
SET/MODESET/MODE
12
CHANNEL CHANNEL
ONED
U
O
1. SET/MODE Key
Exit setup mode, display
individual cell voltage,
display input/output voltage,
go to advanced settings.
2. Decrease Key (-)
Decrease setting
3. Increase Key (+)
Increase setting
4. ENTER, START/STOP Key
Enter setup mode, select
parameter, charge/stop
charge.
5. LCD Display
6. Channel Selection Key
Select channel 1 or 2
5
32
41
6
FRONT PANEL

www.teamorion.com
English - 5
FEATURES
TECHNICAL SPECIFICATIONS
Dual independent charge output (charge two batteries simultaneously)
Works with AC and DC power sources
Integrated power supply
Microprocessor controlled
Backlit LCD display
Up to 6A adjustable charge current
Storage charge mode for LiPo/LiFe
Charges NiCd/NiMH batteries from 1 to 10 cells
Charges LiPo/LiFe batteries with 2 to 4 cells
Integrated balancer w/JST-XH balance ports
Automatic charge cut-off
Adjustable safety timer
10 settings memory slots
Adjustable power output
AC Input voltage 100-240VAC 50/60HZ
DC Input voltage 11-15VDC
Charge current 1 to 6A in 0.1A increments, 2x50W or 60+40W max
Balance current 400mA
Compatible batteries LiPo/LiFe 2 to 4 cells - NiMH/NiCd 1 to 10 cells
Battery connectors 4mm bullet charge outputs / JST-XH balancing
Size 141x153x55mm
Weight 450g

Team Orion Advantage ONE Duo
6 - English
LEFT SIDE CONNECTIONS (CHANNEL 1) RIGHT SIDE CONNECTIONS (CHANNEL 2)
1 2 3 4 5 6 5 4 3 2 1
1. DC Power 11-15VDC Input Connector XT60
2. 4S Balancing Port (JST-XH)
3. 3S Balancing Port (JST-XH)
4. 2S Balancing Port (JST-XH)
5. + Positive Charge Output (4mm)
6. - Negative Charge Output (4mm)
1. Mains 100-240VAC Power Input Connector
2. 4S Balancing Port (JST-XH)
3. 3S Balancing Port (JST-XH)
4. 2S Balancing Port (JST-XH)
5. + Positive Charge Output (4mm)
6. - Negative Charge Output (4mm)

www.teamorion.com
English - 7
CHARGE LEADS AND ADAPTERS
CONNECTORS
EC3®
Connector
Deans®
Connector
Tamiya®
Connector
XT60®
Connector
4mm Bullet
Connector
Deans/Tamiya Adapter
EC3 Charge Lead
US Version:
Other Versions:
x2
x2
x1
Deans Charge Lead
ADAPTER CONNECTION
◀ to charger to battery▶
Deans/Tamiya Adapter
(only EU/CH/UK)

Team Orion Advantage ONE Duo
8 - English
CONNECTING A DC POWER SOURCE
aNever simultaneously connect the
charger to an AC and DC power source.
Plug the supplied DC power cable into
the charger‘s XT60 DC power connec-
tor. Connect the 4mm connectors to a
11-15VDC power source such as a car
battery or power supply (use compatible
connectors for a reliable connection).
4mm Bullet Connector
to DC power source
XT60 Connector
DC Power Cable

www.teamorion.com
English - 9
CONNECTING AN AC POWER SOURCE
aNever simultaneously connect the
charger to an AC and DC power source.
Connect the supplied mains
power cord to the charger‘s
mains power connector. Connect
the cord‘s plug to a 100-240VAC
mains power outlet*.
USA
CH
UK
EU
aNever connect the charger to AC power with the
DC power cord still connected to the charger.
AC Power
Input Connector
* Only one cord with one type of plug is supplied with the charger.
Use a plug which is compatible with your mains power socket.

Team Orion Advantage ONE Duo
10 - English
CONNECTING A LIPO/LIFE
BATTERY TO CHANNEL 1
1. 2S 7.4V Two Cell LiPo Battery
2. Battery Connectors (Deans)
3. Charge lead
4. 2S Balancing Connector JST-XH
5. 4mm Charge Output (+) positive red
6. 4mm Charge Output (-) negative black
1
2
4
5
6
Connect the charge lead to the charger‘s
charge outputs, respecting polarities, red
+ positive, black - negative.
Connect the battery to the charge lead
(only use compatible connectors).
Connect the battery‘s balancing connec-
tor to the correct balance connector on
the charger (JST-XH type).
3

www.teamorion.com
English - 11
CONNECTING A LIPO/LIFE
BATTERY TO CHANNEL 2
1. 2S 7.4V Two Cell LiPo Battery
2. Battery Connectors (Deans)
3. Charge lead
4. 2S Balancing Connector JST-XH
5. 4mm Charge Output (+) positive red
6. 4mm Charge Output (-) negative black
1
2
4
5
6
3
Connect the charge lead to the charger‘s
charge outputs, respecting polarities, red
+ positive, black - negative.
Connect the battery to the charge lead
(only use compatible connectors).
Connect the battery‘s balancing connec-
tor to the correct balance connector on
the charger (JST-XH type).

Team Orion Advantage ONE Duo
12 - English
CONNECTING A NIMH/NICD
BATTERY TO CHANNEL 1
1. 6 Cell 7.2V NiMH Battery
2. Battery Connectors (Deans)
3. Charge lead
4. 4mm Charge Output (+) positive red
5. 4mm Charge Output (-) negative black
1
2
4
5
Connect the charge lead to the charger‘s
charge outputs, respecting polarities, red
+ positive, black - negative. Connect the
battery to the charge lead (use only compa-
tible connectors).
3

www.teamorion.com
English - 13
CONNECTING A NIMH/NICD
BATTERY TO CHANNEL 2
1
2
4
5
1. 6 Cell 7.2V NiMH Battery
2. Battery Connectors (Deans)
3. Charge lead
4. 4mm Charge Output (+) positive red
5. 4mm Charge Output (-) negative black
3
Connect the charge lead to the charger‘s
charge outputs, respecting polarities, red
+ positive, black - negative. Connect the
battery to the charge lead (use only compa-
tible connectors).

Team Orion Advantage ONE Duo
14 - English
LCD SCREEN DATA DISPLAY
SETUP SCREEN
CHARGE SCREEN
During the charge, by pressing the SET key you can
display extra information:
Individual cell voltage (only for LiPo/LiFe)
Input and output voltage (supply and battery voltage)
POWER SUPPLY
aWARNING! Never connect the charger simulta-
neously to an AC and DC power source. Use only
a compatible and reliable power source. Never
connect the charger to AC power with the DC power
cord still connected to the charger. Do not leave
the charger without supervision while it is powered
on. Always disconnect the charger from the power
source when not in use. Power supply issues can
cause the charger to malfunction and cause re,
damage to the product, to personal property and
cause serious injury.
The charger can be powered from an AC power source
such as mains power outlet or a DC power source such as
a car battery. Only use one type of power source at a time.
Connect the power cord to the charger before connecting it
to the power source. Depending on your local mains power
outlet type, you may need to purchase a compatible power
cord separately.
AC power source: connect the AC power cord to the
charger’s AC power input connector and then into a 100-
240VAC power source such as a mains power outlet.
DC power source: plug the DC power cord into the DC
power XT60 connector. Connect the 4mm bullet connectors
to a 11-15VDC/12A min. power source. Respect polarities,
red is positive + and black is negative -. If necessary use
adapters to ensure a safe and reliable connection.
M01 LIPO CHG 2 1
5000mAh C=5.0A
Battery
type
Battery capacity Charge current
Memory
slot
Function
mode
Cell
number
Channel
number
CHG 12:59 105 1
LP 4.97A 8.037V
Battery type Charge current Battery voltage
Function
mode
Charge
time
Channel
number
Charged
capacity (mAh)

www.teamorion.com
English - 15
CHARGE OUTPUT SELECTION
The charger has two independent charge outputs (chan-
nels), n.1 on the left and n.2 on the right. You need to
adjust the settings of each channel independently. Change
channel by pressing the CHANNEL key, the actual channel
(1 or 2) is indicated at the top right corner of the LCD.
CHARGER SETUP
aWARNING! Always identify the battery type and
make sure that it is compatible with the charger! Al-
ways use charge settings, which are compatible with
your battery! Always make sure you are adjusting
the charge settings for the correct channel! Failure
to use appropriate charge settings or attempting to
charge an incompatible battery could result in re,
property damage or injury!
You must use and setup the charger according to the
battery manufacturer’s recommendations; make sure that
you properly identify the battery type and specications
(usually indicated on the battery label). The charger can
charge NiCd/NiMH batteries from 1 to 10 cells and LiPo/
LiFe batteries with 2 to 4 cells.
You must adjust the settings of each charge channel se-
parately, make sure you are adjusting the proper channel
(1 or 2).
Modifying the charge settings
To modify the charge settings, press the ENTER key to
enter the setup mode and select the different parameters
(adjustable parameters will ash when selected).
Use the + and – keys to change the value of the parameter.
You can exit the setup mode by pressing the SET/MODE
key.
Settings memory
The charger has 10 memory slots for saving charge set-
tings. The settings are automatically loaded as you cycle
through the memory slots and automatically saved to the
current memory slot as you modify them. Memory slots 1
to 5 are only for LiPo/LiFe batteries settings and 6 to 10
are only for NiMH/NiCd batteries settings.
Battery type
aWARNING! Selecting the wrong battery type can
result in re, property damage or injury!
The charger can charge NiMH, NiCd, LiPo and LiFe
batteries. Select the correct battery type for the battery
you wish to charge.
The different battery types use specic charging methods;
make sure you select the correct battery type to avoid
accidents.

Team Orion Advantage ONE Duo
16 - English
Number of cells
aWARNING! Improperly adjusting the number of
cells selected can result in re, property damage or
injury!
Batteries are usually composed of two or more cells, adjust
this setting to the number of cells contained inside the
battery (LiFe = 3.3V/cell, LiPo=3.7V/cell, NiMH-NiCd=1.2V
cell). The charger can charge LiPo/LiFe batteries with 2
to 4 cells (6.6-14.8V) and NiMH/NiCd batteries with 1 to
10 cells (1.2-12V).
Battery capacity
aWARNING! Improperly adjusting the battery
capacity setting can overload the battery and result
in re, property damage or injury!
Adjust this setting to the battery capacity value in mAh (mil-
liamp hour). The charger uses this setting to automatically
adjust the charge current to an optimal value of 1C, equal
to the battery capacity (ex. 4000mAh = 4A charge current).
NOTE: as an extra safety measure, when charging NiMH/
NiCd batteries, the charge will stop when the charged mAh
counter reaches the preset value (whether the battery is
actually full or not).
Charge current
aWARNING! Using a too high charge current can
overload the battery and result in re, property
damage or injury! Always follow the battery manu-
facturer recommendations.
The charger automatically adjusts the charge current in
relation to the battery capacity setting (see above), but you
can adjust the charge current manually. The charge current
is adjustable in 0.1A steps up to 6A. The standard charge
current is 1C, which means one time the battery capacity,
ex. 4000mAh battery = 4A charge current. A higher charge
current charges the battery faster.
NOTE: depending on the battery type, the actual charge
current may be lower than the charge current setting.

www.teamorion.com
English - 17
CHARGING BATTERIES
aWARNING! Always use charge settings which
are compatible with the battery. Always monitor the
charging process. Always disconnect the battery
from the charger once the charge is nished. Always
end the charging process if the battery becomes hot
to the touch or starts to change form (swell) during
the charge process. Failure to carefully setup the
charger and supervise the charge process can result
in re, property damage or injury!
Battery connectors : two charge leads with one battery
connector type are supplied with the charger (Deans or
EC3, depending on the version). If your battery uses a
different type of connector, you will have to purchase a
compatible charge lead or adapter separately.
Adapters : a Deans to Tamiya adapter is also included with
certain versions of the charger. This allows you to charge
batteries equipped with Tamiya connectors by connecting
the adapter between the battery and charge lead..
Safety timer : The integrated safety timer will stop any
process after 120 minutes whether the battery is full or not
(the safety timer setting can be modied in the advanced
settings).
YOU CAN STOP THE CHARGE PROCESS AT ANY TIME
BY PRESSING THE ENTER/START/STOP KEY!
Charging LiPo/LiFe batteries
aWARNING! LiPo/LiFe batteries must be equipped
with two connectors, one for charging and one for
balancing! Never charge a LiPo/LiFe battery without
connecting its balancing connector to the correct
balancing port on the charger! Never use NiMH/NiCd
mode to charge a LiPo/LiFe battery, this will likely
cause the battery to overcharge and risk causing
re, property damage and personal injury.
aCHARGING LIPO/LIFE BATTERIES WITHOUT
BALANCING IS NOT POSSIBLE.
Balancing : The charger‘s integrated balancing ports
use JST-XH type connectors. If your battery uses another
connector type, you will have to purchase compatible
adapters. LiPo/LiFe batteries use different balance connec-
tors depending on the number of cells inside them; make
sure that you are connecting the balancing connector into
the correct balance port. The balancing function allows
the charger to measure the battery individual cells voltage
and adapt the charge process accordingly. Depending on
the cells unbalance and battery state, the charge will take
more or less time to complete.

Team Orion Advantage ONE Duo
18 - English
Procedure LiPo/LiFe
Select the charge channel, 1 or 2.
Select memory prole 1 to 5, CHG mode and adjust
the charge settings if necessary.
Connect the battery to the charger using the
charge lead.
Connect the battery balancing connector to the
correct balancing port on the charger.
Press the START/STOP key to start the charge.
Once the charge is completed, press the START/
STOP key to display the nal charge data.
Press the START/STOP key again to return to the
main screen.
Disconnect the battery.
Charging NiMH/NiCd batteries
NiMH/NiCd batteries require only one connection to the
charger. NOTE: In NiMH/NiCd mode the charge will stop
when the charged mAh counter reaches the preset mAh
value, whether the battery is full or not.
Procedure NiMH/NiCd
Select the charge channel, 1 or 2.
Select memory prole 6 to 10, CHG mode and adjust
the charge settings if necessary.
Connect the battery to the charger using the
charge lead.
Press the START/STOP key to start the charge.
Once the charge is completed, press the START/
STOP key to display the nal charge data.
Press the START/STOP key again to return to the
main screen.
Disconnect the battery.

www.teamorion.com
English - 19
STORAGE CHARGE LIPO/LIFE
To avoid loss of performance and/or permanent damage,
LiPo and LiFe batteries must be stored charged at 50%
(not full or empty). The charger features a storage charge
that charges the batteries at 50% of their capacity (3.85V/
cell for LiPo and 3.3V/cell for LiFe).
Procedure
Select the charge channel, 1 or 2.
Select memory prole 1 to 5, select STR mode
and adjust the charge settings.
Connect the battery to the charger using the
charge leads
Connect the balancing plug to the appropriate
correct port
Press the START/STOP key to start the charge.
Once the storage charge is completed, press the
START/STOP key to display the nal charge data.
Press START/STOP key to return to the main screen.
Disconnect the battery.
NOTE: Storage mode will only function if the batteries
are charged below 50%. The charger cannot discharge
batteries.
ADVANCED SETTINGS
The advanced settings allow to ne-tune the charger’s
function. You do not need to modify these settings for
standard use. To enter the advanced settings menu, press
the SET/MODE key from the main screen and then use
the ENTER and +/- keys to select and modify the settings.
Power allocation
This setting changes the power output balance between
the two charge channels (by default the power to channel
1 and 2 is the same). If you charge a higher voltage battery
like a 4S LiPo battery, allocating more power to the channel
will allow for a higher effective charge current and therefore
a faster charge. When you press the SET key, the setting
and channel number ash, using the + and – keys you can
increase or decrease the power attributed to the current
charge channel.
Key Beep
Allows the user to switch the beep tone on/off.
Safety Timer
The safety timer interrupts the charger‘s function when
the set time is reached. The default setting is 120 minutes
and can be adjusted from 10 to 240 minutes. For improved
safety we recommend using the shortest time possible
which still allows for a full charge of your batteries.

Team Orion Advantage ONE Duo
20 - English
Input/output voltage display
This screen displays the actual input/output voltage for
the selected channel. Input voltage is the external DC
power source voltage or integrated AC to DC power supply
voltage. Output voltage is the actual voltage of the battery
connected to the selected channel.
Cell voltage display
This screen displays the cell voltage of the individual cells
of the battery connected to the selected channel (only for
LiPo/LiFe batteries).
Other manuals for Advantage One
3
Table of contents
Languages:
Other Team Orion Batteries Charger manuals

Team Orion
Team Orion D48 User manual

Team Orion
Team Orion Advantage One User manual

Team Orion
Team Orion ProSpec Advantage User manual
Team Orion
Team Orion ADVANTAGE TOUCH DUO V-MAX Instruction manual
Team Orion
Team Orion Advantage One User manual

Team Orion
Team Orion Advantage Touch Instruction manual
Team Orion
Team Orion advantage iq605 User manual
Team Orion
Team Orion Advantage One 405 User manual

Team Orion
Team Orion TWINSPEC advantage User manual
Team Orion
Team Orion Advantage ONE 1X6A User manual
