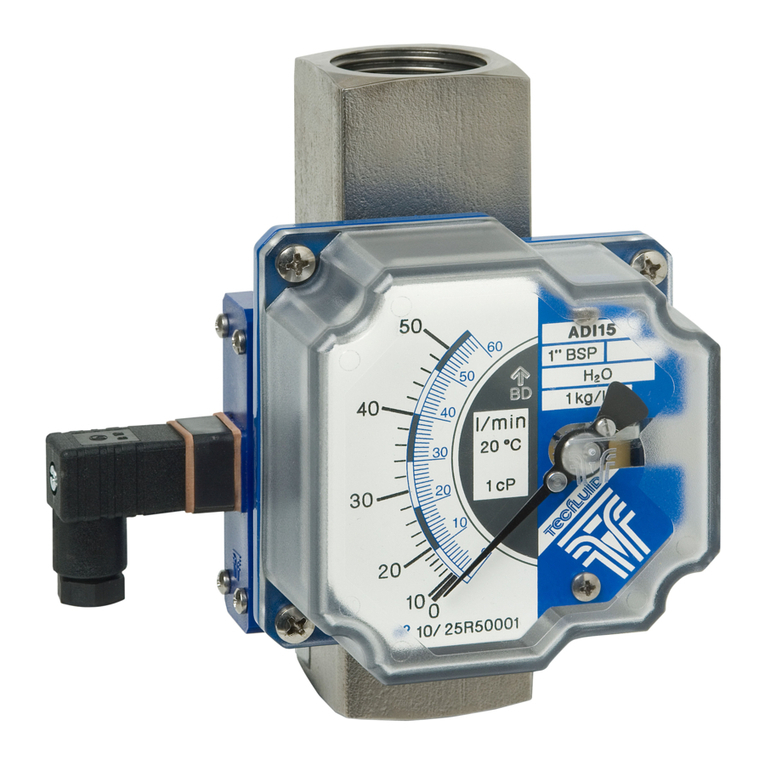
Tecfluid M21 User manual

R-MI-M21 Rev.: 4 English version
Series M21
Variable area flowmeter
Instructions manual
The art of measuring

2
Thank you for choosing a product from Tecfluid S.A.
This instruction manual allows the installation, configuration,
programming and maintenance. It is recommended to read it before
using the equipment.
• This document shall not be copied or disclosed in whole or in any
part by any means, without the written permission of Tecfluid S.A.
• Tecfluid S.A. reserve the right to make changes as deemed
necessary at any time and without notice, in order to improve the
quality and safety, with no obligation to update this manual.
• Make sure this manual goes to the end user.
• Keep this manual in a place where you can find it when you need
it.
• In case of loss, ask for a new manual or download it directly from
our website www.tecfluid.com Downloads section.
• Any deviation from the procedures described in this instruction
manual, may cause user safety risks, damage of the unit or cause
errors in the equipment performance.
• Do not modify the equipment without permission. Tecfluid S.A. are
not responsible for any problems caused by a change not
allowed. If you need to modify the equipment for any reason,
PREFACE
WARNINGS

3
TABLE OF CONTENTS
SERIES M21
1 INTRODUCTION ........................................................................... 6
2 WORKING PRINCIPLE ................................................................... 6
3 RECEPTION .................................................................................. 8
4 INSTALLATION ............................................................................. 8
4.1 Valves ................................................................................ 8
4.2 Filters ................................................................................. 8
4.3 Straight pipe sections ......................................................... 8
5 OPERATION ................................................................................. 9
5.1 Gas flow measurement ....................................................... 9
5.2 Gas damping mechanism .................................................... 10
5.3 Liquid flow measurement .................................................... 11
6 RCA / RCD FLOW REGULATORS .................................................. 12
6.1 Regulation curves ............................................................... 13
AMD LIMIT SWITCH
7 INTRODUCTION ........................................................................... 15
8 OPERATION ................................................................................. 15
9 MOUNTING THE LIMIT SWITCH IN AN EXISTING EQUIPMENT ....... 16
9.1 Kit contents ......................................................................... 16
9.2 Preparing the kit ................................................................. 16
9.3 Assembling the AMD kit ...................................................... 17
9.4 Switching point adjustment ................................................. 18
9.5 Electrical connection ........................................................... 19
9.6 Mounting ........................................................................... 19
10 ELECTRICAL CONNECTION .......................................................... 19
TH6 TRANSMITTERS
11 INTRODUCTION ........................................................................... 20
12 MODELS ...................................................................................... 20
12.1 TH6 ................................................................................... 20

4
12.2 TH6H ................................................................................. 20
13 ELECTRICAL CONNECTION .......................................................... 20
13.1 Power supply and analog output ......................................... 21
14 4-WIRE CONNECTION .................................................................. 21
15 HART TRANSMITTERS ................................................................. 22
15.1 Additional functions with HART communication .................... 22
15.2 HART communication characteristics ................................... 22
16 ”WRITE PROTECT” ....................................................................... 23
17 MAINTENANCE ............................................................................ 24
17.1 Series M21 ........................................................................ 24
17.2 M21 with damping system .................................................. 25
17.3 Potential problems with the metering tube ............................ 25
17.3.1 Jammed float .......................................................... 25
17.3.2 Lack of magnetic field ............................................. 26
17.3.3 Damaged calibrated orifice and/or float .................... 26
17.4 Potential problems with the indicator housing ........................ 26
17.4.1 The indicator pointer rubs on the reading scale ......... 26
17.4.2 Deviation of the zero on the scale ............................ 26
17.5 RCA regulator maintenance ................................................. 27
17.6 RCD regulator maintenance ................................................ 28
17.7 AMD limit switch maintenance ............................................. 29
17.7.1 Electrical verification ................................................ 29
17.8 TH6 transmitter maintenance ............................................. 30
18 TECHNICAL CHARACTERISTICS ................................................... 30
18.1 Series M21 ......................................................................... 30
18.2 AMD limit switch ................................................................. 31
18.3 TH6 transmitter .................................................................. 31
18.3.1 Power supply .......................................................... 31
18.3.2 Outputs .................................................................. 31
18.3.3 General characteristics ............................................ 31

5
19 SAFETY INSTRUCTIONS ............................................................... 32
19.1 Pressure equipment directive .............................................. 32
19.2 Certificate of conformity TR CU (EAC marking) ..................... 32
20 ADDITIONAL INSTRUCTIONS FOR THE ATEX VERSION ................. 33
20.1 Non-metallic parts .............................................................. 33
20.2 Connecting conductive parts to earth .................................. 33
20.3 AMD limit switch ................................................................. .34
20.4 TH6 transmitters ................................................................. 34
20.5 Marking .............................................................................. 35
21 FLOW RANGES ............................................................................ 36
22 DIMENSIONS ............................................................................... 37
23 ATEX CERTIFICATE ...................................................................... 40
24 DECLARATIONS OF CONFORMITY ACCORDING TO ATEX ............ 43

6
SERIES M21
1 INTRODUCTION
The series M21 are flowmeters for liquids, gases and steam.
They are very robust instruments prepared to work under extreme conditions.
They have local flow rate indication by means of magnetic coupling, with scales calibrated in
l/h, m3/h, kg/h, t/h, %, etc.
They can fit switches or electronic transmitters that allow to detect a specific flow rate and
provide a flow rate signal to a remote device.
2 WORKING PRINCIPLE
Based on variable area principle.
The flowmeter consists of a measuring tube and a float inside it. The flow pushes the float to
an equilibrium point. The area obtained between the float and the tube is proportional to the
flow rate.
The equilibrium point depends on:
•E = Force of the fluid flow
•Ff = Weight of the float
•Al = Free area of flow
where:
(Al = Ao, calibrated orifice area, - Af, float area)

7
The M21-H... models have horizontal inlet and outlet, and optionally they can be supplied
with a regulating valve on the inlet.
M21 models always work in a vertical position with upwards flow.
The equilibrium point is determined by considering the fluid force and the float weight.

8
3 RECEPTION
The series M21 flowmeters are supplied conveniently packaged for their protection during
transportation and storage, together with their instructions manual for installation and
operation.
The instruments are supplied tested in our calibration rigs, ready for installation and service.
Before installing the flowmeter, remove all the blocking elements.
With the instrument in its working position, move the float and check that the indicating
needle moves all over the scale and returns to zero.
4 INSTALLATION
Flowmeters models M21 must be installed in a completely vertical position and with upwards
flow direction.
It is important that the position is completely vertical given that deviations of about 5º can
produce errors of about 8-10% of the readings.
4.1 Valves
If the fluid to be measured is a liquid, it is recommended to install a regulating valve before
the flowmeter (see point 5.3), or to use a M21-H... model, which already includes a valve on
the inlet.
For gas flow measurement, the valve position will depend on the calibrating pressure (see
point 5.1).
Valves should always be opened slowly to avoid water hammers.
4.2 Filters
The installation of a filter before the instrument is important, this will avoid possible
obstructions and breakdowns in the measuring system.
The filter mesh should be maximum 200 µm.
In case of having abundant magnetic particles in suspension, it is necessary to mount a
magnetic filter on the inlet of the instrument to avoid the accumulation of particles around the
float, which would make it to jam.
4.3 Straight pipe sections
In order to have stable readings, it is essential to avoid turbulences. To do this, it is
necessary to install the instrument in a straight pipe section. This section should have the
same inner diameter as the flowmeter. The required minimum distances upstream and
downstream of the sensor are the following:
Upstream 5 DN
Downstream 3 DN
These distances must be free of elements that can disturb the flow profile, such as elbows,
diameter changes, valves, etc.

9
5 OPERATION
Once the meter is installed, the regulating valve should be opened slowly. The fluid flow will
move the float which, by means of magnetic coupling, moves the indicating needle.
Any variations of working conditions with respect to those when calibrated can induce
reading errors. The calibration working conditions are indicated on the instrument’s
dataplate.
5.1 Gas flow measurement
The working pressure and temperature are of maximum importance for correct gas
measurement as they directly affect the scale readings.
For example, if a meter is calibrated at 2 bar gauge and the working pressure is 1 bar gauge
there will be an error of about 22%.
In the same way, if working temperature does not match calibrating temperature, errors will
be induced in the flow rate readings.
In applications of gas flow measurement where the calibrating pressure of the instrument
corresponds to the inlet pressure, being higher than the atmospheric pressure, the
regulating valve must be installed downstream of the flowmeter. Thus, it is ensured that the
instrument works at calibrating pressure and a back pressure that keeps the float in
equilibrium is obtained.
NOTE: Scheme valid for gas flow
measurement applications with a pressure
higher than atmospheric. For gases at
atmospheric pressure, turn valves upside
down.
The flow should be adjusted by means of the regulating valve, while keeping the shut off
valve fully open.
REGULATING VALVE
SHUT OFF VALVE

10
If the regulation is done using the shut off valve, in open circuits or at low gas flow in the
meter, the gas will expand which will sharply diminish its density, providing very serious
reading errors.
If the flow is regulated by the shut off valve, the float usually experiences an oscillating
movement which produces a shut off action until sufficient pressure is gained to overcome its
weight. The sudden fall of pressure, when the gas escapes, will make it fall. This cycle is
repeated generating an oscillating measurement (resonance).
In applications where the gas outlet is at atmospheric pressure, install the regulating valve
upstream of the flowmeter if the flowmeter was calibrated at atmospheric pressure. The shut
off valve is then installed downstream of the flowmeter and it should be fully open.
The valve opening procedure should be as following:
- With the regulating valve closed, fully open the shut off valve.
- Gradually open the regulating valve until the desired flow rate.
And for closing:
- Close the regulating valve gradually until zero flow rate.
- Fully close the shut off valve to isolate the flowmeter.
Operating in a different way may involve water hammers that can damage the meter reading
or generate instabilities.
REMARK: For gas applications at a pressure higher than the atmospheric pressure, it is
recommended to use the M21 models without valve and install a separate valve at the outlet
of the flowmeter.
M21-H... models do not allow their own valve to be mounted at the outlet, they are only
available with valve at the inlet.
5.2 Gas damping mechanism
M21 ¼” damping mechanism M21 ½” and ¾” damping mechanism
BSP connection
BSP connection
NPT connection
NPT connection

11
When measuring low pressure gas flow with AISI 316L floats, oscillation of the float often
occurs, which makes it very difficult to read the flow rates. In these cases it is recommended
to install a damper in the instrument.
The damper consists of a piston mounted inside a cylinder, closed at its lower end. The
compression forces of the gas absorb the floats oscillations, maintaining it stable in the
reading point.
Close the valves during work stops at the end of the working day in order to avoid sudden
surges when started up. If the float hits the stops sharply this could cause damage to the
meter.
5.3 Liquid flow measurement
When measuring liquids the regulating valve should be installed as shown in the following
figure.
Being the shut off valve partially open, open the regulating valve slowly until the needle of the
indicator housing shows a low flow rate. Then also open the shut off valve slowly in order to
get rid of the air and then progressively to fully opened.
The required flow rate is then regulated by using the regulating valve.
Close the valves during work stops at the end of the working day in order to avoid sudden
surges when started up. If the float hits the stops sharply this could cause damage to the
meter.
SHUT OFF VALVE
REGULATING VALVE

12
6 RCA / RCD FLOW REGULATORS
The M21 series flowmeters are built to incorporate the RCA and RCD regulators, that
keep a constant flow rate when the operating pressure at the inlet or outlet are not
constant.
In applications for gases, the RCA model is used in installations where inlet pressure is
variable and outlet pressure or counter pressure is constant, while model RCD is used
in installations where the inlet pressure is constant and outlet pressure or counter
pressure is variable.
In liquids, model RCA is the commonly used.
RCA
P0
P2
RCD
P0
P2

13
The differential pressure between P0and P2 should always be higher than 350-450
mbar depending on the model. This differential pressure is calculated for the proper
operation of the flow rate regulator.
6.1 Regulation curves
The flow curves show the relationship between the inlet pressure P0and the counter
pressure P2in the RCA regulator.
The different flow rates are adjusted by means of the regulating valve of the flowmeter. The
counter pressure P2, in these cases, corresponds to the atmospheric pressure.
variation without
regulator
variation with
regulator
P0 = inlet pressure RCA regulator (low flow)
Q air (Nl/h)
P0(bar)
The dotted line shows the variation of flow without the action of the constant flow
regulator.
With constant flow regulator, variations of 100% in the inlet pressure P0 involve
variations of flow of less than 1%.

14
variation of
flow
P0 = inlet pressure RCA regulator (high flow)
Q air (Nl/h)
P0(bar)
variation of
flow
P0 = outlet pressure RCD regulator (low flow)
Q air (Nl/h)
P0(bar)

15
AMD LIMIT SWITCH
7 INTRODUCTION
The AMD limit switch can be used to generate an alarm or an operation when the flow rate
that the instrument is measuring reaches a preset value on the scale plate.
The AMD limit switch consists of a NAMUR slot type inductive sensor, that is actuated by a
vane. Given that there is no physical contact in the operation, the limit switch has no influence
on the indicator needle movement.
An instrument can be equipped with one or two sensors, depending on the number of points
to be detected. A NAMUR amplifier with a relay output can be supplied as an option.
8 OPERATION
The indicator needle moves together with the vane mounted on its shaft. When the vane
enters into the slot of the sensor, the limit switch changes its state.
The sensor is mounted on a support which includes a needle that indicates the switching
position. The needle, that is below the scale plate, can be seen through the scale slot.
Switching
points

16
9 MOUNTING THE LIMIT SWITCH IN AN EXISTING EQUIPMENT
When the AMD limit switch is to be fitted to an existing device, please follow these steps.
9.1 Kit contents
The kit contains the following elements:
In the kits, the gaskets (5) and the blanking plugs (7) are not provided as loose parts. They
are incorporated in the cable glands (6).
9.2 Preparing the kit
Remove the cover, unscrewing the four screws M4.
Slide the scale plate in the direction indicated in the figure, until it is released from the slot.
Ensure that the gaskets (5) are placed in the thread of the gland (6). If not, they should be
placed. Remove the plugs from the indicator box with a flat screwdriver and replace them by
the two cable glands.
The cable glands that are not expected to be used should be left with the blanking plug (7)
placed to preserve watertight.
AMD kit
Quantity Material Position
1 AMD limit switch circuit 1
2 Self tapping screw DIN7982 B-2,2 x 9,5 Nº2 A2 2
1 AMD vane 3
1 Self tapping screw DIN7982 B-2,2 x 9,5 Nº2 A2 4
2 Gasket 5
2 Cable gland IP68 6
2 Cable gland blanking plug 7
Cable glands (6)
Blanking plug (7)

17
9.3 Assembling the AMD kit
Slide the circuit (1) into the slot until it stops, and then screw it as shown in the figure.
Place the vane (3) in the position shown in the figure. The height on the shaft should be such
that when the vane passes through the sensor slots, remains centered without touching
them. Tighten the screw (4) holding the vane against the shaft.
Slot
Screw (2)
Screw (2)
Vane (3)

18
9.4 Switching point adjustment
At the bottom of the switching needle, the fixing nuts of the switching points can be found.
To move the switching point, the fixing nuts have to be slightly loosen without removing the
scale plate (see figure on the next page). After that, place the switching point at the required
scale value, and fix it with the nuts.
As standard, when the instrument has only one AMD, it is configured as a minimum limit
switch.
Switching needles
Switching needles
Fixing nuts
Fixing nuts

19
9.5 Electrical connection
Do it according to section 10.
9.6 Mounting
Slide the scale plate into the slot until it stops as shown in the figure. Mount the cover with
the four screws M4.
10 ELECTRICAL CONNECTION
For the electrical connection, the instrument is provided with a four terminal connector.
For the electrical installation it is recommended to use multiple conductor cables with
sections of 0.25 or 0.5 mm2, in order to make it easier to connect.
Before starting the installation, check that the cable glands are the right size for the cables to
be used, this will guarantee the instrument will stay watertight. The M12x1.5 cable glands
used are for cables with outside diameters between 2.5 mm and 6.5 mm.
Peel the outside insulation to free the inner cables. It is recommended to tin the ends of the
wires to avoid loose ends. Pass the cables through the cable glands and screw down in the
corresponding positions of the terminal strip. Once the wiring is finished make sure that the
cables are well gripped by the cable glands to maintain the degree of protection.
The cable glands must be always closed. Entry of dust or some types of vapours can
damage the internal system of bearings and therefore the equipment.
To gain access to the terminal block, the scale plate must be removed. To do this, slide it to
the left through the slot until released.
The numeration of the terminals is the following:
Limit switch 2
(maximum)
Limit switch 1
(minimum)

20
TH6 TRANSMITTERS
11 INTRODUCTION
Transmitters TH6 are electronic position transducers with a microprocessor. The instrument
uses the Hall effect to capture the field of a magnet. This signal, after the microcontroller
processing, is converted into a current signal of 4-20 mA in a 2-wire loop. This signal is
proportional to the flow rate.
12 MODELS
12.1 TH6
It is a 4 to 20 mA transmitter proportional to flow rate. 4 mA corresponds to beginning of the
scale. 20 mA corresponds to full scale. Between the beginning of the scale and the first point
of the scale the analog output is constant at 4 mA, to avoid false readings of flow rate.
12.2 TH6H
It is a TH6 transmitter that incorporates HART TM protocol compatibility. With this protocol the
user can change the measuring range of the 4-20 mA loop, and data like flow rate, with its
associated measuring units.
13 ELECTRICAL CONNECTION
For the electrical connection, the transmitter has two screw terminals.
For the electrical installation it is recommended to use multiple conductor cables with
individual cable sections in the order of 0.25 to 0.5 mm2in order to make it easier to
connect.
A twisted pair wiring should be used to avoid electrical interferences in the 4-20 mA loop. In
some instances, shielded cable may be necessary.
Before starting the installation, check that the cable glands are the right size for the cables to
be used, this will guarantee the instrument will stay watertight. The M12x1.5 cable glands
used are for cables with outside diameters between 2.5 mm and 6.5 mm.
Peel the outside insulation to free the inner cables. It is recommended to tin the ends of the
wires to avoid loose ends. Pass the cables through the cable glands and screw down in the
corresponding positions of the terminal strip. Once the wiring is finished make sure that the
cables are well gripped by the cable glands to maintain the degree of protection.
The cable glands must be always closed. Entry of dust or some types of vapours can
damage the internal system of bearings and therefore the equipment.
To help in the wiring of the equipment, the description of the terminals is marked on the
printed circuit next to the terminal strip.
Before connecting the power supply, you must be sure that the supply voltage is the correct
for the installation. The power supply voltage is indicated on the label of the transmitter.
Other manuals for M21
1
Table of contents
Other Tecfluid Measuring Instrument manuals

Tecfluid
Tecfluid LTDR series User manual

Tecfluid
Tecfluid FLOMID Series User manual

Tecfluid
Tecfluid 60 M-1 Series User manual

Tecfluid
Tecfluid CU Series User manual

Tecfluid
Tecfluid FLOMAT Series User manual

Tecfluid
Tecfluid 2100 Series User manual

Tecfluid
Tecfluid FLOMAT FX FlomatFX User manual
Tecfluid
Tecfluid AD Series User manual

Tecfluid
Tecfluid Series LT User manual

Tecfluid
Tecfluid LS Series User manual