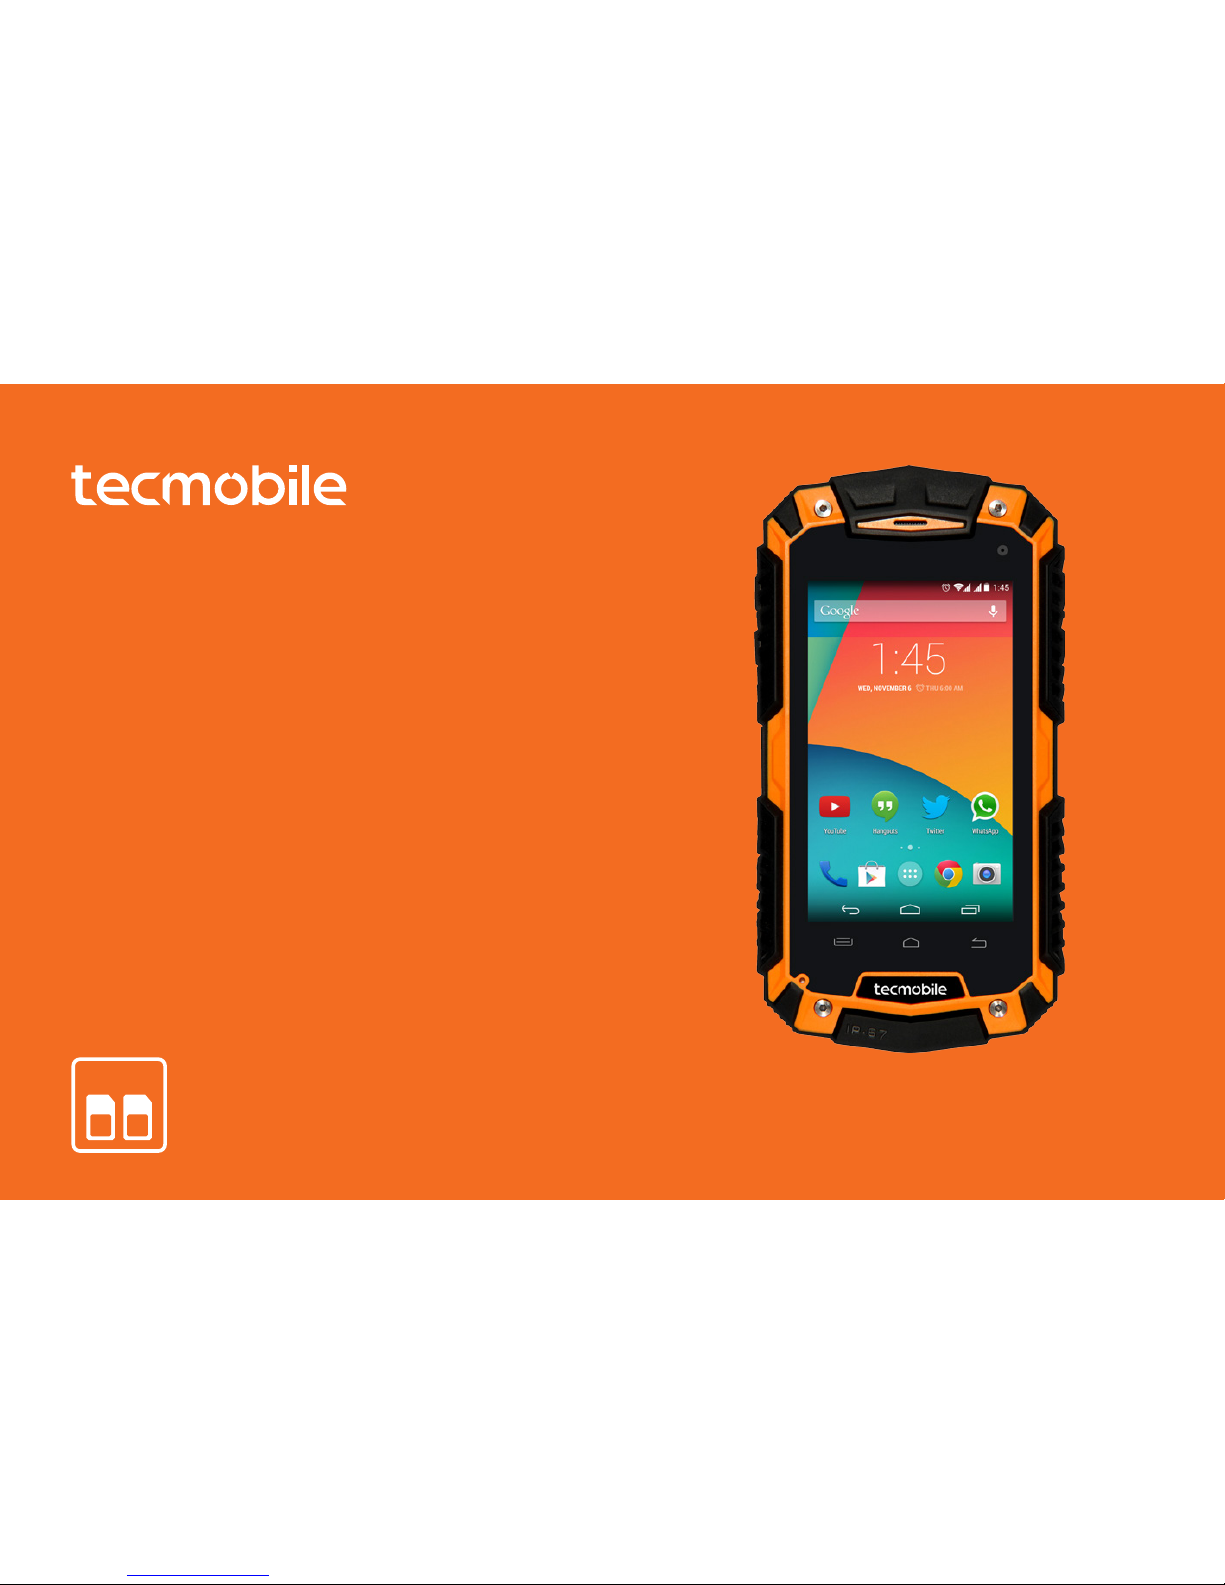
Tecmobile Titan 550 User manual
English
User Manual
Dual SIM (850/2100)
1 2
DUAL SIM
Titan 550

1 Introduction 4
2 Description of icons 7
3 Getting Started 8
4 Basic Functions 14
5 Tools 19
6 Settings 33
7 Troubleshooting 38
8 Legal Information 40
9 Health and Safety 41
10 Declaration of conformity 45

4 5
1 Introduction
Thank you for purchasing the Titan 550. This instruction manual is to guide you to understand the functions and features.
In addition to common call functions, this phone also provides you a variety of useful features and services. Some of the
services and functions will depend on the network operator and additional data charges may apply. Please contact your
network operator for more information.
1.1 Box contents
Please check the box includes the following components. If there are any items missing, please contact your supplier.
Handset Data Cable
Earphone User Manual
Power Adaptor Quick Start-Up Guide
English
6 7
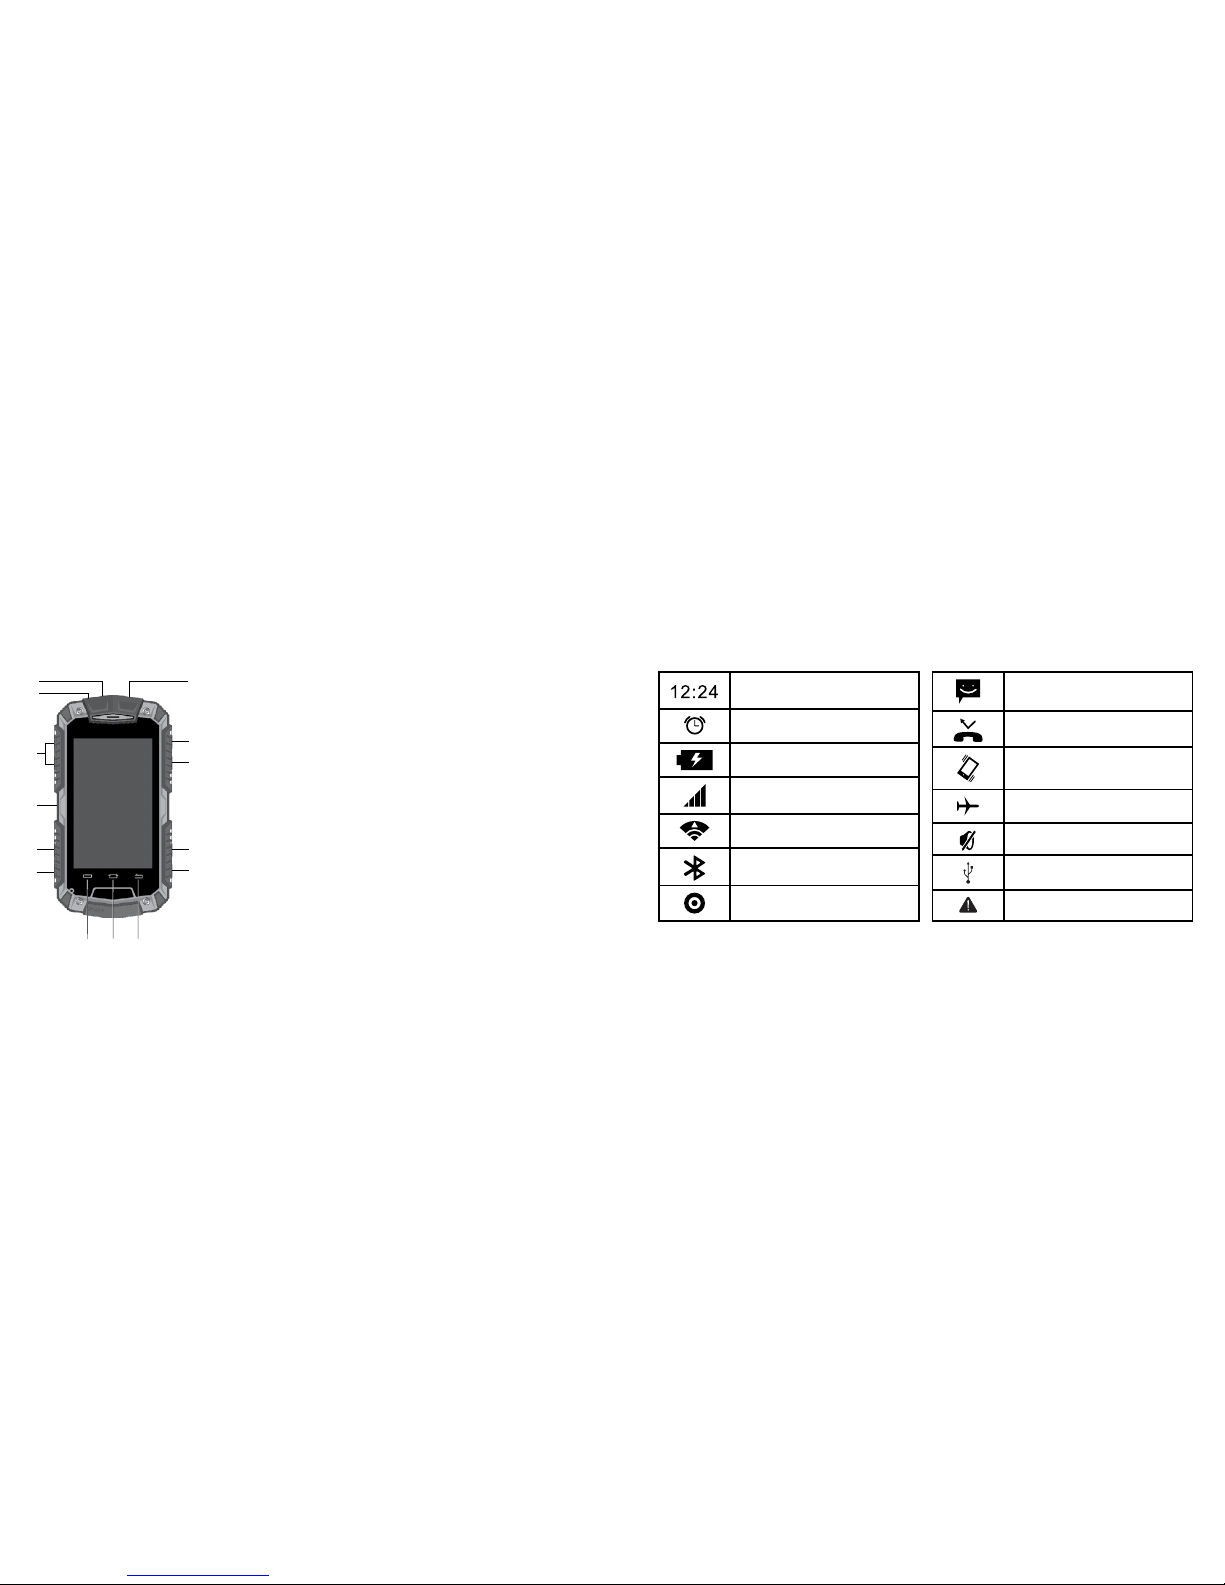
1.2 Getting to know your phone
1) USB Port –Charging and Data port
2) Remote Control Sensor
3) Volume Button –Increase of decrease the volume during an active call or
increase or decrease the volume on the current profile
4) PTT Button – Shortcut to Push To Talk function
5) SMS Key – shortcut to SMS message menu
6) FM Radio – Shortcut to FM radio
7) Earphone Port - 3.5mm Audio port
8) Power ON/OFF - When the phone is powered OFF, press to turn ON the
phone. When the phone is ON and the screen is unlocked, press to turn
OFF the phone display. When the screen is unlocked, press and hold to
access the phones Option Menu to select Silent, Vibration or Airplane Mode
9) Call Records – Shortcut to your Call Records list
10) SOS Button – Press and hold to dial an emergency number and send a message
for help
11) Camera Button – Shortcut to your camera viewfinder interface
12) Menu Button - Access all the applications in the phone
13) Home Button - Reverts to the Home Screen
14) Back Button - Revert to the previous screen or to go back to the Home Screen
2 Description of icons
Clock
Alarm clock has been set and activated
Battery level indicator
Network signal strength
Connected to a wireless network
Bluetooth activated
Music indicator
New message received
Missed call
Meeting mode
Flight mode
Mute mode
USB connected
Access restricted
1
2
7
8
11
10
9
3
4
5
6
12 13 14
8 9
3 Getting Started
3.1 Installing the SIM card, Micro SD card and Battery
Removing the battery cover
Turn OFF the phone, and disconnect the external power supply. Use the lock ring to rotate the screws counter clockwise
on the back cover and remove the back cover.
Use the lock ring to rotate the screws counterclockwise on the back cover.
Insert the SIM card and Micro-SD Card
The device has two SIM card slots, insert the SIM card into the SIM slot. Insert the SD card into the slot by pushing the SD
card downwards.

10 11
Inserting the battery
Insert the battery into the battery compartment by aligning the connectors; use the lock ring to rotate the screw
clockwise to secure the back cover.
3.2 Charging your phone
Charge your phone for a minimum of 12 hours for the initial use. The battery indicator will flash when the phone is on
charge. Once it is fully charged the battery indicator will stop flashing. Disconnect the external power supply from your
phone.
12 13
3.3 Powering ON/ OFF
Press the hold the Power ON/OFF button to start up the device. To turn OFF the phone, press and hold until the
following message box appears and select Power O. You can also use to select the flight, reboot, mute, vibration and
standard mode.
Power ON/OFF
3.4 PIN Code protection
If your SIM card has a pre-set PIN Code, you will be prompted to input a PIN Code when you first insert it into your
phone. The PIN Code may be supplied by your network operator along with the SIM card. If you lose your PIN Code,
please contact your network operator for further information. If you enter the incorrect PIN1 code in several times, the
SIM card will be locked. Please contact your network operator for more information.
3.5 Lock and unlocking the screen
You can lock the touch screen and the buttons to prevent accidental operation. When the phone is powered ON, press
the Power ON/ OFF button to lock the screen. You can still receive Messages and Voice Calls when the screen is locked.
Press the Power ON/ OFF button to re-activate the screen, and then unlock the screen by following the instructions on
display. Please refer to Security section on the phone for more information.

14 15
4 Basic Functions
4.1 Making a call
On the main screen, tap the icon to bring up the keypad dialer. Dial your number on your screen. To amend the entry,
tap the icon to delete the characters, then press icon to make the call.
4.2 Answering/ rejecting an incoming call
During an incoming call, tap on the icon and slide icon to answer the call. To reject a call, slide the icon or
slide the icon to send an SMS response message for rejecting the call.
16 17
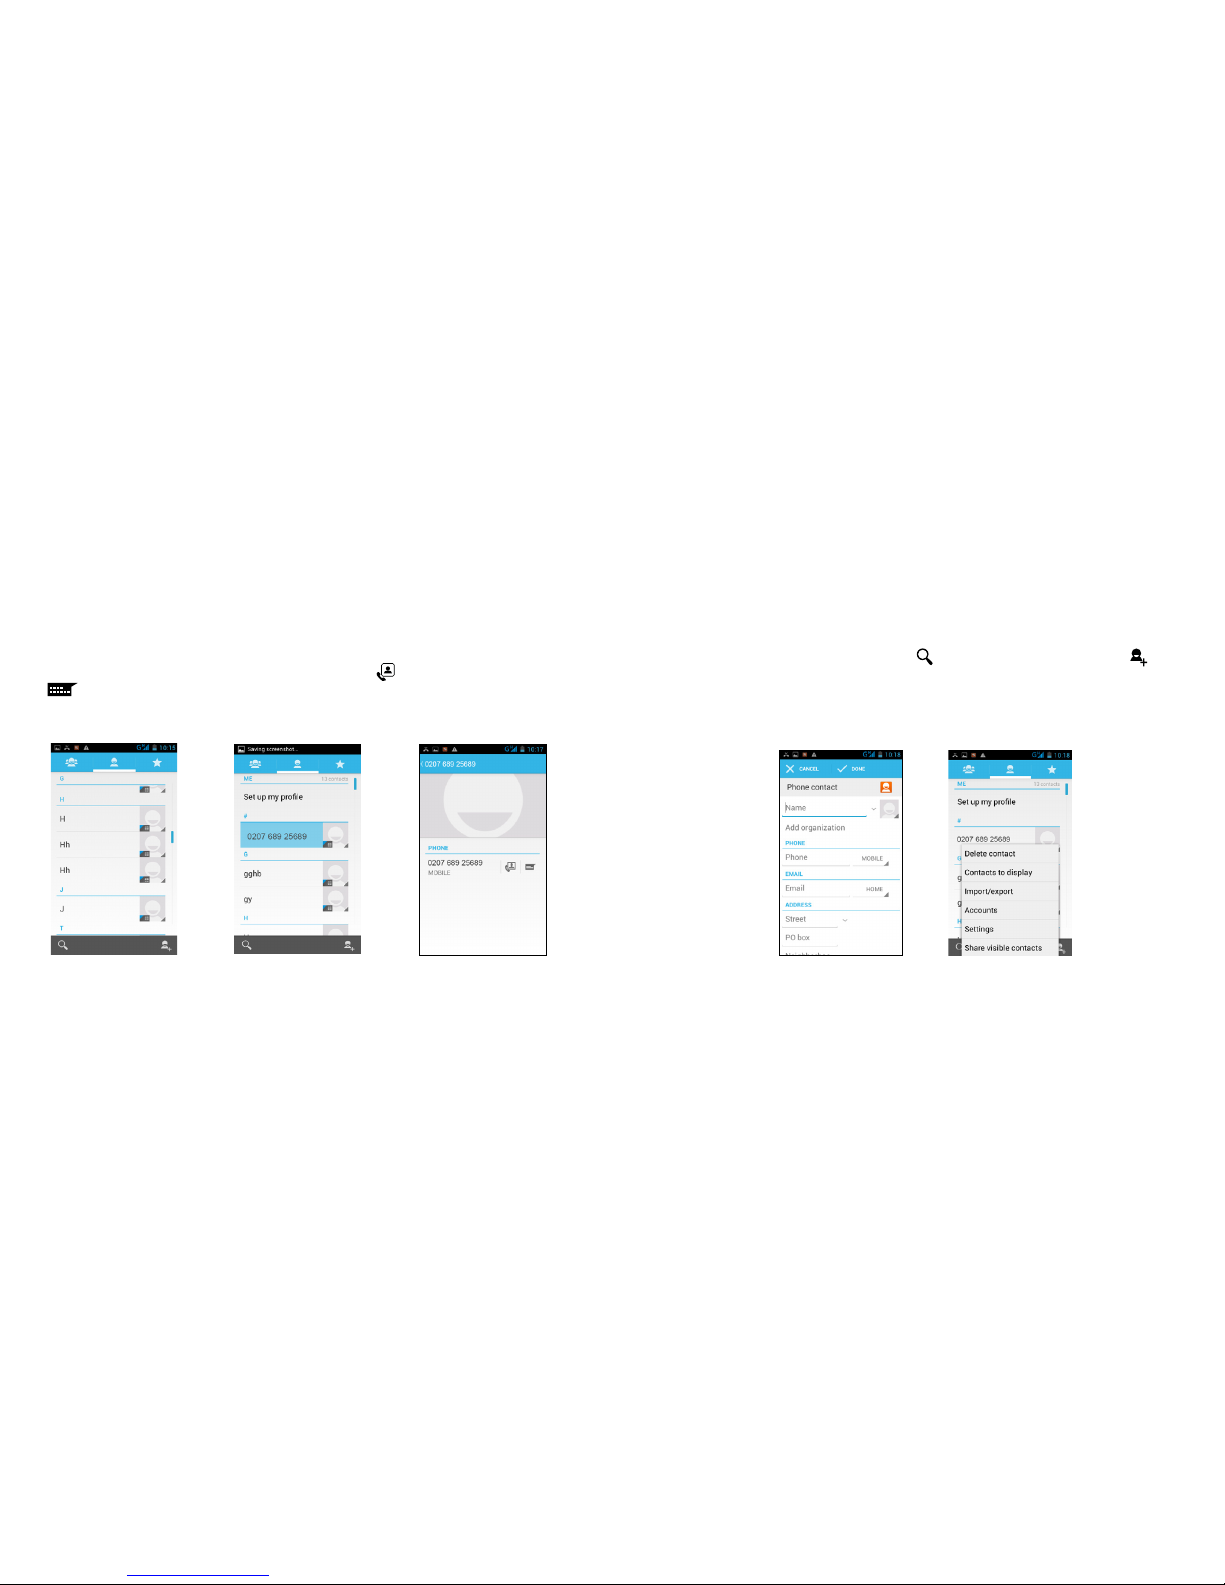
4.3 Contacts
You can directly access the Contacts from the main screen, or access your contacts through the "Dial"
application. Tap on the contact to view the contact information stored, tap on to call the contact or tap on
the icon to send an SMS to the contact. Tap on the Menu key to modify, share or delete the contact.
4.4 Searching for a contact
Access your Contacts from the main menu and tap on the icon search for a contact in your list. Tap on
icon to add a new contact. You can choose to save the entry to your phone or the SIM card and edit the details
for your new contacts. You can also manage your contacts and delete, import, export and share contacts and
other operations.

18 19
4.5 Messages
On the main screen, tap on the icon to directly access your Messages. Tap on the icon and compose your
written message. Tap on icon on the screen to insert images, video, audio and other attachments. The SMS message
will automatically converted into MMS. Choose a number from your contacts list. Tap on icon to send a message after
completion.
5 Tools
5.1 Camera
On the main screen, tap on the icon and tap on the icon to access the camera viewfinder screen. You can
choose various camera mode at the top of the screen and at the bottom right hand corner, you can choose the flashlight
mode, and switch camera mode. Touch the preview area to adjust the focus.

20 21
Tap on the icon to enter into the camera setting mode; you can modify the camera exposure, eects, shooting and
other preferences.
Tap on the icon to take a picture or tap on the icon to convert into the video interface for recording video.
5.2 Images
On the main screen, tap on icon the main screen to enter the application, and then tap on icon, you can view all
the pictures and video files that saved in the mobile phone and SD card, press menu key to browse images, delete and
grouping operation. To share an image tap on the icon and select the preferred method of sending the file.
22 23
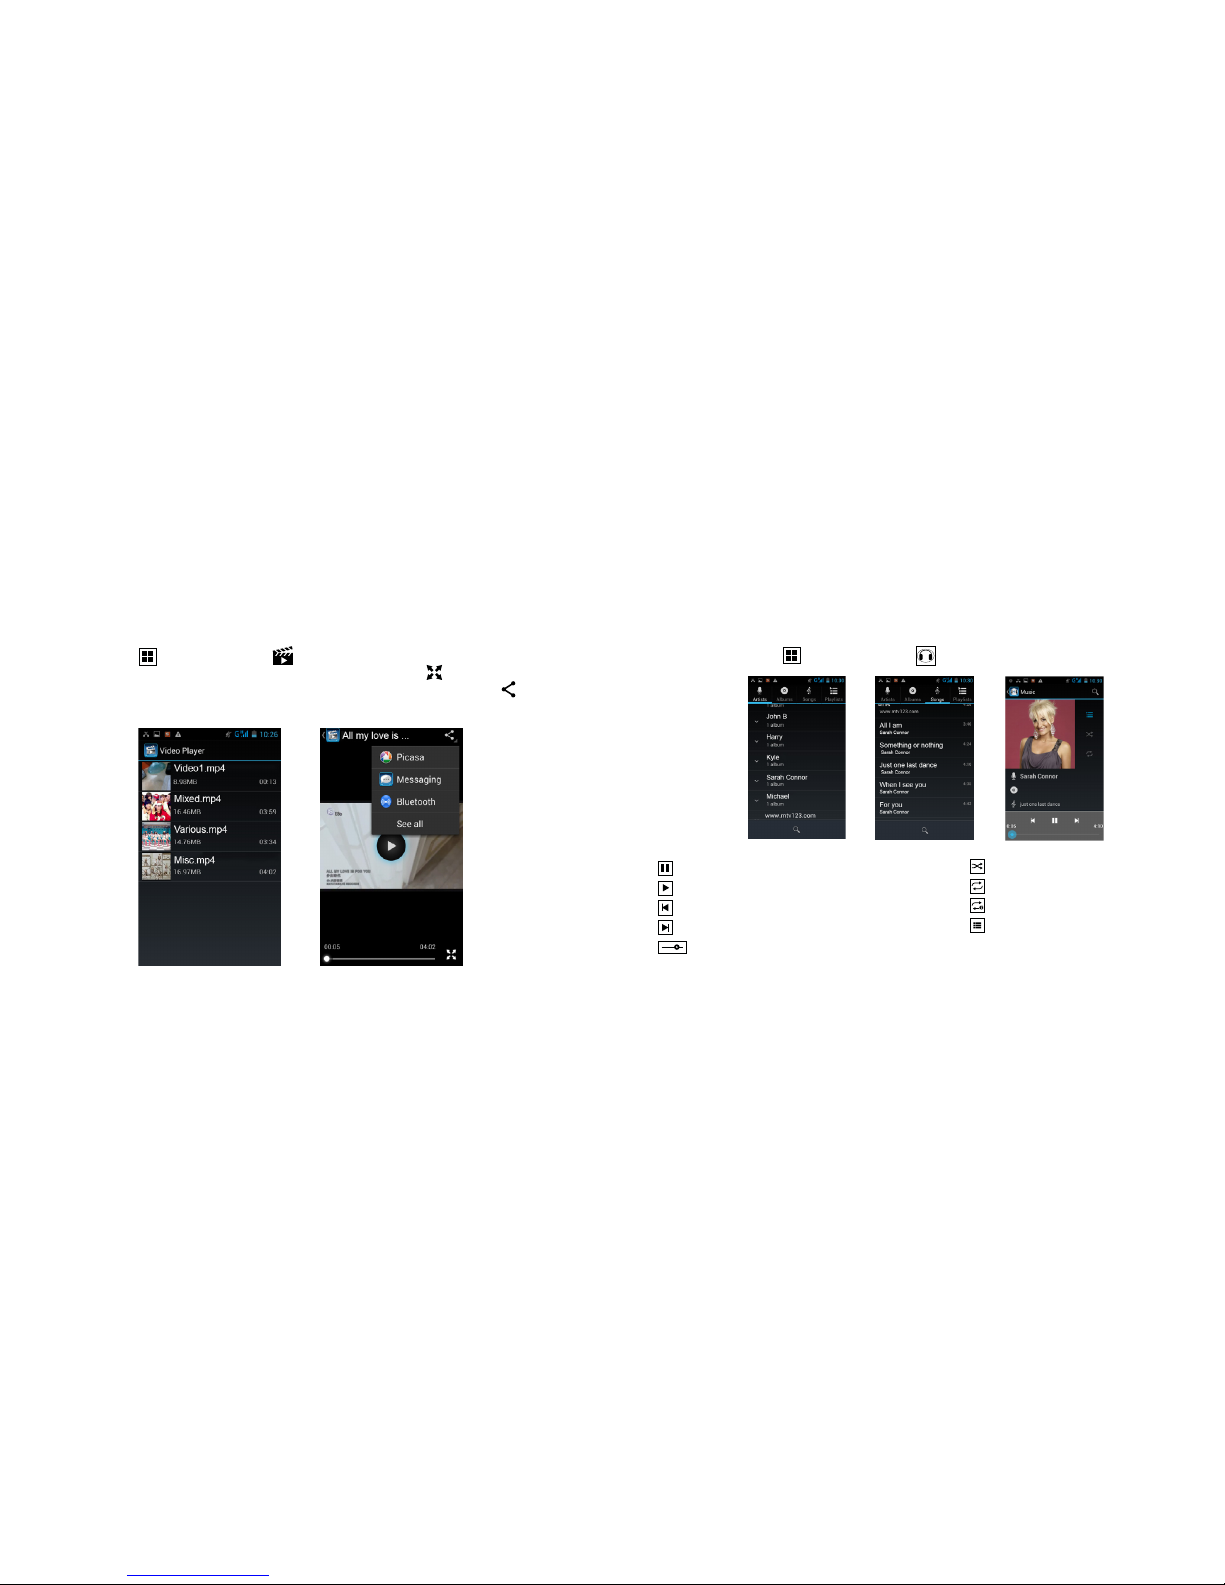
5.3 Video Player
On the main screen, tap icon, and then tap on the icon to display the video list. You can also delete, sort, and
manage your video files. Tap on a file name from the video list to play your video, use the icon enlarge to full-screen
mode. Slide the time progress bar to forward and reverse the video footage. To share the video tap on the icon and
select your preferred method of sending the file.
5.4 Music Player
On the main screen, tap the icon, and then tap on the icon to access the music player.
Your music list can be view by Artist, Albums, Songs or Playlist.
Pause/play song
Play/resume play
Revert to last song or press and hold to rewind the track
Skip to next song or press and hold to forward the track
Playback time/display - sliding the scroll bar to jump to
any song
Song shue ON/OFF
Repeat song ON/OFF
Current song being repeated
Revert to song list
24 25
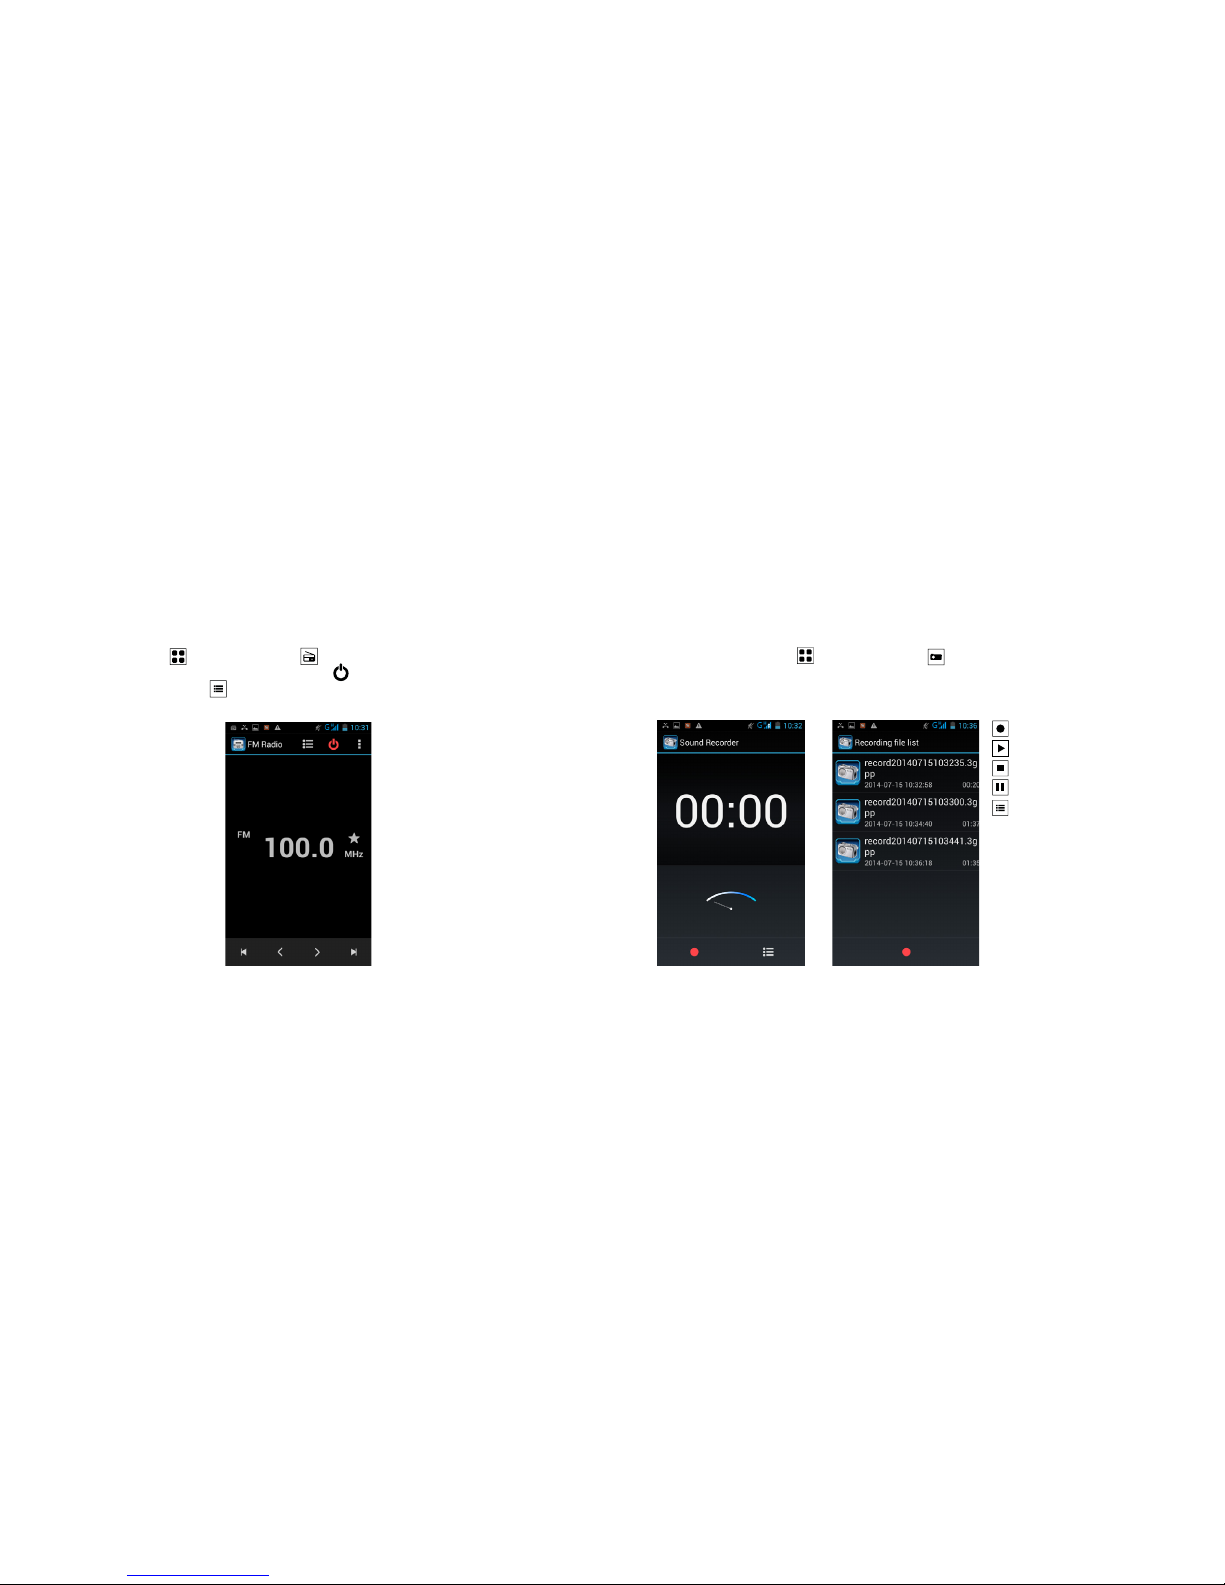
5.5 FM Radio
On the main screen, tap on the icon and then tap on the icon to access the radio. Insert your headset into to
the earphone/audio jack and search for your radio station. Press the icon to Stop/Play the channel. You can select a
radio station from the saved channel list or automatically search for a FM radio station.
5.6 Sound Recorder
On the main screen, tap on the icon and then tap on the icon to access sound recording feature.
Start recording
Play recording
End recording
Pause recording
List all recording stored on your phone

26 27
5.7 Clock
On the main screen, tap on the icon, and then tap on icon to access the clock settings. You can amend the date
and time, week and alarm settings.
View and set the alarm
Stopwatch function
Edit the settings for night mode,
set men u and set the alarm
5.8 Calendar
On the main screen, tap on icon on the main screen and then tap on icon to access the calendar.
In the calendar interface, you can slide up and down to view the previous month and next month's on the calendar, the
calendar view and reminder setting can be adjusted to your preference.
28 29
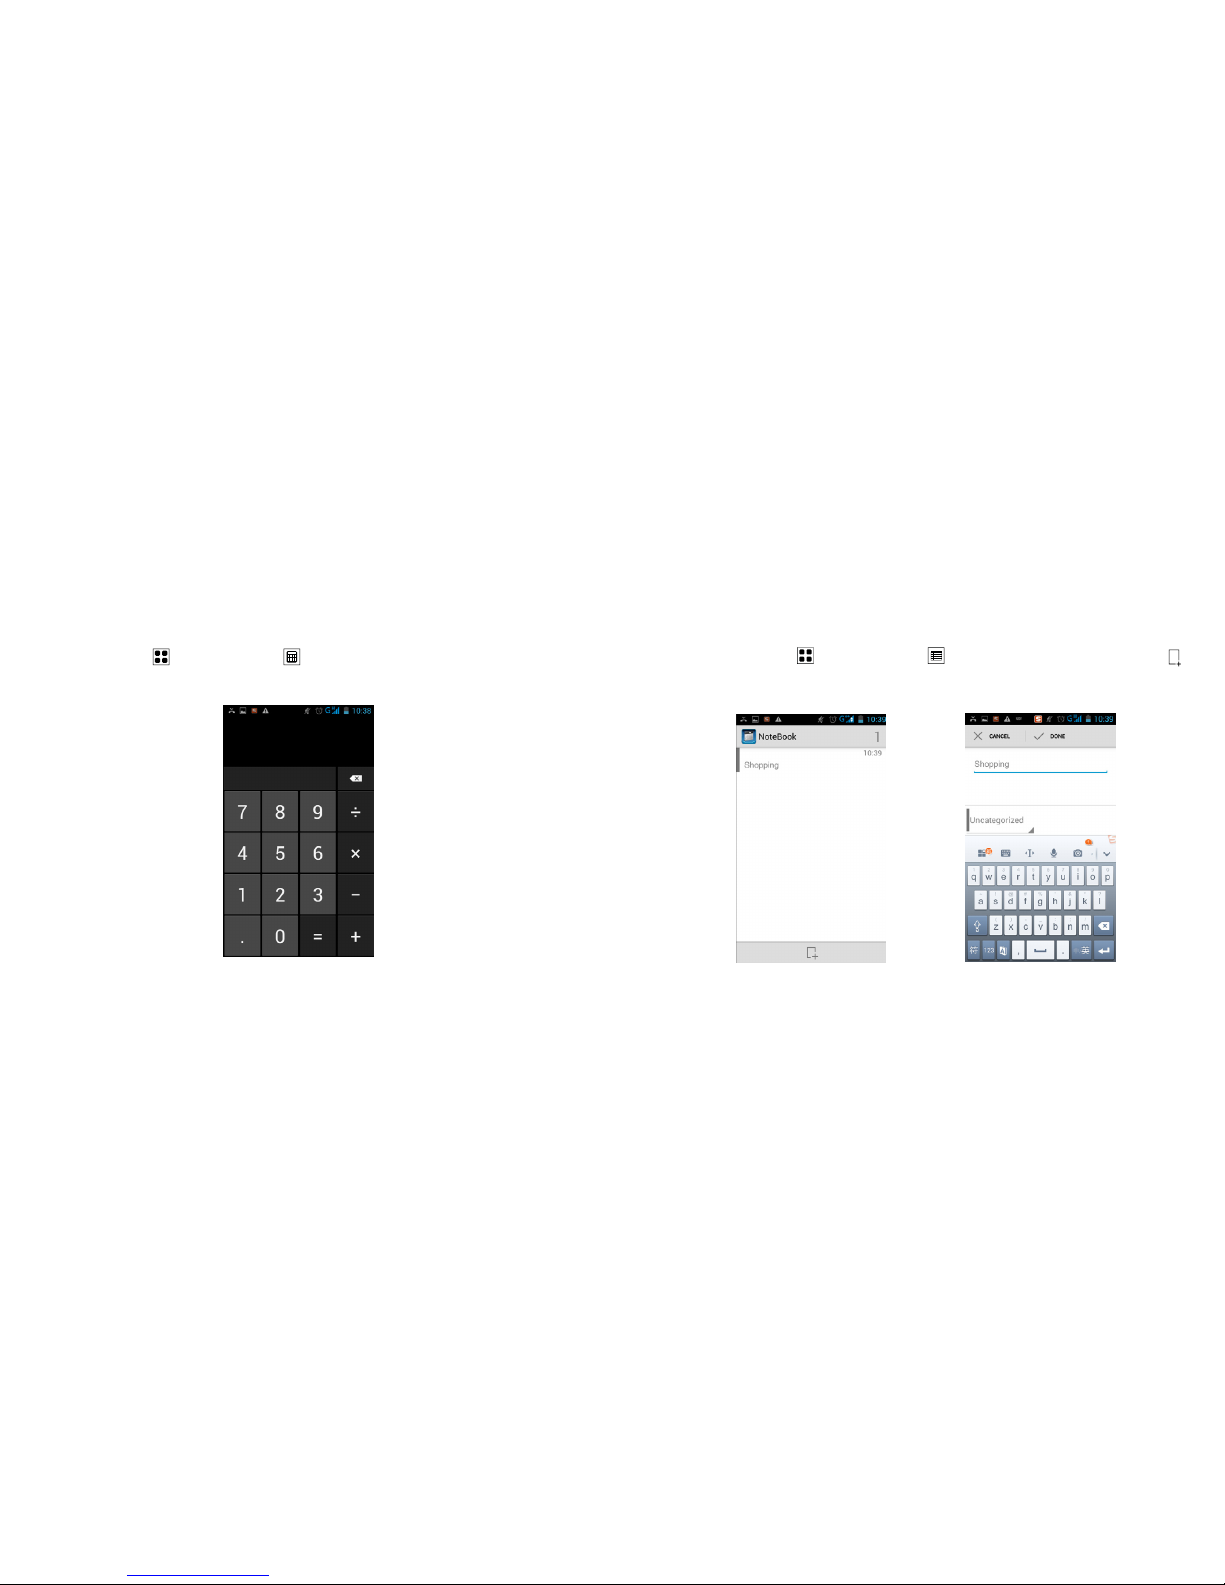
5.9 Calculator
On the main screen, tap on icon and then tap on the icon to access the calculator interface. Your phone provides
you a calculator with the four basic functions of adding, subtracting, multiplication and division, allowing you to perform
simple arithmetic.
5.10 Notepad
On the main screen, tap on the icon and then tap on the icon to access the Notebook interface. Tap on the
icon to add a new note. Select the “Unclassified" to create categories to organise your notes.
30 31
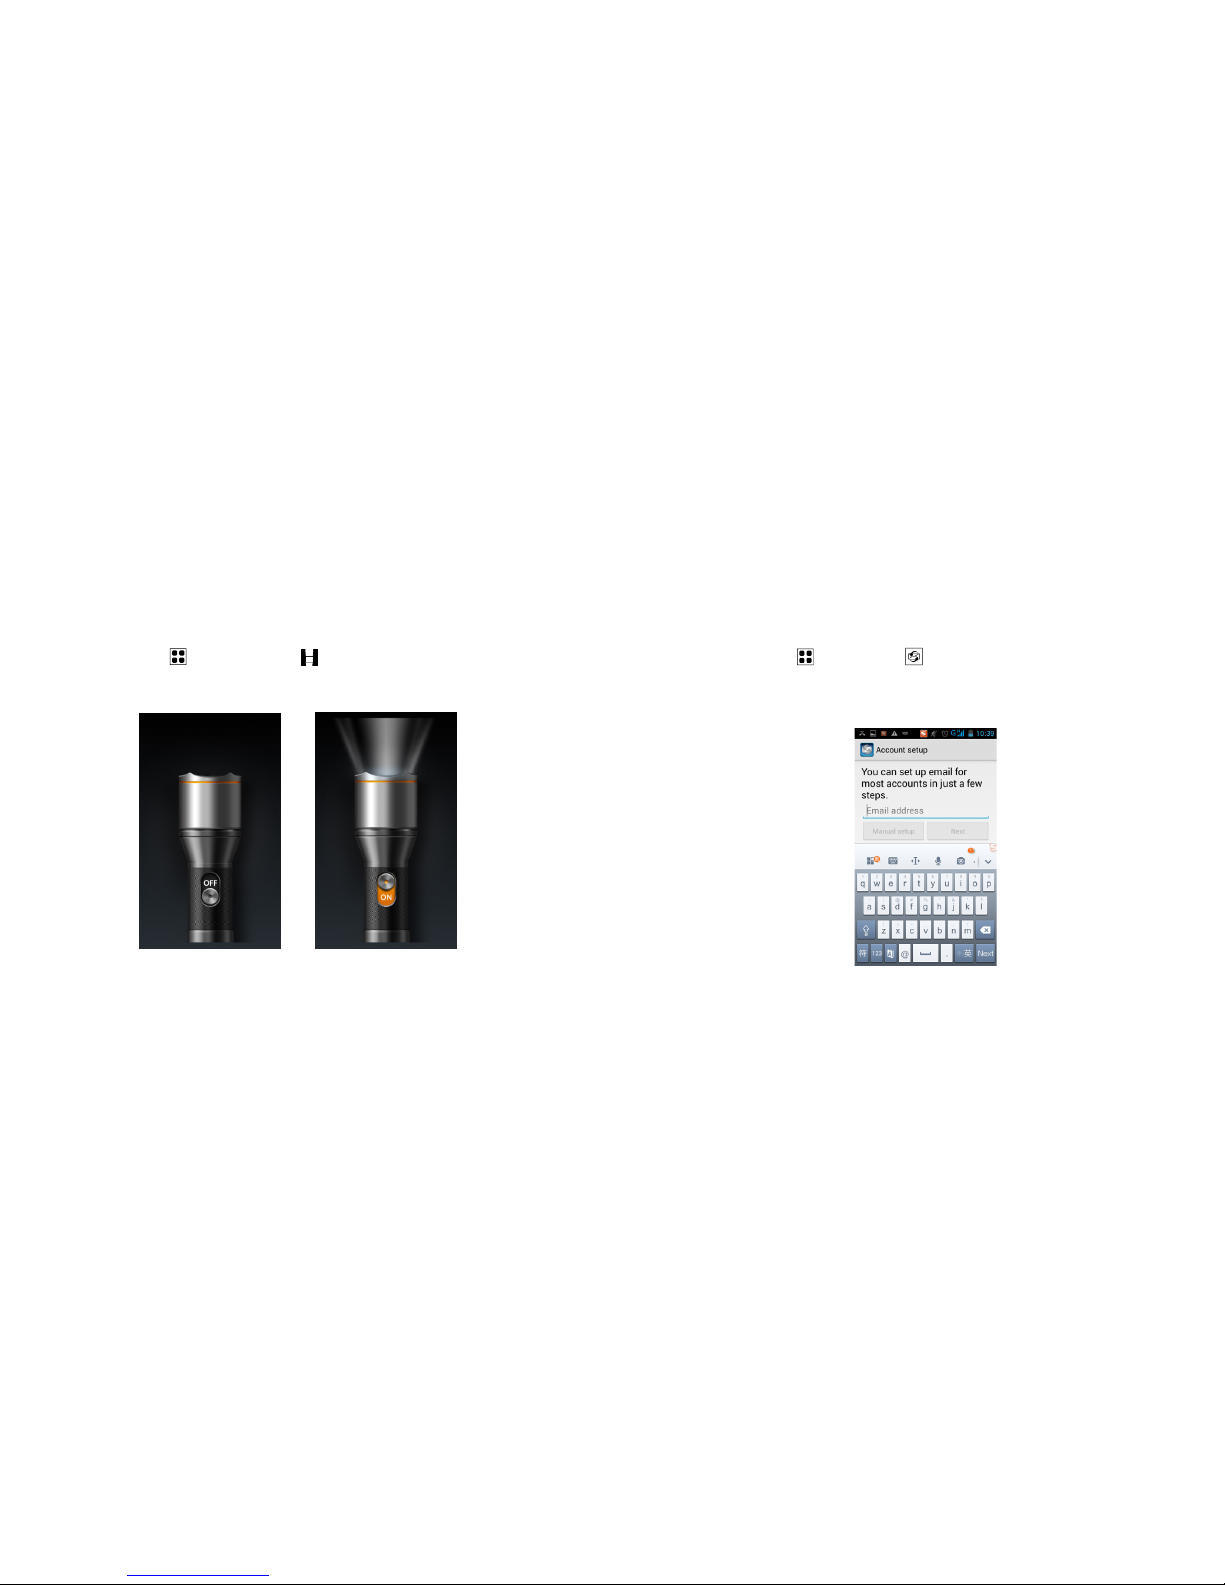
5.11 Flashlight
On the main screen, tap on the icon and then tap on the icon to access the flashlight interface. Enable and dis-
able the Flashlight by selecting ON/OFF. Exiting this interface will turn OFF the flashlight.
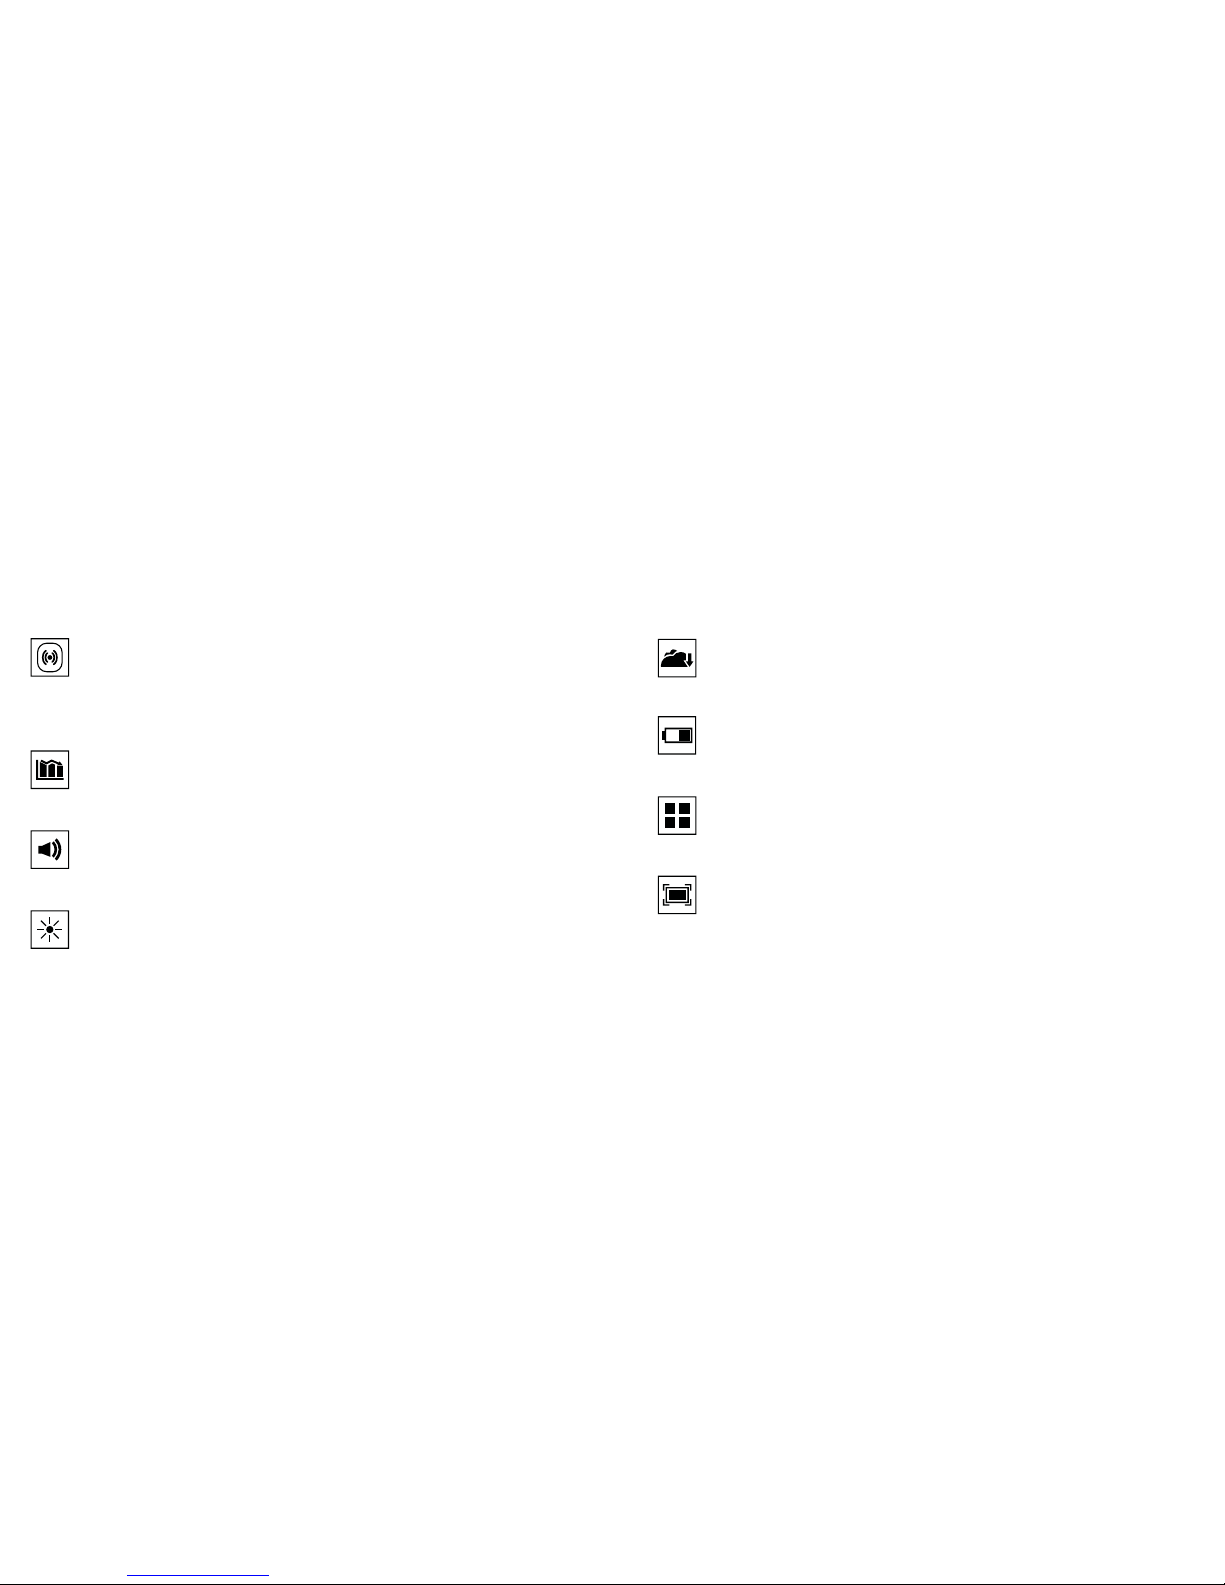
5.12 E-mail
On the main screen, tap on the icon and tap on the icon to enter into the e-mail interface. You can send email
messages to anyone with an email address. Follow the instructions on the screen to set up your email accounts. You can
then manage your emails from your mobile. You will require access to a WIFI network or a data plan from your network
operator. Addition charges may occur on your tari, please contact your network operator for more information.

32 33
5.13 Browser
On the main screen, tap on the icon and then tap on the icon to enter the browser interface. You will require
access to a WIFI network or a data plan from your network operator. Addition charges may occur on your tari, please
contact your network operator for more information. You can create a bookmark on your phone and sync bookmarks
with your computer.
5.14 Download
On the main screen, tap on the icon, and then tap on the icon to enter the download interface. You can view the
content, which have been downloaded, or being downloaded. You can also manage your files and sorted by size or time
of operation.
6 Settings
On the main screen, tap on icon and then tap on icon to enter into the settings menu. Manage and personalise
the following your phone settings.
6.1 SIM Management
Set your SIM card as the default for making voice calls, video calls, messages, data connections and other
settings.
6.2 Wi-Fi
Wi-Fi is a wireless networking technology that provides access to local area networks. WI-Fi communication
requires access to an existing Wi-Fi network. Wi-Fi networks can be Open (unsecured), or Secured (requiring
you to provide login credentials).
34 35
6.3 Bluetooth
Bluetooth is a short-range wireless communications technology for exchanging information over a distance
of 10 meters. You do not need to line up the devices to send information with Bluetooth. If the devices are in
range, you can exchange information between them, even if they are in dierent rooms. Your device can use
Bluetooth to share photos, contacts and other content with other Bluetooth devices. Many of the apps on
your device provide options for sharing via Bluetooth.
6.4 Data Usage
Control your device’s connection to mobile data service, and monitor your data usage. Data usage is
measured by your device, and your service provider may account for usage dierently, so consider using a
conservative limit.
6.5 Audio profiles
A profile is a collection of settings. Changing the profile changes the phone’s settings, such as the ring tone
and volume, or the message alert tone. Edit and change your General, Silent, Meeting and Outdoor profile to
your preference.
6.6 Display
Personalise you display by adjusting the brightness, scene, wallpaper, themes and preferences.
6.7 Storage
You can view the phone and SD card total capacity, free space; you can choose the preferred installation
location and format the phone memory.
6.8 Battery
You can set the phone percentage of battery display and see remaining battery power and time.
6.9 App
You can view the downloaded applications, phone storage applications, running applications and all
applications. You can manage, sort and arrange the order of the applications.
6.10 Location access
This feature allows applications to use Google’s location service to faster estimate your location. Anonymous
location data is collected and sent to Google.
36 37
6.11 Security
As a security measure, you can encrypt the contents of your device or an optional installed memory card
(not included), and require a password each time you turn on the device or access the memory card. Set the
screen security, SIM card lock, password, device management, credential storage and other settings.
6.12 SOS Setting
The SOS function allows you to send a help request to the numbers you predefine. You can set up an
emergency number and edit emergency text messages. When the SOS emergency call button is pressed, the
phone will automatically dial the number, and send text messages.
6.13 Language and Input Method
You can choose your preferred language and input method.
6.14 Backup and Reset
You can back up your data, automatically restore, and restore the factory settings and operations on your
phones. The restore factory settings will delete all personal data on your phone.
6.15 Add Account
Sync accounts to share your content with other devices and displays account configuration and management
features for Email, and Social media and Application accounts.
6.16 Date and Time
You can choose to have the date and time automatically adjusted according to your time zone location, or
change the time and date display format.
6.17 Schedule Power ON/OFF
Set the time to automatically power ON or power OFF the phone.
6.18 Accessibility
Improves accessibility for users who have impaired vision, hearing, or reduced dexterity.
6.19 About Phone
View information about your phone, including status, legal information, hardware and software versions.

38 39
Unable to boot The battery power has no power Please recharge your battery
SIM card error
SIM card may be damaged Contact your network operator for more
information
SIM card not installed Ensure the SIM Card has been installed
correctly
SIM card contact point may be dirty Use clean dry cloth to clean the e SIM card
metal contact point
Unable to connect the
network
SIM card is invalid Contact your network operator for more
information
You are not within a GSM or 3G network
service area
Contact your network operator for more
information
The signal is weak Please move to an area with stronger signal
Unable to make calls to
a specific contact
The call barring function is activated Cancel the call barring function
The fixed dial function is activated Cancel the fixed dial function
PIN error Incorrect PIN Code was input three times Contact your network operator for more
information
Unable to charge Battery or charger damaged Replace with a new battery or charger
7 Troubleshooting
Problem The causes Solution
Poor signal
Using the mobile phone in poor reception
area, where nearby buildings or basement
can cause the obstruction of radio waves
cannot eectively communicate
Move to an open area location away from
obstructing buildings
Using the mobile phone during peak time Wait and avoid making calls during peak
hours
Routine maintenance work carried out by
your next work operator on nearby mast
Please contact you network operator for
more information
Echo and noise Poor network coverage within the region Disconnect the current call and try
redialing
Short Standby time
Standby time is related to the network
system setting
Turn o the mobile phone in the poor
reception area.
The battery may be near its end of life
charging cycle Please replace new battery.
The phone is constantly searching for a
base station and use battery power, caus-
ing the standby time to become shorter
Please move to strong signal place or turn
o the phone.
Other manuals for Titan 550
1
Table of contents
Other Tecmobile Cell Phone manuals

Tecmobile
Tecmobile R50 User manual

Tecmobile
Tecmobile R30 User manual

Tecmobile
Tecmobile Titan 150 User manual

Tecmobile
Tecmobile Titan 150 User manual

Tecmobile
Tecmobile 25 User manual

Tecmobile
Tecmobile R30 User manual

Tecmobile
Tecmobile MXC-545 User manual

Tecmobile
Tecmobile You 40 User manual

Tecmobile
Tecmobile Titan 550 User manual

Tecmobile
Tecmobile TITAN 600 User manual


