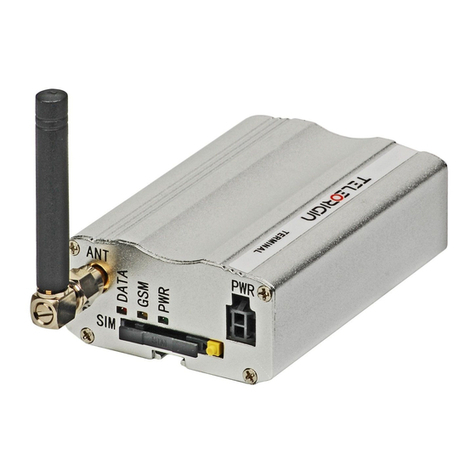
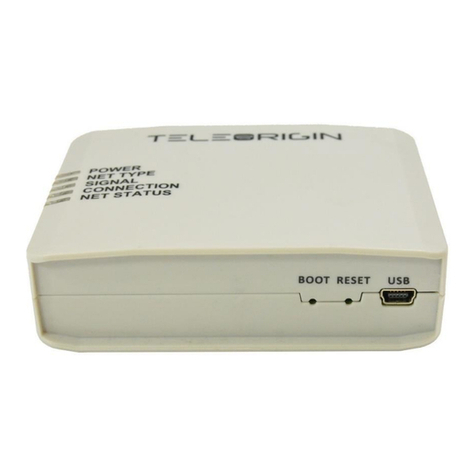
Teleorigin RB900-Pro User manual

1
Contents

2
1. Overview 4
2. References 5
3.Package 6
3.1 Box 6
4. Complete package contents 7
5. General presentation 8
5.1 Product pictures 8
5.2 External connections 9
5.2.1 GSM antenna connector 9
5.2.2 Bluetooth antenna connector 10
5.2.3 RS-232 Interface (EIA574) 11
5.2.4 Power supply connector 12
5.2.5 SIM card holder 13
5.3 Product sticker 14
6. Basic features and services 15
7. Using the modem 16
7.1 Setting up the modem 16
7.2 Mounting the modem on the wall 16
7.3 Checking the communication with the modem 17
7.4 Status of the modem (LEDs) 17
7.5 Disabling and enabling echo function 18
7.6 Verifying the strength of received signal 19
7.7 PIN code status 19
7.8 Network registration 20
7.8.1 GSM network registration 20
7.9 GPRS network registration 21
7.10 AT commands summary 22
8. Troubleshooting 23
8.1 No connection/communication with the modem 23
8.2 Receiving ERROR message 23
8.3 Receiving NO CARRIER message 24
9. Technical characteristics 25
9.1 Mechanical characteristic 25
9.2 Housing description (dimensioning diagram) 25
10. Electrical characteristic 26
10.1 Power supply 26
10.2 RF characteristics 26
10.3 External antenna 27

4
Overview
The RB900-Pro terminal is the complete modem solution for wireless m2m applications.
Based on the high quality module, RB900-Pro offers high level GSM/UMTS/LTE Cat. 1,
GPIO and optional Dual SIM, MIMO, OneWire, GNSS receiver and internal battery
features in compact aluminum housing with all the standardized interfaces. Its small size
and wide supply voltage range, make it easy to integrate into all kinds of machines.
The RB900-Pro modem series, offering e-mail, TCP/UDP data transmission, SMS and
SMTP communication is a universal solution for all low-volume M2M and mobile data
applications including metering, traffic systems, transportation and logistics, security,
vending machines, and facility management.
The device can be controlled by standard AT commands or by customer's own
application, thus making it the smallest, most complete SMT platform for m2m solutions.
This document contains a full description of the RB900-Pro modem and gives
information about installation and use.

5
References
[1] Quectel_EC25&EC21_AT_Commands_Manual_V1.1.pdf

7
Complete package contents
Complete package contains:
•RB900-Pro terminal (item A)
•antenna (item B)
•power supply with 4-pin (item C)
•2-pin GPIO cable 1,5m open end (item D)
•1-pin GPIO cable 1,5m open end (item E)

8
General presentation
Product pictures
SMA antenna
connector
Extractable
SIM card
holder
SIM card holder ejector
TR switch
DATA
GSM
PWR
LEDs
Serial DE15 D-sub connector
Power supply and I/O connector
IO connector
USB interface

9
External connections
GSM antenna connector
An SMA antenna input is used to connect an external GSM antenna. To establish a
connection with a GSM network, an external antenna must be used. Type of antenna
depends on the GSM coverage. In good circumstances (level of received signal is high)
use the antenna supplied in the package. If the range of GSM is low or none, an outdoor
or indoor (for instance in a place where GSM range is sufficient) antenna should be used.
Note: If there is no antenna connected to the SMA connector, connection with a GSM
network is impossible.

10
D-Sub 15-pin connector
The RB900-Pro terminal is equipped with a D-Sub DE15F 15-pin connector to control
the RS232 interface, RS232 AUX/Debug/MCU/Modem (option) or RS485 Modem/MCU
(option).
Table of DB9 pins:
Pin No.
Name
Dir
Description
1
DCD
OUT
Data Carrier Detect. Raised by DCE when modem
synchronized.
2
TXD
IN
Transmit Data (a.k.a TxD, Tx). Sending data from DTE.
3
Boot
Modem boot
4
NC
-
-
5
NC
-
-
6
RXD
OUT
Receive Data (a.k.a RxD, Rx). Arriving data from DCE.
7
DSR
OUT
Data Set Ready. Raised by DCE to indicate ready (optionally
RS485 A)
8
DTR
IN
Data Terminal Ready. Raised by DTE when powered on. In
auto-answer mode raised only when RI arrives from DCE.
9
GND
-
Ground
10
NC
-
-
11
CTS
OUT
Clear To Send. Raised by DCE in response to RTS from DTE.
12
RTS
IN
Request To Send. Raised by DTE when it wishes to send.
Expects CTS from DCE.
13
RI
OUT
Ring Indicator. Set when incoming ring detected - used for auto-
answer application.
14
Reset
IN
Modem reset
15
NC*
-
Not connected in standard version*
* - Analog Input 0, 0-10V as an option

11
Power supply and I/O connector
The power supply and I/O connector is a 4-pin Micro Fit connector for external DC
power supply connection, which can handle voltage from range 5..30 V DC, 2.5 W max.
continuous power and one output (OC) and one Input.
No.
Singal
1
Output 1 (OC)
2
Not connected in standard version*
3
GND
4
V+ DC
* - Opto Input 1 as an option
Attention!
Any attempt to power on the terminal from a DC source outside of the 5 to 30
V range may result in physical destruction of the device.
NOTE: If the internal battery option is present, removing power supply will not turn the
terminal OFF.

12
GPIO connector
The GPIO connector is a 2-pin Micro Fit connector for digital inputs. Pinout:
No.
Singal
1
GND*
2
1-Wire**
* Pin no. 1 on GPIO connector can be used as Opto Input 3 (option).
** Pin no. 2 can be used as Opto Input 2 or Analog Input 1 (option).

13
LED behaviour
The operational status of the RB900-Pro terminal is signalized by external LEDs placed
on the front panel of the modem. The status of all modem LEDs is described in the table
below.
LED
Color
Description
PWR
Green
Power supply
GSM
Yellow
Net status:
Flicker slowly (200ms High/1800ms Low) - Network
searching
Flicker slowly (1800ms High/200ms Low) - Idle
Flicker quickly (125ms High/125ms Low) - Data transfer
is ongoing
DATA
Blue
GSM GPIO 2 –controlled by user with AT command:
AT+QGPIOCFG=10,0,1,0,0
AT+QGPIO=0,10
AT+QGPIO=1,10,0 (LED OFF)
AT+QGPIO=1,10,1 (LED ON)

14
SIM card holder
SIM card holder is placed at the front of the RB900-Pro terminal (as shown below) and
is accessible externally. To insert a SIM card into the holder, press the yellow button,
eject the little drawer, place the SIM card inside and reinsert the drawer into the modem
(you will hear a “click”). To operate the module in a GSM network, it is necessary to insert
a SIM card obtained from the network operator.

15
Product sticker
Product stickers are on the modem and on the product box. A production
sticker includes the following information:
⚫product serial number (IMEI) and model signature
⚫manufacturer address
⚫the CE marking
⚫the 15-digit bar code (box sticker only)
Device sticker Box sticker

16
Basic features and services
Basic features and available services for the RB900-Pro are contained in the table below.
Feature/service
Description
Standard
Supported Bands:
LTE Cat. 1: B1/B3/B5/B7/B8/B20
WCDMA: B1/B5/B8
GSM: Dual-band B3/B8
Physical:
•83 x 53,5 x 25 mm
•Weight 89 g
Speed
LTE: Max. 10Mbps (Downlink) / Max. 5Mbps (Uplink)
WCDMA: Max. 384Kbps (Downlink) / Max. 384Kbps (Uplink)
EDGE: Max. 296Kbps (Downlink) / Max. 236.8Kbps (Uplink)
GPRS: Max 107Kbps (Downlink) / Max. 85.6Kbps (Uplink)
Interfaces
•USB 2.0 with High Speed up to 480Mbps
•RS232 on 15-pin D-Sub female connector
•RS485
•GPIO
•1-Wire (check )
•OneWire (optional)
•GNSS receiver (optional)
•Internal battery (optional)
Connectors
•GSM/LTE SMA-Female
•LTE Diversity SMA-Female (optional)
•GNSS receiver SMA-Female (optional)
SIM Card
•3.0V / 1.8V
•STK 3.1
Sensitivity
•LTE B1: -101.5dBm (10M), LTE B2: -101dBm (10M), LTE B3: -
101.5dBm (10M), LTE B4: -101dBm (10M), LTE B5: -101dBm
(10M), LTE B7: -99.5dBm (10M), LTE B8: -101dBm (10M), LTE
B12: -101dBm (10M), LTE B13: -100dBm (10M), LTE B20: -
102.5dBm (10M), LTE B28: -102dBm (10M),
•WCDMA B1: -110dBm, WCDMA B2: -110dBm, WCDMA B4: -
110dBm, WCDMA B5: -110.5dBm, WCDMA B8: -110.5dBm
•GSM: -109dBm
•DCS: -109dBm
SMS
•MO / MT Text and PDU mode
Power supply
5V –30V DC

17
Using the modem
Setting up the modem
To set the modem up, follow these steps:
•Eject SIM card holder using the yellow button and pull out the drawer.
•Insert your SIM card into the drawer.
•Verify if the SIM card fits in the drawer properly.
•Insert the drawer into the modem. Connect the antenna to the SMA connector
•Optionally, the modem can be connected using RS232 or USB interface
•Plug the power supply cable into the power supply input
•Now the modem is ready to work.
Installing USB drivers
Before you connect the device to the USB interface, you need to install the drivers.
They can be downloaded using the links below:
Windows: setup.exe
Linux: README

18
Checking the communication with the modem
Once the modem is connected you can check RS232 or USB communication between
the RB900-Pro and the PC using any Terminal program. Configuration of the DTE (port
COM) could be as follows:
•Bits per second: 115200 bps,
•Data bits: 8,
•Parity: None,
•Stop bits: 1,
•Flow control: hardware.
Using a communication software such as Hyperterminal, enter the AT and push 'enter'
button. The response of the terminal should be 'OK' displayed in the Hyperterminal
window.
If the connection with the modem cannot be established do the following:
•Check if modem is connected with PC via RS-232 or USB.
•Check the configuration of the COM port.
Examples of AT commands:
•ATE1 enables modem echo function,
•AT+CPIN? shows current status of SIM card
•AT+CPIN=xxxx to enter PIN, where 'xxxx' are digitals
•AT+CSQ to verify received signal strength
•ATD<phone_number>; to initiate a voice call
•ATH to hang up a voice call
For further information about AT commands and their usage, refer to [1].
Disabling and enabling echo function
If echo is not displayed when enteringAT command, that means:
•The local echo function in software (such as Hyperterminal) is disabled
•The echo function of the modem is disabled
To enable echo function of the modem enter the ATE1 command.
In Machine to Machine communication it is recommended to disable echo function (type
ATE0) in order to avoid unnecessary CPU usage.
For further information about AT commands and their usage, refer to [1].

19
Verifying the strength of received signal
RB900-Pro terminal can establish a connection with network if the received signal
strength is sufficiently strong. To verify the signal strength and bit error rate, do the
following:
using software such as Hyperterminal enter AT+CSQ. This command displays the
received signal strength indication <rssi> and channel bit error rate <ber>. The modem
answers as follows:
+CSQ: <rssi>,<ber>
OK
<parameter>
Description
<rssi>
0 through 31 - covers the range of -113 dbm (or less) to -51dbm (or greater)
<ber>
Channel bit error rate (in percent)
0–7 RXQUAL values in the GSM 05.08 table
99 Unknown or not detectable
For further information about AT commands and their usage, refer to [1].
PIN code status
To check the PIN code status enter AT+CPIN? Command.
The table below shows the relevant main responses of the modem:
Answer
Description
+CPIN: SIM PIN
PIN code has not been entered
+CPIN: READY
PIN code has been entered correctly
For further information about AT commands and their usage, refer to [1].

20
Network registration
GSM network registration
To check GSM network registration status enter AT+CREG? into the software (for
instance Hyperterminal). The modem will answer in following format:
+CREG: <n>,<stat>[,<lac>,<ci>]
OK
The following table shows the +CREG parameters:
<parameter>
Description
<n>
0Disables the network registration unsolicited result code.
1Enables the network registration unsolicited result code +CREG: <stat>.
2Enables the network registration and location information in unsolicited
reports and Read command +CREG:<stat>[,<lac>,<ci>].
The default is 0.
<stat>
0Not registered, and the ME is not currently searching for a new operator to which to
register.
1Registered, home network.
2Not registered, but the ME is currently searching for a new operator to which to register.
3Registration denied.*
4Unknown.
5Registered, roaming.
<lac>
Two-byte location area code in hexadecimal format
<ci>
Two-byte cell ID in hexadecimal format.
*To manage connecting to a network, the SIM card inserted into the modem must be valid.
For further information about AT commands and their usage, refer to [1].
Table of contents
Other Teleorigin Modem manuals
Popular Modem manuals by other brands
IGI Mobile
IGI Mobile GWU-300 user manual
Microflex
Microflex MicroLink-HM 101-0035 Installation Operation & Specifications Manual

Digicel
Digicel EX - 250 quick start guide
Zte
Zte AC8720 user manual

Yahoo!
Yahoo! BB Trio Modem 26M Setup guide
Telenetics
Telenetics MIU Dial or Leased Line modem with RS-485 Installation & operation manual


