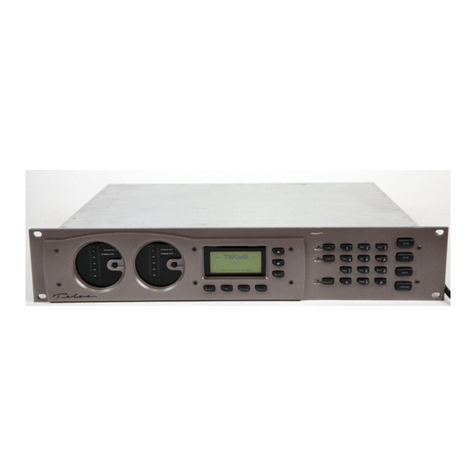
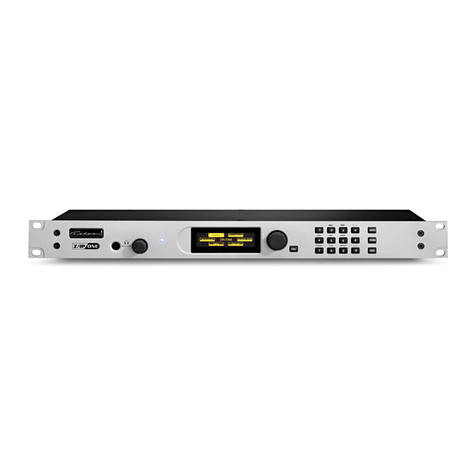
Telos Hx1 Instruction Manual

QUICK-START INSTALLATION GUIDE
THE FOLLOWING ITEMS ARE REQUIRED FOR INSTALLATION:
Telos Hx1 / Hx2
Digital Hybrid Telephone Interface
We have made these Telos Hybrid Systems easy to set up and configure. This quick-start guide will take you
through the basic steps to configure your new Hx1 or Hx2 to start delivering clean, clear caller audio to your show
in no time. Before we get started, let’s make sure you have what you need.
THANK YOU FOR PURCHASING THE TELOS HX1 / HX2
DIGITAL HYBRID TELEPHONE INTERFACE.
• An available 1RU 19 inch rack mount enclosure slot
• POTS Phone Set
• Regular analog POTS line from the Telco
• Telos Hx1 or Hx2 Digital Hybrid
Telephone Interface
• AC Power Cable
• Rack Mount Hardware
• RJ-11 cable for POTS Line

INITIAL SET UP
1. Install your Hx1 / Hx2 in a 1 RU high space on a standard 19” rack.
2. Connect your POTS line to the “LINE” RJ-11 jack (A) with a supplied RJ-11 cable.
3. Connect your POTS Phone to the “PHONE” RJ-11 jack (B) with an RJ-11 cable.
4. Hx2 users: To establish connections for HYBRID #2, connect your POTS line to the “LINE” RJ-11 jack
(C) and connect your POTS Phone to the “PHONE” RJ-11 jack (D) for HYBRID #2 with an RJ-11 cable.
PHYSICAL CONNECTIONS
CONTINUE TO AUDIO CONFIGURATION
The initial connections for your Hx1 / Hx2 are complete and ready to
be configured for audio input. Continue to the "Audio Configuration"
instructions.
B A
B DA C

AUDIO CONFIGURATION
ESTABLISH A MIX MINUS OUTPUT ON YOUR CONSOLE
1. A mix minus is the mix of all the sources you want the caller to hear, minus the caller. The caller can
already hear themselves on the phone (side-tone), so it is not necessary and undesirable to send the
caller’s audio back to the caller.
2. Based on your model, proceed to the appropriate steps to set up either your Hx1 or Hx2.
HX1 AUDIO CONFIGURATION
a. Connect one cable to the SEND IN XLR jack (E). Connect the other end of the cable to the phone
bus line output of your console.
b. Connect one cable to the RCV OUT XLR jack (F). Connect the other end to the line input for the
channel designated for callers on your console.
to phone bus line output
of your console
to line input for the channel designated
for callers on your console
E F
Telos recommends connecting your Hx1 / Hx2 to professional-grade audio equipment with balanced audio
connections. If your Hx1 / Hx2 must connect to semi-pro "unbalanced" audio inputs or outputs, we recommend
using a two-way, external balanced / unbalanced line level converter. Common models include the "Matchbox",
"ProMatch", and "CleanBox Pro", as well as other model names.
MAKING YOUR OWN CABLES?
If it is necessary to make your own cables to patch the system into your console,
please refer to the illustration below for proper configuration.

AUDIO CONFIGURATION (CONT.)
HX2 AUDIO CONFIGURATION
a. Connect one cable to the SEND IN #1 XLR jack (E). Connect the other end of the cable to the
phone bus line output of your console.
b. Connect one cable to the RCV OUT #1 XLR jack (F). Connect the other end to the line input for the
channel designated for callers on your console.
c. Connect one cable to the SEND IN #2 XLR jack (G). Connect the other end of the cable to the
phone bus line output of your console.
d. Connect one cable to the RCV OUT #2 XLR jack (H). Connect the other end to the line input for the
channel designated for callers on your console.
Hx2 TIP: If only one mix minus can be sent from your console, don’t fret! You can set up an
internal mix minus by setting the OPTIONS DIP #6 Switch on the rear panel to the ON position.
When this is done, the signal at SEND IN #1 will be sent to both callers and each callers’ audio will
be sent to the opposite hybrid for conferencing.
to phone bus line output
of your console
E
to line input for the
channel designated for
callers on your console
F
CONTINUE TO DIP SWITCH CONFIGURATION
The audio configurations for your Hx1 / Hx2 are complete. Continue to the
"DIP Switch Configuration" instructions.
G
to phone bus line output
of your console
H
to line input for the
channel designated for
callers on your console

DIP SWITCH CONFIGURATION
1. NOTE: If you are using the Hx1 or Hx2 outside of the United States of America, please refer to the "Country
Specific Configuration Settings" Section in the manual for instructions and tables for setting the internal
DIP SWITCHES to the proper Telco Country setting.
2. On the rear panel of the Hx1 and Hx2 hybrid are two banks of DIP switches (I) labeled SETTINGS and
OPTIONS. The SETTINGS bank of DIP switches (SW1 & SW2) allows you to control the operational levels of
various signal processing stages of the hybrid unit.
3. The illustration (I) depicts the factory default setting for the Hx1 and Hx2. Please refer to the product
manual for full descriptions of settings and functions.
4. If no special settings are required, make sure DIP switches are in the default position.
REAR PANEL DIP SWITCH CONTROL
CONTINUE TO TEST YOUR CONNECTION
The Hx1 / Hx2 is configured and ready to make or receive
calls. Continue to the “Test Your Connection” instructions.
I
INSTALLATION HELP
For more details on other configuration options, or for additional
information about configuring an Hx1 or Hx2, please access the full
manual online at https://www.telosalliance.com/Telos/HX.
If you have more questions, call the Telos Alliance 24/7 Support Team at
happy to help you out.

PERFORM AN OPERATIONAL TEST
1. Connect the Hx1 or Hx2 to AC Mains (J).
2. The unit will complete a self test.
3. A dot should be present on the front of the display (K) if the phone line is properly connected. If a minus sign
is displayed, the unit does not detect the line voltage and your wiring should be checked. If you are testing an
Hx2 with two POTS lines connected, make sure a dot is visible on both displays.
4. Press the Hybrid ON button (L). A dial tone should be present on the hybrid’s output and RCV bargraph meter
(M). If you are testing an Hx2 with two POTS lines connected, this step should be performed for each line
independently.
5. Verify correct mix minus operation at this point by noting that the RCV bargraph (M) shows the dial tone at
a nominal level, and that the SND bargraph (N) shows only the microphone or audio present on the device
feeding the Hx SEND IN. You should only see dial tone on the RCV meter. If you see dial tone on both SEND
and RCV meters, check your mix minus.
6. Press the Hybrid OFF button (O) to end the test.
L
O
K
N M
Phone line is
properly connected
Phone line is NOT
properly connected
YOUR SETUP IS COMPLETE!
That’s it! You are now ready to experience the Telos Hx1/
Hx2 for optimal caller audio quality.
1. To make an outgoing call, make sure that the hybrid is off (dot on the display (K)). Using the POTS phone
attached to the PHONE jack, seize the line, wait for a dial tone, and dial the desired number. When you are
ready to place the caller on the hybrid, press the ON button (L), wait for the hybrid to take the caller and hang
up the POTS phone.
2. To screen an incoming call, simply answer the call on the POTS phone attached to the PHONE jack on the rear
of the Hx. When you are ready to place the caller on the hybrid, press the ON button (L), wait for the hybrid
to take the call, and hang up the POTS phone.
USING THE ATTACHED PHONE
TEST YOUR CONNECTION

This Page Intentionally Left Blank

1241 Superior Ave. • Cleveland, Ohio, 44114, USA • +1.216.241.7225 • TelosAlliance.com
© 2021 Telos Alliance. All Rights Reserved. C21/1/17016 • 1490-00166-002 — QUICK START GUIDE: Hx1/Hx2
Subscribe to our Newsletter
Weekly updates on all things broadcast via email
TelosAlliance.com/directcurrent
Social Media
Facebook: /TelosAlliance
Twitter: @TelosAlliance
LinkedIn: /TelosAlliance
YouTube: TelosAllianceTV
Product Catalog
TelosAlliance.com/mobile
24/7 Tech Support
Radio: +1 (216) 622-0247
TV: +1 (717) 735-3611
Radio: [email protected]
TV: [email protected]om
QUICK LINKS
QUICK-START INSTALLATION GUIDE
Other manuals for Hx1
1
This manual suits for next models
1
Table of contents
Other Telos Telephone System manuals
Popular Telephone System manuals by other brands

Panasonic
Panasonic KX-TS105W operating instructions

Interalia
Interalia DMU operating manual

Panasonic
Panasonic KX-TDE200AL Brochure & specs

Lucent Technologies
Lucent Technologies MERLIN LEGEND Release 5.0 System programming and maintenance

NEC
NEC Electra Elite DSS user guide

Panasonic
Panasonic KX-TD816JT Programming guide