3
OPERATION
• Before using the soldering iron for the rst time, wet the cleaning sponge and
place it in the iron holder tray. Keep it damp during use.
WARNING: switch off the mains power before connecting or disconnecting the iron or
the control station may be damaged.
• Connect the soldering iron to the control station by inserting the connector and
tightening the locking ring nger tight.
• Place the iron in the holder and turn on the mains power.
Setting the temperature:
• The digital display will initially
display the current set
temperature (the value from the
last usage) for three seconds.
• After a few seconds it will display the actual temperature in °C or °F.
• Pressing and holding the “up” or “down” button, you can quickly either increase or
decrease the temperature.
• The display screen shows the set
temperature value followed by
the actual tip temperature.
Temperature unit exchange:
• In the power-off condition, press and hold the “#” button, then turn on the station.
The temperature unit will change between “°C” and “°F” and will store the setting
automatically.
Storing and recalling 3 preset temperatures:
• The three preset buttons can be used to store quick
access temperatures for instant recall.
• Press and hold the “#” key followed by buttons 1, 2 or 3,
you can store the current temperature into memory.
• Press buttons 1, 2 or 3 once to use the set temperature
stored as displayed at the bottom of the LCD screen.
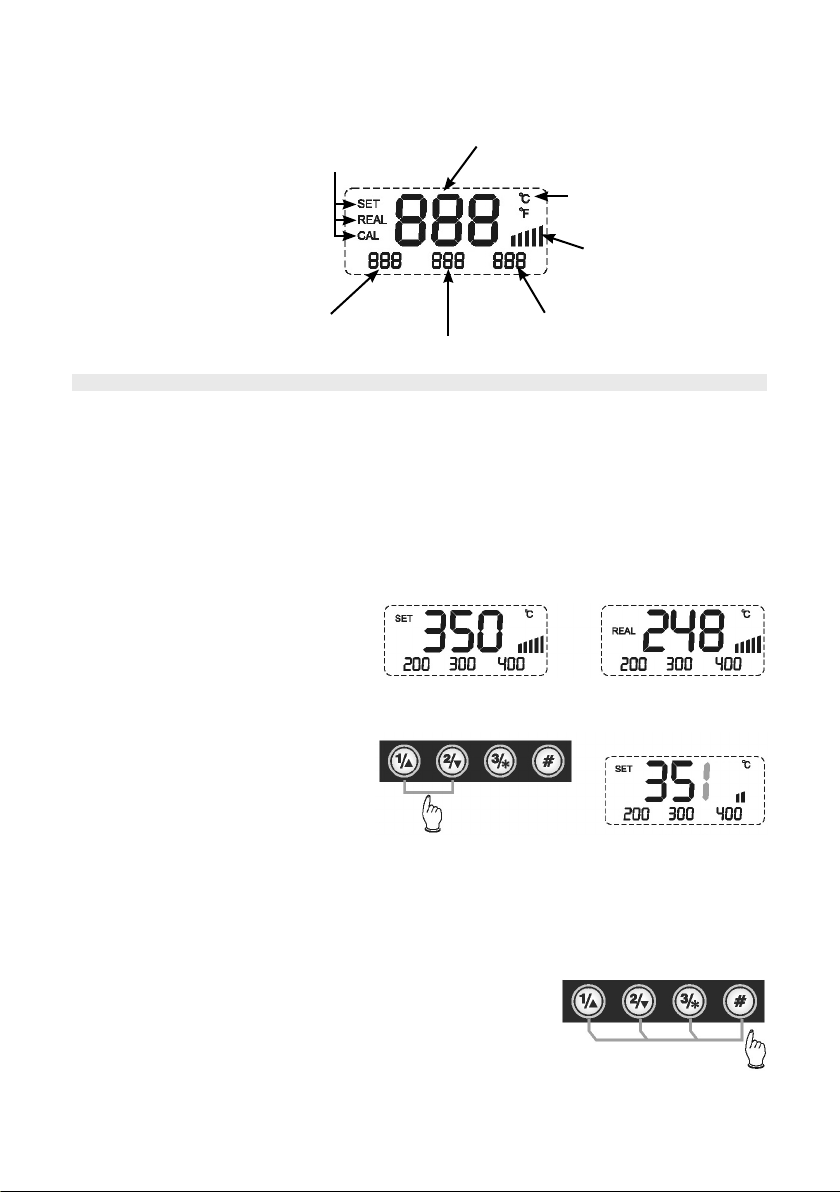
Display of status:
SET: Set temperature
REAL: Real temperature
CAL: Calibration temperature
Setting value and temperature display
Temperature unit
Heater ON indicator
Memory temperature 3
Memory temperature 2
Memory temperature 1