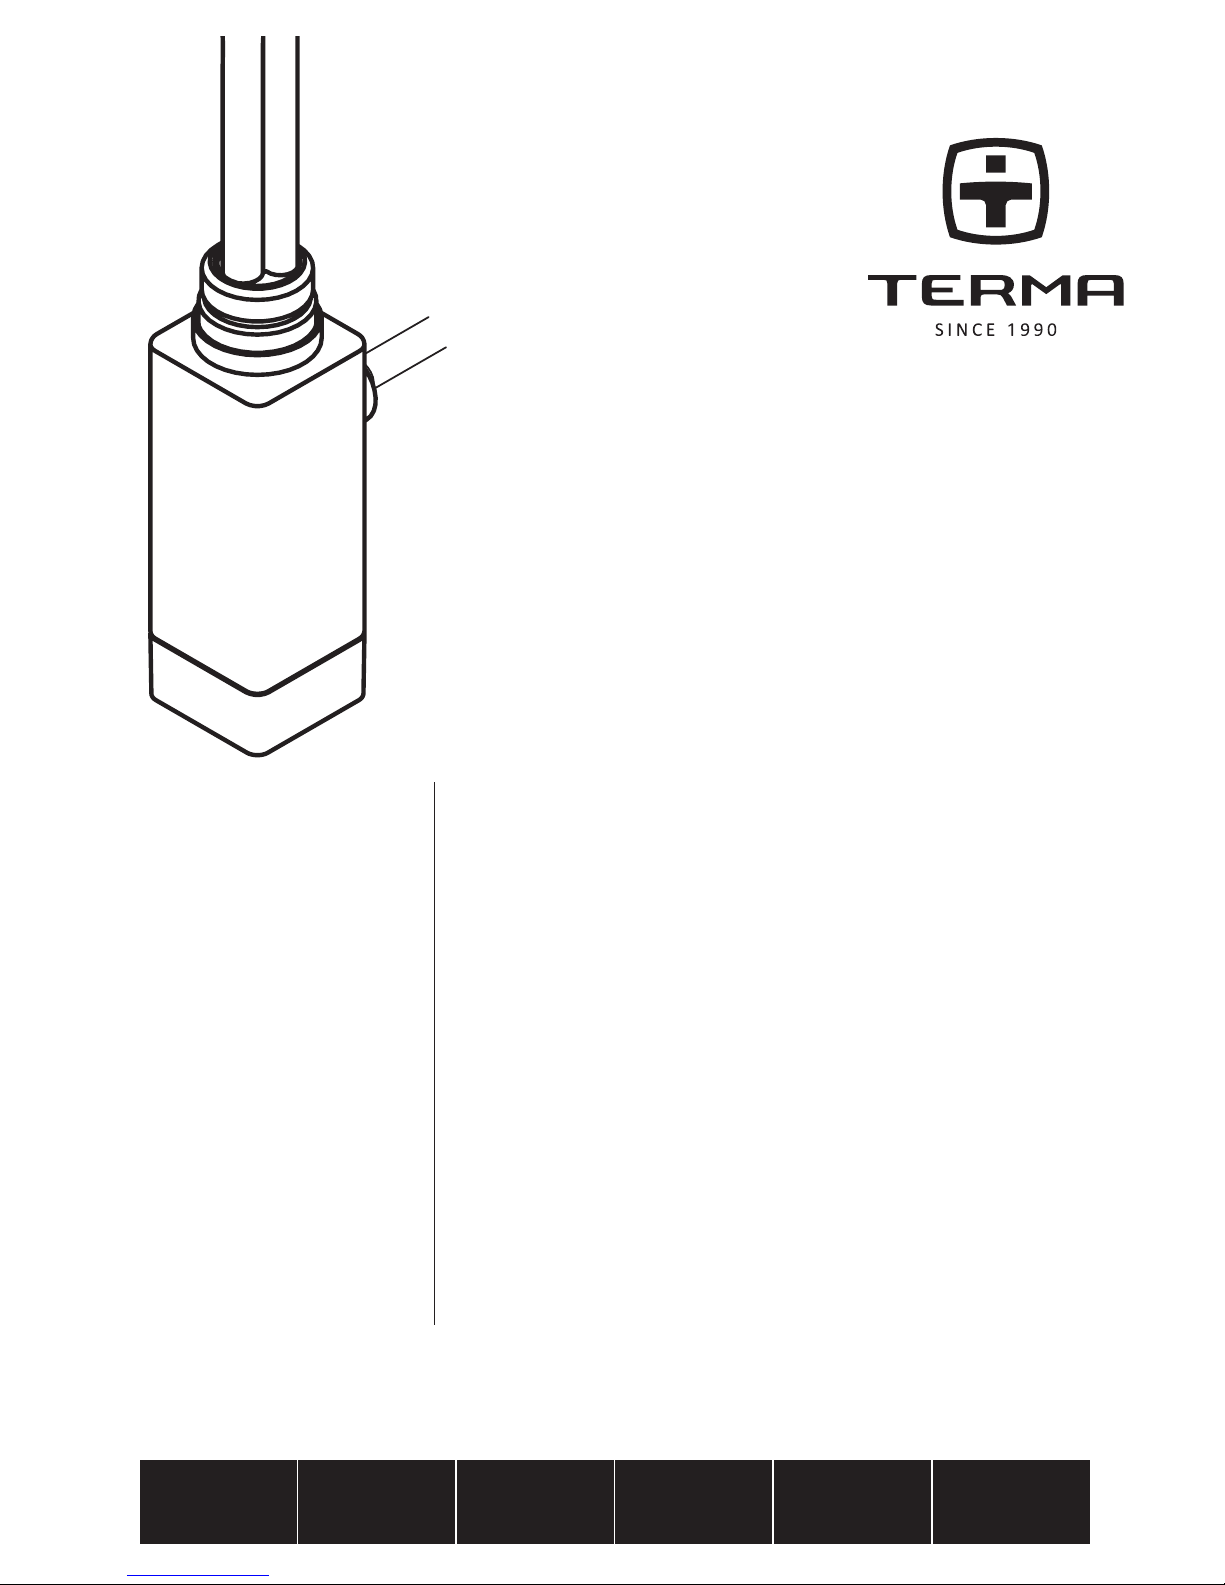
TERMA ONE User manual

EN ITFRDE RUPL
30 39
30
30
User Manual
Heang Element and Electric Radiator
Instrukcja użytkowania
Grzałka i grzejnik elektryczny
Betriebsanleitung
Heizpatrone und Elektroheizkörper
Mode d’emploi
Kit résistances et radiateur électrique série ONE
Manuale d’uso
Elemento elerico riscaldante e radiatore elerico serie ONE
Инструкция по применению
Нагревательный элемент и электрический радиатор
ONE

2User manual — ONE

3
EN
Electric radiator
Guide to safe installaon
1. Do not install the radiator over or under
an electrical socket point.
2. Your electric heater should be lled with
a carefully measured amount of liquid. In
the case of loss of heang medium, or in
any other case which demands its supple-
mentaon, contact your supplier.
3. If the device is not equipped with an exter-
nal temperature controller do not use the
device in a small room while unsupervised
disabled or incapacitated individuals are
inside it. Only use the device if those indi-
viduals are under constant supervision.

4User manual — ONE
4. Install the electric dryer so that the lowest tube is at
least 600 mm above the oor.
5. The electric installaon to which the heater is perma-
nently connected must have the right current dieren-
al and overcurrent relay (R.C.D.) of 30 mA. An Omni-
pole cut-out is required for disconnecng the device on
all poles, via joints posioned at least 3 mm apart.
6. The device is suitable for connecon in zone 3 of a bath-
room, as dened by applicable regulaons, unless oth-
erwise specied by regulaons applicable in the coun-
try of installaon and use.
Aenon: the device must be installed out of reach of
persons in the bathtub, shower or pool.

5
EN
7. The device should only be installed by a qualied installer in accordance with the appli-
cable regulaons regarding safety and all other regulaons.
8. All installaons to which the device is connected should comply with regulaons appli-
cable in the country of installaon and use.
9. Extension leads or electric plug adapters should not be used in order to supply pow-
er to the heater.
10. The device is intended for home use only. Use it solely as described in the manual.
11. Fing and Installaon of the device must be carried out in accordance with all local
regulaons for electrical safety, including installaon within permissible locaons only.
Observe bathroom electrical zone regulaons.
Zone 1
Zone 2
Zone 3

6User manual — ONE
12. Ensure that the heater has been installed on a wall in accordance with its installaon
manual.
13. Please forward this instrucon manual to the end user.
…addionally, when installing (by yourself) the heang element
in a radiator.
14. Ensure that the power cord does not touch the hot
parts of the heang element or radiator.
15. The heang element must be fully submerged in the heang liquid during its operaon.
16. It is permied to test the heang element in the open air (but never inside the empty
radiator) for a period not longer than 3 seconds.
CAUTION: The heang element and radiator can heat up to high temperatures. Handle with
cauon, do not touch the hot device.
17. Never turn the heang element on in an empty radiator!
18. Before installing or removing the device, make sure it is disconnected from the pow-
er source.
19. Do not open the device — any interference with internal components will invalidate
the warranty.
20. The heang element’s power output must not exceed the radiators power output for
the parameters 75/65/20° C.

7
EN
Safety requirements — use
21. Note: Some parts of the radiator can be very hot and
can cause burns. Pay special aenon to the presence
of children or people with disabilies.
22. The Electric radiator and the heang element are not
a toy. Children under the age of 3 should not be al-
lowed within close proximity of the device without the
supervision of an adult. Children aged 3 to 8 should
only be allowed to operate the heater (except the
cleaning) when it has been properly installed and con-
nected. The child must be under adult supervision or
have been trained to safely operate the device while
understanding the risks.
23. Children above the age of 8 and people with disabili-
es are allowed to operate the device. But they must
be under adult supervision or have been trained to
safely operate the device while understanding the
risks.
24. If the device is used as a clothes and towel dryer, ensure
that the fabrics drying on it have only been washed in
water, avoiding contact with any harsh chemicals.

8User manual — ONE
25. If the power cord is damaged the device should not be
used. Unplug the device and contact the manufactur-
er or distributor.
26. Regularly check if the radiator is lled with a liquid. Regularly check the device for dam-
age to ensure it is safe to use.
27. Do not allow ooding into the heang element casing.
28. The device must be disconnected from the mains during cleaning and maintenance.
29. The pressure in the radiator should not exceed 1MPa (10 bar). Ensure that an air cush-
ion is preserved in electric radiators. In central heang systems, leave one or both
valves open to prevent pressure build up due to the thermal expansion of the liquid.
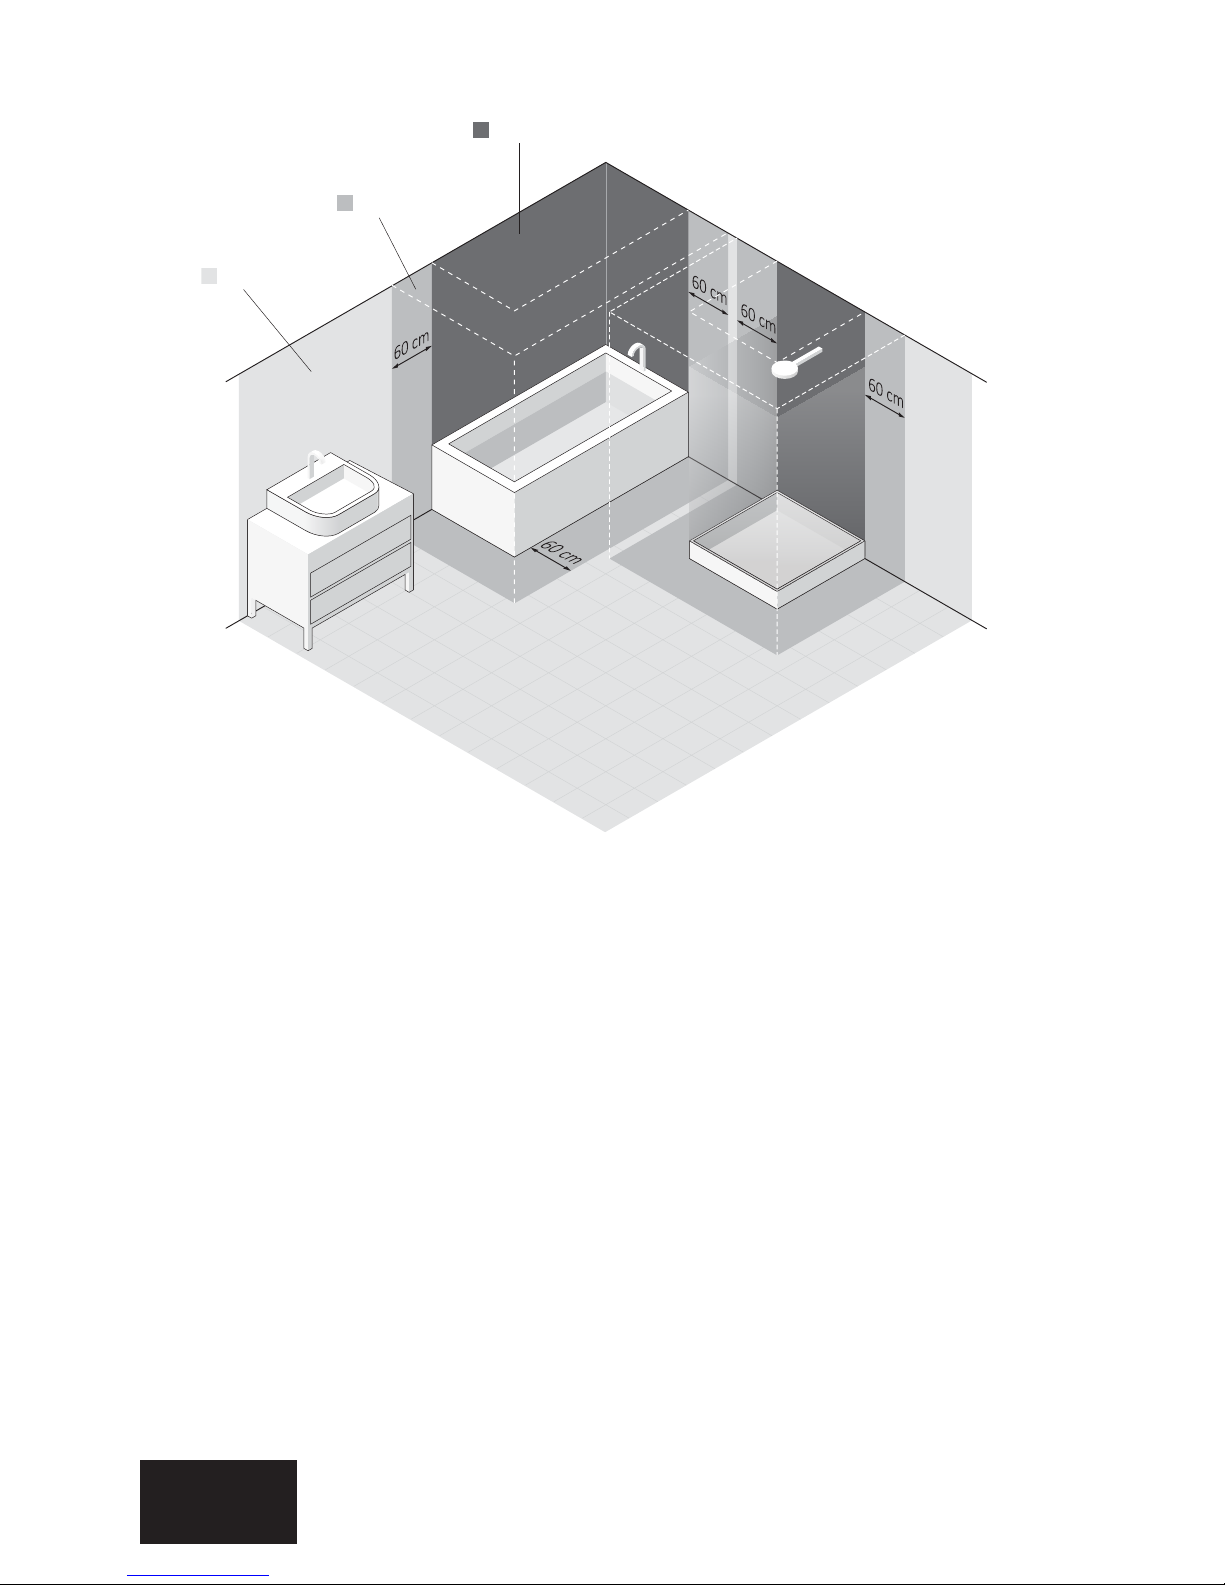
Installaon or disassembly
Detailed informaon on all possible ways of the device installaon or disassembly, is avail-
able from the manufacturer or importer of the item (see footer at the boom of the man-
ual). Below are the most important requirements and guidelines which should be strictly
followed in order to ensure a long term, unfailing operaon of device.
Before installaon
1. Read chapter: "Guide to safe installaon".
2. If you are installing the “ONE electric radiator” go straight to point 10.
3. The device is intended for operaon in a vercal posion with heang element turned
upwards.
4. Always use the correct radiator approved heang mediums only (water, water with ad-
dion of radiator approved an-freeze agent only, selected types of oil).
5. Do not turn the device on if not immersed in water or other liquid as it could cause dam-
age to thermal fuse and will not be liable for claim under warranty.

9
EN
6. Ensure all necessary safety measures in order to avoid excessive pressure inside the ra-
diator (allow the right space for airbag or leave at least one of the central heang valves
open).
7. Do not ll the radiator with liquids of temperature higher than 65° C.
8. Do not install the device in central heang systems where temperature of liquid inside
the system may exceed 82° C.
9. Make sure that connecon "radiator — heater" is ght prior to lling the radiator with
heang liquid (does not concern devices preinstalled at the manufacturer’s or heater
versions built-in inside the radiator.)
10. When connecng the device to installaon, follow below instrucons:
a. Brown wire — connecon to live circuit (L)
b. Blue wire — connecon to neutral circuit (N)
c. Yellow & green wire — connecon to earth (PE).
11. For detailed installaon hints – see the last pages of this manual.
Intended use
The ONE is an electric heang element device intended for installaon inside water towel
radiators (electric only or connected to the central heang systems). The ONE electric ra-
diator or any radiator with the ONE heang element installed is designed for the purpose
of drying clothes and / or towels or heang rooms.

10 User manual — ONE
Technical informaon
Electric data: 230 V / 50 Hz
Insulaon class: Class I
Casing protecon class: IPx5
Heang output: 120, 200, 300, 400, 600, 800, 1000 [W]
Connecon types: PW — straight cable with plug (type Z)
SW — spiral cable with plug (type Z)
PB — straight cable without plug (permanent connecon
to electric installaon – see “Guide to safe installaon“ p.5)
Radiator connecon: thread G ½"
Funcons and use
Heater One has two radiator temperature sengs (45° C and 60° C) as well as automac
switch-o aer 2 hours (TIMER). The on/o buon is also used for the purpose of chang-
ing sengs, while dierent colours of the LED diode indicate current seng. The device
has a built-in IR receiver for wireless communicaon with an external controller which pro-
vides addional funcons to the device.
power supply
cable
on/o buon
IR receiver
LED diode

11
EN
Turning the device on and seng heang
temperature
The following sengs are acvated by pressing of the on/o buon in the following order:
1. The device is turned on and automacally set to 45° C;
2. The heater switches to 60° C;
3. The heater is turned o. Current seng is indicated by a LED diode:
• Heater is o — diode is not on.
• Heater is on seng 1 (45° C) — yellow light.
• Heater is on seng 2 (60° C) — red light.
Device seng is remembered also aer electricity cut-o.
Automac switch-o (mer)
Pressing and holding of the on/o buon acvates the TIMER funcon — the heater works
for 2 hours on seng 60° C, aer which it switches o. Acve TIMER is indicated by pulsat-
ing diode. Regardless of whether the heater is currently on or o the TIMER can be acvat-
ed by pressing and holding the buon. A quick press of the buon then turns the device o.
An-freeze funcon
When the device is o but sll has a live feed, and the temperature inside the room
falls down below 6° C the device will automacally turn on and start heang. This funcon
will prevent the heang medium inside the radiator from freezing. When this funcon is
acve every 4 seconds a ashing orange LED diode is visible.

12 User manual — ONE
Remote control mode (wireless communicaon)
If there is a dedicated IR controller inside the room, which sends signals to the heater, then,
the rst signal correctly received by the heater, automacally switches the device into re-
ceiving mode. When in this mode, the device will heat with the heat output dictated by
the external controller while sll controlling temperature not to exceed approximately 60°
C. Remote mode is indicated by the diode shining with constant blue light. Every correctly
received signal from the external controller is indicated by short ash of the diode. If there
is a break in communicaon (the heater does not receive a signal from the external con-
troller for 30 minutes), the heater will switch to a signal-awaing mode. The blue diode will
start pulsang steadily and the device will automacally turn o with the anfreeze func-
on sll acve unl the connecon is reached again.
TIMER funcon can be used also in remote mode (in such a case, aer the mer operaon
has seized, the heater will not turn o but it will return to the remote control operaon).
Malfuncon alerts
The device constantly monitors all parameters which may indicate its damage or any ad-
verse phenomena, and automacally acvates necessary protecve procedures. Those are,
amongst others: protecon against operaon in "dry condions", monitoring of controlling
and measuring systems, monitoring an “open window” or “free ow of water in a central
heang system”. All malfuncon alerts are indicated by a ashing white diode.
Maintenance
• Always disconnect the device from electricity before you start cleaning the radiator.
• Recurrently check level of the heang medium inside the radiator.
• Clean the item with a dry or damp cloth with a small amount of detergent without any
solvents or abrasive agents.

13
EN
Before disassembly
1. Disconnect the device from electric circuit and ensure that the radiator has cooled down
before you start disassembling the radiator.
2. Be careful — electric radiator lled with heang liquid may be very heavy. Ensure all nec-
essary safety measures.
3. Prior to disassembly make sure that water inside both the radiator and installaon does
not cause any damage (close the valves, empty the radiator, etc. if required).
Ulizaon
This product should not be disposed of as general waste but should be brought to the ap-
propriate collecon point for recycling of electric and electronic devices. This informaon
is present on the product, user manual and on packaging. Informaon on the appropriate
point for used devices can be provided by your local authority or vendor of the product.
Thank You for your eort towards environment protecon.

14 User manual — ONE
Troubleshoong
Symptom Possible cause Adviced acon
LED diode is not on,
heang element does
not heat
Damaged
electronics
contact Your local Distributor
LED diode pulsing:
WHITE & RED or
WHITE & YELLOW
The radiator is
not warming up
quickly
1. Check and conrm that the heang element's output
is not too low for the size of radiator.
2. (Dual Fuel only) - check the ow of the heated agent
is it owing back into the central heang system, if this
is the case you will need to close one of the valves (ow
or return). In the case of a 'side connecon' you will
need to close the upper valve. If the problem connues
contact Your dealer.
LED
diode
pulsing
WHITE
(mal-
funcon
alert)
TWO
ashes
Low water level
(work in dry con-
dions)
1. May happen once or twice aer switching on - this is
not a malfuncon;
2. If lasts longer - check the lever of heang agent level
THREE
ashes
Overheang Check and reduce the water temperature in the central
heang system-must not exceed 82 deg
Check and conrm that the heang element's output
does not exceed the recommended output of your
radiator. Turn the heang element o with the ON/
OFF buon and wait for 20 min. If the radiator is sll
hot, disconnect it from its electrical supply - contact
the Distributor.
FOUR
ashes
Temperature
sensor damaged
Contact Your local Distributor
FIVE
ashes
The radiator is
not warming up
quickly
1. Check and conrm that the heang element's output
is not too low for the size of radiator.
2. (Dual Fuel only) - check the ow of the heated agent,
is it owing back into the central heang system, if this
is the case you will need to close one of the valves (ow
or return). In the case of a 'side connecon' you will
need to close the upper valve. If the problem connues
contact Your dealer.

15
EN
Symptom Possible cause Adviced acon
BLUE diode does not light (lack
of IR communicaon)
Problem in
the external
programmer
Check the baeries
Place the programmer close to the heang
element and change the temperature seng
- if the devices communicate correctly, LED
diode lights blue and blinks aer each order
correctly received.
Problem with the
heang element
contact the Distributor
YELLOW and RED diode light but
radiator sll cool
Thermal fuse
or electronics
damaged
contact the Distributor
BLUE diode lights but radiator
sll cool
Room tempera-
ture is equal or
higher than the
one set in exter-
nal programmer
Everything is working. To make the heang
element heat you may turn on the ON mode
in external programmer or the Dryer mode in
the element.
(Note: Turning the controller 'OFF' will not ter-
minate the connecon between the heang
element and the controller, the only way to
do this is to remove the baeries from the
controller or move it to another room)
BLUE diode pulsing The heang
element is no
longer communi-
cang with the IR
controller
Is the controller sll in 'line of site' of the
heang element or is it being blocked by an
object or has it been placed in another room,
c l e a r t h e o b s t r u c o n o r m o v e t h e c o n t r o l l e r .
Check the baeries. If not and the problem sll
exists - contact the Distributor
Construcon of the device as well as physical characteriscs of dierent heang mediums,
may cause an uneven temperature distribuon in the radiator, which may cause that bot-
tom pipes as well as the the highest one can be cold. This type of behavior is absolutely
normal and is not an eect of the heater malfuncon.


EN ITFRDE RUPL
Instrukcja
użytkowania
Grzałka elektryczna
30 39
30
30
ONE

18 Instrukcja użytkowania — ONE

19
PL
Grzejnik elektryczny
Wymagania bezpieczeństwa -
instalacja
1. Nie instaluj grzejnika bezpośrednio pod
gniazdkiem elektrycznym.
2. Grzejnik elektryczny powinien być wypeł-
niony dokładnie odmierzoną ilością cieczy.
W przypadku stwierdzenia ubytku czynnika
grzewczego oraz w każdym innym wyma-
gającym jego uzupełnienia skontaktuj się ze
sprzedawcą.
3. Jeśli urządzenie nie jest wyposażone w re-
gulator temperatury pomieszczenia, to nie
używaj go w małych pomieszczeniach, gdy
znajdują się w nich osoby niezdolne do sa-
modzielnego opuszczenia pomieszczenia,
chyba że jest zapewniony stały nadzór.

20 Instrukcja użytkowania — ONE
4. Suszarka elektryczna do ubrań lub ręczników powinna
być zainstalowana tak, aby najniższa rurka znajdowała
się co najmniej 600 mm nad podłogą.
5. Przy podłączeniu urządzenia do instalacji elektrycznej
na stałe należy zapewnić, aby obwód, do którego pod-
łączone jest urządzenie, posiadał właściwy wyłącz-
nik nadmiarowo-prądowy oraz różnicowo-prądowy
(R.C.D.) o czułości 30 mA. Obowiązkowy jest również
wyłącznik umożliwiający rozłączenie urządzenia na
wszystkich biegunach za pomocą styków o odstępie 3
mm.
6. W łazience, urządzenie może być zainstalowane wy-
łącznie w stree 3, zdeniowanej przez właściwe prze-
pisy, chyba, że odrębne regulacje stanowią inaczej.
UWAGA: Grzejnik musi znajdować się poza zasięgiem
osoby korzystającej z wanny, brodzika lub basenu.
Other manuals for ONE
4
Table of contents
Languages:
Other TERMA Heater manuals

TERMA
TERMA VOLTAN 1kW User manual

TERMA
TERMA KTX 1 User manual

TERMA
TERMA ROLO User manual

TERMA
TERMA SIM User manual

TERMA
TERMA Alex ONE User manual

TERMA
TERMA ONE User manual

TERMA
TERMA SIS User manual

TERMA
TERMA SKT Series User manual

TERMA
TERMA Ecostrad VeeSmart User manual

TERMA
TERMA Jade 1149 x 400 mm User manual
Popular Heater manuals by other brands

Neomitis
Neomitis Anthemys + EcoSens2 White Installation and operating instructions

EUROM
EUROM Swift 1300 instruction manual

PINK
PINK Triple Roll-on Heater Professional Edition quick start guide

Fagor
Fagor CZ-120 Instructions for use

Zehnder Rittling
Zehnder Rittling Fanvector FV-04 Installation & operation manual

Inforesight
Inforesight Ziro Series Reference manual