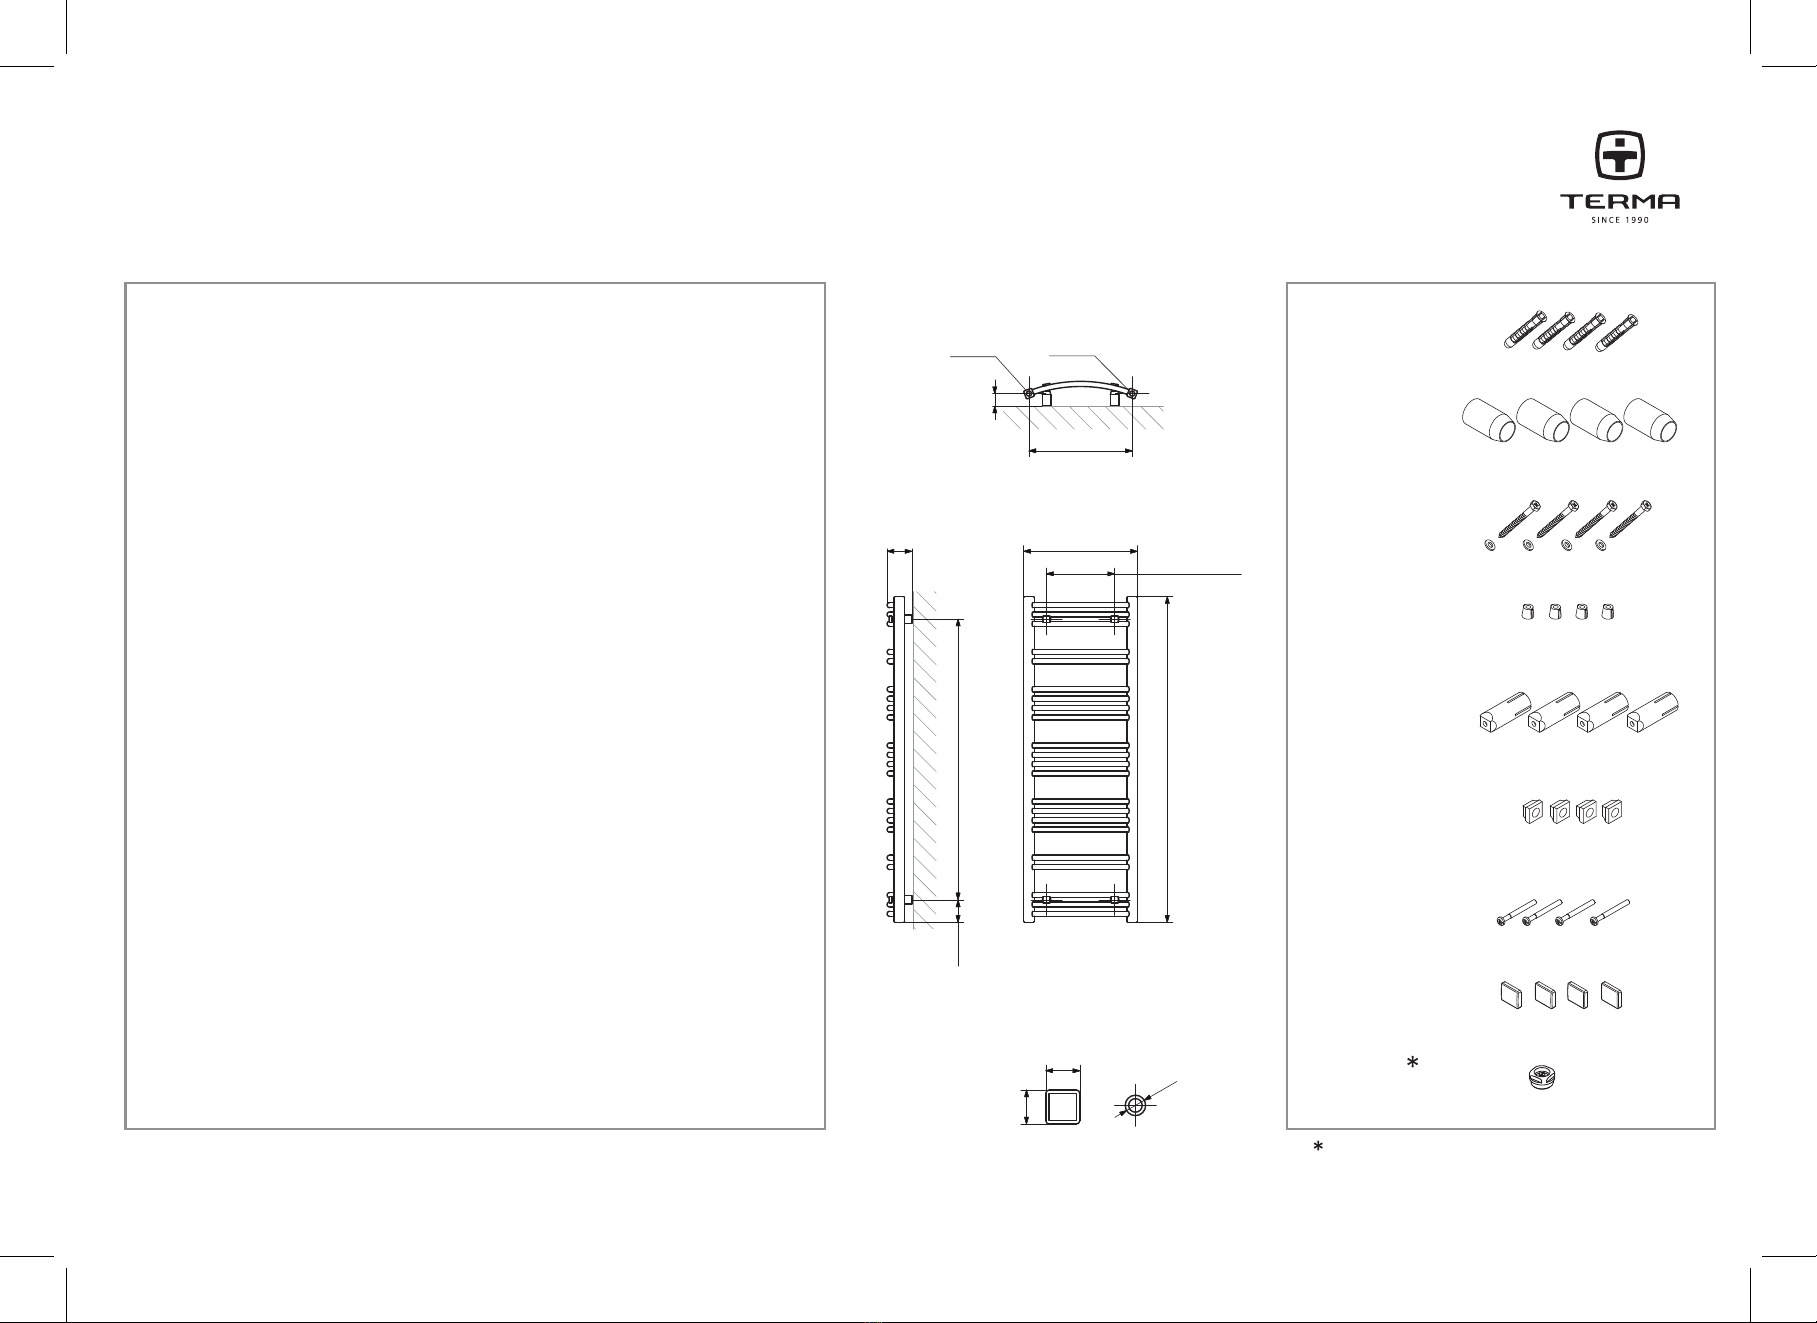
Installaon guide Jade 1149 x 400 mm
5 (F)
18
30
30
400 (B)
1149 (A)
79,
87 ÷ 95
240 (D)
990 (E)
364
44
÷ 52
G1/2" G1/2"
pipe centres
distance
from the wall
vercal brackeng distance
horizontal brackeng
distance
Refers to water and dual fuel version
Fixing kit content
rawl plug
mounng
bracket - 1
wall fixing
screw +
washer
conical nut
mounng
bracket - 2
mounng
bracket - 3
fixing screw
cap
air vent
(1)
(2)
(3)
(4)
(5)
(6)
(7)
(8)
Please read the instrucons in full before starng to fit your radiator.
• Please check that all parts listed are present before starng installaon.
• Valves are not provided, please make sure that you have them before you start.
This product requires standard 1/2" radiator valves.
• Before drilling holes for the brackets please check that there are no hidden
wires or pipes.
• The plugs supplied are for hard walls masonry only. Please make sure you are
using the correct plug for your wall.
• Terma radiators are designed for closed heang systems.
• The radiator should be fied at least 100 mm from the floor to
maximise heat efficiency.
• Nong the distances between bracket centres, mark out the posion of the
brackets on the wall.
• Drill holes to approximately 80 mm depth using a 10 mm drill bit and insert rawl
plugs (1). Using connecng screw with a washer (2) aach mounng bracket-1
(3).
•Using Mounng bracket - 2 (5) and conical nut (4) on the inside and mounng
bracket - 3 (6) and fixing screw on the outside fix the brackets to the radiator.
• Guide all mounng brackets-2 (5) into mounng brackets-1 (2)
and fix the radiator ghtening the fixing screws.
• Place caps onto mounng brackets - 3
• Connect the water flow using appropriate 1/2" BSP valves. Follow valves
manufacture guidelines for correct installaion.
• Fill the radiator and purge any trapped air via the bleed valve at the top of the
radiator.
• Wipe your radiator down using a clean damp cloth.
Never use scourers or abrasives.
For all installaon and warranty enquiries please
contact Crimson Bear Customer Support on
01535 636256


