FF-MM-295-REV - 02
Page 9
Operation and Maintenance Guide DP 12 Metal Series
er (7A)& PTFE diaphragm (14A).
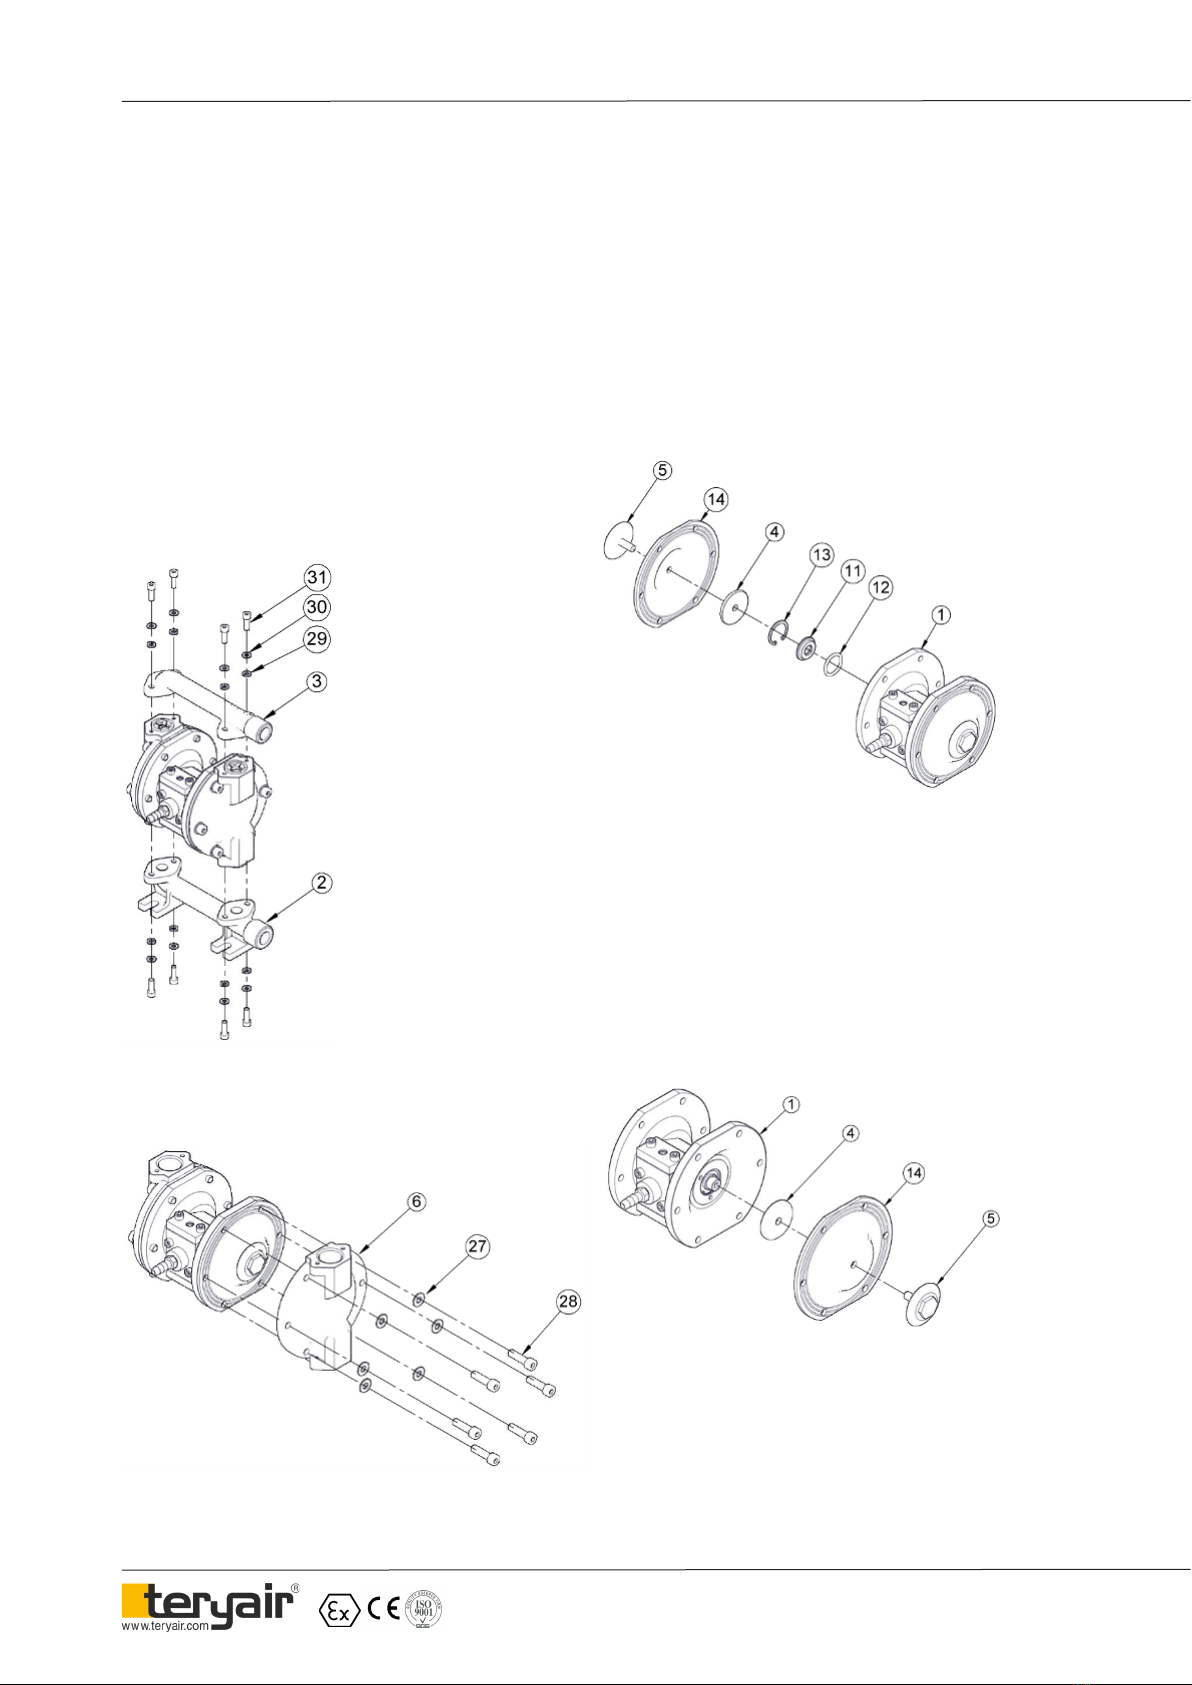
f. Now replace the diaphragms (14). Ensure that diaphragm
orientation is correct, i.e. For ALB/ ALN the sticker side of
the diaphragm (14) to be located in the outer chamber (6).
* For ALT & SST model the PTFE diaphragm (14A) to be
located in outer chamber (6) side.
g. Lubricate the edge of the sha (7) with specied lubricant.
Slowly insert the sha with rotating motion. Care should be
taken not to damage the backup rings (8).
h. Once the half sha open portion comes out of the bush,
follow the procedure in reverse manner as described in part
(a) & (b) and assemble the pump.
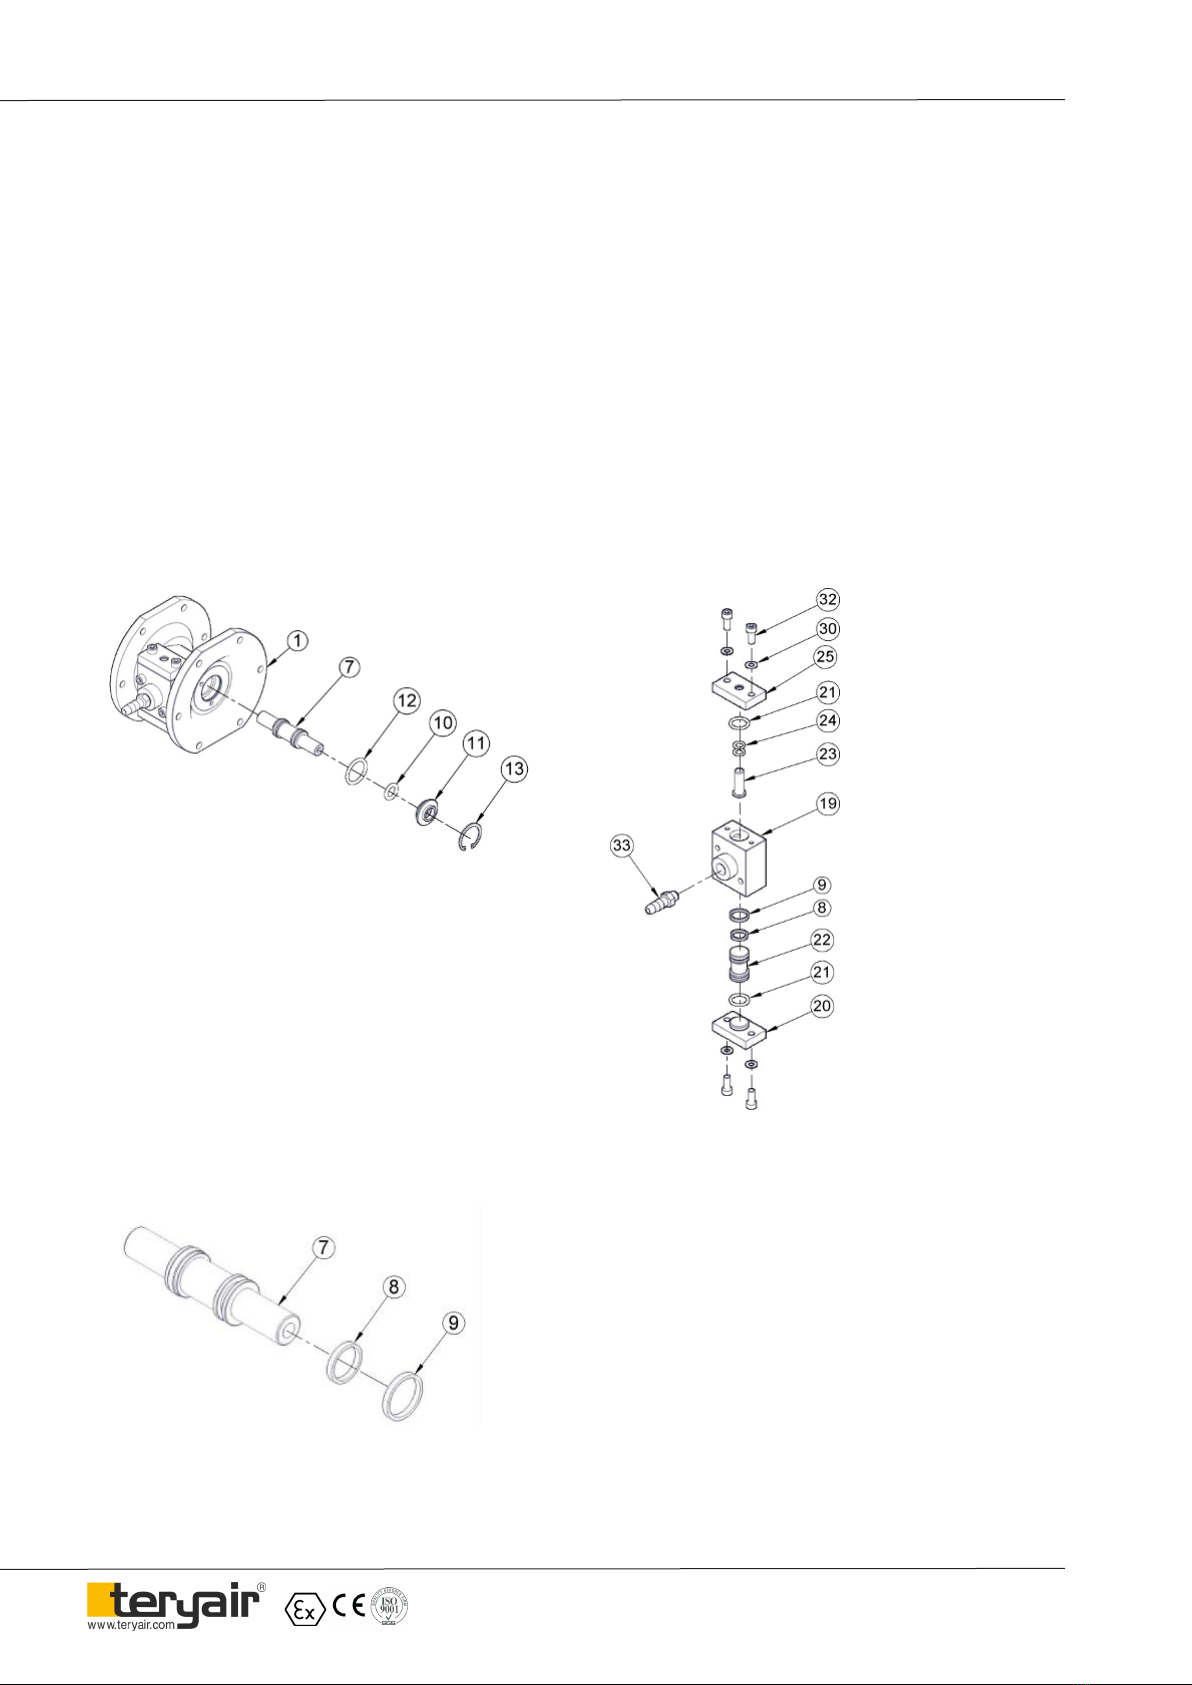
2) Replacement of Shaft O rings
a. For removing the seals from sha, rst follow the step a, b,
c, d & e from the diaphragm replacement.
b. Remove the circlip (13) with the help of nose pliers. is
will allow to remove the sha (7) with seals along with the
collar (11) and O-rings (12).
c. Now pull out the sha (7) from the circlip open side of
sha housing (1).
d. Now remove the PTFE rings (9)& backup ring (8) from
the sha (7) with the help of needle Nose pliers.
e. Once all the old seals are have been removed, the inside
of the bush (located in sha housing) should be cleaned to
ensure no debris is le that may damage to new seals (Pres-
surized air is preferable).
f. Now t new seals in following manner. First back up rings
(8) and later PTFE rings (9).
g. Lubricate the inner portion of bush with specied lubri-
cant.
h. Slowly insert the sha with rotating motion. is will
complete the resizing of the seals.
i. Now replace the O-ring (12), (10)and complete the assem-
bly procedure in reverse manner.
3) Replacement of Ball seat& Ball
a. Follow the step (a) of diaphragm replacement. Replace the
o-ring (18), ball cage (17),ball (16)&ball seat (15) with new
one.
4) Replacement of air valve and oring
of end cap
a. Unscrew bolt (34) from the sha housing (1). Remove the
air valve assembly along with the bolt (32).
b. Now remove the bolt (32) and washer (30) from both
ends. Now remove the end cap (25) & (20) from both ends.
Now slide out the air valve (22). Change the O-ring (21) of
both end caps. Remove the pin (23) and replace the o ring
(24).
c. Now remove and replace the ring (9) and backup ring (8)
from the air valve (22).Lubricate the inner portion of air
valve body (19) before assembling the air valve (22).
d. Now assemble the rest of the parts in reverse manner
e. You can also change the gasket (26) for air valve body.