1110
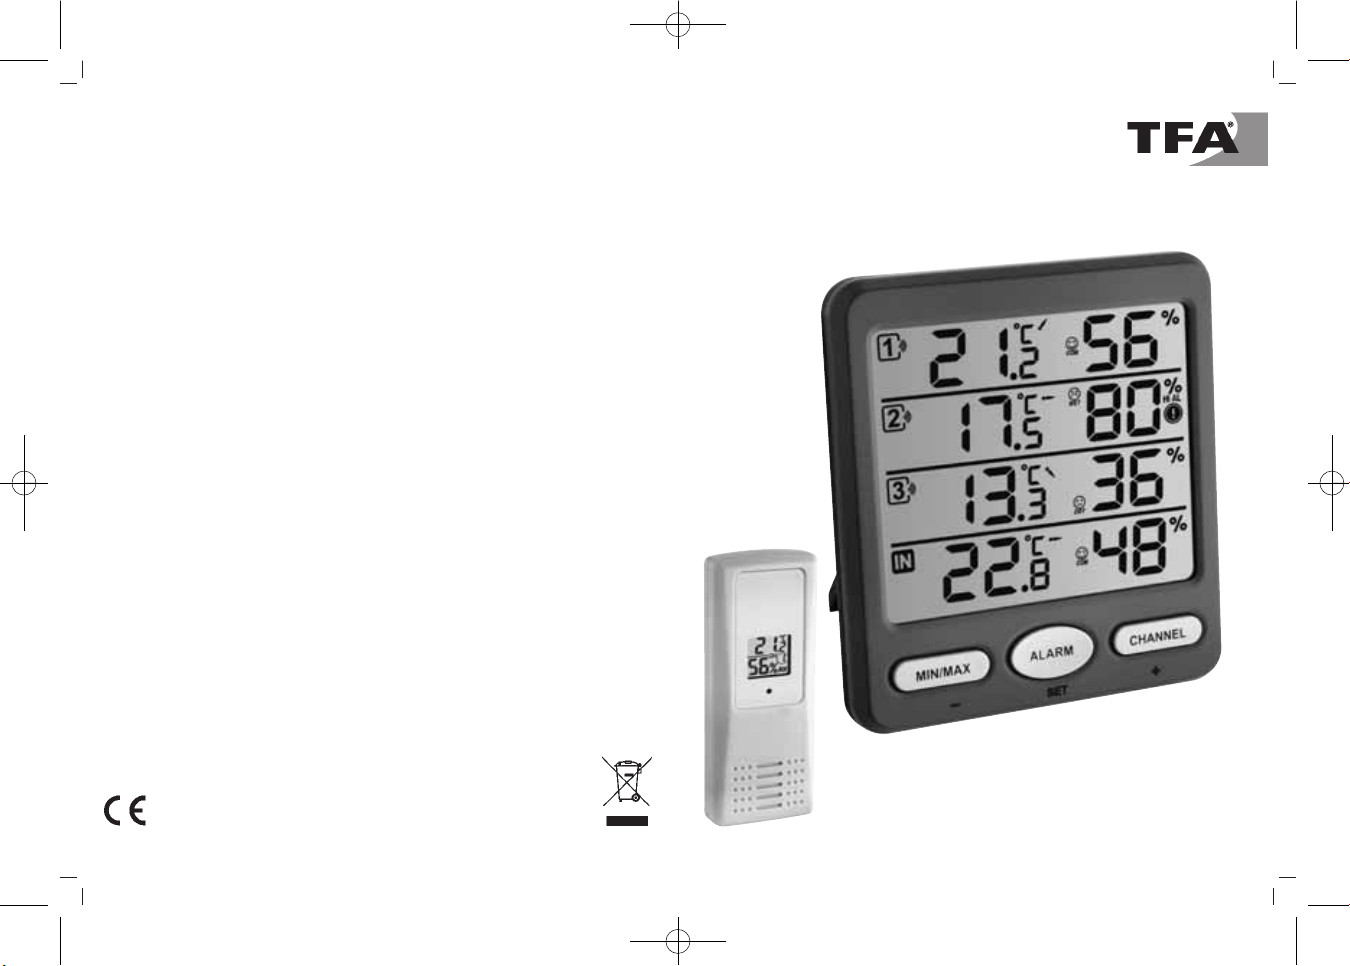
KLIMA-MONITOR - Funk-Thermo-Hygrometer
KLIMA-MONITOR - Funk-Thermo-Hygrometer
•
Das Alarmsymbol erscheint.
•
Bestätigen Sie mit der ALARM / SET Taste.
•
LO AL und -20°C (Voreinstellung IN: 10°C) oder die zuletzt eingestellte Tem-
peratur-Untergrenze wird auf dem Display angezeigt.
•
Stellen Sie mit der CHANNEL / + Taste oder der MIN/MAX / – Taste die
gewünschte untere Temperaturgrenze ein.
•
Drücken und halten Sie die ALARM / SET Taste, nachdem Sie den Wert ein-
gestellt haben und dieser noch blinkt, um die Alarm-Funktion zu aktivieren.
•
Das Alarmsymbol erscheint.
•
Bestätigen Sie mit der ALARM / SET Taste.
7.1.2 Luftfeuchtigkeitsalarm
•
HI AL und 90 % (Voreinstellung IN: 80 %) oder die zuletzt eingestellte Luft-
feuchtigkeit-Obergrenze wird auf dem Display angezeigt.
•
Stellen Sie mit der CHANNEL / + Taste oder der MIN/MAX / – Taste die
gewünschte obere Luftfeuchtigkeitsgrenze ein.
•
Drücken und halten Sie die ALARM / SET Taste, nachdem Sie den Wert ein-
gestellt haben und dieser noch blinkt, um die Alarm-Funktion zu aktivieren.
•
Das Alarmsymbol erscheint.
•
Bestätigen Sie mit der ALARM / SET Taste.
•
LO AL und 30% (Voreinstellung IN: 40 %) oder die zuletzt eingestellte Luft-
feuchtigkeit-Untergrenze wird auf dem Display angezeigt.
•
Stellen Sie mit der CHANNEL / + Taste oder der MIN/MAX / – Taste die
gewünschte untere Luftfeuchtigkeitsgrenze ein.
•
Drücken und halten Sie die ALARM / SET Taste, nachdem Sie den Wert ein-
gestellt haben und dieser noch blinkt, um die Alarm-Funktion zu aktivieren.
•
Das Alarmsymbol erscheint.
•
Stellen Sie nun den Alarm für die zusätzlichen Sender und für den Innensen-
sor auf die gleiche Weise ein.
•
Wiederholen Sie die oben genannten Schritte solange, bis Sie alle gewünsch-
ten Alarme eingestellt und aktiviert haben.
7.2 Display-Anzeige der eingestellten Alarmwerte
•
Drücken Sie einmal die ALARM / SET Taste im Normalmodus, um sich die
eingestellten Alarm-Obergrenzen (Kanal 1-3 und Innensensor) anzeigen zu
lassen.
6.7 Höchst- und Tiefstwerte
•
Drücken Sie die MIN/MAX / – Taste.
•
MAX erscheint auf dem Display.
•
Es erscheinen die höchsten Messwerte seit der letzten Rückstellung.
•
Drücken und halten Sie die MIN/MAX / – Taste, um die maximalen Werte des
aktuell ausgewählten Kanals zu löschen.
•
Drücken Sie die MIN/MAX / – Taste noch einmal.
•
MIN erscheint im Display.
•
Die niedrigsten Messwerte seit der letzten Rückstellung werden angezeigt.
•
Drücken und halten Sie die MIN/MAX / – Taste, um die minimalen Werte des
aktuell ausgewählten Kanals zu löschen.
•
Um wieder die Anzeige mit den aktuellen Werten zu erhalten, betätigen Sie
nochmals die MIN/MAX / – Taste.
7. Einstellungen
•
Das Gerät verlässt automatisch den Einstellmodus, wenn längere Zeit keine
Taste gedrückt wird.
•
Halten Sie die MIN/MAX / – oder CHANNEL / + Taste im Einstellungsmodus
gedrückt, gelangen Sie in den Schnelldurchlauf.
7.1 Einstellung des Alarms für Temperatur und Luftfeuchtigkeit
7.1.1 Temperaturalarm
•
Drücken Sie die CHANNEL / + Taste solange, bis der Pfeil auf dem gewünsch-
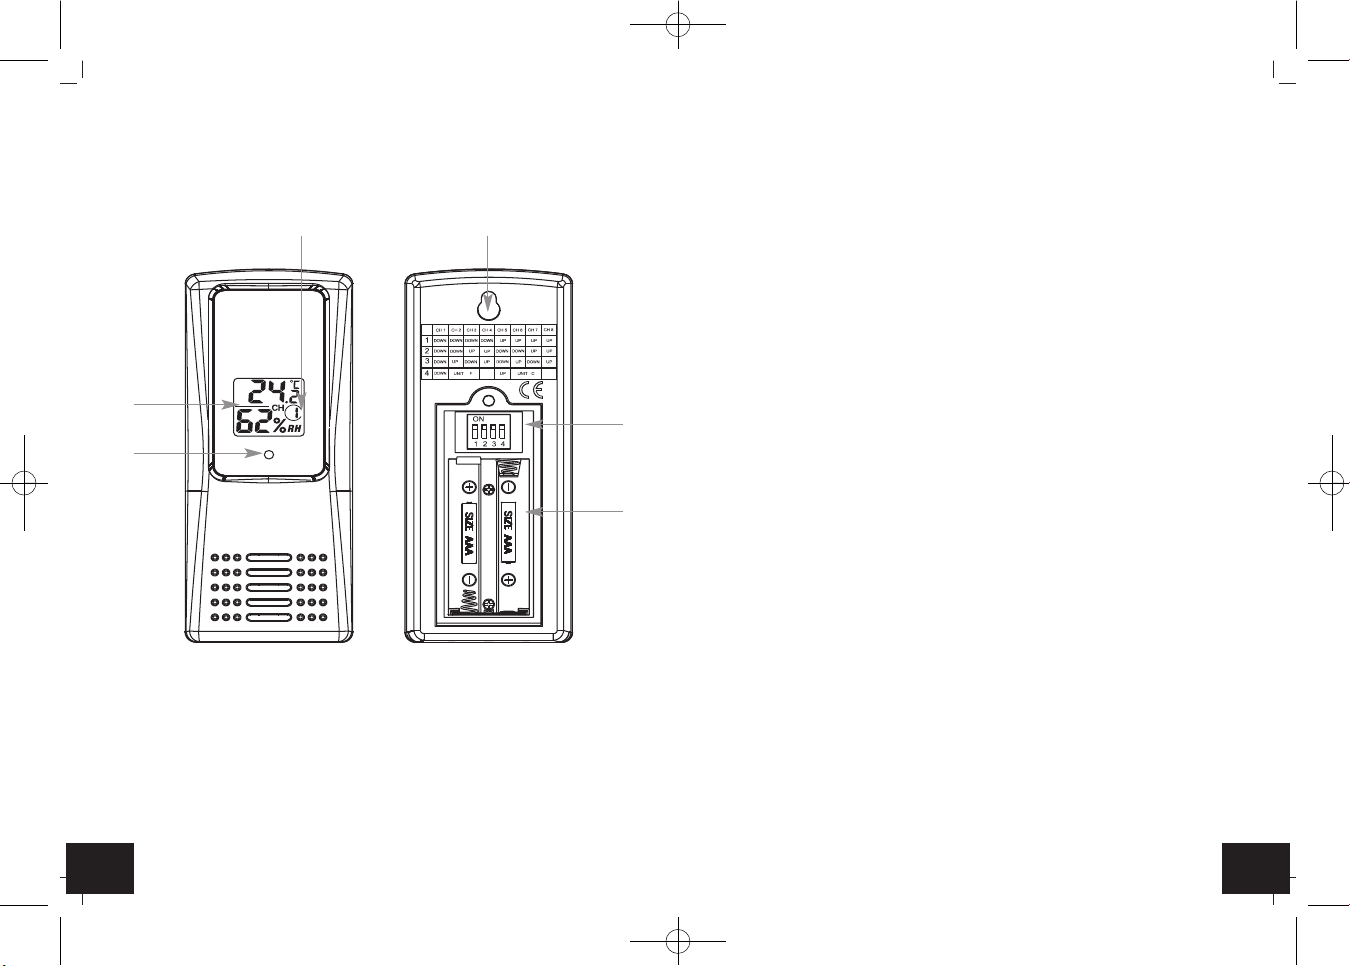
ten Kanal angezeigt wird (Kanal 1-3 und Innensensor).
•
Halten Sie die ALARM / SET Taste für 3 Sekunden gedrückt.
•
HI AL und 60°C (Voreinstellung IN: 35°C) oder die zuletzt eingestellte Tempe-
ratur-Obergrenze wird auf dem Display angezeigt.
•
Stellen Sie mit der CHANNEL / + Taste oder der MIN/MAX / – Taste die
gewünschte obere Temperaturgrenze ein.
•
Drücken und halten Sie die ALARM / SET Taste, nachdem Sie den Wert ein-
gestellt haben und dieser noch blinkt, um die Alarm-Funktion zu aktivieren.
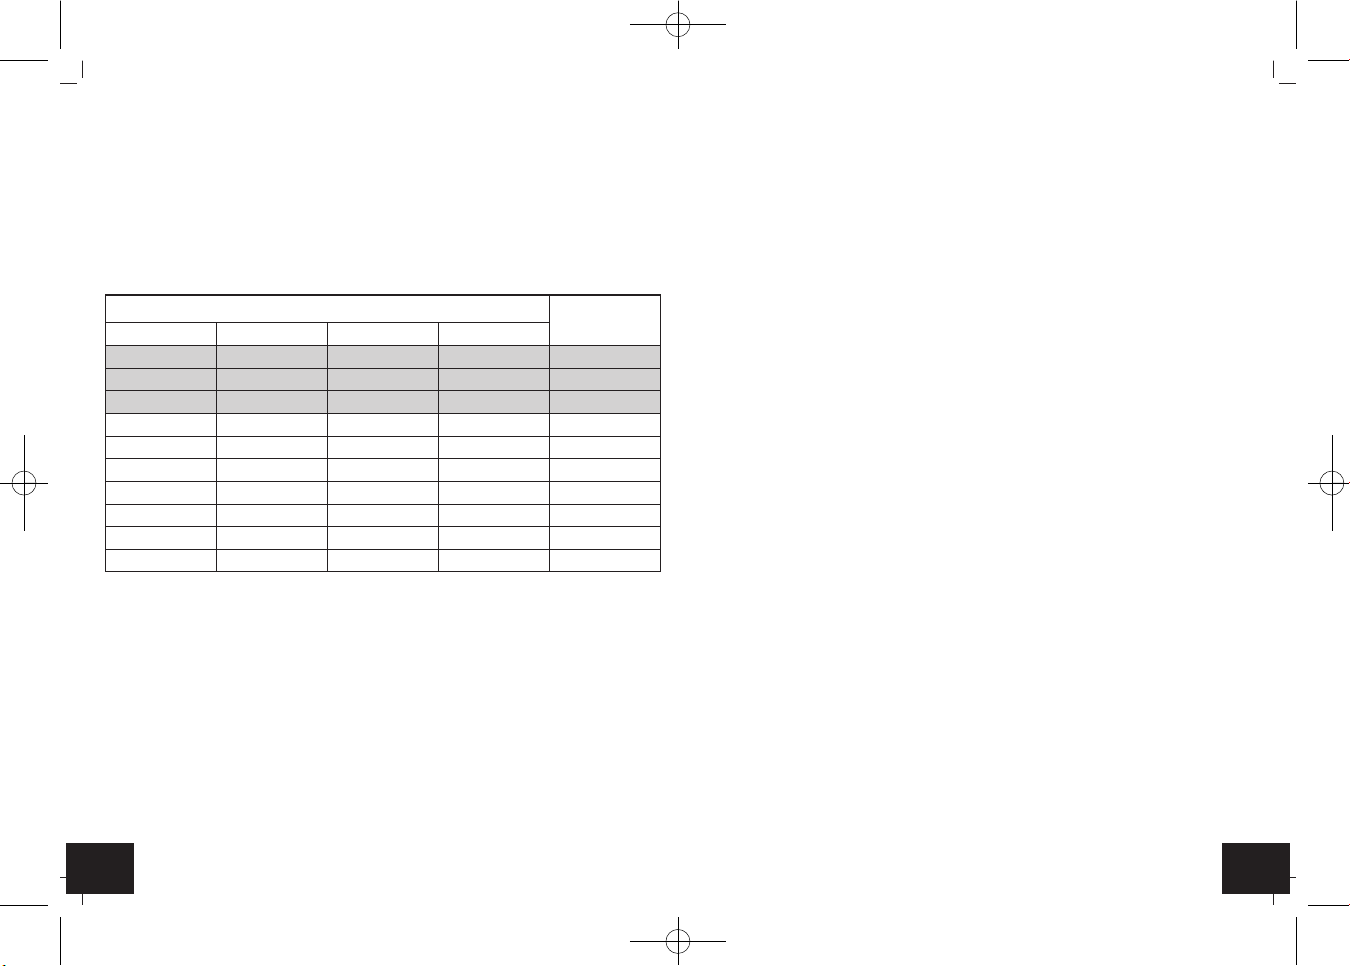
RH < 45% RH 45...65% RH > 65%
trocken Comfort feucht
TFA_No. 30.3054_Anleit_08_16 05.08.2016 09:30 Uhr Seite 6