Therabody Recovery Therm User manual

Powered by Cryothermal Technology
User Manual

Table of contents
EN 3-10
ES 11-18
FR 19-26
IT 27-34
DE 35-42
FRCA 43-50
SC 51-58

3
EN
Precise cold, heat, and vibration for advanced knee therapy.
Product Overview
From the creators of Theragun comes RecoveryTherm Hot & Cold Vibration
Knee, precisely delivering heating, cooling, and vibration therapy in one
wearable garment, the rst of its kind. From improving athletic performance to
enhancing muscle recovery and general wellness, the RecoveryTherm Hot &
Cold Vibration Knee oers a solution for everyone.
Intended Use
The RecoveryTherm Hot & Cold Vibration Knee is intended to help alleviate
pain, improve athletic performance, and enhance muscle recovery post-work-
out. While cooling, heating, and vibration oer unique therapeutic benets,
rapidly alternating between the three, known as contrast therapy, optimizes and
increases blood flow to reduce pain and soreness.

4
EN
Getting started
Put on your garment
Step 1
Scan the QR code to get started.
1. Find a comfortable position sitting down, with your legs either at a 90-degree
angle or fully extended.
2. Unbuckle the straps and extend the garment.
3. To put the RecoveryTherm Hot & Cold Vibration Knee on, place the
garment’s center open circle on your knee cap. The blue fans should be
facing outwards, and the control panel should be resting on your thigh.
Ensure that nothing is blocking the airflow to the blue fans.
4. Secure the RecoveryTherm Hot & Cold Vibration Knee by buckling each
strap. The straps should provide compression without being uncomfortable
or painful. If standing up, readjust the top strap for increased compression.
Add the extenders to the end of the straps when using the device for larger
muscles.
5. For additional support, attach the third strap (found inside the pouch in the
carrying case). To attach, Velcro one of the sides using the rubber connectors
that are to the right and left of the knee cap. Use the third strap in instances
where further support is needed, for example, when standing or moving
during treatment. The use of the third
strap is optional and fully removable.
6. For safe and optimal use, store your
garment in a cool, dry location (below 78
degrees Fahrenheit/26 degrees Celsius)
to protect the temperature of the metal
plates.

5
EN
Step 2
Use your Garment
1. Insert the battery into the control panel. The Therabody logo should be
facing outwards, with the charging port on the bottom. Battery insertion
should be seamless and not forced.
2. Press and hold the power button for two seconds.
3. Select one of three treatment options (cold, hot, or contrast) using the
respective mode buttons.
4. Short press the snowflake button to use the cold treatment only. The blue
lights around the Therabody logo will illuminate when the cold setting is
on. The vibration will automatically start on low; short press the vibration
button to toggle between patterns (low, high, wave, o). The treatment
will run for approximately 20 minutes. The LEDs will turn o sequentially
as each treatment mode is complete; e.g., the blue lights will turn o after
a cooling mode. Once the treatment is complete, the device will turn o.
5. Short press the re button to use the hot treatment only. The orange lights
around the Therabody logo will illuminate when the hot setting is on. The
vibration will automatically start on high; short press the vibration button
to toggle between patterns (low, high, wave, o). The treatment will run
for approximately 15 minutes. Once the treatment is complete, the device
will turn o.
6. Short press the contrast button to begin contrast therapy treatment.
Both the orange and blue lights around the Therabody logo will illuminate
when the contrast setting is on; blue indicates cold therapy, and orange
indicates hot therapy. The vibration will automatically start on the wave
setting; short press the vibration button to toggle between patterns (low,
high, wave, o). The device will move from cold to hot for approximately 18
minutes. Once the treatment is complete, the device will turn o.

6
EN
See Warnings for important safety instructions
Step 3
Feel the dierence. Every day.
Whether used for targeted pain relief, post-workout muscle recovery, or general
soreness, RecoveryTherm Hot & Cold Vibration Knee will help keep you feeling
your best.
7. Vibration therapy can be used without hot, cold, or contrast therapy. Short
press the vibration button once the device is turned on. Vibration can be
added or customized at any point during your treatment; short press the
vibration button to toggle between patterns (low intensity, high intensity,
and wave).
8. Depending on the selected mode, treatment times can vary between
12-18 minutes.
9. To access the Pro Mode, short press the snowflake button three times.
The Pro Mode is a cold treatment (with lower temperatures, reaching 8
degrees C) and a low vibration therapy.
Inner Fabric: 89% germanium-infused nylon, 11% spandex
Outer Fabric: 84% nylon, 16% spandex
SPOT CLEAN ONLY
SEE USER MANUAL FOR CLEANING INSTRUCTIONS
DO NOT MACHINE WASH
MADE IN CHINA

7
EN
Getting to know your wearable device
Removable battery Three adjustable straps (the third strap is
optional and can be found inside the pouch)
Wrap garment USB-C Port Strap extenders
Located on Battery
D
Figure 1
D
Push to Release
Battery
See Warnings for important safety instructions
E
E

8
EN
Protocols Overview
Table 1. Preset protocols (see Figure 2)
Step Step Step Step Step Step Total
Heating
Temperature
gradually increases
(Orange light around
Therabody logo)
2
Minutes
2
Minutes
2
Minutes
2
Minutes
2
Minutes
2
Minutes
12
Minutes
Cooling
Maintains cold
temperature
(Blue light around
Therabody logo)
3
Minutes
3
Minutes
3
Minutes
3
Minutes
3
Minutes
3
Minutes
18
Minutes
Contrast
Temperature
alternates between
heating and cooling
(Orange and blue
lights around
Therabody logo)
3
minutes
Cooling
3
minutes
Cooling
2
minutes
Heating
3
minutes
Cooling
3
minutes
Cooling
2
minutes
Heating
16
Minutes
1 2 3 4 5 6

9
EN
When to use What to Choose Intended benet Pro Tip
Pre-activity Hot Warm-up joints
Improve range of motion
Add vibration therapy to
enhance blood flow.
Post-activity Cold Reduce joint swelling
Reduce muscle soreness
Add vibration therapy to
improve comfort during
the cooling treatment.
Post-activity
General
soreness
Contrast Reduce joint swelling
Reduce muscle soreness
Add vibration therapy to
enhance blood flow and
improve comfort during
the contrast treatment.
Table 2. Treatment type selection
Figure 2
1
2
4
3 5
6

10
EN
Cleaning Instructions:
1. The RecoveryTherm Hot & Cold Vibration Knee is NOT waterproof or
machine washable. Do not allow excess liquids or water to enter the product.
2. Remove the battery before cleaning.
3. To clean, wipe the inner surface of the strap with a dampened microber
cloth. Wipe down the metallic parts and the flexible ngers.
ChargingCharging
• To charge the RecoveryTherm Hot & Cold Vibration Knee, remove the
battery from the control panel and connect it to the included USB-C adapter.
• The RecoveryTherm Hot & Cold Vibration Knee is USB-C enabled.
• The battery level is displayed in the LED indicator on the battery pack, next to
the USB-C connector:
• Orange: low charge, blue: mid charge, green: fully charged.
• When charging, the LED will flash to indicate it is properly
connected and will turn solid green when complete.
Note: If using an alternative adapter, ensure that it is from a certied manufacturer and has not
suered any structural damage. Do not try to use the device while charging.

11
ES
Funciones de frío, calor y vibración precisas para lograr una
terapia avanzada para la rodilla.
Descripción general del producto
De los creadores de Theragun, llega el dispositivo RecoveryTherm Hot & Cold
Vibration Knee para proporcionarte una terapia de calor, frío y vibración precisa
en la primera prenda de su clase que puedes llevar puesta. Desde la mejora del
rendimiento atlético hasta el aumento de la recuperación muscular y el bienestar
general, el RecoveryTherm Hot & Cold Vibration Knee ofrece una solución para
todo el mundo.
Uso previsto
El RecoveryTherm Hot & Cold Vibration Knee ha sido diseñado para ayudar a
aliviar el dolor, mejorar el rendimiento deportivo y favorecer la recuperación
muscular después del entrenamiento. Si bien el frío, el calor y la vibración ofrecen
benecios terapéuticos únicos, la alternancia rápida entre los tres, conocida
como terapia de contraste, optimiza y aumenta el flujo sanguíneo para reducir el
dolor y las molestias.

12
ES
Guía de inicio rápido
Póngase la faja.
Paso 1
Escanee el código QR para empezar.
1. Siéntate en una posición cómoda, ya sea con las piernas en un ángulo de 90
grados o completamente extendidas.
2. Desabrocha las correas y extiende la prenda.
3. Para ponerte el RecoveryTherm Hot & Cold Vibration Knee, coloca la apertura
central de la prenda sobre la rótula. Los ventiladores azules deben quedar
orientados hacia fuera y el panel de control debe descansar sobre el muslo.
Asegúrate de que nada bloquee el flujo de aire de los ventiladores azules.
4. Sujeta el RecoveryTherm Hot & Cold Vibration Knee abrochando todas las
correas. Las correas deben proporcionar compresión sin llegar a ser incómodas
ni doler. Si vas a estar de pie, vuelve a ajustar la correa superior para aumentar la
compresión. Utiliza los extensores de las correas si fuera necesario.
5. Para lograr un refuerzo adicional, añade la tercera correa (que encontrarás
dentro de la bolsa en el estuche de transporte). Para ello, ja con el velcro uno de
los lados usando los conectores de goma que están a la derecha e izquierda de la
rodillera. Utiliza la tercera correa en los casos en que se necesite más refuerzo, por
ejemplo, si vas a estar de pie o en movimiento durante el tratamiento. El uso de la
tercera correa es opcional y es totalmente
extraíble.
6. Para un uso seguro y óptimo, guarda la
prenda en un lugar fresco y seco (por debajo
de 26 ºC) para proteger la temperatura de
las placas de metal.

13
ES
Paso 2
Cómo utilizar la faja
1. Inserta la batería en el panel de control. El logotipo de Therabody debe estar
orientado hacia fuera, con el puerto de carga en la parte inferior. La inserción
de la batería debe ser fluida y no forzada.
2. Mantén pulsado el botón de encendido durante dos segundos.
3. Selecciona una de las tres opciones de tratamiento (frío, calor o contraste)
usando los botones de modo respectivos.
4. Pulsa el botón de copo de nieve para usar solo el tratamiento de frío. Las
luces azules alrededor del logotipo de Therabody se iluminarán cuando el
modo frío esté activado. La vibración comenzará automáticamente en nivel
bajo; pulsa el botón de vibración para alternar entre modos (bajo, alto, ondas,
apagado). El tratamiento durará aproximadamente 20 minutos. Las luces
LED se apagarán secuencialmente a medida que se complete cada modo de
tratamiento; por ejemplo, las luces azules se apagarán después del modo frío.
Una vez nalizado el tratamiento, el dispositivo se apagará.
5. Pulsa el botón de la llama para usar solo el tratamiento de calor. Las luces
naranjas alrededor del logotipo de Therabody se iluminarán cuando el modo
calor esté activado. La vibración comenzará automáticamente en nivel alto;
pulsa el botón de vibración para alternar entre modos (bajo, alto, ondas,
apagado). El tratamiento durará aproximadamente 15 minutos. Una vez
nalizado el tratamiento, el dispositivo se apagará.
6. Pulsa el botón de contraste para comenzar el tratamiento de terapia de
contraste. Tanto las luces de color naranja como las azules alrededor del
logotipo de Therabody se iluminarán cuando el modo de contraste esté
activado; el azul indica terapia de frío y el naranja indica terapia de calor.
La vibración comenzará automáticamente en modo ondas; pulsa el botón
de vibración para alternar entre modos (bajo, alto, ondas, apagado). El
dispositivo pasará de frío a calor durante aproximadamente 18 minutos. Una
vez nalizado el tratamiento, el dispositivo se apagará.

14
ES
Consulte las advertencias para obtener instrucciones de seguridad
importantes
Paso 3
Sienta la diferencia. Cada día.
Tanto si lo usas para el alivio de un dolor especíco, la recuperación muscular
después del entrenamiento o el dolor en general, el RecoveryTherm Hot & Cold
Vibration Knee te ayudará a estar mejor.
7. La terapia de vibración se puede utilizar sin terapia de calor, frío o de
contraste. Pulsa el botón de vibración una vez que el dispositivo esté
encendido. La vibración se puede añadir o personalizar en cualquier
momento durante el tratamiento; pulsa el botón de vibración para alternar
entre modos (bajo, alto y ondas).
8. Según el modo que hayas seleccionado, la duración de los tratamientos
puede variar entre 12 y 18 minutos.
9. Para acceder al modo Pro, pulsa el botón del copo de nieve tres veces. El
modo Pro es un tratamiento de frío (con temperaturas más bajas, llegando a
los 8 ºC) y una terapia de vibración en modo bajo.
Tejido interior: 89% nailon con impregnación de germanio, 11% elastano
Tejido exterior: 84% nailon, 16% elastano
LIMPIAR SOLO LAS MANCHAS
CONSULTA EL MANUAL DEL USUARIO PARA LEER LAS INSTRUCCIONES DE
LIMPIEZA
NO LAVAR A MÁQUINA
FABRICADO EN CHINA

15
ES
Introducción al dispositivo
Batería extraíble Tres correas ajustables (la tercera correa es
opcional y se encuentra dentro de la bolsa)
Faja Puerto USB C Extensores de
correas
Ubicado en la batería
D
Imagen 1
D
Pulse para liberar
la batería
E
E

16
ES
Descripción general de los protocolos
Tabla 1. Protocolos preestablecidos (ver la imagen 2)
PASO
PASO PASO PASO PASO PASO Total
Calor
La temperatura
aumenta
gradualmente (luz
naranja alrededor
del logotipo de
Therabody)
2
minutos
2
minutos
2
minutos
2
minutos
2
minutos
2
minutos
12
minutos
Frío
Mantiene la tem-
peratura fría
(luz azul alrededor
del logotipo de
Therabody)
3
minutos
3
minutos
3
minutos
3
minutos
3
minutos
3
minutos
18
minutos
Contraste
La temperatura
alterna entre calor
y frío (luces naranja
y azul alrededor
del logotipo de
Therabody)
3
minutos
Frío
3
minutos
Frío
2
minutos
Calor
3
minutos
Frío
3
minutos
Frío
2
minutos
Calor
16
minutos
1 2 3 4 5 6

17
ES
Cuándo usarlo Qué usar Benecios previstos Consejo de experto
Antes de la
actividad Calor
Calentar articulaciones
Mejorar el rango de
movimiento
Añade la terapia por
vibración para mejorar el
flujo sanguíneo.
Después de la
actividad Frío
Reducir la inflamación de
las articulaciones
Reduce los dolores
musculares
Añade la terapia por
vibración para sentir mayor
comodidad durante el
tratamiento de frío.
Después de la
actividad
Dolor en general
Contraste
Reducir la inflamación de
las articulaciones
Reduce los dolores
musculares
Añade la terapia por
vibración para sentir mayor
comodidad durante el
tratamiento de contraste.
Tabla 2. Selección del tipo de tratamiento
Imagen 2
1
2
4
3 5
6

18
ES
Instrucciones de limpieza:
1. El RecoveryTherm Hot & Cold Vibration Knee NO es resistente al agua ni se
puede lavar a máquina. No permitas que entren en contacto con abundante
agua ni con ningún otro tipo de líquido.
2. Retire la batería antes de limpiarla.
3. Para limpiarlo, pasa un paño de microbra húmedo por la supercie interior
de la correa. Limpia las partes metálicas y los dedos flexibles.
Batería y cargaBatería y carga
• Para cargar el RecoveryTherm Hot & Cold Vibration Knee, extrae la batería
del panel de control y conéctala al adaptador USB-C incluido.
• El RecoveryTherm Hot & Cold Vibration Knee viene equipado con USB-C.
• El nivel de carga se muestra en el indicador LED de la batería, al lado del
puerto USB C:
• Naranja: carga baja; azul: carga media; verde: carga completa.
• Durante la carga, el LED parpadeará para indicar que el cargador
está correctamente conectado y se iluminará en verde jo cuando
nalice.
Nota: Si utilizas un adaptador distinto, comprueba que sea de un fabricante certicado y que no
haya sufrido daños estructurales. No intentes usar el dispositivo mientras se está cargando.

19
FR
Un réglage précis du froid, du chaud et des vibrations pour
une thérapie avancée du genou.
Présentation du produit
Les créateurs du Theragun ont mis au point RecoveryTherm Hot & Cold
Vibration Knee, orant une thérapie ciblée alliant chaleur, froid et vibrations
dans dispositif portable unique, le premier de sa catégorie. Améliorant les
performances physiques, la récupération musculaire et le bien-être général,
le dispositif RecoveryTherm Hot & Cold Vibration Knee ore un éventail de
solutions personnalisées.
Utilisation prévue
RecoveryTherm Hot & Cold Vibration Knee a été conçu pour soulager la douleur,
améliorer les performances physiques et favoriser la récupération musculaire
après un entraînement. Alors que le froid, la chaleur et les vibrations orent des
avantages thérapeutiques uniques, l'alternance rapide entre les trois, connue
sous le nom de thérapie par contraste, optimise et augmente la circulation
sanguine pour réduire la douleur et les courbatures.

20
FR
Pour commencer
Enlez la ceinture
Étape1:
Scanner le code QR pour commencer.
1. Installez-vous confortablement, en position assise, les jambes à l'équerre ou
complètement étendues.
2. Desserrez les sangles et déployez le dispositif.
3. Pour enler RecoveryTherm Hot & Cold Vibration Knee, placez la partie ajourée
du cercle central du dispositif sur la rotule. Les ventilateurs bleus doivent être
tournés vers l’extérieur, et le panneau de commande doit reposer sur votre
cuisse. Veillez à ce que rien ne bloque l’air arrivant dans les ventilateurs.
4. Fixez le RecoveryTherm Hot & Cold Vibration Knee à l’aide des sangles,
de façon à obtenir un maintien ferme, sans que ce soit inconfortable ou
douloureux. Si vous devez vous lever, réajustez la sangle supérieure pour une
compression accrue. Fixez les rallonges à l'extrémité des sangles lorsque vous
utilisez l'appareil pour traiter des muscles plus gros.
5. Pour un meilleur soutien, xez la troisième sangle (qui se trouve dans la pochette
de l'étui de transport). Pour ce faire, xez l'un des côtés à l'aide des câbles en
caoutchouc qui se trouvent à droite et à gauche de la rotule. Utilisez la troisième
sangle si davantage de soutien est nécessaire, par exemple lorsque vous vous
tenez debout ou que vous vous déplacez pendant le traitement. L'utilisation de
la troisième sangle est facultative et
celle-ci est entièrement amovible.
6. Pour une utilisation sûre et optimale,
rangez l'appareil dans un endroit frais
et sec (moins de 26degrés Celsius)
pour protéger les plaques de métal
d'écarts thermiques trop importants.
Other manuals for Recovery Therm
3
Table of contents
Languages:
Other Therabody Medical Equipment manuals
Popular Medical Equipment manuals by other brands
ZAMST
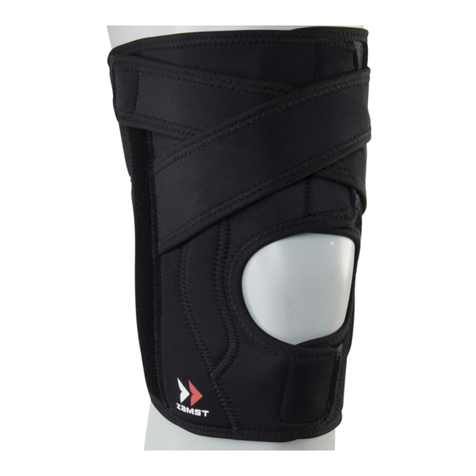
ZAMST EK-1 Instructions for use
RAUMEDIC
RAUMEDIC NPS3 Instructions for use
ADC
ADC Soneplex Wideband System 3190 Installation and Verification Guide
Smiths Medical
Smiths Medical Medfusion 3000 Series Technical & service manual
Arjo
Arjo AtmosAir Velaris - Plus Flex Quick reference guide-use
MedRock
MedRock HipTrac instruction manual
