manuals.online logo
Brands
  1. Home
  2. •
  3. Brands
  4. •
  5. Thetford
  6. •
  7. Plumbing Product
  8. •
  9. Thetford Style Plus Lite & II 34122 User manual

Thetford Style Plus Lite & II 34122 User manual

ENGLISH
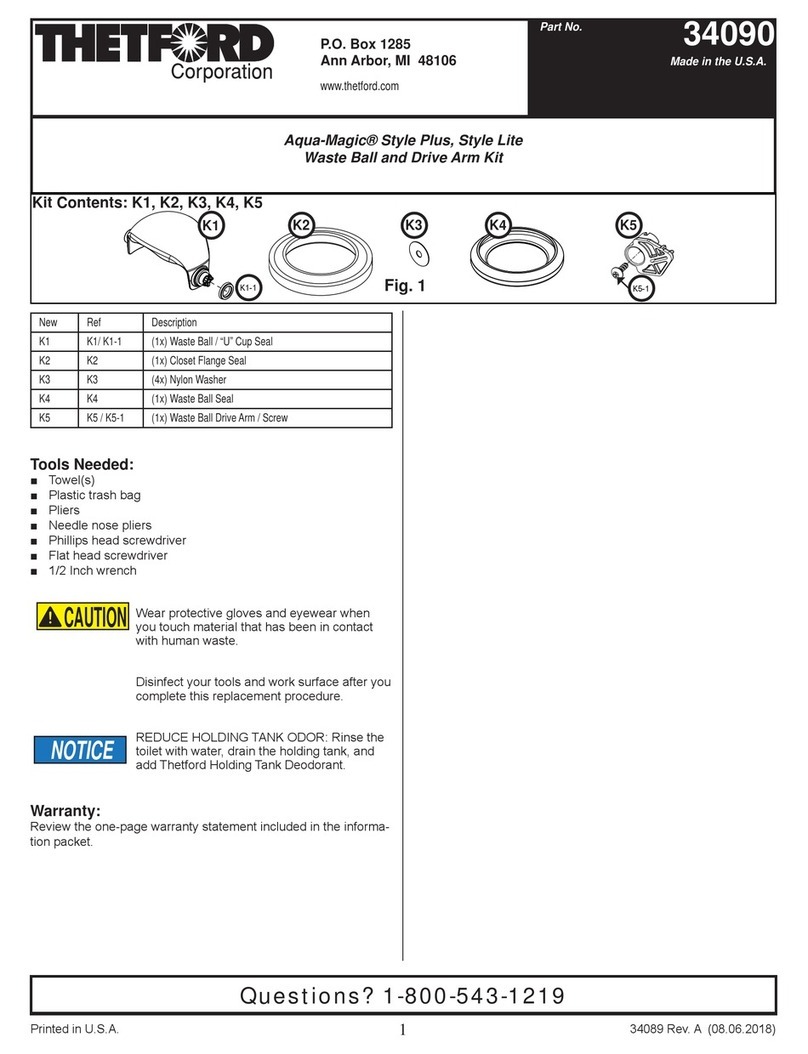
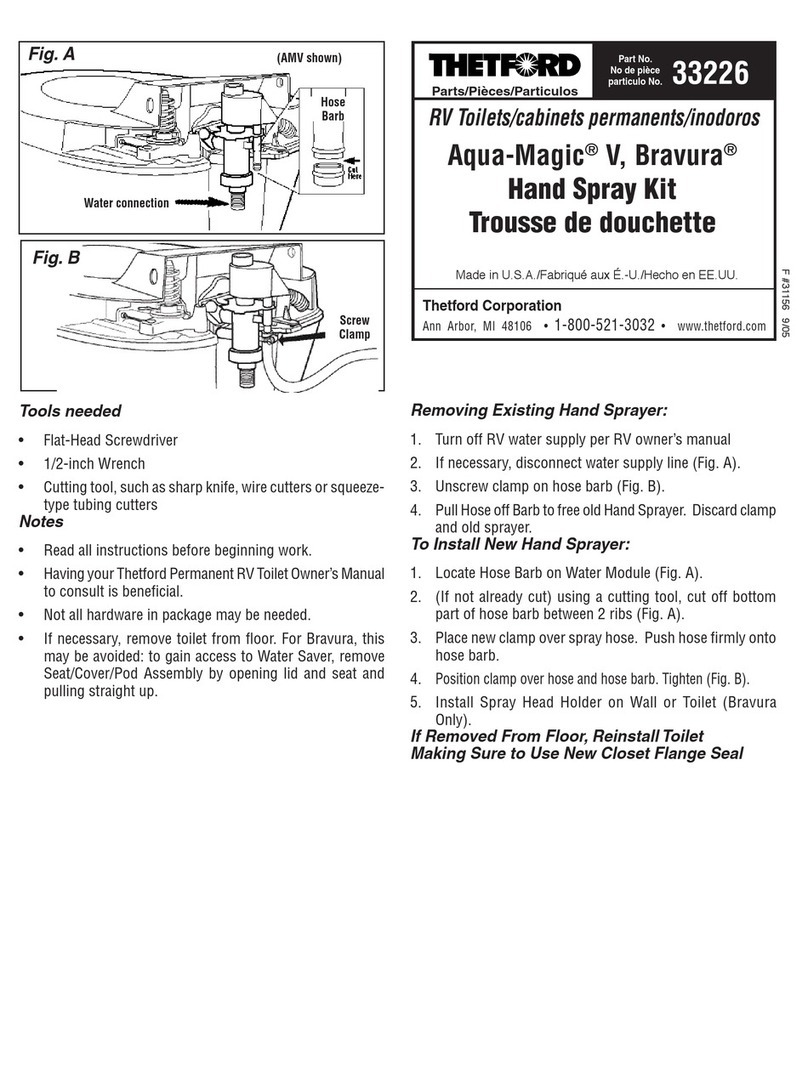
Kit Contains
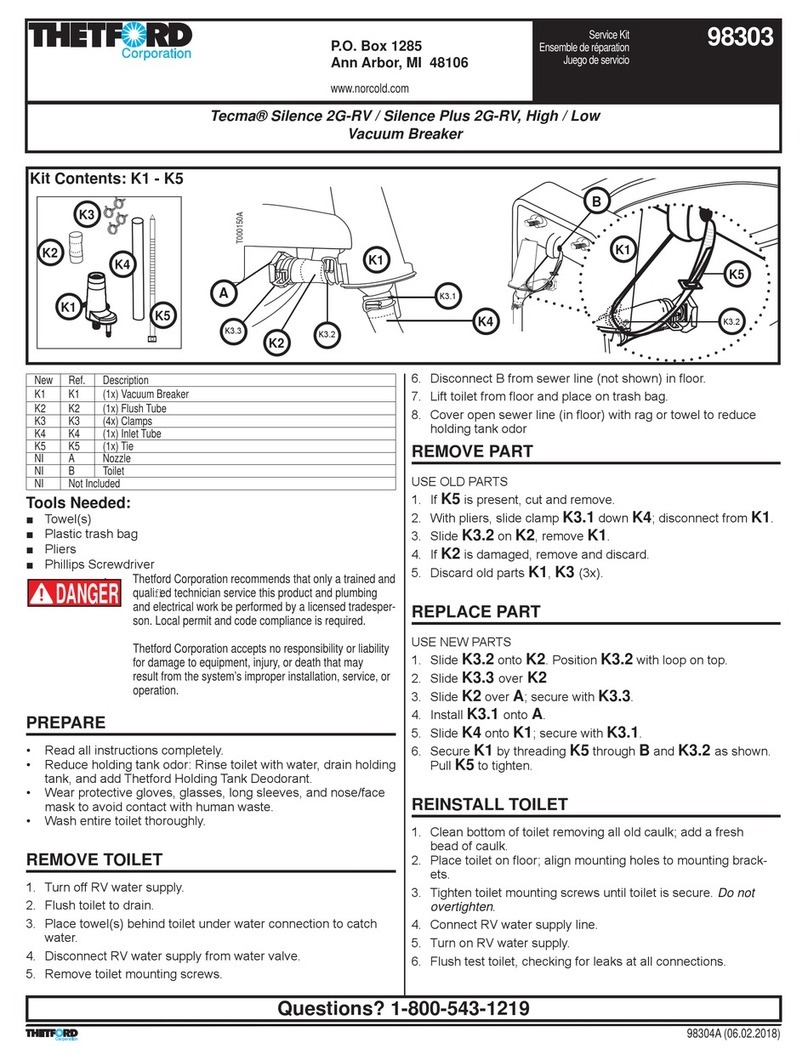
4Vacuum breaker subassembly
(PN 34313)
4Clamps (3) (PN 19541)
4Flush hose (PN 34377)
4Closet flange seal (PN 02125)
4Instruction sheet (PN 34123)
Needed
4Towel(s)
4Plastic trash bag
4Needle Nose Pliers
41/2-inch wrench
Before Beginning
4 Read all instructions completely.
4Reduce holding tank odor: Rinse
toilet with water, drain holding tank,
and add Thetford Holding Tank
Deodorant.
4Wear protective gloves, glasses,
long sleeves, and nose/face mask
to avoid contact with human waste.
4Wash entire toilet thoroughly.
4Refer to Figure 1 for component
locations. Style Lite shown.
Remove Toilet
1. Turn off RV water supply per RV
Owner’s Manual.
2. Flush toilet to drain.
3. Style Plus only - Remove shroud:
a. Unhook two O-rings holding
Shroud together in back of
toilet.
b. Holding down pedal, spread
shroud apart while pulling it
forward and off.
4. Place towel(s) behind toilet under
water connection to catch water.
5. Disconnect RV water supply from
toilet.
6. Remove Closet Flange Bolt Cov-
ers (if present) and Nuts.
7. Lift Toilet from floor and place on
FRANçAIS
La trousse comprend les éléments
suivants
4 Sous-ensemble de dispositif anti-refoulement
(PN 34313)
4 Crampons de serrage (3) (PN 19541)
4 Tuyau d’évacuation (PN 34377)
4 Joint d’étanchéité de la bride de sol (PN
02125)
4 Feuille d’instructions (PN 34123)
Éléments requis
4 Serviette(s)
4 Sac en plastique pour déchets
4Pinces à bec effilé
4 Clef de 1/2 po
Avant de commencer
4 Lisez toutes les instructions.
4 Prenez les mesures pour réduire les odeurs
provenant du bac à eaux usées. Rincez le
cabinet avec de l’eau; faites égoutter le bac à
eaux usées et versez-y le désodorisant pour
bac à eaux usées de Thetford (Thetford Hold-
ing Tank Deodorant).
4 Portez des gants et des lunettes de protection,
des manches longues ainsi qu’un masque
facial pour éviter tout contact avec les eaux
usées sanitaires.
4 Lavez à fond l’ensemble du cabinet d’aisance.
4 Consultez le schéma 1 pour connaître
l’emplacement des composantes. Le modèle
Style Lite est présenté.
Retirez le cabinet
1. Coupez l’alimentation en eau du VR selon
les indications données dans le manuel
d’entretien de celui-ci.
2. Tirez la chasse d’eau.
3. Style Plus – Retirez l’enveloppe de protection:
a. Tenez la pédale enfoncée et décrochez
les deux joints toriques qui maintien-
nent l’enveloppe de protection en place à
l’arrière de l’unité.
b. Déployez l’enveloppe de protection tout en
la tirant vers l’avant.
4. Placez la ou les serviettes derrière le cabinet
ESPAÑOL
El juego trae
4Subconjunto de dispositivo rompevacío (Art.
No. 34313)
4Abrazaderas (3) (Art. No. 19541)
4Manguera de descarga (Art. No. 34377)
4Junta hermética de brida del suelo (Art. No.
02125)
4Hoja de instrucciones (Art. No. 34123)
Necesita
4Toalla(s)
4Bolsa de plástico para basura
4Alicates de punta fina
4Llave de 1/2”
Antes de comenzar
4Lea completamente todas las instrucciones.
4Reduzca el olor del tanque de retención: Lave
el inodoro con agua, vacíe el tanque de reten-
ción y échele desodorante Thetford (Holding
Tank Deodorant).
4Use guantes protectores, anteojos, mangas
largas y máscara para la nariz/la cara, para
evitar el contacto con las aguas negras.
4Lave bien todo el inodoro.
4Consulte la figura 1 para ubicar las piezas. Se
ilustra el modelo Style Lite.
Retire el inodoro
1. Cierre el suministro de agua según las instruc-
ciones del manual del propietario del VR.
2. Haga pasar el agua para vaciar el inodoro.
3. Style Plus – Retire el recubrimiento:
a. Pise el pedal y manténgalo oprimido,
desenganche las dos juntas tóricas que
mantienen unido el recubrimiento, ubicado
en la parte posterior de la unidad.
b. Separe las piezas del recubrimiento a la
vez que tira de ellas hacia delante.
4. Coloque una(s) toalla(s) detrás del inodoro,
debajo de la conexión de suministro de agua,
para atrapar el agua.
5. Desconecte el suministro de agua del VR de la
válvula para el agua.
6. Retire las tapas de los pernos de la brida del
suelo (si las tienen) y las tuercas.
FIGURE 1/SCHÉMA 1/FIGURA 1
Part No.
Pièce No.
Artículo
No. 34122
Style®Plus, Lite & II
Vacuum Breaker Kit
Trousse à dispositif
anti-refoulement
Juego de dispositivo rompevacío
RV Toilets/Cabinets d’aisances pour VR/Inodoros para VR
Made in the USA/Fabriqué aux É.-U./Hecho en EE UU
Thetford Corporation
Ann Arbor, MI 1-800-521-3032 www.thetford.com
F# 34123 12/06
Inlet tube/
Tube d’admission/
Tubo de entrada
Clamp A/
Crampon de
serrage A/
Abrazadera A
Vacuum breaker/
Dispositif anti-refoulement/
Dispositivo rompevacío
Flush hose/
Tuyau de chasse/
Manguera de
descarga
Nozzle/
Buse/
Boquilla
Clamp C/
Crampon de
serrage C/
Abrazadera C
Clamp B/
Crampon de
serrage B/
Abrazadera B
Pod (Lite only)/
Boîtier (Lite uniquement)/
Receptáculo (únicamente en el
modelo Lite)
Pod O-Ring/
Joint torique
du boîtier/
Junta tórica del
receptáculo
trash bag.
8. Cover holding tank opening
with a towel.
9. Remove old closet flange
Seal. Discard.
Remove Old Vacuum
Breaker
1. Style Lite - Remove pod:
a. Remove pod o-ring.
b. Remove pod.
2. With pliers, slide clamp A
down inlet tube, then remove
inlet tube from vacuum
breaker.
3. Slide clamp C backward on
flush hose, then remove the
vacuum breaker.
4. Discard old vacuum breaker,
and clamps A, B, and C.
Install New Vacuum
Breaker
1. Install new flush hose on
nozzle, then secure with new
clamp C.
2. Slide new clamp B up flush
hose.
3. Install new vacuum breaker
on flush hose, then secure
with new clamp B.
4. Install new clamp A on inlet
tube.
5. Install inlet tube on vacuum
breaker, then secure with
new clamp A.
6. Style Lite - Install pod.
a. Install pod.
b. Install pod o-ring.
Reinstall Toilet
1. Install new Closet Flange
Seal, lip side down, on toilet.
2. Uncover holding tank open-
ing and remove towel(s).
3. Place Toilet on floor, aligning
mounting holes with closet
bolts.
4. Tighten Closet Flange Nuts
until toilet does not rock. Do
not overtighten.
5. Replace Bolt Covers (if pres-
ent).
6. Connect RV water supply line
to Toilet.
7. Style Plus only – Install
Shroud:
a. Spread Shroud open,
then lower pedal opening
over pedal neck.
b. Wrap Shroud around to
back of toilet. Push pedal
down, then push shroud
into place to engage front
fastening device.
c. Secure back of Shroud
with two O-rings – larger
on top and smaller on
bottom.
8. Turn on RV water supply.
9. Flush test Toilet, checking for
leaks at all connections.
ENGLISH FRANçAIS ESPAÑOL
sous le raccord d’eau pour récupérer l’eau qui fuit.
5. Débranchez l’alimentation en eau du RV à partir du
robinet de la prise d’eau.
6. Retirez les chapeaux (le cas échéant) des boulons
et les écrous de la bride de sol.
7. Soulevez le cabinet du sol et placez-le sur un sac à
déchets.
8. Couvrez l’ouverture du bac à eaux usées.
9. Retirez le vieux joint d’étanchéité de la bride de sol
et jetez-le.
Retirez le vieux dispositif anti-refoulement
1. Style Lite – Retirez le boîtier;
a. Retirez le joint torique du boîtier.
b. Retirez le boîtier.
2. À l’aide des pinces, faites glisser le crampon de
serrage A vers le bas sur le tube d’admission, puis
retirez le tube d’admission du dispositif anti-refoule-
ment.
3. Faites glisser le crampon de serrage C en arriére
sur le tuyau d’évacuation, puis retirez le dispositif
anti-refoulement.
4. Jetez le vieux dispositif anti-refoulement et les
crampons de serrage A, B et C.
Installez le nouveau dispositif anti-
refoulement
1. Installez le nouveau tuyau d’évacuation (s’il a été
retiré) sur la buse, puis fixez-le avec le nouveau
crampon de serrage C.
2. Faites glisser le nouveau crampon B vers le haut du
tuyau d’évacuation.
3. Installez le nouveau dispositif anti-refoulement sur
le tuyau d’évacuation, puis fixez-le à l’aide du nou-
veau crampon B.
4. Installez le nouveau crampon A sur le tuyau
d’admission.
5. Installez le tuyau d’admission sur le dispositif
anti-refoulement, puis fixez-le à l’aide du nouveau
crampon A.
6. Style Lite – Installez le boîtier.
a. Installez le boîtier.
b. Installez le joint torique du boîtier.
Réinstallez le cabinet
1. Installez le nouveau joint d’étanchéité de la bride de
sol, la lèvre vers le bas, sur le cabinet.
2. Mettez à découvert l’ouverture du bac à eaux usées
et retirez la ou les serviettes.
3. Placez le cabinet sur le sol, en alignant les orifices
de montage avec les boulons du cabinet.
4. Resserrez les écrous du joint d’étanchéité jusqu’à
ce que le cabinet soit stable. Ne les serrez pas trop.
5. Remettez les chapeaux sur les boulons (s’il y a
lieu).
6. Branchez la conduite d’alimentation en eau du VR.
7. Style Plus - Installez l’enveloppe de protection:
a. Déployez l’enveloppe de protection, puis abais-
sez l’ouverture de la pédale à la hauteur de son
cou.
b. Ramenez l’enveloppe de protection jusqu’à
l’arrière. Enfoncez la pédale, puis poussez
l’enveloppe de protection pour faire s’engager le
dispositif d’attache frontal.
c. Fixez l’arrière de l’enveloppe de protection à
l’aide de deux joints toriques – le plus grand
dans la partie supérieure et le plus petit dans la
partie inférieure.
8. Ouvrez la conduite d’alimentation en eau du VR.
9. Tirez la chasse d’eau pour tester le cabinet, en véri-
fiant la présence de fuite à toutes les connexions.
7. Levante el inodoro del piso y colóquelo sobre
la bolsa para basura.
8. Tape la abertura del tanque de retención.
9. Retire la junta hermética de brida del suelo
usada y deséchela.
Retire el dispositivo rompevacío usado
1. Style Lite – Retire el receptáculo:
a. Retire la junta tórica del receptáculo.
b. Retire el receptáculo.
2. Con los alicates, corra la abrazadera A por
el tubo de entrada, luego retire el tubo del
dispositivo rompevacío.
3. Corra la abrazadera B hacia atrás, por la
manguera de descarga, luego retire el dis-
positivo rompevacío.
4. Deseche el dispositivo rompevacío usado y
las abrazaderas A, B y C.
Instale el nuevo dispositivo
rompevacío
1. Instale en la boquilla una manguera de
descarga nueva, luego asegúrela con una
abrazadera C nueva.
2. Corra una abrazadera B nueva por la
manguera de descarga.
3. Instale el dispositivo rompevacío nuevo en la
manguera de descarga, luego asegúrela con
una abrazadera B nueva.
4. Instale una abrazadera A nueva en el tubo de
entrada.
5. Instale el tubo de entrada en el dispositivo
rompevacío, luego asegúrelo con una abraza-
dera A nueva
6. Style Lite – Instale el receptáculo:
a. Instale el receptáculo.
b. Instale la junta tórica del receptáculo.
Vuelva a instalar el inodoro
1. Instale en el inodoro la nueva junta hermética
de brida del suelo, con el lado del reborde
hacia abajo.
2. Destape la abertura del tanque de retención y
retire la(s) toalla(s).
3. Coloque el inodoro sobre el piso, alineando
los orificios de montaje con los pernos del
excusado.
4. Apriete las tuercas de la brida del suelo hasta
que no se pueda mover el inodoro. No las
apriete demasiado.
5. Vuelva a colocar las tapas de los pernos (si
las tienen).
6. Conecte la tubería de suministro de agua del
VR.
7. Style Plus – Instale el recubrimiento:
a. Separe el recubrimiento, luego descienda
la abertura del pedal sobre el cuello del
pedal.
b. Envuelva el inodoro con el recubrimiento
hasta su parte posterior. Pise el pedal,
luego meta el recubrimiento en su sitio
para que se fije al dispositivo de sujeción
delantero.
c. Fije la parte posterior del recubrimiento
con las dos juntas tóricas – la mayor en
la parte superior y la menor en la parte
inferior.
8. Abra el suministro de agua del VR.
9. Haga pasar el agua para detectar fugas en
todas las conexiones del inodoro.

Other Thetford Plumbing Product manuals

Thetford XR17200 User manual

Thetford

Thetford XR17200 User manual

Thetford Aqua-Magic 34120 User manual

Thetford

Thetford Aqua-Magic 34120 User manual

Thetford 51802 Setup guide

Thetford

Thetford 51802 Setup guide

Thetford EasyFit User manual

Thetford

Thetford EasyFit User manual

Thetford 2384978 Setup guide

Thetford

Thetford 2384978 Setup guide

Thetford 92909 Series Setup guide

Thetford

Thetford 92909 Series Setup guide

Thetford Sani-Con Turbo User manual

Thetford

Thetford Sani-Con Turbo User manual

Thetford 100 Series User manual

Thetford

Thetford 100 Series User manual

Thetford 19833 User manual

Thetford

Thetford 19833 User manual

Thetford 23709 Setup guide

Thetford

Thetford 23709 Setup guide

Thetford C500 User manual

Thetford

Thetford C500 User manual

Thetford SmartTote User manual

Thetford

Thetford SmartTote User manual

Thetford ELECTRA MAGIC User manual

Thetford

Thetford ELECTRA MAGIC User manual

Thetford 33226 User manual

Thetford

Thetford 33226 User manual

Thetford Aqua-Magic 33186 User manual

Thetford

Thetford Aqua-Magic 33186 User manual

Thetford Tecma Silence 2G-RV User manual

Thetford

Thetford Tecma Silence 2G-RV User manual

Thetford Aqua-Magic V User manual

Thetford

Thetford Aqua-Magic V User manual

Thetford Sani-Con User manual

Thetford

Thetford Sani-Con User manual

Thetford Sanicon Turbo 500 User manual

Thetford

Thetford Sanicon Turbo 500 User manual

Thetford Aqua-Magic STYLE PLUS User manual

Thetford

Thetford Aqua-Magic STYLE PLUS User manual

Popular Plumbing Product manuals by other brands

Helvex KUBICA E-48 installation guide

Helvex

Helvex KUBICA E-48 installation guide

Clou first CL/03.12110 installation instructions

Clou

Clou first CL/03.12110 installation instructions

Brizo T608 Series manual

Brizo

Brizo T608 Series manual

American Standard Seva 1480.10X installation instructions

American Standard

American Standard Seva 1480.10X installation instructions

CRISTINA BOLLICINE CRIBO102 installation instructions

CRISTINA

CRISTINA BOLLICINE CRIBO102 installation instructions

Elkay EWMA7220SACC Specifications

Elkay

Elkay EWMA7220SACC Specifications

Mira Elate J95N installation guide

Mira

Mira Elate J95N installation guide

American Standard ELITE 4453 Series installation instructions

American Standard

American Standard ELITE 4453 Series installation instructions

Pfister Park Avenue LG6-4FE Quick installation guide

Pfister

Pfister Park Avenue LG6-4FE Quick installation guide

newform B-EASY 72675E instructions

newform

newform B-EASY 72675E instructions

Blanco Neo Rados 157-102 Specifications

Blanco

Blanco Neo Rados 157-102 Specifications

Santec KARLIE 1870EP installation instructions

Santec

Santec KARLIE 1870EP installation instructions

American Standard Easy Touch 6310SSEZ Specification sheet

American Standard

American Standard Easy Touch 6310SSEZ Specification sheet

Kalia SPEC Sobrio BF1861 installation instructions

Kalia SPEC

Kalia SPEC Sobrio BF1861 installation instructions

keep living Pressalit Care R8683 Mounting instructions

keep living

keep living Pressalit Care R8683 Mounting instructions

BELLOSTA revivre 8031/3/A quick start guide

BELLOSTA

BELLOSTA revivre 8031/3/A quick start guide

Nobili LV113/70 quick start guide

Nobili

Nobili LV113/70 quick start guide

Danze D328544T manual

Danze

Danze D328544T manual

manuals.online logo
manuals.online logoBrands
  • About & Mission
  • Contact us
  • Privacy Policy
  • Terms and Conditions

Copyright 2025 Manuals.Online. All Rights Reserved.