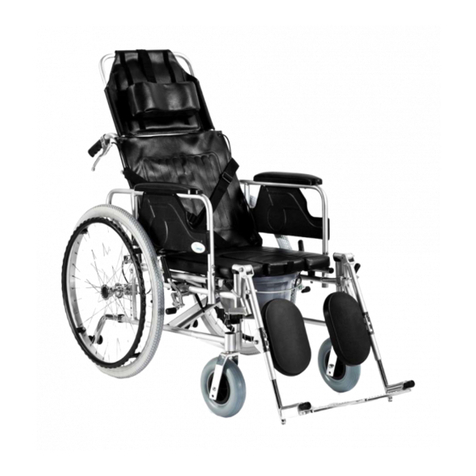
Timago TGR-R WA C2600 User manual

1
USER MANUAL
Aluminium wheelchair
Product code: TGR-R WA C2600
Dear Customers,
Thank you for purchasing our product. We hope that the equipment you have selected will meet
your expectations. We would like to share some important information with you.
Timago International Group is a Polish company which distributes medical, rehabilitation and
orthopaedic products to pharmacies and medical stores.
Our mission is to ensure your comfort by offering safe, functional, and high-quality products.
We have many years of experience in this sector. Timago products reach a wide range of users in
Poland and throughout Europe through our distributors (medical retailers).
Timago’s company culture promotes openness to your needs. Our goal is to promote safe and
correct use of our products for treatment and rehabilitation in order to improve comfort and quality
of life.
We invite you to access our website for more information: timago.com.

2
1. Introduction
Prior to use of our products you should inspect the equipment for any defects which may have
occurred during transport. If this happens, please contact your retailer.
Then, please read this instruction which includes important information for the user.
Please contact us if you have any questions concerning the use of the equipment. Our advisors will
provide you with any information you require on an ongoing basis.
Please note that if you have questions other than those concerning the use of our products, you
should contact your doctor, nurse or physical therapist.
2. Characteristics
The wheelchair is made of light aluminium frame reinforced with double cross bar. Additionally
upholstered backrest and seat are made of air-permeable material. Flip-up armrests are made in
profiled version with cut edge. The wheelchair is equipped with quick release function allowing fast
dismantling of wheels, attendant brakes and foldable backrest. Footrests are available in a swing
away version. The wheelchair is supplied with pneumatic rear wheels (22’’) and solid rubber front
wheels 6’’ in diameter.
The set includes:
•Frame with seat
•Right footrest with footplate
•Left footrest with footplate
•Protective strap
•Pump
•Set of keys for wheelchair assembly/dismantling

3
Elements of the wheelchair:
a. Hand grip
b. Attendant brake
c. Backrest lock
d. Armrest
e. Locking pin of the armrest
f. Wheel lock
g. Handrim
h. Quick release
i. Assembly pin of the footrest
j. Footrest
k. Adjustment of the centre of gravity on
the front wheels
l. Anti-tip wheels
3. Application
The wheelchair is designed for people who have problems with unassisted moving and for patients
with dysfunctions and reduced mobility. This self propelled wheelchair can also be pushed by an
accompanying person. The wheelchair is suitable for indoor and outdoor use.
4. Assembly and general recommendations for use
Note! Follow the information contained in this manual while assembly and adjustment. Users with
reduced mobility may need help from a third person who has appropriate skills.
Note! Do not sit in the wheelchair or use it in any other way before completion of assembly.
UNFOLDING AND ASSEMBLY
Step 1. Unfolding the wheelchair
Place the wheelchair on the ground. Unfold the wheelchair using the hand grips which are at the
back of the backrest. Then, press the front and rear edge of the seat so that all the elements fit
together.
Step 2. Assembly of footrests
Assemble the right and the left footrest in the front part of the frame by placing them on two pins
and turn them inwards until they are locked.

4
Step 3. Adjustment of footplates
Adjust the right and the left footplate by tightening the screw which is placed at the bottom of
footrests with included key. Proper space should be left between the footplates and the ground as
footplates set too low may cause difficulties in overcoming such obstructions as curb. Adjust the
footplates so that the angle between trunk and thighs is 900 (optimum sitting position is provided to
the user, then).
Step 4. Assembly of protective strap
Put the protective strap on the footrest as it prevents user’s legs from sliding down under the
wheelchair from footplates.
Note! Do not use the wheelchair without protective strap.
Step 5. Adjustment of anti-tip wheels
In order to adjust anti-tip wheels, which are located at the back of the wheelchair, pull the lock,
move the wheels upwards or downwards, and select appropriate height.
Step 6. Checking the assembly of wheels
Lift the wheelchair slightly and spin the right wheel and then the left one by pulling the handrims and
check if the wheels spin properly.
Step 7. Assembly of cushion and upholstery
Fix the cushion and upholstery to the backrest with Velcro.
On completion of the above activities, the wheelchair is ready to use.
FOLDING
The wheelchair can be re-folded in order to be transported and stored more easily.
•Swing away the footplates and set them in vertical position (perpendicularly to the ground).
•Grab the cushion and upholstery and detach from Velcro.
•To fold the frame, pull the seat upwards by holding the front and the back edge in the
middle, so that the frame jumps out from the connecting elements.
•If necessary, lift the anti-tipping wheels to the maximum height.
FLIP-UP FUNCTION OF ARMRESTS
•Press the locking button located in the front part of the armrest and push the armrest
backwards.
•To close the armrest, push it downwards so that the locking button clicks.

5
PUMPING THE WHEELS
•The wheelchair was equipped with pneumatic rear wheels 22’’ in diameter and swivel, PU
front wheels 6’’ in diameter (tubeless tyre). Remember to control the air pressure in both
wheels and check the condition of the tyres in search of abrasions, cuts or surface depletion.
•To balance the air pressure in the wheels, twist off the cap of the valve, insert the pump
(included in the set) into the valve, and pump the air.
WHEEL LOCKS
•To lock the wheels, push the wheel lock lever forwards until the wheel is fully blocked
(separately for left and right wheel). Please, note that the wheel lock only serves to lock the
wheels when the wheelchair is at a complete stop.
WHEEL LOCKS ADJUSTMENT
The correct lock of the wheel lock depends on its adjustment and position. The handle of the wheel
lock should be positioned so that the wheel lock shoe blocks the wheel firmly and the lever does not
face excessive resistance.
•In case of excessive resistance, pull the handle forwards slightly by twisting off the locking
screw which is located on the other side of the wheel lock (from the inside of the
wheelchair). Set the wheel lock shoe in such position that the wheel lock blocks the wheel
easily and without resistance.
•When the wheel lock shoe does not touch or lock the wheel sufficiently, follow the above
instruction by moving the handle in the opposite direction.
ATTENDANT BRAKES
The levers of the brakes are located behind the backrest, under the hand grips on the right and left
side, and are connected with wheel lock by cable.
•In order to apply emergency breaking or stopping lock, squeeze the lever of the brake and in
order to release the brake, drop the levers. Perform this activity smoothly and with
appropriate force.
Note! These brakes should not be used to slow down the wheelchair. If they are often used for this
purpose, they may cause tyre abrasion which will not be covered by guarantee terms.
FOLDING BACKREST
•To fold the backrest, simultaneously pull downwards the locking elements which are located
under the hand grips at the back of the backrest.

6
ADJUSTMENT FOR PATIENTS AFTER AMPUTATIONS IN THE LOWER LIMBS AREA
Note! For professional adjustment, ask your retailer or other person who has appropriate knowledge
and qualifications. Do not adjust inclination angle of the seat by yourself.
•To adjust the centre of gravity, unscrew fixing screw in right and left wheel. Then, set the
seat inclination by moving fixing axis of the wheel upwards or downwards, the same in both
wheels.
•The seat inclination should be set in such a way so that the user does not slide down from
the wheelchair and can freely use handrims.
SEAT BELT
•The belt, which is included in the standard equipment, protects the trunk in cases when the
user slides down from the wheelchair or is not able to keep correct position independently.
The belt is fastened with the use of buckle.
•Note! The belt does not guarantee complete safety. It is possible that in some situations
the belt will not fulfill its function. In such case undertake other safety measures and use
other belt, e.g. with perineal band or with braces (depending on illness and the stage of
dysfunction). To choose suitable belt, contact with the retailer.
WHEELCHAIR HANDLING
Note! The assistance of the third person may be required while first use regardless of the user’s
health condition.
BEFORE USE
Step 1. Checking the condition of the wheelchair
Check the condition of the wheel locks, construction and tyres. Check also the correctness of the
assembled components and their adjustment.
Note! Do not use the wheelchair if any defects or deficiencies are noticed.
Step 2. Engaging the wheel locks
Engage the wheel locks when getting in or out the wheelchair.
Step 3. Setting the footplates
The footplates should be in vertical position when getting in or out the wheelchair. Do not use the
footplates as a support while getting in or out the wheelchair due to the risk of wheelchair tipping
over and falling.
Note! Do not stand on the footplates due to the risk of damage.

7
Step 4. Setting the wheels
Front wheels should be positioned in the direction of riding.
Step 5. Getting in the wheelchair
The wheelchair should be located at the place of changing the seat as close as possible. The
wheelchair should touch the bed or other seat being used, rear wheel and front element of the
frame. If the user cannot change his/her seat independently, transfer the user to the wheelchair.
Step 6. Unfolding the footplates
When the user sits in the wheelchair, unfold the footplates parallel to the ground so that his/her feet
are on the footplates while using the wheelchair.
Step 7. Correct position of the user
The user should sit in the upright position and his/her knees should be bent at the angle of 90°.
SAFETY USAGE
•Remember about proper setting of the anti-tipping wheels which serve as a protection
against falling, especially in cases of leaning the seat backwards.
•Lifting objects from the ground may be dangerous for the person sitting in the wheelchair as
the shift of the center of gravity may cause the wheelchair to tip over with the user. In order
to lift the object from the ground, a third person should be asked for help or a special
instrument should be used.
•Be particularly careful while riding upwards or downwards the inclined surfaces. When the
wheelchair is on the inclined surface, the accompanying person should always stand below
and protect the wheelchair from sliding down or tipping over.The center of gravity is always
at the back of the wheelchair!
•Remember that a heavy object hung on the backrest may change the center of gravity.
•Be particularly careful when the accompanying person drives into a curb, a stair or some
other obstacle. It is essential not to lean over the wheelchair beyond its point of gravity as
the wheelchair may tip over. The weight of the wheelchair with the user will have to be
maintained by the accompanying person.
•Make sure that the accompanying person is strong enough to push the wheelchair safely.
•Do not use the wheel lock in order to slow down the wheelchair. Engaging the wheel lock
while the wheelchair is moving may pose threat to user’s safety.

8
•Do not use the wheelchair under the influence of alcohol or medicine that may impair the
ability of machine or vehicles operation. It concerns both the user of the wheelchair and the
accompanying person.
Note! Do not exceed maximum capacity of the wheelchair!
Note! Do not transfer the wheelchair by grasping the armrests or footrests. The wheelchair should
be transferred by grasping the frame construction. It is unacceptable to transfer the wheelchair with
the user.
Note! The wheelchair can be used both inside and outside the buildings ONLY on hardened and even
surfaces. It is unacceptable to use the wheelchair on icy, wet, greasy, and strongly sanded surfaces as
they do not provide firm stability to the user. Do not use the wheelchair outdoors under
unfavourable weather conditions.
Note! Do not overcome architectonic obstacles rapidly what affects the user’s safety. In case of
significant difficulties, you should ask for help at least one fit person.
Note! Do not ride through e.g. doors without checking whether their width is greater than the outer
width of the wheelchair.
Note! Do not sit on the wheelchair when it is not properly unfolded and the frame is not in
connecting elements.
Note! Do not place any objects between the spokes as it may lock the wheels.
Note! Do not use the wheelchair to transport heavy objects.
Note! Do not climb on the wheelchair or stand on the seat and its remaining parts.
INDEPENDED USE OF THE WHEELCHAIR
The user may use the wheelchair independently using the handrims fixed to the wheels. Depending
on the user’s strength and health condition, it is possible to overcome ground obstacles and hills of
low and moderate inclination, and to turn into desired directions independently. Using the
wheelchair requires basic skills in controlling over the device. A help from the third person is
required to overcome difficult ground barriers (steep or long ramps, high steps, stairs, etc.).
Note! First independent attempts should be undertaken under the security of the third person!
Moving forwards. First steps
Step 1. Place hands on handrims.
Step 2. Lean forwards slightly.
Step 3. Move your arms forward, straightening your elbows using the same force in both hands.
Step 4. Release the handrims.

9
Step 5. The wheelchair was put in motion. Straighten up and grab the handrims again.
Step 6. Straighten up and make next cycles of movements looking ahead.
Braking
•To brake, stop the handrims with your hands gradually or make a slight backward move.
Moving backwards
•Put hands on handrims in the front part of the wheels so that they are straight in elbows.
•Make a move backwards by pilling right and left handrim using the same force in both hands.
•Watch the course of the wheelchair by turning the head back and forth alternately by the
right and left arm.
Turning in place
•Put one hand on the handrim behind your hip and the other one in front of your hip.
•Push one wheel forwards and the other wheel backwards simultaneously.
•The greater the span between hands, the greater the turn.
Turning while riding
•Make more vigorous move forwards on the handrim with one hand.
•With a stronger turn, you can stop the wheel with one hand and with the other make more
vigorous move on the handrim forwards.
•Follow this rule also when moving backwards.
Inclination
•To ride on inclinations, lean forwards in order to move the center of gravity in the direction
of riding.
Note! Avoid sudden changes of directions, leaning over the sides, and hills inclined at the angle
greater than 7°.
Overcoming threshold, step
•To place front wheels on the step, lean forwards and push handrims forwards energetically.
•To place rear wheels on the step, lean forwards and push handrims backwards.
Note! Stairs with more than one step should be overcome with the help of 2 people.

10
Riding down the hill, step
•This maneuver should be done while riding backwards.
•The silhouette should be leaned forwards in order to properly move the center of gravity
while the speed of ride should be controlled by firm grip on the handrims.
•It is important to control the direction and speed while riding down the hill.)
Note! In case of longer hills you should ride only in the company of the third person who will walk
protectively behind the wheelchair.
USAGE WITH HELP OF THE ACCOMPANYING PERSON
Optionally, the wheelchair can be pushed by the accompanying person who holds hand grips placed
on the backrest. The accompanying person must obey the following rules:
•Before the ride, make sure that no user’s body part or piece of cloth is exposed to moving
parts of the wheelchair.
•When the user is not able to keep sitting position independently, equip (additionally) the
wheelchair with stabilizing belts.
•The wheelchair should be pushed with both hands. When it is necessary to raise the front
wheels, press the lower grip of the frame with one foot and simultaneously pull the hand
grips towards you; lean over the wheelchair backwards.
•To stop the wheelchair, move the wheel lock lever (located at the rear wheels) towards the
front of the wheelchair until the wheel is locked (perceptible resistance). Repeat the action
with the other wheel. To release the wheel lock and allow further riding, move the lever
towards the back of the wheelchair.
Note! While getting in or out the wheelchair, changing the user’s position or stop, the wheels must
be absolutely locked.
Note! Never leave the user in the wheelchair unattended (even with engaged wheel locks) on ramps
and landings, etc.!
Riding down the step
•Ride up to the edge of the step and grab handrims.
•Pull both hand grips towards you and simultaneously press the tube of the frame with your
foot in order to lift front wheels.
•Keeping the wheelchair in this position, move the wheelchair carefully down the step and
push it forwards so that the front wheels touch the ground.

11
Riding up the step
•Place the wheelchair backwards to the step.
•Pull both hand grips towards you in order to lift the front wheels from the ground. Pull the
rear wheels over the edge of the step so that the front wheels can be placed on the ground
again.
TRANSPORT WITH HELP OF THIRD PERSON
Stairs
The help of at least two fit people is required in order to transport the user in the wheelchair. Any
obstacles which may pose a risk for the user or other people must be removed.
•To transport the wheelchair upwards or downwards, one person grabs hand grips and pulls
the wheelchair towards him/her, slightly lifting front wheels.
•The second person grabs the frame from the front (remove the footrests for this purpose)
and assisting each other, pull or lower the wheelchair.
•Perform these activities smoothly and calmly with no sudden moves which may cause an
accident.
Note! Remember to protect the user properly by fastening the belts around user’s trunk.
Car
Note! Wheelchair users should not be transported in vehicles while in wheelchair. To travel safely,
the user should be secured in the seat of the car while the folded wheelchair should be placed in the
boot.
Note! Do not transport the wheelchair inside the car! It may pose a huge risk for the passengers in
case of car accident!
•To transport the wheelchair, fold it, and if necessary, dismantle the footrests and rear
wheels.
•If such, follow dismantle/assembly instructions given in this manual.
Ramps
In order to transport the user in the wheelchair on ramps, strictly follow the safety rules and act as in
case of transporting the user on stairs (see above).
Note! Follow the manufacturer's recommendations of ramp and strictly comply with permitted
loads.

12
5. Technical data
Overall width
61-66 cm
Inner width
43, 46, 48 cm
Overall depth
110 cm
Seat height from the ground
46 cm
Overall height
88 cm
Seat dimensions
42, 45, 47 cm x 41 cm
Weight
13.5-15.5 kg
Maximum capacity
100 kg
Folded width
36 cm
Frame colour
silver
6. Notes and recommendations
Note! Check the condition of the wheelchair regularly and promptly contact with the retailer in case
of any damage that may raise doubts of the safety use of the wheelchair.
Note! Keep the wheelchair in dry places below 40° C and do not expose it to sun rays, water, dust,
sand, etc. The wheelchair must be properly protected (i.e. covered) and free from any external loads
while storage. Remember that the surface temperature of upholstery and frame components may
increase when exposed to the sun or other heat source, which may cause burns.
Note! Only use original spare parts admitted to operation by the manufacturer. For this purpose,
contact with the retailer.
Note! Do not make any repairs or modifications by yourself.
Note! Do not adjust the angle of the seat by yourself.
NOTE! Timago International Group does not bear responsibility of improper moving in the
wheelchair, failure to comply safety regulations and misuse.
7. Cleaning and maintenance
Reviews
Check the condition of the wheelchair regularly:

13
•Before each use: check the condition of mechanical components, correct assembly of
removable components, proper work of wheel locks, tyre condition, and proper unfolding of
the wheelchair.
•Every 4 weeks: check the condition of mechanical components including proper greasing,
wheel lock adjustment and seat condition.
•Every 6 months: it is recommended to do review at the service point indicated by the
manufacturer (according to the applicable service price list).
Cleaning and maintenance
Carry out the maintenance of the wheelchair components regularly:
•The upholstery and the cushion can be cleaned with damp (not wet) cloth and cold or warm
water, without the use of detergents. Difficult stains can be cleaned with a sponge. Do not
soak the upholstery too much. Dry away from heat sources.
•Plastic elements should be cleaned with damp cloth possibly with the use of appropriate
detergents for plastic elements. In such case follow the instructions given by the producer
and safety measures.
8. Warranty information
All products distributed by our company are under a warranty, the terms of which are described in
the warranty card received at the time of purchase. Please, keep in mind that for warranty purposes,
the proof of purchase (receipt or invoice) should be retained.
As a user friendly company, we only supply products which have been thoroughly tested with respect
to materials, quality and functionality.
Please contact us if you have any questions concerning our servicing procedure.
9. Labels
Reference number Manufacturer
LOT number Manufacture date
Serial number
Representative in Euro-
pean Union
Note
Please read the
instruction
The Manufacturer checked for compliance with essential
medical devices requirements.

14
10. Recommended products
Products offered by Timago International Group include:
Orthoses and joint stabilizers
Manual and special-use wheelchairs
Walkers and rollators
Crutches and canes
Rehabilitation beds
Ancillary and sanitary equipment
Anti-decubitus equipment and accessories
Stabilizing and immobilizing belts
Electro-medical equipment
Disposable medical equipment
Our complete line of products is available from our distributors.
Learn more at: timago.com.
Manufacturer:
Timago International Group
Spółka z o.o. i Spółka – Spółka komandytowa
ul. Karpacka 24/12
43-316 Bielsko-Biała, Polska
T.: +48 33 499 50 00
F.: +48 33 499 50 11
Issue I, date 29.07.2016
Table of contents
Other Timago Wheelchair manuals
Timago
Timago FS 654 LGC User manual

Timago
Timago FS 7962L User manual
Timago
Timago ALH 008 User manual

Timago
Timago TGR-R PP 474 User manual

Timago
Timago FS 901 User manual

Timago
Timago H011-B User manual

Timago
Timago T101 User manual

Timago
Timago FS 908LQ User manual

Timago
Timago FS 681 User manual

Timago
Timago T101 User manual

Timago
Timago FS 7962L User manual

Timago
Timago SIMPLE-TIM User manual

Timago
Timago Big-TIM User manual
Timago
Timago TGR-R KP-U 3522 User manual
Timago
Timago MASTER-TIM User manual

Timago
Timago H011 User manual

Timago
Timago TGR-R KP 355L User manual

Timago
Timago FS 692 User manual
Timago
Timago FS 894 User manual
Timago
Timago TGR-R WA 6700 User manual