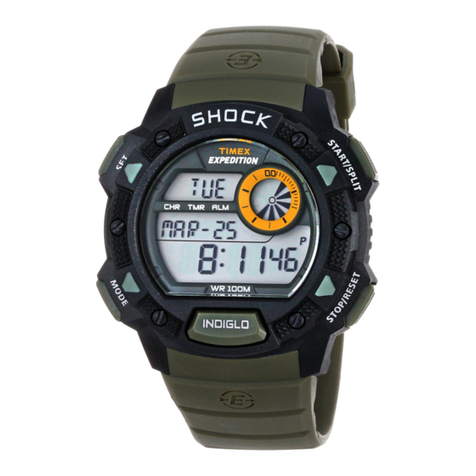
Timex Expedition User manual

EXPEDITION® 4-PUSHER DIGITAL
Register your product at https://www.timex.com/productWarranty.html
Enregistrez votre produit sur fr.timex.ca/product-registration.html
www.timex.fr/fr_FR/product-registration.html
製品登録サイト https://www.timexwatch.jp/
00900 W3
USER GUIDE …..……..……..……..……..……..… 1
MODE D’EMPLOI……..……..……..……..……..… 3
ユ ー ザ ガ イド …..……..……..……..……..……..… 5
745-096000 10.21.19

ENGLISH 745-096000
1
EXTENDED WARRANTY
Available in U.S. only. Extend your warranty for an additional 4 years from date
of purchase for $5. You can pay with AMEX, Discover, Visa or MasterCard by
calling 1 800-448-4639 during normal business hours. Payment must be made
within 30 days of purchase. Name, address, telephone number, purchase date,
and 5-digit model number required. You can also mail a check for $5 to: Timex
Extended Warranty, P.O. Box 1676, Dept. EF, Little Rock, AR 72203.
Please read instructions carefully to understand how to operate your Timex®
watch. Your model may not have all of the features described in this
booklet.
FEATURES
• Two time zones
• Alarm
• 24-hour countdown timer
• 99-lap chronograph
• Hourly chime
BASIC OPERATIONS
MODE
INDIGLO®START/SPLIT
OR +
ALARM ON
SET
OR –
STOP/RESET
TIME AND DATE
A. Press and hold SET. SECONDS digits will flash.
B. Press START/SPLIT to set SECONDS to 0.
C. Press MODE to select HOURS.
D. Press START/SPLIT to advance. Press and hold to advance quickly.
Go through 12 hours for AM or PM.
E. Press MODE to select MINUTES, then START/SPLIT to advance. Press and
hold to advance quickly.
F. Repeat to set MONTH, DATE, DAY, 12- or 24-hour TIME display.
G. Press SET when done.
Note: Press START/SPLIT to view TIME ZONE 2.
CHRONOGRAPH
A. Press MODE to select CHRONO.
B. Press SET to select Lap or Split display.
C. Press START/SPLIT to start.
D. Press START/SPLIT to record lap time.
E. Press MODE to display lap or split time (automatic after 10 seconds).
F. Press STOP/RESET to pause.
G. Press START/SPLIT to resume.
H. Press STOP/RESET to stop.
I. Press STOP/RESET to reset.
Note: When CHRONO is running LAP or SPLIT appears in time display.
ALARM AND CHIME
A. Press MODE to select ALARM.
B. Press SET to select Time Zone 1 or 2 (T-1 or T-2).
C. Press START/SPLIT to change.
D. Press MODE to select HOURS. Digits will flash.
E. Press START/SPLIT to advance. Press and hold to advance quickly. Go
through 12 hours for AM or PM
F. Press MODE to select TENS of MINUTES.
G. Press START/SPLIT to advance. Press and hold to advance quickly. Repeat
for MINUTES, Time Zone 1 or 2.
H. Press SET when done.
I. In ALARM Mode, press START/SPLIT repeatedly to turn ALARM and CHIME
modes on or o.
Note: When alarm time is indicated in appropriate time zone, watch will beep
for 20 seconds, or until a watch button is pushed. Alarm will repeat every 24
hours until deactivated.
COUNTDOWN TIMER
A. Press MODE to select TIMER.
B. Press SET to select TENS of HOURS. Digits will flash.
C. Press START/SPLIT to advance. Press and hold to advance quickly.
D. Press MODE to select HOURS.
E. Repeat to set TENS of MINUTES, MINUTES, TENS of SECONDS, and
SECONDS.
F. Press SET when done.
G. Press START/SPLIT to start timer.
H. Press STOP/RESET to pause, START/SPLIT to resume.
I. Press STOP/RESET again to reset.
Note: Watch will beep when countdown ends.
SECOND TIME ZONE
A. Press MODE to select TIME ZONE 2.
B. Press and hold SET to set time. HOURS digits will flash.
C. Press START/SPLIT to advance. Go through 12 hours for AM or PM.
D. Press MODE to select MONTH, DATE, 12- or 24-hour TIME display. Press
START/SPLIT to advance.
E. Press SET when done.
F. Press START/SPLIT to view TIME ZONE 2.
INDIGLO®NIGHT-LIGHT / NIGHT MODE®FEATURE
Press INDIGLO®button to activate night-light. Electroluminescent technology
used in INDIGLO®night-light illuminates entire watch face at night and in low
light conditions.
Press and hold INDIGLO®button for 4 seconds to activate NIGHT-MODE®
feature. Moon icon Pwill appear. Once activated, any button pushed will cause
INDIGLO®night-light to stay on for 3 seconds. NIGHT-MODE®feature will stay
activated for 8 hours or until deactivated by pressing and holding INDIGLO®
button again for 4 seconds.
WATER & SHOCK RESISTANCE
If your watch is water-resistant, meter marking or (O) is indicated.
Water-Resistance Depth p.s.i.a. * Water Pressure Below Surface
30m/98ft 60
50m/164ft 86
100m/328ft 160
*pounds per square inch absolute
WARNING: TO MAINTAIN WATER-RESISTANCE, DO NOT PRESS ANY
BUTTONS UNDER WATER.
1. Watch is water-resistant only as long as lens, push buttons and case remain
intact.
2. Watch is not a diver watch and should not be used for diving.
3. Rinse watch with fresh water after exposure to salt water.
4. Shock-resistance will be indicated on watch face or caseback. Watches are
designed to pass ISO test for shock-resistance. However, care should be
taken to avoid damaging crystal/lens.
ENGLISH 745-096000
2
FAST WRAP®STRAP
Some watches have FAST WRAP straps. To adjust the strap:
1. Slide end of strap through D-ring.
2. Pull tight to adjust and fasten for snug and comfortable t.
BRACELET ADJUSTMENT
1. Find spring bar that connects bracelet to clasp.
2. Using a pointed tool, push in spring bar and gently twist bracelet to
disengage.
3. Determine wrist size, then insert spring bar in correct bottom hole.
4. Push down on spring bar, align with top hole and release to lock in place.
FIG. 1 FIG. 2 FIG. 3
BATTERY
Timex strongly recommends that a retailer or jeweler replace battery. If
applicable, push reset button when replacing battery. Battery type is indicated
on caseback. Battery life estimates are based on certain assumptions regarding
usage; battery life may vary depending on actual usage.
DO NOT DISPOSE OF BATTERY IN FIRE. DO NOT RECHARGE. KEEP
LOOSE BATTERIES AWAY FROM CHILDREN.
TIMEX INTERNATIONAL WARRANTY
http://www.timex.com/productWarranty.html
©2019 Timex Group USA, Inc. TIMEX, EXPEDITION, INDIGLO and NIGHT-
MODE and FAST WRAP are registered trademarks of Timex Group B.V. and its
subsidiaries.

FRANÇAIS 745-096000
3
Veuillez lire les instructions attentivement pour bien comprendre le
fonctionnement de votre montre Timex®.Il est possible que ce modèle
ne présente pas toutes les fonctions décrites dans le dépliant.
FONCTIONS
• Deux fuseaux horaires
• Réveil
• Minuterie de compte à rebours de 24 heures
• Chronomètre 99 temps intermédiaires
• Carillon horaire
OPÉRATIONS DE BASE
MODE
INDIGLO®
START/SPLIT
(DÉMARRER/TEMPS
INTERMÉDIAIRE)
OU +
ALARM ON (RÉVEIL ACTIVÉ)
SET (RÉGLER)
OU –
STOP/RESET
(ARRÊTER/RÉINITIALISER)
HEURE ET DATE
A. Tenir le bouton SET enfoncé. Les chires des SECONDES clignoteront.
B. Appuyer sur START/SPLIT pour mettre les SECONDES à 0.
C. Appuyer sur MODE pour sélectionner les HEURES.
D. Appuyer sur START/SPLIT pour avancer. Tenir le bouton enfoncé pour
avancer rapidement. Faire déler 12 heures pour alterner entre AM (matin)
et PM (après-midi).
E. Appuyer sur MODE pour sélectionner les MINUTES, puis sur START/SPLIT
pour avancer. Tenir le bouton enfoncé pour avancer rapidement.
F. Répéter pour régler le MOIS, la DATE, le JOUR et l’achage de l’HEURE sur
12 ou 24 heures.
G. Appuyer sur SET pour valider.
Remarque : Appuyer sur START/SPLIT pour acher le FUSEAU HORAIRE 2.
CHRONOMÈTRE
A. Appuyer sur MODE pour sélectionner CHRONO.
B. Appuyer sur SET pour sélectionner l’achage des temps au tour (Lap) ou
intermédiaires (Split).
C. Appuyer sur START/SPLIT pour démarrer.
D. Appuyer sur START/SPLIT pour enregistrer le temps au tour.
E. Appuyer sur MODE pour acher le temps au tour ou intermédiaire
(automatique au bout de 10 secondes).
F. Appuyer sur STOP/RESET pour marquer une pause.
G. Appuyer sur START/SPLIT pour redémarrer.
H. Appuyer sur STOP/RESET pour arrêter.
I. Appuyer sur STOP/RESET pour remettre à zéro.
Remarque : Lorsque le CHRONO est en marche, le message LAP ou SPLIT
s’ache.
RÉVEIL ET CARILLON
A. Appuyer sur MODE pour sélectionner ALARM (réveil).
B. Appuyer sur SET pour sélectionner le fuseau horaire 1 ou 2 (T-1 ou T-2).
C. Appuyer sur START/SPLIT pour changer.
D. Appuyer sur MODE pour sélectionner les HEURES. Les chires clignoteront.
E. Appuyer sur START/SPLIT pour avancer. Tenir le bouton enfoncé pour
avancer rapidement. Faire déler 12 heures pour alterner entre matin (AM)
et après-midi (PM).
F. Appuyer sur MODE pour sélectionner les DIZAINES de MINUTES.
G. Appuyer sur START/SPLIT pour avancer. Tenir le bouton enfoncé pour
avancer rapidement. Répéter pour les MINUTES, les fuseaux horaires 1
ou 2.
H. Appuyer sur SET pour valider.
I. En mode ALARM, appuyer plusieurs fois sur START/SPLIT pour activer ou
désactiver les modes ALARM et CHIME (carIllon).
Remarque : Lorsque l’heure de l’alarme est indiquée dans le fuseau horaire
approprié, la montre sonne pendant 20 secondes ou jusqu’à ce qu’un des
boutons soit enfoncé. L’alarme se répète toutes les 24 heures jusqu’à ce
qu’elle soit désactivée.
MINUTERIE DE COMPTE À REBOURS
A. Appuyer sur MODE pour sélectionner TIMER (minuterie).
B. Appuyer sur SET pour sélectionner les DIZAINES d’HEURES. Les chires
clignoteront.
C. Appuyer sur START/SPLIT pour avancer. Tenir le bouton enfoncé pour
avancer rapidement.
D. Appuyer sur MODE pour sélectionner les HEURES.
E. Répéter ces étapes pour régler les DIZAINES de MINUTES, les MINUTES,
les DIZAINES de SECONDES et les SECONDES
F. Appuyer sur SET pour valider.
G. Appuyer sur START/SPLIT pour démarrer la minuterie de compte à rebours.
H. Appuyer sur STOP/RESET pour marquer une pause, sur START/SPLIT pour
redémarrer.
I. Appuyer de nouveau sur STOP/RESET pour remettre à zéro.
Remarque : La montre émet un bip à la n du compte à rebours.
SECOND FUSEAU HORAIRE
A. Appuyer sur MODE pour sélectionner TIME ZONE 2 (fuseau horaire 2).
B. Tenir SET enfoncé pour régler l’heure. Les chires des HEURES clignoteront.
C. Appuyer sur START/SPLIT pour avancer. Faire déler 12 heures pour
alterner entre AM (matin) et PM (après-midi).
D. Appuyer sur MODE pour sélectionner le MOIS, la DATE et l’achage de
l’HEURE sur 12 ou 24 heures. Appuyer sur START/SPLIT pour avancer.
E. Appuyer sur SET pour valider.
F. Appuyer sur START/SPLIT pour acher le FUSEAU HORAIRE 2.
VEILLEUSE INDIGLO®/ FONCTION NIGHT-MODE®
Appuyer sur INDIGLO®pour activer la veilleuse. La technologie
électroluminescente utilisée dans la veilleuse INDIGLO®permet d’illuminer le
cadran de la montre la nuit et dans des conditions de faible éclairage.
Tenir le bouton INDIGLO®enfoncé pendant 4 secondes pour activer la fonction
NIGHT-MODE®. L’icône de lune P s’achera. Lorsque celle-ci est activée,
appuyer sur un bouton quelconque pour que la veilleuse INDIGLO®s’allume
pendant 3 secondes. La fonction NIGHT-MODE®reste activée pendant
8 heures ou peut être manuellement désactivée en tenant de nouveau le bouton
INDIGLO®enfoncé pendant 4 secondes.

FRANÇAIS 745-096000
4
ÉTANCHÉITÉ ET RÉSISTANCE AUX CHOCS
Si la montre est étanche, la profondeur maximale ou le symbole (O) est
indiqué.
Profondeur d'étanchéité p.s.i.a. * Pression de l’eau sous la surface
30 m/98 pi 60
50 m/164 pi 86
100 m/328 pi 160
*livres par pouce carré (abs.)
AVERTISSEMENT : POUR PRÉSERVER L’ÉTANCHÉITÉ, NE PAS
ENFONCER LES BOUTONS SOUS L’EAU.
1. La montre est étanche à condition que le verre, les boutons poussoir et le
boîtier soient intacts.
2. La montre n’est pas conçue pour la plongée. Ne pas l’utiliser dans ces
conditions.
3. Rincer à l'eau douce après tout contact avec l'eau de mer.
4. La résistance aux chocs est indiquée sur le cadran de la montre ou au dos
du boîtier. Les montres sont conçues pour se conformer à l'essai de choc
ISO. Toutefois, prendre garde à éviter d'endommager le verre/cristal.
BRACELET FAST WRAP®
Certaines montres ont des bracelets FAST WRAP. Pour ajuster le bracelet :
1. Faire glisser l’extrémité du bracelet à travers l’anneau en D.
2. Serrer le bracelet pour l’ajuster et le xer an d’obtenir un bon ajustement.
AJUSTEMENT DU BRACELET
1. Trouver la barrette à ressort qui attache le bracelet au fermoir.
2. À l’aide d’un outil pointu, enfoncer la barrette et faire pivoter délicatement
le bracelet pour le dégager.
3. Déterminer la taille du poignet puis introduire la barrette à ressort dans
l’orice inférieur correspondant.
4. Enfoncer la barrette puis l’aligner sur l’orice supérieur puis la relâcher pour
la mettre en place.
FIG. 1 FIG. 2 FIG. 3
PILE
Timex recommande fortement de faire changer la pile par un détaillant
ou un bijoutier. Le cas échéant, appuyer sur le bouton de remise à zéro lors
du changement de la pile. Le type de pile est indiqué sur le dos du boîtier.
L’estimation de la durée de vie de la pile est basée sur certaines hypothèses
d’utilisation ; la durée réelle peut varier selon l’utilisation de la montre.
NE PAS JETER LA PILE AU FEU. NE PAS RECHARGER LA PILE.
GARDER LES PILES HORS DE LA PORTÉE DES ENFANTS.
GARANTIE INTERNATIONALE TIMEX
fr.timex.ca/productWarranty.html
www.timex.fr/fr_FR/productWarranty.html
©2019 Timex Group USA, Inc. TIMEX, EXPEDITION, INDIGLO et NIGHT-MODE
et FAST WRAP sont des marques déposées de Timex Group B.V. et de ses
liales.

日本語 745-096000
5
Timex® 腕時計をご使用の際は、取り扱い説明書をよくお読みください。モデルによっ
ては記載されているすべての機能が備わっていない場合があります。
機能
• 2 つ のタイムゾーン
• アラーム
• 最大 24 時 間 のカウントダウンタイマー
• 最大 99 ラップ計測可能なクロノグラフ
• 毎 時 チャイム
基本操作
MODE
INDIGLO®START/SPLIT
または +
ALARM ON
SET
または –
STOP/RESET
時刻と日付
A. SET ボタンを 押し続けます。秒の数字が点滅します。
B. START/SPLIT ボタンを押して秒を 0 に設定します。
C. MODE ボタンを押して時を選択します。
D. START/SPLIT ボタンを押して数字を進めます。ボタンを押し続けると早送りでき
ます。AM と PM の 切り替えは 12 時間進めて行います。
E. MODE ボタンを押して分を選択し、START/SPLIT ボタンを押して数字を進め
ます。ボタンを押し続けると早 送りできます。
F. 同様にして月、日、12 時間または 24 時間表示を設定します。
G. 設定が終わったら SET を押します。
注: タイムゾーン 2 を 表 示するには START/SPLIT ボ タン を 押してください 。
クロノグ ラフ
A. MODE を押して CHRONO を選びます。
B. SET を押して、ラップ表示またはスプリット表示を選びます。
C. START/SPLIT を 押 し て ス タートし ま す 。
D. START/SPLIT を押すとラップタイムを記録します。
E. MODE を押すとラップ タイムま たは スプリットタイムを 表 示します
(10 秒後から自動表示)。
F. STOP/RESET ボタンで一時停止します。
G. START/SPLIT ボタン で 再 開しま す 。
H. STOP/RESET ボタン で 停 止します 。
I. STOP/RESET ボ タ ン で リ セ ット し ま す 。
注: CHRONOが作動中は時刻表示に LAP または SPLIT と表 示されます。
ラップ1ラップ2ラップ3
分分
分
分
分
スプリット 1
スプリット 2
スプリット 3
スプリット
4
分
分
分
ラップ4
アラームとチャイム
A. MODE を押して ALARM を選びます。
B. SET を 押してタイムゾーン 1 または 2 (T-1 または T-2)を 選 び ま す 。
C. START/SPLIT を押して変更します。
D. MODE を押して時を選 択します。数 字 が点滅します。
E. START/SPLIT を押して数字を進めます。ボタンを押し続けると早送りできます。
AM と PM の 切り替えは 12 時間進めて行います。
F. MODE を 押 し て 分( 10 の 位 )を 選 び ま す 。
G. START/SPLIT を押して数字を進めます。ボタンを押し続けると早送りできます。
分( 1 の 位 )、タ イ ム ゾ ー ン 1 または 2 も同様に設定します。
H. 設定が終わったら SET を押します。
I. ア ラ ー ム モ ード で START/SPLIT を 押 す と 、ア ラー ム モ ードと チ ャ イム モ ード の オ
ン/オフを切り替えることができます。
注: アラーム時刻が適切なタイムゾーンで表示されると、20 秒 間ビープ 音 が 鳴り
ます。腕時計のボタンを押すと音が止まります。アラームは、解除するまで
24 時 間ごとに 繰り返します 。
カウントダウン タイマー
A. MODE を押して TIMER を選びます。
B. SET を 押 し て 時( 10 の位)を選びます。数字が点滅します。
C. START/SPLIT を押して数字を進めます。ボタンを押し続けると早送りできます。
D. MODE を 押 し て 時( 1 の 位 )を 選 択 し ま す 。
E. 同 様 に 分( 10 の 位 )、分( 1 の 位 )、秒( 10 の 位 )、秒( 1 の 位 )を 設 定 し ま す 。
F. 設定が終わったら SET を押します。
G. START/SPLIT を押してタイマーを開 始します。
H. STOP/RESET を押すと一時停止し、START/SPLIT を押すと再 開します。
I. STOP/RESET を 再 び 押 す とリセットし ま す 。
注: カウントダウン が 終 了 するとビープ 音 が 鳴りま す 。
第 2 タイムゾーン
A. MODE を押して TIME ZONE 2 を選びます。
B. SET を押し続けて時間を設定します。時の数字が点滅します。
C. START/SPLIT を押して数字を進めます。AM と PM の 切り替 えは 12 時間進
めて行います。
D. MODE を押して月、日、12 時間または 24 時間表示を選びます。
START/SPLIT を押して数字を進めます。
E. 設定が終わったら SET を押します。
F. タイムゾーン 2 を表 示 するには START/SPLIT ボタン を 押し てください 。
INDIGLO® ナ イト ラ イト / NIGHT MODE® 機能
INDIGLO® ボタンを押して盤面を照らします。INDIGLO® ナイトライトの電子発光技
術で夜間や暗い時でも盤面は鮮明に見えます。
INDIGLO® ボタンを 4 秒間押し続けると NIGHT-MODE® 機能が作動します。月の
ア イコン P が表示されます。作動中、どれかのボタンを押すと INDIGLO® ナ イト ラ イ
トが 3 秒間発光します。 NIGHT-MODE® 機能は 8 時間有効です。INDIGLO® ボタ
ンを再び 4 秒間押し続けると解除されます。
耐水性と耐衝撃性
耐水性の腕時計には、メートル表示または (O) マークが 表 示 され ています 。
耐水性深度 p.s.i.a.*水面下水圧
30m/98ft 60
50m/164ft 86
100m/328ft 160
*ポンド/平方インチの絶対値
警告: 耐水性を維持するため、水中ではボタンを押さないでください。
1. 腕時計はレンズ、プッシュボタン、ケースが損傷していない場合に限り耐水性があ
ります 。
2. 腕時計はダイバーウォッチではありません。ダイビングには使用しないでください。
3. 腕時計に塩水がかかった場合は真水ですすいでください。
4. 耐衝撃性は腕時計の文字盤またはケース裏面に表示されています。
この腕時計は ISO の耐衝撃性テストに合格できるよう設計されていますが、
クリスタル/レンズが損傷しないよう十分注意してください。

日本語 745-096000
6
FAST WRAP® ストラップ
腕時計によっては FAST WRAP ストラップ が つい て い ま す 。ストラップ を 調 整 す る
には、
1. D 字型のリングにストラップの端を通します。
2. ストラップを引っ張って、ぴったりフィットする快適 な長さに調 節して留めてくださ
い。
ブ レ ス レ ット の 調 整
1. ブレスレットと留め金をつないでいるスプリング棒をみつけます。
2. 先 の 尖 った 道 具 を 使って スプリング 棒 を 押し 、ブレ スレットをそっと ねじって 外し
ます。
3. 手首に合わせて長さを決めたら、正しい下穴にスプリング棒を入れます。
4. スプリング棒を押し下げ、上穴にあててリリースし、定位置にはめ込みます。
図 1図 2図 3
電池
Timex では販売店または時計専門店で腕時計の電池を交換することを強くお勧め
します。リセットボタンがある場合は、電池交換の際に押してください。電池の種類は
ケース裏面に表記されています。電池の寿命は一定の使用条件を仮定して概算した
ものです。電池の寿命は実際の使用方法によって異なります。
電池を焼却しないでください。充電しないでください。外した電池はお子様の手が
届 か な い ように 注 意し てくだ さい 。
TIMEX 国際保証書
www.timexwatch.jp/fs/timex/c/guide#returns
©2019 Timex Group USA, Inc. TIMEX、EXPEDITION、INDIGLO、NIGHT-
MODE、FAST WRAP は Timex Group B.V. とその子会社の商標です。
Other manuals for Expedition
5
Table of contents
Languages:
Other Timex Watch manuals

Timex
Timex W-297 User manual

Timex
Timex IRONMAN TRAIN SMARTER T5K629 User manual

Timex
Timex 472-095002 User manual

Timex
Timex W-105 User manual

Timex
Timex W-209 User manual

Timex
Timex iQ+ Move User manual

Timex
Timex W-184 User manual

Timex
Timex IronmanW-276 User manual

Timex
Timex IRONMAN R300 User manual

Timex
Timex Ironman Transit+ User manual

Timex
Timex w-215 User manual

Timex
Timex W-2-US User manual

Timex
Timex W-10 User manual

Timex
Timex KIDS User manual

Timex
Timex 814-095006 User manual

Timex
Timex iConnect User manual

Timex
Timex W197 User manual

Timex
Timex Stopwatch User manual

Timex
Timex IQ+ Move Multi-Time User manual

Timex
Timex iConnect Pro User manual