Timex Ironman Run x20 GPS M062 User manual

Instruction Manual
W302 Run x20 GPS 9.29.14
Run x20 GPS
x20
x20ux20
GPSx20GPS
GPSx20GPS
GPSx20GPS
x20nx20
x20ux20nx20ux20
GPSx20GPSx20GPSx20GPS
GPS
GPSGPSGPS
GPSx20GPSGPSGPSx20GPS
GPSGPSGPS
RGPSRGPSRGPSR
uGPSuGPSuGPSu
GPSx20GPSx20GPSx20GPS
GPS
GPSGPSGPS
GPSx20GPSGPSGPSx20GPS
GPSGPSGPS
RGPSRGPSRGPSR
uGPSuGPSuGPSu
GPSx20GPSRGPSx20GPS
GPSx20GPSx20GPSx20GPSRGPSx20GPSx20GPSx20GPS
GPSGPSGPSRGPSGPSGPS
GPSx20GPSGPSGPSx20GPSRGPSx20GPSGPSGPSx20GPS
GPSuGPS
GPSGPSGPSuGPSGPSGPS
RGPSRGPSRGPSRuRGPSRGPSRGPSR
GPSGPSGPSnGPSGPSGPS
RGPSRGPSRGPSRnRGPSRGPSRGPSR
uGPSuGPSuGPSunuGPSuGPSuGPSu
GPSx20GPSRGPSx20GPS
GPSx20GPSx20GPSx20GPSRGPSx20GPSx20GPSx20GPS
GPSGPSGPSRGPSGPSGPS
GPSx20GPSGPSGPSx20GPSRGPSx20GPSGPSGPSx20GPS
GPSuGPS
GPSGPSGPSuGPSGPSGPS
GPSGPSGPSuGPSGPSGPS
RGPSRGPSRGPSRuRGPSRGPSRGPSR
GPSGPSGPSnGPSGPSGPS
RGPSRGPSRGPSRnRGPSRGPSRGPSR
uGPSuGPSuGPSunuGPSuGPSuGPSu
x20
x20x20x20
x20Rx20x20x20Rx20
x20ux20x20x20ux20
GPSx20GPS
nGPSnx20nGPSn
Rx20R
nRnx20nRn
RRRx20RRR
x20Rx20Rx20Rx20x20x20Rx20Rx20Rx20
GPSRGPSx20GPSRGPS
nGPSnRnGPSnx20nGPSnRnGPSn
x20ux20x20x20ux20
x20Rx20ux20Rx20x20x20Rx20ux20Rx20
x20ux20ux20ux20x20x20ux20ux20ux20
GPSGPSGPSx20GPSGPSGPS
uGPSuGPSuGPSux20uGPSuGPSuGPSu
nGPSnGPSnGPSnx20nGPSnGPSnGPSn
x20GPSx20
x20ux20GPSx20ux20
x20nx20GPSx20nx20
x20nx20GPSx20nx20
x20ux20nx20ux20GPSx20ux20nx20ux20
x20nx20nx20nx20GPSx20nx20nx20nx20
x20GPSx20
x20x20x20GPSx20x20x20
x20nx20x20x20nx20GPSx20nx20x20x20nx20
x20x20x20GPSx20x20x20
GPSx20GPSx20GPSx20GPSGPSGPSx20GPSx20GPSx20GPS

2
Table of Contents
important Safety Instructions and Warnings .............................................................................3
What's Included................................................................................................................................... 3
Getting Started....................................................................................................................................3
Introducing the Watch ......................................................................................................................4
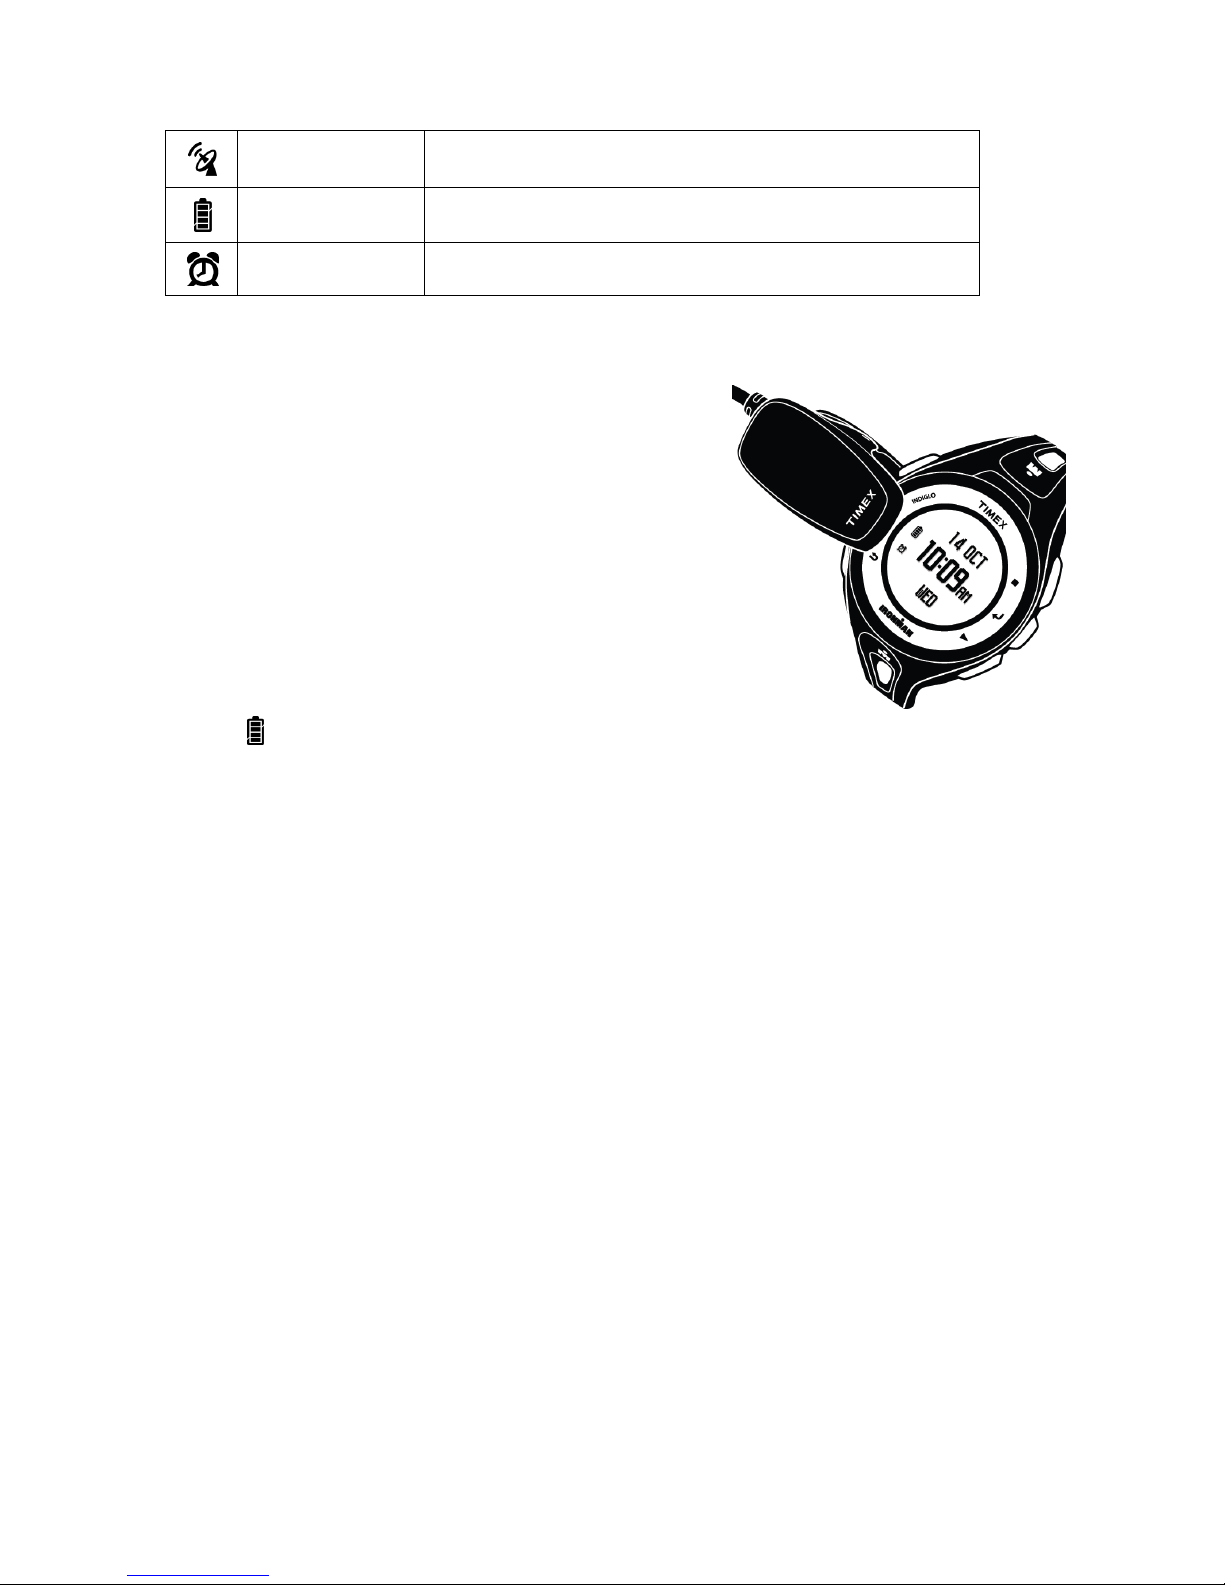
Charging the Watch........................................................................................................................... 5
Maximizing Battery Life...........................................................................................................................5
Navigating the Watch ....................................................................................................................... 5
First-Time Setup..................................................................................................................................6
Settings Configured in First-Time Setup ..........................................................................................6
Going For a Run .................................................................................................................................. 7
Starting a Workout.................................................................................................................................... 7
Stopping and Saving a Workout..........................................................................................................8
Taking Laps and Splits ...................................................................................................................... 8
What Are Lap and Split Times?............................................................................................................8
Run/Walk Training With Intervals .................................................................................................9
Benefits of Interval Training...................................................................................................................9
Setting Up an Interval Workout ...........................................................................................................9
Starting an Interval Workout.................................................................................................................9
Reviewing Workouts........................................................................................................................ 10
Reviewing Workout Summaries......................................................................................................... 10
Reviewing Individual Laps......................................................................................................................11
Deleting Workouts ...................................................................................................................................12
Configuring Settings.........................................................................................................................12
Setting the Alarm......................................................................................................................................12
Setting the Time and Date ....................................................................................................................12
Setting Units .............................................................................................................................................. 13
Setting Sounds.......................................................................................................................................... 13
Setting Sleep Mode................................................................................................................................. 13
Configuring Workout Zones................................................................................................................ 13
Setting User Info....................................................................................................................................... 14
Troubleshooting .................................................................................................................................15
Problems Connecting to GPS.............................................................................................................. 15
Water Resistance...............................................................................................................................15
Timex International Warranty ........................................................................................................15
Declaration of Conformity ............................................................................................................. 16

3
Thank you for purchasing the TIMEX®IRONMAN®Run x20 GPS watch! Refer to this User Guide to
learn more about this exciting product.
IMPORTANT SAFETY INSTRUCTIONS AND WARNINGS
1. To prevent risk of fire, chemical burn, electrolyte leak, and/or injury from the unit’s internal
Lithium-polymer battery:
a. Do not attempt to remove the case-back or exterior shell of the unit, or to remove its non-
user-replaceable battery.
b. Do not leave the unit exposed to a heat source or in a high-temperature location (such as
in the sun or in an unattended vehicle). To prevent damage, store the unit out of direct
sunlight.
c. Do not puncture or incinerate the unit.
d. When storing the unit for an extended time, keep it in the 32 to 77°F (0 to 25°C)
temperature range.
e. Charge the unit only within the 32 to 113°F (0 to 45°C) temperature range.
f. Do not operate the unit outside the -4 to 131°F (-20 to 55°C) temperature range.
g. Contact your local waste disposal department to properly recycle or dispose of the unit or
its battery.
2. Use only the charging cable supplied.
3. This unit is not a medical device and is not recommended for use by persons with serious heart
conditions. Always consult your physician before beginning or modifying an exercise program.
4. Do not attempt to read the unit’s display while moving: this is unsafe and distracting, and could
result in an accident or collision. Read the display only when you can safely do so.
WHAT'S INCLUDED
•Timex®IRONMAN®Run x20 GPS watch
•Charging cable
GETTING STARTED
For first use, please follow these general steps to get started:
1. Become familiar with your watch
2. Charge your watch
3. Learn how to navigate the watch’s display
4. Configure your watch
5. Record your first workout
6. Review your performance

4
INTRODUCING THE WATCH
STOP/UP ( / )
•Moves up in a screen. •Highlights the previous item in a menu.
•Increases a setting. •Displays seconds in the Time of Day display.
•Pauses a workout.
•During any workout: Stops the watch and displays Save/Resume/Discard options.
MENU/ENTER ( ↵)
•Opens the main menu. •Selects a highlighted menu item.
•In a settings screen: Moves to the next field. In the last field, saves settings and returns
to the previous menu/screen.
•During any workout: Briefly shows the Time of Day display. Closes a split display.
START/SPLIT/DOWN ( / )
•Moves down in a screen. •Highlights the next item in a menu.
•Decreases a setting. •Displays seconds in the Time of Day display.
•During a stopwatch workout: Starts a workout. Takes a split.
•During an interval workout: Hold to skip an interval.
BACK/DISPLAY ( )
•Returns to the previous menu. •Displays seconds in the Time of Day display.
•Saves changes. •Stops GPS search.
•During a stopwatch workout: Moves through displays. Closes a split display.
•During an interval workout: Briefly shows total time/distance.
POWER/INDIGLO® NIGHT-LIGHT
•Press and hold to turn the watch on or off.
•Press to light the night-light for a few seconds.
NOTE: Any changes you make to watch settings (except Yes/No selections) are saved when you
press the BACK/DISPLAY key ( ).
POWER / INDIGLO
®
(INDIGLO)
BACK / DISPLAY
( )
STOP / UP
( / )
MENU / ENTER
( ↵)
START / SPLIT / DOWN
( / )

5
ICONS
GPS status Solid: GPS is acquired.
Flashing: Searching for GPS.
Battery Solid: Battery charge in 25% increments.
Flashing: Watch is powered on and charging.
Alarm Alarm is active and will sound at the programmed time.
CHARGING THE WATCH
Before you use the watch the first time, fully charge the
battery using your computer or a wall outlet as a power
source.
1. Attach the charging cable clip to the watch so the clip’s
pins align with the contacts on the back of the watch.
2. Select a power source:
•Computer: Insert the free end of the charging cable
into a powered USB port on your computer.
•Wall outlet: Insert the free end of the charging
cable into a USB power adapter, then insert the
adapter into a wall outlet.
3. Let the battery charge at least three hours. The battery
icon flashes during charging.
MAXIMIZING BATTERY LIFE
Use this procedure to maximize the time range of your watch's rechargeable battery:
1. Use your watch without recharging until the last battery indicator segment disappears and the
empty indicator begins flashing. If the watch display goes blank, you can still proceed with this
process as long as the display has been in that state for no more than one or two days.
2. Fully charge the watch battery for at least three hours, until all four segments in the battery
level indicator are no longer blinking.
3. Repeat this procedure twice more.
NOTE:Repeat this procedure every two months if the watch is not used or recharged regularly.
NAVIGATING THE WATCH
Use the , , ↵,and buttons to access the watch's features:
•Press or to highlight a menu item.
•Press ↵to select the item.
•Press to return to the previous menu.

6
From the watch's initial (Time of Day) display, press ↵to open the main menu.
•Workout ―Choose a workout: stopwatch (timed) or interval (variable
intensity).
•History ―Display your saved workouts.
•Settings ―Customize your watch and workout settings.
If the display shows or at the bottom, press or to scroll through
additional menu items.
FIRST-TIME SETUP
The first time you power on the watch, you will set up language, units, personal profile, and other
required information.
1. Press and hold POWER to power on the watch. The watch then begins the first-time setup
process.
If first-time setup does not begin, press ↵to go to the main menu, then select SETTINGS >
ABOUT > FACTORY RESET (YES). The watch then powers down. Press and hold POWER to
continue.
2. Follow the instructions shown in the watch's display, using the , , ↵, and buttons.
SETTINGS CONFIGURED IN FIRST-TIME SETUP
NOTE: Set the values as precisely as possible to enjoy accurate workout data calculations.
•Language ―Choose the language used in the watch menus and messages.
•Unit ―Choose the units for workout data: English (feet, miles, pounds) or Metric (meters,
kilometers, kilograms).
•Date ―Set the current year, month, and day.
•Time format ―Choose 12- or 24-hour format.
•Time of day ―Set the time at your location in hours, minutes, and seconds.
NOTE: When using 12-hour format, scroll past 11 AM to continue to pm (afternoon) hours.
•Gender ―Choose your gender to assist in calculating calories burned.
•Birthday ―Set your birthday to assist in calculating calories burned.
•Height ―Set your height to assist in calculating calories burned.
•Weight ―Set your weight to assist in calculating calories burned.

7
GOING FOR A RUN
Use the stopwatch to time workouts, display real-time data during workouts, and to save workouts
for review. You can also record workouts through Interval mode, as described later in this manual.
STARTING A WORKOUT
1. Press ↵to open the main menu.
2. Select WORKOUT > STOPWATCH.
NOTE: If the watch displays a message that memory is nearly full, choose OVERWRITE to let the
new workout replace the oldest workout in memory, or DELETE ALL to remove all
workouts from memory.
3. The watch then automatically searches for GPS, and shows GPS READY when a fix is made.
If the watch indicates that a GPS fix was not made, move away from any tall buildings or trees,
stand still, and select RETRY to search again.
4. Select START to begin timing the workout.
VIEWING WORKOUT SCREENS
The stopwatch provides three screens for viewing real-time workout data. Each screen includes
one or two fields, and a "mini-page" at the bottom that can show time of day or the lap number.
•During a workout, press to cycle through the screens.
CUSTOMIZING WORKOUT SCREENS
You can customize the three workout screens to include the following data.
Data Description
SPLIT TIME Total elapsed time of the workout
LAP TIME Elapsed time for the current lap
DISTANCE Total distance traveled during the workout
PACE Current minutes per mile/km
AVG PACE Average minutes per mile/km over the entire workout
SPEED Current speed
AVG SPEED Average speed over the entire workout
CALORIES Estimated number of calories burned during the workout
NOTE: If no GPS fix was obtained, the watch can only record split and lap times.
Customize the workout screens as follows:
1. From the main menu, select SETTINGS > DISPLAY.
2. Select a page/screen to edit.
3. Select the data to display in each line. To leave a line blank, select OFF.
4. Repeat steps 1 through 3 for each page.
5. Set the data to display in the mini page. (The mini page stays the same no matter which
page/screen is selected.)

8
STOPPING AND SAVING A WORKOUT
1. Press to stop timing.
2. Select RESUME to continue timing again, SAVE to end the workout and save the data, or
DISCARD to end the workout and clear the stopwatch.
TAKING LAPS AND SPLITS
WHAT ARE LAP AND SPLIT TIMES?
Lap time is the length of an individual segment of your workout (usually a repeated segment, such
as a lap around a track). Split time is the total elapsed time from the beginning of your workout
through the current segment.
When you “take a split”, you have completed timing one segment (such as a lap) of the workout,
and are now timing the next segment.
This figure illustrates lap and split times for a typical workout in which four laps/splits were taken:
TAKING A LAP/SPLIT
•When the stopwatch is running, press to record a lap/split.
The watch then displays the average pace for the workout, the distance of the lap you just
completed, the lap time, and the split time, and begins timing a new lap.
The watch can store up to 99 lap times per workout.
Once you stop and save the workout, you can review summary data for the entire workout, as well
as for individual laps.
HANDS-FREE RECORDING
Every time you reach one mile or kilometer (units chosen in your first-time setup), the watch
automatically records a lap. You can update this hands-free auto lap function as follows:
1. From the main menu, select SETTINGS > AUTO LAP.
2. Select DISTANCE or TIME as the auto lap trigger.
3. Set the distance or time at which the watch takes an auto lap.
To use auto lap, simply start timing a workout. Every time you reach the specified distance or time,
the stopwatch takes a lap/split.

9
RUN/WALK TRAINING WITH INTERVALS
BENEFITS OF INTERVAL TRAINING
Your watch features an Interval mode that can track times or distances for up 99 repetitions of one
or two intervals.
Interval workouts are powerful tools for targeting and training to improve running speed,
endurance, and threshold. Periods of heavy activity such as running interspersed with recovery
periods of lesser activity such as walking help you train longer and more intensely. Combining
aerobic and anaerobic activity in this way helps you:
•Target workouts for improving speed, cardiovascular and muscular endurance, and other
qualities.
•Improve your body’s processing of lactic acid.
•Reduce the risk of injury.
For best results, set up your interval workouts to train for a specific quality, such as in the following
examples.
EXAMPLE ENDURANCE WORKOUT
To train for endurance, you might set up a classic 1-mile repeat workout: three or four repetitions of
a 1-mile interval at about half-marathon pace, each followed by a 1-minute walking recovery.
EXAMPLE SPEED WORKOUT
To train for speed, you might run sets of 4 x 400m: run a fast 400m interval at slightly more than
race pace, followed by a 2-minute slow jog recovery, then repeat both intervals four times.
SETTING UP AN INTERVAL WORKOUT
1. From the main menu, select SETTINGS > INTERVALS.
2. Select INT 1.
3. Select a name for the interval: RUN, WALK, HARD, EASY, FAST, or SLOW.
4. Select to end the interval after a specified DISTANCE or a specified TIME.
NOTE: All distance-based intervals require GPS. You can mix distance- and time-based intervals
in the same workout.
5. Repeat steps 2 through 4 for INT 2.
STARTING AN INTERVAL WORKOUT
1. From the main menu, select WORKOUT > INTERVALS.
NOTE: If a message states that memory is nearly full, choose OVERWRITE to write the new
workout over the oldest workout in memory, or choose DELETE ALL to remove all
workouts from memory.
2. Press ↵to confirm the displayed settings. The watch then automatically searches for GPS, and
shows GPS READY when a fix is made.
TIP: To acquire GPS more quickly, move away from tall buildings and trees, and stand still.
3. From GPS READY, select START to begin timing the workout.
4. During your workout, press to see the elapsed time and total distance.

10
5. At the end of each interval, the watch beeps and displays the next interval’s name and the
remaining time.
6. When both intervals are complete, the workout repeats and the repetition count increases. The
intervals continue repeating until you stop the workout.
7. To skip an interval, press and hold .
STOPPING AND SAVING AN INTERVAL WORKOUT
1. Press to stop timing.
2. Select RESUME to continue timing the workout, SAVE to end the workout and save the data, or
DISCARD to end the workout and reset the interval timer.
REVIEWING WORKOUTS
The watch can store up to 10 workouts. You can use the HISTORY screens to review these saved
workouts and track your progress.
REVIEWING WORKOUT SUMMARIES
The workout summary contains data about complete workouts.
OPENING THE WORKOUT
1. From the main menu, select HISTORY, then select STOPWATCH or INTERVAL.
2. Select the workout to review, then select SUMMARY.
3. Use and to scroll through the workout data.
The following tables show the types of data displayed for stopwatch and interval workouts.
SUMMARY DATA: STOPWATCH WORKOUT
Data Description
WORKOUT DAY* Date the workout was saved
TOTAL TIME* Total elapsed time of the workout
DISTANCE Total distance traveled during the workout (GPS required)
AVG PACE Average minutes per mile/km over the entire workout (GPS required)
AVG SPEED Average speed over the entire workout (GPS required)
LAP #* Number of laps in the workout (up to 99)
KCAL Estimated number of calories burned during the workout (GPS required)
* These items are the only data available from a stopwatch workout without GPS.

11
SUMMARY DATA: INTERVALS WITH GPS
Data Description
WORKOUT DAY* Date the workout was saved
TOTAL TIME* Total elapsed time of the workout
DISTANCE* Total distance traveled during the workout
AVG PACE Average minutes per mile/km over the entire workout
AVG SPEED Average speed over the entire workout
KCAL Estimated number of calories burned during the workout
* These items are the only data available from a workout when both intervals are by time.
SUMMARY DATA: INTERVALS WITHOUT GPS
Data Description
WORKOUT DAY Date the workout was saved
TOTAL TIME Total elapsed time of the workout
REVIEWING INDIVIDUAL LAPS
You can also view data for individual laps of a stopwatch workout.
VIEWING LAP DETAILS
1. From the main menu, select HISTORY.
2. Select STOPWATCH.
3. Open the workout to review.
4. Select LAP DETAIL.
5. Data specific to the first lap displays onscreen.
6. Press and to scroll through individual laps.
DATA DISPLAYED IN DETAILS SCREENS
Data Description
LAP NUMBER* Lap number: L1, L2, etc.
LAP TIME* Elapsed time in the lap
DISTANCE Distance traveled in the lap (GPS required)
PACE Minutes per mile/km for the lap (GPS required)
AVG SPEED Average speed for the lap (GPS required)
KCAL Estimated number of calories burned during the workout (GPS required)
* These items are the only data available from a stopwatch workout without GPS.

12
DELETING WORKOUTS
You can delete individual workouts or all workouts to free up memory on the watch.
1. From the main menu, select HISTORY.
2. Select the type of workout to delete: STOPWATCH or INTERVAL.
3. Delete one or all workouts:
•To delete one workout: select the workout, then select DELETE.
•To delete all workouts: select DELETE ALL.
4. Select YES.
CONFIGURING SETTINGS
Make changes to the watch settings to enhance your workouts and customize your experience.
SETTING THE ALARM
Set the alarm to receive an audible alert every day.
1. From the main menu, select SETTINGS.
2. Select WATCH > ALARM.
3. Set the time the alarm will sound: use ↵and to select hours/minutes, and and to
change the settings.
4. Set ALARM to ON.
When the alarm is on, the icon appears on the time-of-day screen, and the alarm sounds at the
specified time each day.
SETTING THE TIME AND DATE
The time and date are set during first-time setup, but you can reset them anytime.
SETTING THE TIME AND TIME FORMAT
1. From the main menu, select SETTINGS > WATCH > TIME.
2. Set the time format to 12-hour or 24-hour.
3. Set the hours.
NOTE: When using 12-hour format, scroll past 11 AM to continue to pm (afternoon) hours.
4. Set the minutes.
SETTING THE DATE
1. From the main menu, select SETTINGS > WATCH > DATE.
2. Set the year.
3. Set the month.
4. Set the day.

13
SETTING UNITS
During first-time setup, you selected the system of measurement in which your data displays. You
can change this later, or choose to display distance data in different units.
SETTING GENERAL UNITS
The watch can use English or metric units.
1. From the main menu, select SETTINGS > WATCH > UNITS.
2. Select ENGLISH or METRIC.
SETTING DISTANCE UNITS
Distances displayed during workouts can use different units than the general settings.
1. From the main menu, select SETTINGS > WATCH > DISTANCE.
2. Select ENGLISH or METRIC.
SETTING SOUNDS
You can set the watch to sound a tone every time a button is pressed, and to give audible alerts
during workouts when an interval ends or other workout event occurs.
1. From the main menu, select SETTINGS > WATCH > SOUND.
2. Open BUTTON SOUND or WORKOUT SOUND.
3. Select ON or OFF.
SETTING SLEEP MODE
Set a period in which the watch enters a low-power sleep mode to save battery life.
1. From the main menu, select SETTINGS > WATCH > SLEEP MODE.
2. Select ENABLE.
3. Set SLEEP MODE FROM to the time the watch enters sleep mode.
4. Set SLEEP MODE TO to the time the watch exits sleep mode.
When sleep mode is active, you can press any button to wake the watch. The watch then goes
back into sleep mode 1 minute after you stop pressing buttons.
CONFIGURING WORKOUT ZONES
You can set up zones for pace and speed. To do this, input upper and lower limits for these
workout data, and the watch will sound an alert when you are outside of this range to prompt you
to change your workout behavior to get back in zone.
Zones help you train at a specific intensity, which can help you target your workouts for a
particular physical quality.
THE BENEFITS OF KNOWING YOUR PACE
Pace is the number of minutes it takes you to run 1 mile or kilometer.
It is important to know your pace both when you are training and during a race. While training, you
can set a pace slightly higher than your race pace to build speed. When you are racing, you can
adjust your pace to make up for slow miles or avoid burnout resulting from starting out too fast.

14
This chart shows the pace to set to achieve your desired race time.
Target Pace Event Finish Time
MIN/MI MIN/KM 5K 10K 20K Half
Marathon 25K 30K Marathon
5:00 3:06 0:15:32 0:31:04 1:02:08 1:05:33 1:17:40 1:33:12 2:11:05
5:30 3:25 0:17:05 0:34:10 1:08:20 1:12:06 1:25:25 1:42:30 2:24:11
6:00 3:43 0:18:38 0:37:17 1:14:32 1:18:39 1:33:10 1:51:48 2:37:17
6:30 4:02 0:20:11 0:40:24 1:20:44 1:25:12 1:40:55 2:01:06 2:50:23
7:00 4:20 0:21:44 0:43:30 1:26:56 1:31:45 1:48:40 2:10:24 3:03:29
7:30 4:39 0:23:17 0:46:36 1:33:08 1:38:18 1:56:25 2:19:42 3:16:35
8:00 4:58 0:24:50 0:49:42 1:39:20 1:44:51 2:04:10 2:29:00 3:29:41
8:30 5:16 0:26:23 0:52:48 1:45:32 1:51:24 2:11:55 2:38:18 3:42:47
9:00 5:35 0:27:56 0:55:54 1:51:44 1:57:57 2:19:40 2:47:36 3:55:53
9:30 5:54 0:29:29 0:59:00 1:57:56 2:04:30 2:27:25 2:56:54 4:08:59
10:00 6:12 0:31:02 1:02:06 2:04:08 2:11:03 2:35:10 3:06:12 4:22:05
10:30 6:31 0:32:35 1:05:12 2:10:20 2:17:36 2:42:55 3:15:30 4:35:11
11:00 6:50 0:34:08 1:08:18 2:16:32 2:24:09 2:50:40 3:24:48 4:48:17
11:30 7:08 0:35:41 1:11:24 2:22:44 2:30:42 2:58:25 3:34:06 5:01:23
12:00 7:27 0:37:14 1:14:30 2:28:56 2:37:15 3:06:10 3:43:24 5:14:29
12:30 7:46 0:38:47 1:17:36 2:35:08 2:43:48 3:13:55 3:52:42 5:27:35
13:00 8:04 0:40:20 1:20:42 2:41:20 2:50:21 3:21:40 4:02:00 5:40:41
13:30 8:23 0:41:53 1:23:48 2:47:32 2:56:54 3:29:25 4:11:18 5:53:47
14:00 8:41 0:43:26 1:26:54 2:53:44 3:03:27 3:37:10 4:20:36 6:06:53
SETTING UP ZONES
1. From the main menu, select SETTINGS > ZONES.
2. Select the zone to set: PACE or SPEED.
3. Set the boundaries of the zone.
•For pace, set the FAST PACE (the maximum pace at which you should run) and the SLOW
PACE (the minimum pace at which you should run).
•For speed, set the MIN SPEED (the slowest speed you should run) and MAX SPEED (the
fastest speed you should run).
4. Select the ALERT.
5. Select whether to use audible zone alerts: PACE or SPEED sounds a tone when you go outside
the specified zone for more than 10 seconds.
SETTING USER INFO
You can update your personal data anytime.
1. From the main menu, select SETTINGS > USER.
2. As needed, set your LANGUAGE, WEIGHT, HEIGHT, GENDER, and BIRTHDAY.
NOTE: Set the values as precisely as possible to enjoy accurate workout data calculations.

15
TROUBLESHOOTING
PROBLEMS CONNECTING TO GPS
If you can’t get a GPS fix, try these steps:
•Make sure that you are outside. It can be very difficult to acquire a fix indoors.
•Move away from buildings and tall trees. Large structures can block the satellite signals.
•Stand still. Movement can increase the time it takes for the GPS to acquire a satellite signal.
NOTE: While the first GPS fix can take some time to acquire, subsequent fixes are usually faster
because the GPS searches for recently acquired satellites first.
WATER RESISTANCE
The Run x20 GPS is water resistant to 50 meters.
Water-Resistance Depth Water Pressure Below Surface
50m / 164ft 86 psia *
* Pounds per square inch absolute
WARNING:To maintain water resistance, do not press any buttons under water.
•The watch is water-resistant only as long as its lens, push buttons, and case remain intact.
•The watch should not be used for diving.
•Rinse the watch with fresh water after exposure to salt water, including perspiration.
TIMEX INTERNATIONAL WARRANTY
U.S. – LIMITED WARRANTY
Your TIMEX® device is warranted against manufacturing defects by Timex Group USA, Inc. for a
period of ONE YEAR from the original purchase date. Timex and its worldwide affiliates will honor
this International Warranty.
Please note that Timex may, at its option, repair your device by installing new or thoroughly
reconditioned and inspected components or replace it with an identical or similar model.
IMPORTANT — PLEASE NOTE THAT THIS WARRANTY DOES NOT COVER DEFECTS OR
DAMAGES TO YOUR WATCH:
1) after the warranty period expires;
2) if the device was not originally purchased from an authorized Timex retailer;
3) from repair services not performed by Timex;
4) from accidents, tampering or abuse; and
5) lens or crystal, strap or band, watch case, attachments or battery. Timex may charge you for
replacing any of these parts.
THIS WARRANTY AND THE REMEDIES CONTAINED HEREIN ARE EXCLUSIVE AND IN LIEU OF
ALL OTHER WARRANTIES, EXPRESS OR IMPLIED, INCLUDING ANY IMPLIED WARRANTY OF
MERCHANTABILITY OR FITNESS FOR PARTICULAR PURPOSE. TIMEX IS NOT LIABLE FOR ANY
SPECIAL, INCIDENTAL OR CONSEQUENTIAL DAMAGES. Some countries and states do not allow
limitations on implied warranties and do not allow exclusions or limitations on damages, so these
limitations may not apply to you. This warranty gives you specific legal rights and you may also
have other rights which vary from country to country and state to state.
To obtain warranty service, please return your device to Timex, one of its affiliates or the Timex
retailer where the device was purchased, together with a completed original Watch Repair Coupon
or, in the U.S. and Canada only, the completed original Watch Repair Coupon or a written
statement identifying your name, address, telephone number and date and place of purchase.
Please include the following with your device to cover postage and handling (this is not a repair

16
charge): a US$8.00 check or money order in the U.S.; a CAN$10.00 cheque or money order in
Canada; and a UK£3.50 cheque or money order in the U.K. In other countries, Timex will charge you
for postage and handling. NEVER INCLUDE A SPECIAL WATCHBAND OR ANY OTHER ARTICLE
OF PERSONAL VALUE IN YOUR SHIPMENT.
For the U.S., please call 1-800-328-2677 for additional warranty information. For Canada, call
1-800-263-0981. For Brazil, call +55 (11) 5572 9733. For Mexico, call 18 19 01-800-01-060-00. For
Central America, the Caribbean, Bermuda and the Bahamas, call (501) 370-5775 (U.S.). For Asia,
call 852-2815-0091. For the U.K., call 44 020 8687 9620. For France, call 03 81 63 42 51 (10 a.m. -
12 Noon). For Germany/Austria: +43 662 88921 30. For the Middle East and Africa, call 971-4-
310850. For other areas, please contact your local Timex retailer or Timex distributor for warranty
information.
©2014 Timex Group USA, Inc. TIMEX and INDIGLO are registered trademarks of Timex Group B.V.
and its subsidiaries. IRONMAN®and MDOT are registered trademarks of World Triathlon
Corporation. Used here by permission.
TIMEX INTERNATIONAL WARRANTY REPAIR COUPON
Original Purchase Date: ________________________________________
(attach a copy of sales receipt, if available)
Purchased by: ________________________________________________
(name, address, telephone number)
Place of Purchase: ____________________________________________
(name and address)
Reason for Return: ____________________________________________
____________________________________________________________
DECLARATION OF CONFORMITY
Manufacturers Name: Timex Group USA, Inc.
Manufacturers Address: 555 Christian Road
Middlebury, CT 06762
United States of America
declares that the product:
Product Name: Timex® Ironman® Run x20 GPS
Model Numbers: M062
conforms to the following specifications:
R&TTE: 2014/53/EU
Standards: EN 300 440-1 V1.6.1 (2010-08)
EN 300 440-2 V1.4.1 (2010-08)
EN 301 489-1 V1.9.2 (2011-09)
EN 301 489-3 V1.4.1 (2002-08)
IC RSS-310 Issue 3, December 2010
LVD: 2006/95/EC
Standards: EN 60950-1: 2006/A2:2013
Digital Device Emissions
Standards: FCC CFR 47 PART 15 B: 2013
EN 55022:2010+AC:2011
EN 55024:2010
Agent:
Sam Everett, Quality Regulatory Engineer
Date: 10 June, 2014, Middlebury, Connecticut, U.S.A.
This manual suits for next models
1
Table of contents
Other Timex Watch manuals

Timex
Timex Acclaim User manual

Timex
Timex W208 User manual

Timex
Timex W-14 User manual

Timex
Timex Ironman Data Link USB User manual

Timex
Timex 104 User manual

Timex
Timex W92 User manual

Timex
Timex M-286 Marathon Installation and operation manual

Timex
Timex W-91 User manual

Timex
Timex W-89 User manual

Timex
Timex W-139 User manual

Timex
Timex ironman T5K523 User manual

Timex
Timex Ironman User manual

Timex
Timex W-163 User manual

Timex
Timex W-191-AS User manual

Timex
Timex W-6 User manual

Timex
Timex W-141 User manual

Timex
Timex Ironman T5K018 User manual

Timex
Timex IRONMAN Classic 50 Move+ User manual

Timex
Timex iConnect Premium Active User manual

Timex
Timex W-107-US User manual