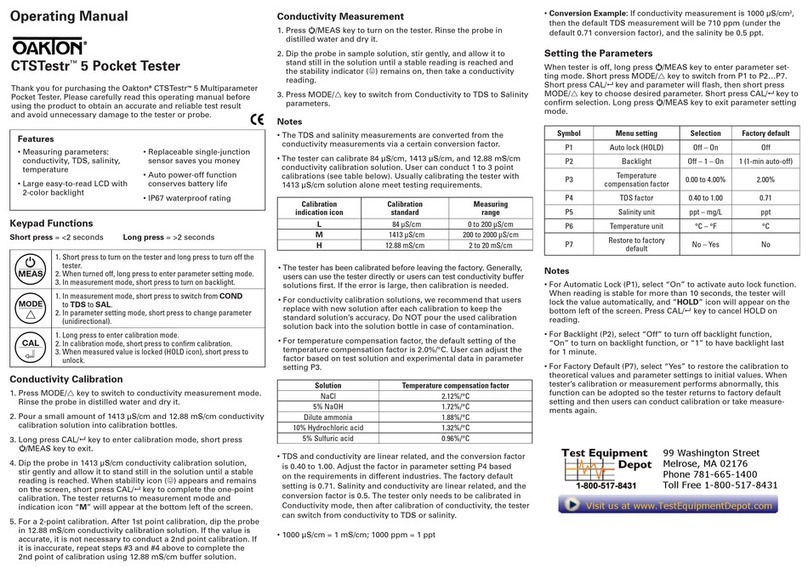
Tintometer Lovibond SensoDirect pH110 User manual

FR
SensoDirect pH110
Instruction Manual
Lovibond®Water Testing
Tintometer®Group
GB
DE

2SensoDirect 110
Inhaltsverzeichnis
1 Gerätebeschreibung ......................................................................................... 2
2 Technische Daten ............................................................................................. 3
3 Funktionsbeschreibung..................................................................................... 3
4. Kalibrierung ..................................................................................................... 4
4.1 Übersicht.......................................................................................................... 4
4.2 Benötigtes Zubehör.......................................................................................... 4
4.3 Zwei-Punkt-Kalibrierung................................................................................... 4
4.4 Ein-Punkt-Kalibrierung...................................................................................... 4
5. Messung durchführen ...................................................................................... 4
6 Batteriewechsel................................................................................................ 5
7. Zubehör ........................................................................................................... 5
1. Gerätebeschreibung
• Dieses pH-Messgerät ist für ein breites Anwendungsspektrum konzipiert. Hierzu gehört
der Einsatz in Aquarien und Fischzüchtereien, Lebensmittel- und Getränkeindustrien,
Photographie, Laboren, Qualitätskontrolle, Schwimmbädern und Wasseraufbereitung.
• Qualitativ hochwertiges, kompaktes Gerät für einfachste Handhabung.
• Spritzwasser geschützte Folientastatur, einfach abzulesendes LC-Display und abriebfeste
Funktionstasten.
Lieferumfang
Bitte überprüfen Sie direkt nach dem Auspacken den Lieferumfang.
Es sollten folgende Bestandteile enthalten sein:
• Lovibond®SensoDirect pH110
• Lovibond®SensoDirect pH Elektrode Kunststoff/Gel-Typ mit BNC-Stecker
• 9V Batterie
• Schutzarmierung
• 7 Schrauben
• Schraubendreher
• Kunststoffabdeckung für Kalibrierschrauben
• Bedienungsanleitung
Einbau der Batterie
Vor der ersten Inbetriebnahme das Gerät aus der Schutzarmierung herausnehmen, den Bat-
teriefachdeckel öffnen und die 9 V-Batterie einsetzen.
Auf die richtige Polarität ist zu achten.
Schutzarmierung
Das Gerät ist standardmäßig mit einer Schutzarmierung ausgestattet.
Vor der ersten Messung die Schutzarmierung mit den mitgelieferten Schrauben befestigen.
Die Schutzarmierung gewährleistet zuverlässige Bedienung und Messungen unter erschwerten
Bedingungen.

3
SensoDirect 110
Bei Gebrauch des Gerätes ohne Schutzarmierung bitte die mitgelieferte Kunststoffabdeckung
für die Kalibrierschrauben zum Schutz vor Staub und Feuchtigkeit verwenden.
2. Technische Daten
Anzeige LCD, 21,5 mm, Höhe der Digitalanzeige
Messbereich 0 - 14 pH
Auflösung 0,01 pH
Genauigkeit ± 0,07 pH (pH 5 - pH 9)
± 0,1 pH (pH 4 - pH 10)
± 0,2 pH (pH 1 - pH 3,9, pH 10,1 - pH 13)
(23 ± 5°C, nach Kalibrierung)
Eingangsimpendanz 1012 Ohm
Temperatur-
kompensation nein
Umgebungs- 0 - 50°C
bedingungen maximal 80% rel. Feuchte
Kalibrierung pH 4 / pH 10 (Steilheit) & pH 7 (Asymmetriepotential)
Stromversorgung 006P DC 9V-Batterie
Stromverbrauch ca. 2,0 mA
Abmessungen 208 x 110 x 34 mm (L x B x H)
Gewicht ca. 380 g
pH-Elektrode pH Kunststoff-Typ, Gel-Elektrolyt mit BNC-Stecker
3. Funktionsbeschreibung
Abbildung 1
1 Anzeige 6 Kalibrierung Asymmetrie pH 7
2 ON-Taste (Einschalten) 7 Kalibrierung Steilheit pH 4 pH10
3 OFF-Taste (Ausschalten) 8 Batteriefach/-deckel
4 HOLD-Taste (Messwert einfrieren) 9 Ständer
5 BNC-Anschluss für pH-Elektrode 10 Schutzarmierung

4SensoDirect 110
4. Kalibrierung
4.1 Übersicht
Das Gerät ist werkseitig durch einen mV-Simulator kalibriert (0 mV bei pH 7, bei 25°C Arbeit-
stemperatur). Da die meisten pH-Elektroden nicht einer idealen Elektrode entsprechen und die
Umgebungstemperatur eventuell nicht exakt 25 °C entspricht, ist es notwendig das Gerät zu
kalibrieren um höchste Messgenauigkeit der pH-Elektrode zu gewährleisten.
4.2 Benötigtes Zubehör
1. Kombinierte pH-Elektrode
2. pH 4 (oder pH 10) & pH 7 Puffer-Lösungen
4.3 Zwei-Punkt-Kalibrierung
1. pH-Elektrode mit dem BNC-Anschluss verbinden (Abb. 1, 5) und in pH 7 Puffer-Lösung
eintauchen.
2. Gerät mit der ON-Taste einschalten (Ab. 1, 2).
3. pH 7 Asymmetriepotential (Abb. 1, 6) korrigieren bis die Anzeige genau pH 7,00 anzeigt.
4. Elektrode mit VE-Wasser spülen.
5. Elektrode in pH 4 (oder pH 10) Puffer-Lösung eintauchen.
6. pH 4 (oder pH 10) (Abb. 1, 7) korrigieren bis die Anzeige genau pH 4,00 (oder pH 10,00)
anzeigt.
7. Elektrode mit VE-Wasser spülen.
8. Schritte iii) bis vii) zwei Mal wiederholen.
4.4 Ein-Punkt-Kalibrierung
1. pH-Elektrode mit dem BNC-Anschluss verbinden und in eine Standard-Puffer-Lösung
eintauchen (z.B. pH 7,00).
2. Gerät mit der ON-Taste einschalten (Ab. 1, 2).
3. pH 7 Asymmetriepotential (Abb. 1, 7) korrigieren bis die Anzeige genau den Wert des
Standard-Puffers anzeigt.
5. Messungen durchführen
Nach der Kalibrierung ist das Gerät einsatzfähig.
1. pH-Elektrode mit dem BNC-Anschluss verbinden.
2. Gerät mit der ON-Taste einschalten.
3. Elektrode in die zu messende Probe eintauchen ; der pH-Wert wird in der Anzeige angezeigt.

5
SensoDirect 110
4. Durch Drücken der Hold-Taste (Figure 1, 4) wird der Messwert in der Anzeige eingefroren
und in der Anzeige erscheint „HOLD“. Zum beenden der „HOLD“-Funktion die Hold-Taste
nochmals drücken.
5. Nach der Messung Elektrode mit VE-Wasser spülen.
6. Batteriewechsel
1. „ “ in der linken Ecke der Anzeige weist darauf hin die Batterie zu wechseln. Genaue
Messungen sind aber noch mehrere Stunden nach Erscheinen des Zeichens möglich.
2. Vor dem Batteriewechsel ist die Schutzarmierung zu entfernen. Zum Austausch der Batterie
den Batteriefachdeckel an der Rückseite des Gerätes lösen (Abb. 1, 9).
3. Batterie entfernen und Ersatzbatterie einsetzen (006P DC 9V.). Anschließend Batteriefach-
deckel wieder einsetzen.
7. Zubehör
721226 pH-Elektrode, Kunststoff-Typ, Gel-Elektrolyt mit BNC-Stecker
721247 pH Puffer-Lösung pH 4,00 (25°C) rot, 90 ml, rückführbar auf N.I.S.T.
721248 pH Puffer-Lösung pH 7,00 (25°C) gelb, 90 ml, rückführbar auf N.I.S.T.
721249 pH Puffer-Lösung pH 10,00 (25°C) blau, 90 ml, rückführbar auf N.I.S.T.
721250 pH-Pufferlösungsset pH4, pH 7, pH 10 (25°C), farbkodiert, jeweils 90 ml in
Plastikflaschen, rückführbar auf NIST (National Institute of Standards and
Technology)
721252 pH Pufferlösung 4,00 (25°C) rot, 1 ltr, rückführbar auf NIST
721254 pH Pufferlösung 7,00 (25°C) gelb, 1 ltr, rückführbar auf NIST
721256 pH Pufferlösung 10,00 (25°C) blau, 1 ltr, rückführbar auf NIST
726404 Aufbewahrungslösung für pH/ORP-Elektroden (3 M KCl), 100 ml
726402 Aufbewahrungslösung für pH/ORP-Elektroden (3 M KCl), 25 ml

6SensoDirect 110
Contents
1 General Description.......................................................................................... 6
2 Specification..................................................................................................... 7
3 Functional Descripton....................................................................................... 7
4 Calibration ....................................................................................................... 8
4.1 Overwiew......................................................................................................... 8
4.2 Equipment Required......................................................................................... 8
4.3 Two Point Calibration ....................................................................................... 8
4.4 Single Point Calibration .................................................................................... 8
6 Changing the Battery ....................................................................................... 9
7 Accessories....................................................................................................... 9
1. General Description
• General purpose pH meter with broad application including AQUARIA & FISH HAT-
CHERIES, FOOD & BEVERAGE PROCESSING, PHOTOGRAPHY, LABORATORY, QUALITY
CONTROL, EDUCATION, SWIMMING POOLS & WATER CONDITIONING
• High quality, compact unit that is designed for easy operation
• Water resistant front panel with easy to read LCD display and rubberised function keys
Unpacking
Please check that the shipment includes the following items:
• Lovibond®SensoDirect pH110
• Lovibond®SensoDirect pH sensor plastic/gel-type with BNC plug
• 9V Battery
• Protective cover
• 7 Screws
• Screwdriver
• Plastic Cover Calibration Screws
• Instruction Manual
Battery installation
Prior to first use take the instrument out of the protective cover open the battery compartment
and insert the 9V battery.
Ensure polarity is correct.
Protective Cover
The instrument is equipped as standard with the protective cover.
Prior to the first measurement please fix the cover by using the enclosed srews. The protective
armouring ensures reliable operation even in harsh environments.
When the instrument is used without the protective cover please use the enclosed plastic cover
to protect the calibration screws against dust and humidity.

7
SensoDirect 110
2. Specification
Display LCD, 21.5 mm (0.7“) digit height
Measurement Range 0 - 14 pH
Resolution 0.01 pH
Accuracy ± 0.07 pH (pH 5 - pH 9)
± 0.1 pH (pH 4 - pH 10)
± 0.2 pH (pH 1 - pH 3.9, pH 10.1 - pH 13)
Main instrument only
23 ± 5°C, after calibration
Input Impedance 1012 Ohms
Temperature
Compensation No adjustment
Operating Temperature 0 - 50°C (32 - 122°F)
Operating Humidity Maximum 80% relative humidity
Calibration External, pH 4 (or pH 10) (slope adjustment) & pH 7 (Offset
adjustment)
Power Supply 006P DC 9V battery
Power Consumption Approx. 2.0 mA
Dimension 208 x 110 x 34 mm (L x W x H)
Weight Approx. 380 g
pH electrode pH plastic type, gel electrolyte with BNC connector
3. Functional Description
Figure 1
1 Display 6 Calibration Offset pH 7
2 Power ON Button 7 Calibration slope pH 4 (pH 10)
3 Power OFF Button 8 Battery compartment/cover
4 Data Hold Button 9 Stand
5 BNC socket for pH electrode 10 Protective cover

8SensoDirect 110
4. Calibration
4.1 Overview
The meter is supplied with calibration by mV signal that simulates an ideal pH electrode mV
output (0 mV at pH 7, based on 25°C working temperature). However, because most pH
electrodes do not exactly replicate the ideal electrode and because the working temperature
may differ from 25°C, it is necessary to calibrate the instrument to ensure measurement ac-
curacy of the combined pH electrode.
4.2 Equipment Required
1. Combination pH electrode
2. pH 4 (or pH 10) & pH 7.0 buffer solutions
4.3 Two Point Calibration
1. Connect the pH electrode to the BNC socket (Figure 1, 5) and immerse in pH 7 buffer
solution.
2. Switch the instrument on by pressing the Power ON Button (Figure 1, 2).
3. Adjust „pH 7 Adjust „ (Figure 1, 6) until the display reads exactly pH 7.00.
4. Rinse the electrode in distilled water.
5. Place the electrode into buffer pH 4 (or pH 10) solution.
6. Adjust slope pH 4 (or pH 10) (Figure 1, 7) until the display reads exactly pH 4.00 (or pH 10.00).
7. Rinse the electrode in distilled water.
8. Repeat steps iii) to vii) at least twice.
4.4 Single Point Calibration
1. Connect the pH electrode to the BNC socket and immerse in a standard buffer solution
(eg pH 7.0).
2. Switch the instrument on by pressing the Power ON Button (Figure 1, 2).
3. Adjust the “pH 7 Adjust „ (Figure 1, 7) until the display reads the same value as the stan-
dard buffer solution used.
5. Taking Measurements
After calibration, the unit is ready for taking measurements.
1. Connect the pH electrode to the BNC socket.
2. Switch the instrument on by pressing the Power ON Button.
3. Immerse the electrode in the solution being measured; the instrument will display the pH
value.
4. During measurement, pressing the Data Hold Button (Figure 1, 4) will freeze the display.
At the same time the display will show a Data Hold indicator. To release the display freeze
function, press the Data. Hold Button again; the Data Hold indicator will disappear from

9
SensoDirect 110
the display.
5. After taking a measurement, rinse the electrode in distilled water.
6. Changing the Battery
1. „ “ in the left corner of the display indicates that it is necessary to replace the battery.
However, accurate measurements may still be made for several hours after the Low Battery”
indicator first appears.
2. Remove the protective cover before replacing the battery. To replace the battery, remove
the Battery Compartment Cover (Figure 1, 9) on the rear of the meter.
3. Remove the battery, install a replacement one (006P DC 9V) and replace the battery com-
partment cover.
7. Accessories
721226 pH Electrode, plastic type, gel electrolyte with BNC connector
721247 pH Buffer Solution pH 4 (25°C) red, 90 mL, traceable to N.I.S.T.
721248 pH Buffer Solution pH 7 (25°C) red, 90 mL, traceable to N.I.S.T.
721249 pH Buffer Solution pH 10 (25°C) red, 90 mL, traceable to N.I.S.T.
721250 pH-Buffer solution set pH 4, pH 7, pH 10 (25°C) colour coded 90 ml each in plastic
bottles, traceable to N.I.S.T
721252 pH Buffer solution 4.00 (25°C) red, 1 ltr., traceable to N.I.S.T
721254 pH Buffer solution 7.00 (25°C) yellow, 1 ltr., traceable to N.I.S.T
721256 pH Buffer solution 10.00 (25°C) blue, 1 ltr., traceable to N.I.S.T
726404 Storage solution for pH/ORP electrodes (3 M KCl), 100 ml
726402 Storage solution for pH/ORP electrodes (3 M KCl), 25 ml

10 SensoDirect 110
Table des matières
1. Description de l’appareil................................................................................. 10
2. Données techniques....................................................................................... 11
3. Description des fonctions ............................................................................... 11
4. Calibrage ....................................................................................................... 12
4.1 Aperçu........................................................................................................... 12
4.2 Accessoires nécessaires................................................................................... 12
4.3 Calibrage sur 2 points .................................................................................... 12
4.4 Calibrage sur 1 point...................................................................................... 12
5. Mesure........................................................................................................... 12
6. Changement de la pile ................................................................................... 13
7. Accessoires..................................................................................................... 13
1. Description de l’appareil
• Cet appareil de mesure du pH a été conçu pour un large domaine d’applications comme
l’utilisation en aquarium et réserves de pêche, l’industrie alimentaire et des boissons, la
photographie, les laboratoires, les contrôles qualité, les piscines et le traitement de l’eau.
• Appareil compact de haute qualité pour un maniement simple.
• Clavier protégé des éclaboussures, affichage LC simple de lecture et touches fonctions
protégées de l’usure par frottement.
Contenu de la livraison
Veuillez vérifier le contenu de la livraison directement après avoir déballé l’appareil.
Vous devez y trouver les éléments suivants :
• SensoDirect pH110 Lovibond®
• Electrode plastique/type Gel avec
• prise de courant BNC
• Pile 9 V
• Boîtier de protection
• 7 visses
• Tourne-visses
• Caches pour visses de calibrage
• Mode d’emploi.
Installation de la pile
Avant la première mise en service, enlever le boîtier de protection de l’appareil, ouvrir le
protège-pile et y introduire la pile 9V. Veuillez bien tenir compte de la polarité.
Boîtier de protection
L’appareil est équipé en série du boîtier de protection.
Avant la première mesure, fixer le boîtier de protection avec les visses. Le boîtier de protection
assure un maniement sûr et des mesures dans des conditions difficiles.
Si vous utilisez l’appareil sans le boîtier de protection, protégez les visses de calibrage de la
poussière et de l’humidité avec leurs caches.

11
SensoDirect 110
2. Données techniques
Affichage : LCD, hauteur de l’écran digital: 21,5 mm
Plage de mesure : 0 – 14 pH
Résolution : 0,01 pH
Précision : ± 0,07 pH (pH 5 – pH 9)
± 0,1 pH (pH 4 – pH 10)
± 0,2 pH (pH 1 – pH 3,9, pH 10,1 – pH 13)
(23 ± 5°C après calibrage)
Résistance interne : 1012 Ohm
Compensation de la
température : non
Conditions
d’environnement : 0 – 50°C, max. 80% d’humidité relative
Calibrage : pH 4,0 (pente)
pH 7,0 (potentiel d’asymétrie)
Alimentation en
courant : pile 006P DC 9V
Consommation
en courant : environ 2,0 mA
Dimensions : 208 x 110 x 34 cm (L x l x h)
Poids : environ 380 g.
Electrode pH : pH type plastique, gel électrolyte avec prise de courant BNC.
3. Description des fonctions
Schéma 1
1 Affichage 6 Calibrage asymétrie pH 7
2 Touche ON (mise en marche) 7 Calibrage pente pH 4 pH10
3 Touche OFF (désactiver) 8 Emplacement pour la pile et cache
4 Touche HOLD (les résultats de la mesure
restent affichés)
9 Support
5 Connexion BNC pour électrode de pH 10 Boîtier de protection

12 SensoDirect 110
4. Calibrage
4.1 Aperçu
L’appareil est calibré en usine par un simulateur mV (0 mV pour pH 7 à une température de
25°C). La plupart des électrodes de pH ne correspondant pas à l’électrode idéale et la tempé-
rature d’environnement n’étant pas exactement 25°C, il est nécessaire de calibrer l’appareil
pour assurer une précision optimale de mesure de l’électrode de pH.
4.2 Accessoires nécessaires
1. Electrode de pH combinée
2. Solutions tampons pH 4 (ou pH 10) et pH 7,00
4.3 Calibrage sur 2 points
1. Relier l’électrode pH à la prise de courant BNC (Schéma 1, 5) et la plonger dans la solu-
tion tampon pH 7.
2. Appuyer sur la touche ON pour mettre l’appareil en marche.
3. Corriger le potentiel d’asymétrie pH 7 (schéma 1, 6) jusqu’à ce que s’affiche exactement
pH 7,00.
4. Nettoyer l’électrode avec de l’eau déminéralisée.
5. Plonger l’électrode dans la solution tampon pH 4 (ou pH 10).
6. Corriger la pente pH 4 (ou pH 10) (schéma 1, 7) jusqu’à ce que s’affiche exactement pH
4,00 (ou pH 10,00).
7. Nettoyer l’électrode avec de l’eau déminéralisée.
8. Renouveler les manipulations 3) et 4) à 2 reprises.
4.4 Calibrage sur 1 point
1. Relier l’électrode de pH à la prise de courant BNC et la plonger dans la solution tampon
standard (ex : pH 7,00).
2. Mettre l’appareil en marche avec la touche ON (schéma 1, 2).
3. Corriger le potentiel d’asymétrie pH 7 (schéma 1, 7) jusqu’à ce que s’affiche exactement
la valeur de la solution tampon standard.
5. Mesure
L’appareil est prêt pour la mesure après le calibrage.
1. Relier l’électrode à la prise de courant BNC.
2. Mettre l’appareil en marche avec la touche ON
3. Plonger l’électrode dans l’échantillon à mesurer; la valeur pH s’affiche sur l’écran.
4. En appuyant sur la touche HOLD (schéma 1, 4), on «fixe» la valeur mesurée à l’écran et
«HOLD» s’affiche. Pour désactiver cette fonction, appuyer de nouveau sur la touche

13
SensoDirect 110
«HOLD».
5. Nettoyer l’électrode après la mesure avec de l’eau distillée.
6. Changement de la pile
1. « » dans le coin gauche de l’écran indique qu’il faut changer la pile. Cependant, vous
pouvez effectuer des mesures exactes pendant encore plusieurs heures après l’apparition
de ce signe.
2. Enlever le boîtier de protection avant de changer la pile. Ouvrir le protège-pile derrière
l’appareil (schéma 1, 9)
3. Enlever la pile usagée et placer la nouvelle pile (006P DC 9V). Remettre le protège-pile.
7. Accessoires
721226 Electrode de pH, type plastique, gel électrolyte avec prise BNC
721247 Solution tampon pH 4,00 (25°C) rouge, 90 ml, selon N.I.S.T
721248 Solution tampon pH 7,00 (25°C) jaune, 90 ml, selon N.I.S.T
721249 Solution tampon pH 10,00 (25°C) bleu, 90 ml, selon N.I.S.T.
721250 Lot de solutions tampons pH pour pH 4, pH 7, pH 10 (25°C), en couleurs codées,
90 ml chacune dans un flacon plastique, traçables selon N.I.S.T
721252 Solution tampon pH 4.00 (25°C) rouge, 1 litre, traçable selon N.I.S.T
721254 Solution tampon pH 7.00 (25°C) jaune, 1 litre, traçable selon N.I.S.T
721256 Solution tampon pH 10.00 (25°C) bleue, 1 litre, traçable selon N.I.S.T
726404 Solution de stockage pour électrodes de pH/ORP (3 M KCl), 100 ml
726402 Solution de stockage pour électrodes de pH/ORP (3 M KCl), 25 ml

14 SensoDirect 110

15
SensoDirect 110

Technische Änderungen vorbehalten
Printed in Germany 08/19
No.: 00 38 59 12
Lovibond®und Tintometer®
sind eingetragene Warenzeichen
der Tintometer Firmengruppe
Tintometer China
Room 1001, China Life Tower
16 Chaoyangmenwai Avenue,
Beijing, 100020
Tel.: +86 10 85251111 App. 330
Fax: +86 10 85251001
chinaoffice@tintometer.com
www.lovibond.com
China
Tintometer South East Asia
Unit B-3-12, BBT One Boulevard,
Lebuh Nilam 2, Bandar Bukit Tinggi,
Klang, 41200, Selangor D.E
Tel.: +60 (0)3 3325 2285/6
Fax: +60 (0)3 3325 2287
lovibond.asia@tintometer.com
www.lovibond.com
Malaysia
Tintometer GmbH
Lovibond®Water Testing
Schleefstraße 8-12
44287 Dortmund
Tel.: +49 (0)231/94510-0
Fax: +49 (0)231/94510-20
sales@tintometer.de
www.lovibond.com
Deutschland
Tintometer AG
Hauptstraße 2
5212 Hausen AG
Tel.: +41 (0)56/4422829
Fax: +41 (0)56/4424121
info@tintometer.ch
www.tintometer.ch
Schweiz
The Tintometer Ltd
Lovibond®House
Sun Rise Way
Amesbury
Salisbury
SP4 7GR
Tel.: +44 (0)1980 664800
Fax: +44 (0)1980 625412
sales@tintometer.com
www.lovibond.com
UK
Tintometer Inc.
6456 Parkland Drive
Sarasota, FL 34243
Tel: 941.756.6410
Fax: 941.727.9654
sales@tintometer.us
www.lovibond.com
USA
Tintometer Brasilien
Caixa Postal: 271
CEP: 13201-970
Jundiaí – SP -
Tel.: +55 (11) 3230-6410
sales@tintometer.com.br
www.lovibond.com.br
Brasilien
Tintometer Indien Pvt. Ltd.
Door No: 7-2-C-14, 2nd, 3rd & 4th Floor
Sanathnagar Industrial Estate,
Hyderabad, 500018
Telangana
Tel: +91 (0) 40 23883300
Toll Free: 1 800 599 3891/ 3892
indiaoffice@tintometer.com
www.lovibondwater.in
Indien
Table of contents
Languages:
Other Tintometer Test Equipment manuals
Tintometer
Tintometer Lovibond SensoDirect 150 User manual
Tintometer
Tintometer Lovibond TB 250 WL User manual
Tintometer
Tintometer Lovibond TB 350 User manual
Tintometer
Tintometer Lovibond MD100 User manual
Tintometer
Tintometer Lovibond Floc-Tester User manual
Tintometer
Tintometer Lovibond SD 315 Oxi User manual

Tintometer
Tintometer Lovibond TB 350 User manual
Tintometer
Tintometer Lovibond TB210 IR User manual
Tintometer
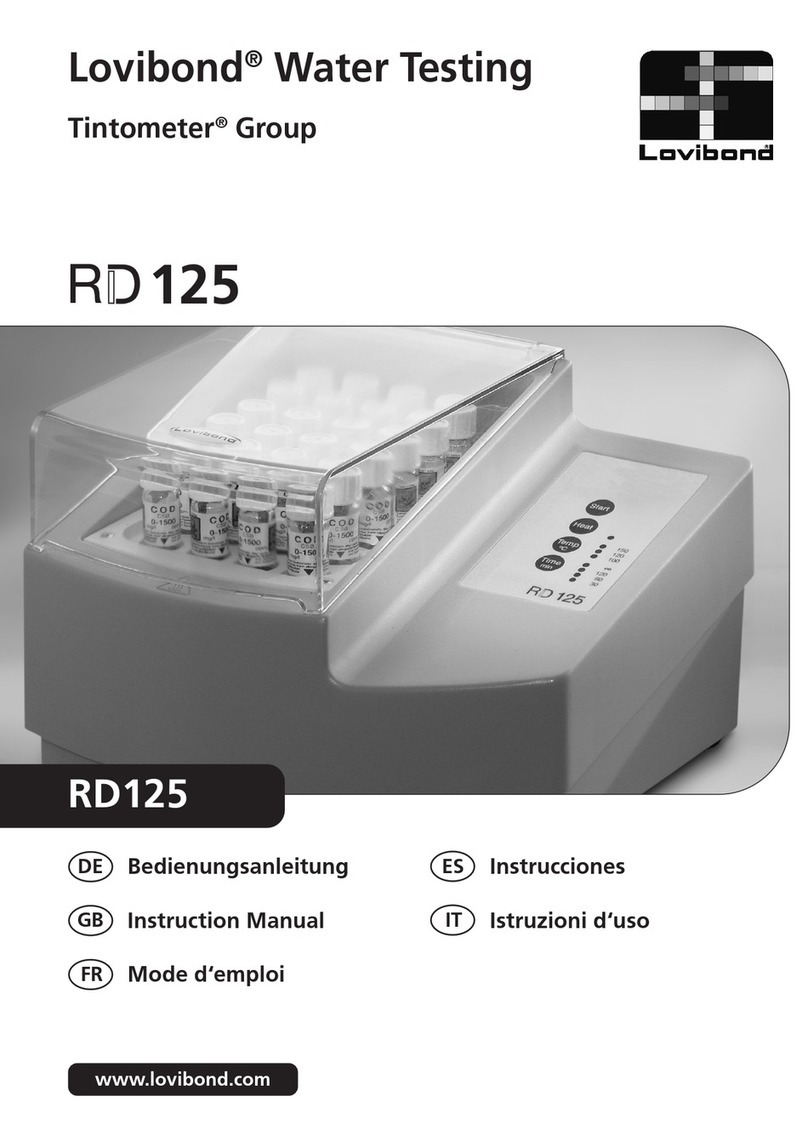
Tintometer Lovibond RD125 User manual
