Topgreener TDODS5-120 User manual

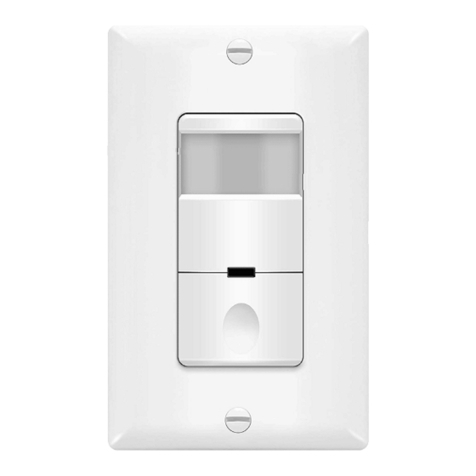
The TDODS5-120 is a motion sensor with a dimmer. This innovative design makes it the single
most energy efficient controller ever! It’s capable of dimming at very low levels and it can deliver the
brightest light that your bulbs are capable of handling. When the room is unoccupied, the sensor will
automatically turn the lights off. The TDODS5-120 can be switched between Vacancy and Occupancy
modes and the sensor can be customized by adjusting the controls hidden under the dimmer buttons.
NEUTRAL WIRE IS NOT REQUIRED FOR TDODS5-120.
Model: TDODS5-120
Occupancy/Vacancy
Sensor & Dimmer
Voltage........................................................................................................................... 120VAC, 60Hz
Tungsten/ Incandescent................................................................................................................600W
Electronic self-ballasted (LED)..........................................................................................150W(1.25A)
Operating temperature.....................................................................................32°F~104°F(0°C~40°C)
Wire Strip Length.............................................................................................................16mm(5/8 in.)
Supply Connection .........................................................................................................#14-#12 AWG
Screw Torque.............................................................................................................................20lbf-in
Motion Sensor Coverage...............................................................................................180°, 700 sq.ft.
INSTALLATION INSTRUCTIONS
WARRANTY
© 2018 Top Greener, Inc. CA, U.S.A. WWW.TOPGREENER.COM 0206200101-4
WARNING
Read and understand these instructions before installing. This device is intended for installation in accordance
with the National Electric Code and local regulations. It is recommended that a qualified electrician performs this
installation. Make sure to turn off the circuit breaker or fuse(s) and make sure power is off before wiring the
device.
Use copper wire only.
Turn the power off at the circuit breaker before installing the
dimmer.
COVERAGE
As Illustrated below, the TDODS5-120 has a 180° detection range with a maximum distance of 30’
detection in front of the sensor and 12’ on the sides, For Maximum results, the sensor must be properly
installed between the height of 4’ to 5’ and away from obstructions such as walls, furniture and
transparent barriers like Low-E glass.
Max. 12’
on the sides
Max. 30’
in the front
This device is warranted to be free of material and workmanship defects for 1 year from the date of purchase. Original receipt or proof of purchase from an authorized retailer must be presented upon warranty claim. ALL claims must be verified and approved by Top Greener, Inc.
Warranties from other TOPGREENER products may vary. This warranty is nontransferable and does not cover normal wear and tear or any malfunction, failure, or defect resulting from misuse, abuse, neglect, alteration, modification, or improper installation. To the fullest extent
permitted by the applicable state law, Top Greener, Inc. shall not be liable to the purchaser or end user customer of TOPGREENER products for direct, indirect, incidental, or consequential damages even if Top Greener, Inc. has been advised of the possibility of such damages.
Top Greener, Inc’s total liability under this or any other warranty, express or implied, is limited to repair, replacement or refund. Repair, replacement or refund are the sole and exclusive remedies for breach of warranty or any other legal theory.
SPECIFICATIONS
FEATURES
WIRING DIRECTIONS:
1. Remove the wall plate.
2. Remove existing switch from wall box and prior to disconnecting wires, identify the wires
and label as needed.
3. Remove wires from existing switch.
4. Follow the diagram below to reconnect the TDODS5-120 sensor switch.
WARNING: The white wire you see in the wall box is not always the
neutral wire. Verify whether the power enters the wall or
ceiling box first. NEUTRAL WIRE IS
NOT REQUIRED FOR TDODS5-120
Load (Red)
Single-Pole
Wire the TDODS5-120 this way
if POWER enters the ceiling box first
Hot
Power
Neutral
Ground
Ceiling box
Wall box
Load
Hot (Black)
Ground (Green)
Remote (Blue)
For 3-way & 4-way connections
Black
White with
non-neutral
marker
Single-Pole
If power enters the wall box first,
then wire the TDODS5-120 this way
NeutralGround
Ceiling box
Wall box
Load
Neutral (White)
POWER
Ground
Remote (Blue)
For 3-way & 4-way connections
Load (Red)
Black
Black Hot (Black)
5
NeutralGround
Ceiling box
Wall box
Load
Neutral (White)
Remote (Blue)
POWER
Load (Red)
Hot (Black)
Ground (Green)
Black
Ground (Green)
Neutral (White)
Travel (Red)
Travel (Red)
Travel (Black)
Load (Black)
Red
Remote (Blue)
Travel
(Black)
3-Way Wiring
TDODS5-120
TDS3K
For 3-Way connections, you will need one TDODS5-120 and one TDS3K.
3-WAY AND 4-WAY WIRING
TDODS5-120 TDS3K
For 4-Way connections, you will need one TDODS5-120 and two or more TDS3K.
TDODS5-120 TDS3K
x1 x2
x1 x1

NeutralGround
Ceiling box
Load
Neutral (White)
Remote (Blue)
Load (Red)
Black capped
Not Used
Ground (Green)
Black
Ground (Green)
Neutral (White)
Travel (Red)
Travel (Red)
Travel (Black)
Load (Black)
Red
Remote (Blue)
Travel
(Black)
Neutral (White)
Remote (Blue)
POWER
Load (Red)
Hot (Black)
Ground (Green)
Travel (Red)
Travel (Black)
4-Way Wiring
Air Gap Switch not
functional at this
location
TDODS5-120
TDS3K
TDS3K
This Air Gap Switch
is functional at this
location
Occupancy (OCC) Mode (Default): Auto ON/ Auto OFF
The lights will automatically turn on when motion is detected by the PIR sensor and keep the lights on
as long as motion is still detected. When motion is no longer detected, the device will start the countdown
(Time Delay) and when time expires, the device will automatically turn the lights OFF.
Vacancy (VAC) Mode: Manual ON/ Auto OFF
The lights will not turn on automatically when motion is detected by the PIR sensor. The dimmer buttons
must be used to turn the lights on. Once lights are on, motion detected by the PIR sensor will keep the
lights on. When motion is no longer detected, the device will start the countdown (Time Delay) and when
time expires, the device will automatically turn the lights OFF.
Within 30 seconds of the lights automatically turning off, if motion is detected
then the lights will turn on.
To switch between Occupancy mode and Vacancy mode
OPERATING MODES
Occupancy mode is indicated by the LED indicator flashing RED when motion is detected. To switch
between Vacancy and Occupany modes, press and hold down both the UP and DOWN bottons for 5
seconds, until the LED indicator flashes TWO times for Vacancy mode and FOUR times for Occupancy
mode.
Vacancy mode is indicated by the LED indicator flashing RED when motion is detected. To switch to
Vacancy mode, press and hold down both the UP and DOWN bottons for 5 seconds, until the LED indicator
flashes TWO times
Manual Control: Dimming and ON/OFF
Turn ON the lights: Tap the UP button. The lights will turn ON to the last used brightness level.
Turn OFF the lights:Tap the DOWN button. The lights will turn OFF completely and save the
brightness level.
Turn the brightness level UP (brighten): Hold down the UP button. The brightness level will gradually
increase until button is released.
Turn the brightness level DOWN (dim): Hold down the DOWN button. The brightness level will
gradually decrease until button is released.
Once you have completed the wiring, we recommend that you turn on the power, then test and adjust the settings
to your desire before installing the wallplate. The adjustment dials are located under the face cover, which can be
removed by prying the face cover off from the indents located at the bottom corner of the face covers. See diagram
below.
POWER UP AND TEST BEFORE WALLPLATE
The Load does not turn On when a person walks in the room:
The Load does not turn Off:
The Load turns on when its not desired:
NOTE: There is a 3 minute warm-up time at initial power-up.
The load may turn on/off several times during the warm-up.
1. Make sure power is turned on at the panel.
2. Make sure a GFCI switch nearby or at the panel is not tripped.
3. Push Manual On/Off Button: if the load turns on, then reset the Ambient Light Level.
4. Check the wiring connection for loose wire cap.
5. Switch may be in VACancy mode. Switch it to Occupancy mode if auto on (always) is the desired
operation.
1. Motion may be detected. The time delay constantly restarts its countdown after the last motion
detected. To verify proper operation, turn the Time Delay Knob to 15s (Test Mode) and make sure
there is no motion (no LED flashing). Tape may be used to cover the fresnel lens while testing.
2. Check for significant heat source emitting within six feet (two meters) such as high wattage light bulb,
portable heaters or HAVC vents.
3. Check the wiring. Make sure the HOT and LOAD wires aren't reversed.
1. Motion may be detected. The time delay constantly restarts its countdown after the last motion
detected. To verify proper operation, turn the Time Delay Knob to 15s (Test Mode) and make sure
there is no motion (no LED flashing). Tape may be used to cover the fresnel lens while testing.
2. Check for significant heat source emitting within six feet (two meters) such as high wattage light bulb,
portable heaters or HAVC vents.
3. If Manual operation of push-button is desired, select VAC mode on the Mode Switch.
TROUBLESHOOTING
OPEN CONTROL PANEL
Remove the cover to expose the control panel. Insert the tip
of a flat screwdriver into the gap and pry the cover off.
To reinstall, simply align the cover and snap back on.
1
23
4
1
23
4
RANGE LIGHT
TEST TIME
10
Min
20
Min
Min
30
Ambient Light Level Dial
Default position: Daylight (100% at position 4)
Adjustable: Daylight to 30Lux (Counter clockwise)
Note: Position 4 means that the sensor will turn the lights on
even when the room is already bright.
Position 1 means the sensor will not turn the lights on
until the brightness in the room drops to 30 lumens or below.
Time Delay Dial
Default position: 15 Seconds (Test mode)
Adjustable: from 15 Seconds to 30 Minutes
(clockwise)
Range Dial (Sensor Sensitivity)
Default position: Center at 65%
Adjustable: 30% (Position 1) to 100% (Position 4)
Other Topgreener Accessories manuals


