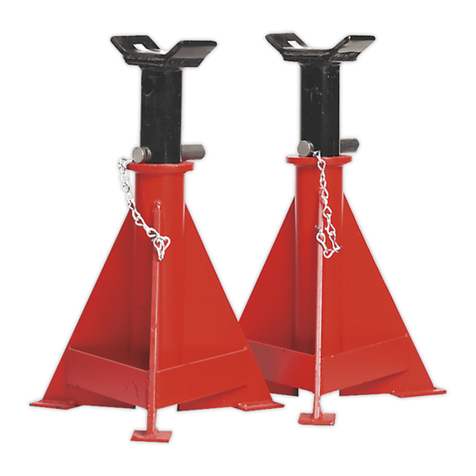
Torin BIG RED T70401 User manual

OWNER’S MANUAL
HYDRAULIC RAM SYSTEM
Item: T70401, T71001L
Questions, problems, missing parts? Before returning to your retailer, call our customer service department at
1-888-44-TORIN (1-888-448-6746), 8 a.m.- 5 p.m., PST, Monday-Friday.
Read carefully and understand all ASSEMBLY AND OPERATION INSTRUCTIONS before operating. Failure
to follow the safety rules and other basic safety precautions may result in serious personal injury.
Version 20200401

2
IMPORTANT
OWNER / USER RESPONSIBILITY
INTENDED USE
TECHNICAL SPECIFICATIONS
Before You Begin Register This Product.
For future reference, record the model name, model number, date of manufacture and purchase date of this
product. You can nd this information on the product.
Model Name
Model Number
Date of Manufacture
Date of Purchase
DO NOT OPERATE OR REPAIR THIS PRODUCT WITHOUT READING THIS MANUAL.
Read and follow the safety instructions. Keep Instructions readily available for operators. Make certain all
operators are properly trained and understand how to safely and correctly operate the product. By proceeding
you agree that you fully understand and comprehend the full contents of this manual. Failure to operate this
product as intended may cause injury or death. The manufacturer is not responsible for any damages or injury
caused by improper use or neglect. Allow product operation only with all parts in place and operating safely.
Use only genuine replacement parts. Service and maintain the product only with authorized or approved
replacement parts; negligence will make the product unsafe for use and will void the warranty. Carefully
inspect the product on a regular basis and perform all maintenance as required. Store these instructions
in a protected dry location. Keep all decals on the product clean and visible. Do not modify and/or use for
any application other than that for which this product was designed. If you have any questions relative to a
particular application, DO NOT use the product until you have rst contacted the distributor or manufacturer to
determine if it can or should be performed on the product.
For technical questions please call 1-888-448-6746.
Portable Power Kits are designed to be used for pushing, spreading, and pressing of vehicle body panels as
well as various component parts and assemblies.
T70401S (4 TON)
Description
T71001L (10 TON)
Description
Application Manual Manual
Capacity 4 Ton 10 Ton
Operating PSI 9,238 8,939
Max. Lift Height 15-5/16in. 20-7/8in.
Min. Lift Height 10-11/16 in. 14-15/16in.
Dimensions L x W x H 22-9/16in. x 13-13/16in. x 6-5/16in. 37in. x 15-3/8in. x 7-1/2in.
Case Included Yes Yes
____________________________
____________________________
____________________________
____________________________

3
GENERAL SAFETY RULES
GENERAL SAFETY RULES
IMPORTANT SAFETY CONSIDERATIONS
WARNING: Read and understand all instructions. Failure to follow all instructions listed below may result
in serious injury.
WARNING: The warnings, cautions, and instructions discussed in this instruction manual cannot
cover all possible conditions or situations that could occur. It must be understood by the operator
that common sense and caution are factors that cannot be built into this product, but must be supplied by
the operator.
CAUTION: Do not allow persons to operate or assemble this product until they have read this manual and
have developed a thorough understanding of how the product works.
PLEASE READ THESE INSTRUCTIONS CAREFULLY.NOTE THE SAFETY INSTRUCTIONS AND
WARNING. USE THE PRODUCT CORRECTLY AND WITH CARE FOR THE PURPOSE OF WHICH IT IS
INTENDED. FAILURE TO DO SO MAY CAUSE DAMAGE TO PROPERTY AND/OR SERIOUS PERSONAL
INJURY. PLEASE KEEP THIS INSTRUCTION MANUAL SAFE FOR FUTURE USE.
We’ve done all we can to assure this equipment offers the outmost in safety, but you have to do your part. No
amount of warning can take the place of your good judgment, so make sure it’s the rst thing you bring to any
job. Beyond that here are some obvious tips:
• Steel and other materials can shatter, so always use ANSI approved impact safety goggles, full-face impact
safety shield and heavy-duty work gloves when operating.
• Remove loose tting clothing. Remove ties, watches, rings and other loose jewelry and contain long hair.
• Keep proper balance and footing, do not over-reach and wear nonskid footwear.
• Do not operate the when you are tired or under the inuence of alcohol, drugs or an intoxicating medication.
• Keep hands and feet away from work area at all times.
• Do not allow untrained persons to operate the equipment.
• If you detect anything that may indicate imminent structural failure, stop using the product immediately and
inspect it thoroughly.
• Do not use to compress springs or any other item that could disengage and cause a potential ying hazard.
• Use this equipment for the purpose for which it is intended. Do not use it for any other purpose it is not
designed to perform.
• Keep children and unauthorized persons away from the work area.
• Only use this equipment on a surface that is stable, level, dry and not slippery, and capable of sustaining
the load. Keep the surface clean, tidy and free form unrelated materials and ensure that there is adequate
lighting.
• Inspect before each use. Do not use if bent, broke, cracked, leaking or otherwise damaged.
• Use extreme caution when working around any parts that are subjected to a shock load.
• Check to ensure that all applicable bolts and nuts are rmly tightened.
• Ensure that work piece is center-loaded and secure.
• Do not make any modications to the equipment.
• Do not use brake fluid or any other improper fluid and avoid mixing different types of oil when adding
hydraulic oil. Only good quality hydraulic jack oil can be used in equipment.
• Do not expose the equipment to rain or any other kind of bad weather.
• If the equipment needs repairing and/or there are any parts that need to be replaced, have it repaired by
authorized technicians and only use the replacement parts supplied by the manufacturer.
WARNING: To reduce the risk of personal injury and/or property damage, ensure that the rated working
pressure of each pressurized attachment be equal to or greater than the rated working pressure
developed by the hydraulic pump.
Always check connections before using. Alteration of these products is strictly prohibited. Use only those
adapters and attachments provided and approved by the manufacturer
Note: when extension tubes and/or offset attachments are used, the rated capacity is always reduced by
50% for each tube or offset attachment connected.

4
RAM KIT USE AND CARE
GENERAL SAFETY INSTRUCTIONS
• Do not modify the ram kit in any way. Unauthorized modication may impair the function and/or safety and
could affect the life of the equipment. There are specic applications for which the Ram Kit was designed.
• Always check of damaged or worn out parts before using the Ram Kit. Broken parts will affect the Ram Kit
operation. Replace or repair damaged or worn parts immediately.
• Store idle. When Ram Kit is not in use, store it in a secure place out of the reach of children. Inspect it for
good working condition prior to storage and before re-use.
• Not for use by children or people with reduced mental capacity.
• Do not use under the inuence of drugs or alcohol.
• Ensure children and other bystanders are kept at a safe distance when using Ram Kit.
• Save these instructions.
• For your safety, read, understand, and follow the information provided with and on this product before
using.
• The owner and/or operator of this equipment shall have an understanding of safe use/operating procedures
before attempting to use.
• The owner and/or operator shall be aware that the use of this product may require special skills and
knowledge.
• Instructions and safety information shall be conveyed in the operator's native language before use of this
device is authorized.
• If any doubt exists as to the safe and proper use of this product as outlined in this factory authorized
manual, remove from service immediately.
• Inspect before each use.
• Do not use if broken, bent cracked, or damaged parts (including labels) are noted.
• If the product appears damaged in any way, operates abnormally or is missing parts, it should be removed
from service immediately and the distributor should be notied.
• If you suspect that the product was subjected to a shock load (a load suddenly dropped unexpectedly
upon it), immediately discontinue use until product has been clocked by a factory authorized service center
(contact distributor or manufacturer for list of Authorized Service Centers).
• It is recommended that an annual inspection be done by qualied personnel.
• Labels and owner's manuals are available from the distributor.
INSPECTION
• Inspect the Ram Kit carefully before each use. Ensure the Product is not damaged, excessively worn, or
missing parts.
• Do not use the Ram Kit unless it is properly lubricated.
• Using a Ram Kit that is not in good clean working condition or properly lubricated may cause serious injury.
• Inspect the work area before each use. Make sure it is free and clear of any potential hazards.
SAFETY MARKINGS
1. Study, understand, and follow all instructions before operating this device.
2. Do not exceed rated capacity.
3. Use only on hard, level surfaces, with less than 3 degrees of slope.
4. Lifting device only. Immediately after lifting, support the vehicle with appropriate means.
5. Do not move or dolly the vehicle while on the jack.
6. Lift only on areas of the vehicle as specied by the vehicle manufacturer.
7. No alterations shall be made to this product.
8. Only attachments and/or adapters supplied by the manufacturer shall be used.
9. Do not get under or allow anyone under the vehicle until it has been supported by jack stands.
10. Center load on saddle prior to lifting.
11. Use wheel chocks or other blocking device on opposing wheels before using jack.
12. Never use on a lawn mower or lawn tractor.
13. Do not use this jack for any use other than the manufacturer specied usage.
14. Do not rock the vehicle while working on or around equipment.
15. The following are not recommended for supporting on this equipment: Foundations, Homes, Mobile
Homes, Trailers, RV’s, Campers, nor Fifth Wheels, etc...
16. Failure to heed these markings may result in personal injury and/or property damage.
WARNING!

5
ASSEMBLY
TO ASSEMBLE HYDRAULIC RAM, PUMP UNIT, AND ATTACHMENTS
1. Unscrew and save the End Plugs located on the
ends of the Hose and Hydraulic Ram.
2. Securely screw the Hose into the Hydraulic Ram.
3. Insert the Pump Handle into the receptacle
located at the top of the Pump Unit.
4. To attach the Rubber Head, the Extension Bars,
the Male Connector, and the Flat Base to the
Hydraulic Ram.
5. To attach the Spreader Wedge to the Pump Unit.
6. For other attachment combinations.
Rubber head
Rubber head
Hydraulic Ram
Hydraulic Ram
Extension Bars
Extension Bars
Male Connector
Male Connector
at Base
at Base
Pump Unit
Rubber Head Hydraulic Ram Flat Base
Flat Base Hydraulic Ram
Extension Bars Spreader Ram Toe
Male Connector
Male Connector
Spreader Wedge

6
SYSTEM AIR PURGE PROCEDURE
Perform the following Air Purge Procedure to remove any air that may have been introduced into the hydraulic
system as a result of product shipment and handing. This step is to be completed without any load pressure.
1. Firmly close the Release Valve by turning it clockwise.
2. Press the tip of the Hydraulic Hose Coupling against a hard surface and pump the pump handle.
3. Continue pumping until the hydraulic uid coming out from the end of the coupler tip is free of air bubbles.
4. Check the oil level and add oil if necessary. (See instruction in Maintenance Section “To Add Oil”.)
5. Turn the Release Valve counter-clockwise to release the pressure in the pump and hose.

7
Example: To Repair Frame Damage
1. Determine which direction the frame needs to straighten.
2. Remove any obstructions that could be damaged or are in the way.
3. Connect the Flat Base to the stationary side of the Hydraulic Ram and connect the appropriate attachment
to the pushing end of the Stroke Ram.
4. Position the Hydraulic Ram so that the Flat Base is resting against a frame member opposite the damaged
area. It must also be in line with the direction in which the damaged area needs to be pushed.
5. Aim the pushing end towards the area that needs to be repaired and slowly apply pressure with the Pump
Unit. Once contact has been made on both points of contact, step away as far as possible and continue to
slowly apply pressure to the damaged area until the desired bend has been made.
CAUTION: Keep hands away from contact areas and tight spaces. The Portable Power Kit may slip and
cause injury.
6. When the damaged area has been bent to the desired position, slowly turn the Release Valve on the Pump
Unit in a counterclockwise direction to release the hydraulic pressure and cautiously remove the Hydraulic
Ram.
Appropriate Attachment Hydraulic Ram Flat Base
Male Connector

8
Example: To Repair Sheet Metal Damage
1. Determine which direction the body panel should be moved.
2. Remove any obstructions that could be damaged or are in the way.
3. Connect the appropriate attachments to the Hydraulic Ram.
4. Attachment must also be in line with the direction in which the damaged area needs to be pushed. A hard
secure surface will be required for to apply pressure on opposing sides.
• A block of wood or a towel may be used to protect the sheet metal.
Note: When repairing larger body panel dents such as a piece of sheet metal, dented door, fender or
suggested use is the Rubber Head.
5. Aim the pushing end towards the area that needs to be repaired and slowly apply pressure with the Pump
Unit. Once contact has been made on both points of contact, step away as far as possible and continue to
slowly apply pressure to the damaged area until the desired bend has been made.
6. When the damaged area has been bent to the desired position, slowly turn the Release Valve on the Pump
Unit in a counter-clockwise direction to release the hydraulic pressure and remove the Hydraulic Ram.

9
Example: To Use the Spreader Wedge
1. Determine which direction part needs to be bent.
2. Remove any obstructions that could be damaged or are in the way.
3. Place Spreader Wedge so that the hinged arm is resting against the part to be moved and the stationary
arm is resting against a non-movable base. Hold the Spreader Ram in position and apply the Pump Unit
pressure. Once contact on either end has been made, step away as far as possible and continued to slowly
apply pressure to the damaged area until the desired bend has been made.
4. When the damaged area has been bent to the desired position, slowly turn the Release Valve Stem on
the Pump Unit in a counterclockwise direction to release the hydraulic pressure and remove the Hydraulic
Ram.

MAINTENANCE INSTRUCTIONS
If you use and maintain your equipment properly, it will give you many years of service. Follow the
maintenance instructions carefully to keep your equipment in good working condition. Never perform any
maintenance on the equipment while it is under a load.
Inspection
You should inspect the product for damage, wear, broken or missing parts (e.g.: pins) and that all components
function before each use. Follow lubrication and storage instructions for optimum product performance.
Binding
If the product binds while under a load, use equipment with equal or a larger load capacity to lower the load
safely to the ground. After un-binding; clean, lubricate and test that equipment is working properly. Rusty
components, dirt, or worn parts can be causes of binding Clean and lubricate the equipment as indicated in
the lubrication section. Test the equipment by lifting without a load. If the binding continues, contact Customer
Service.
Cleaning
If the moving parts of the equipment are obstructed, use cleaning solvent or another good degreaser to clean
the equipment. Remove any existing rust, with a penetrating lubricant.
Lubrication
This equipment will not operate safely without proper lubrication. Using the equipment without proper
lubrication will result in poor performance and damage to the equipment. Some parts in this equipment are not
self-lubricating inspect the equipment before use and lubricate when necessary. After cleaning, lubricate the
equipment using light penetrating oil or lubricating spray.
-Use a good lubricant on all moving parts.
-For light duty use, lubrication is needed once a month.
-For heavy and constant use, lubrication is recommended every week.
-NEVER USE SANDPAPER OR ABRASIVE MATERIAL ON THESE SURFACES!
Rust Prevention:
-Check rams and pump plungers on the power unit assemblies daily for any signs of rust or corrosion.
Without a load lift the equipment as high as it goes and look under and behind the lifting points. If signs of rust
are visible clean as needed.
How the Equipment Operates
With release valve closed, an upward stroke of the jack handle draws oil from the reservoir tank into the
plunger cavity. Hydraulic pressure holds the valve closed, which keeps the oil in the plunger cavity. A
downward stroke of the jack handle releases oil into the cylinder, which forces the ram out. This raises the
saddle. When the ram reaches maximum extension, oil is bypassed back into the reservoir to prevent an over
extended ram stroke and possible damage to the unit. Opening the release valve allows oil to ow back into
reservoir. This releases hydraulic pressure on the ram, which results in lowering the ram.
Storing the Product
1. Lower to the lowest resting position.
2. Place the handle in the resting position.
3. Store in a dry location, recommended indoors.
Note: If the equipment is stored outdoors, be sure to lubricate all parts before and after use to ensure the
equipment stays in good working condition.

11
TO ADD OIL TO HYDRAULIC PUMP UNIT:
After extensive use, the hydraulic oil supply should
be replaced to ensure longer equipment life.
1. Remove the oil plug.
2. Add 0.24 Qts (approximately 7.68oz./ 220ml) of
oil. The oil level should be near position A.
Use a high grade anti-foaming hydraulic oil.
KEEP DIRT AND OTHER MATERIALS CLEAR
WHEN POURING.
3. Add 0.24 Qts (approximately 7.68oz./ 220ml) of
oil. The oil level should be near position A.
Use a high grade anti-foaming hydraulic oil.
KEEP DIRT AND OTHER MATERIALS CLEAR
WHEN POURING.
3. Replace the Oil oil plug.
4. Replace the Oil oil plug.
4. Perform the Air Purge Procedure.
5. Perform the Air Purge Procedure.
TO REPLACE OIL TO HYDRAULIC
PUMP UNIT :
1. Remove the oil plug.
2. Turn the Pump Unit on its side so that old oil will
drain from the oil ll hole.

12
ADDITIONAL WARNINGS:
• DO NOT USE MOTOR OIL IN THE PRODUCT.
• ONLY USE ANTI-FOAMING JACK OIL.
• ALWAYS USE A GOOD GRADE HYDRAULIC JACK OIL.
• DO NOT USE HYDRAULIC BRAKE FLUID, ALCOHOL, GLYCERINE, DETERGENT, MOTOR OIL OR
DIRTY OIL.
• USE OF A NON-RECOMMENDED FLUID CANCAUSE DAMAGE TO A PRODUCT.
• AVOID MIXING DIFFERENT TYPES OF FLUID AND NEVER USE BRAKE FLUID, TURBINE OIL,
TRANSMISSION FLUID, MOTOR OIL OR GLYCERIN. IMPROPER FLUID CAN CAUSE PREMATURE
FAILURE OF THE PRODUCT AND THE POTENTIAL FOR SUDDEN AND IMMEDIATE LOSS OF
LOAD.
• DISPOSE OF HYDRAULIC FLUID IN ACCORDANCE WITH LOCAL REGULATIONS.
LUBRICATION
1. When not in use, the Pump Unit should be stored with the Release Valve open and the Pump Piston fully
retracted.
2. A coating of light lubricating oil to pivot points,
axles and hinges will help to prevent rust.
3. Periodically check the Pump Piston and Rams for
signs of rust or corrosion. Clean as needed and
wipe with a soft non-abrasive clean cloth.
4. When Cylinder Rams are not in use, store ram
fully retracted. Clean as needed and wipe with a
soft non-abrasive clean cloth.
Clean
Full retracted
Clean

13
ASSEMBLY DIAGRAM

14
REF# PART # DESCRIPTION QTY
T70401 T71001L T70401 T71001L
1 QF4.10 QF10.4 Ram toe(offset) 1
2 QF4.13a T71002.1 Plunger toe(offset) 1
3 QF4.8a T71002.2 Flat base 1
4 QF4.12 T71002.3 Wedge head(offset) 1
5 QF4.11 T71002.4 Combination head 1
6 QF4.9a T71002.5 Serrated saddle 1
7 QF4.16b T71002.6 Rubber head 1
8 QF4.14 T71002.7 Male connector 1
9 QF4.15-1(ASM-82) T71002.8a-1(ASM-100) Extension Tube 3-1/4”
(82mm)
Extension Tube 4”
(100mm) 1
10 QF4.15-2(ASM-125) T71002.8a-2(ASM-200) Extension Tube 5”
(125mm)
Extension Tube 8”
(200mm) 1
11 QF4.15-3(ASM-215) T71002.8a-3(ASM-300) Extension Tube 8-1/2”
(215mm)
Extension Tube 12”
(300mm) 1
12 QF4.15-4(ASM-418) T71002.8a-3(ASM-300) Extension Tube 16-1/2”
(418mm)
Extension Tube 12”
(300mm) 1
13 QF4.15-5(ASM-496) T71002.8a-5(ASM-550) Extension Tube 19-1/2”
(496mm)
Extension Tube 22”
(550mm) 1
14 QF4.4(ASM) QF4.4(ASM) Female coupling valve 2
15 QF4.00 T71002.00 Ram assembly 1
16 QF4.6 QF4.6 Male coupling valve 1
17 QF4.3 QF4.3 Hose 1
18 QF4.3(ASM) QF4.3(ASM) Hose with male coupling valve 1
19 GB894.1-10 GB894.1-10 C-clip M10 2
20 Pump pin Ø10-34mm 1
21 Handle socket 1
22 QF4-2 QF4-2 Pump plunger 1
23 Pin Ø10mm 1
24 QF4-6(ASM) QF10-1(ASM) Handle assembly 1
25 GB308-8 GB308-8 Steel ball Ø8mm 1
26 QF4.2(ASM) QF4.2(ASM) Release valve assembly 1
27 TEL05006.1-5(ASM) TEL05006.1-5(ASM) Bleed screw assembly 1
28 QF4.0 T71002.0 Pump unit 1
29 QF4.7 QF4.7 Spreader(1000lb.Capacity) 1
30 QF4.MF QF10.MF Seal kit 1
31 T70401S.BT1-02 T71002L.BT-06 Blow mold case 1
32 T71001B-3(ASM) T71001B-3(ASM) Pressure gauge unit(optional) 1

15
TROUBLESHOOTING
RAM
WON'T
LIFT
LOAD
RAM
WON'T
MAINTAIN
HOLD
RAM
WON'T
LOWER
AFTER
UNLOADING
RAM
WON'T
EXTEND
TO FULL
STROKE
POOR
PERFORMANCE CAUSES AND SOLUTIONS
Releases valve not tightly closed.
Firmly close release valve
Weight Capacity Exceeded.
Air is in the hydraulics.
Purge air from system
Low oil level. Add oil as required.
Oil reservoir is overlled.
Drain excessive oil.
Lubricate moving parts.
Hydraulic unit malfunction.
Replace ram and / or pump.
X XX
X
X X
X X X
X X X
X
X
Safe Operating Temperature is between 40°F – 105°F (4°C - 41°C)
This product is covered under a 1-year limited warranty when used as recommended. Only those items listed
with a Part # are available for purchase. For assistance with the operation or the availability of replacement
parts, contact our Parts and Warranty Department at 1-888-44-TORIN (1-888-448-6746). Please have
available a copy of your receipt, the model number of the product, serial number, and specic details
regarding your question.
Not all equipment components are available for replacement; illustrations provided are a convenient reference
of location and position in the assembly sequence.
The manufacturer reserves the rights to make design changes and or improvements to product lines
and manuals without notice.
WARRANTY NOTICE
We want to know If you have any concerns with our products. If so, please call toll-free for Immediate
assistance. For additional web customer support help inquiries visit the Customer Service section at:
http://www.torin-usa.com.
WARRANTY INFORMATION
X

16
TORIN ONE YEAR LIMITED WARRANTY
Torin Inc.® has been producing quality automotive repair and maintenance products since 1968. All products
sold are felt to be of the highest quality and are covered by the following warranty:
With proof of purchase for a period of one year from the date of that purchase, the manufacturer will repair or
replace, at its discretion, without charge, any of its products or parts thereof which fail due to a defect in
material or workmanship. This warranty does not cover damage or defects caused by improper use, careless
use or abuse of the equipment. This warranty does not cover parts normally considered to wear out or be
consumed in the normal operation of the equipment. Except where such limitations and exclusions are
specically prohibited by applicable law, (1) the CONSUMERS SOLE AND EXCLUSIVE REMEDY SHALL BE
THE REPAIR OR REPLACEMENT OF DEFECTIVE PRODUCTS AS DESCRIBED
ABOVE, and (2) THE MANUFACTURER SHALL NOT BE LIABLE FOR ANY CONSEQUENTIAL OR
INCIDENTAL DAMAGE OR LOSS WHATSOEVER, and (3) THE DURATION OF ANY AND ALL
EXPRESSED AND IMPLIED WARRANTIES, INCLUDING, WITHOUT LIMITATION, ANY WARRANTIES OF
MERCHANTABILITY AND FITNESS FOR A PARTICULAR PURPOSE, IS LIMITED TO A PERIOD OF ONE
YEAR FROM DATE OF PURCHASE. Product alteration in any manner by anyone other than us, with the sole
exception of alterations made pursuant to product instructions and in a workman like manner. You
acknowledge and agree that any use of the product for any purpose other than the specied use(s) stated in
the product instructions is at Your own risk.
Always check for damaged or worn out parts before using any product. Broken parts will affect the equipment
operation. Replace or repair damaged or worn parts immediately. Do not modify the product in any way.
Unauthorized modication may impair the function and/or safety and could affect the life of the equipment.
There are specic applications for which products are designed and tested during production. Manufacturer
provided warranted items are not authorized to be repaired by anyone other than the manufacturer or
manufacture approved repair person. Distributor does not have authorization to amend these statements. You
acknowledge and agree that any modication of the product for any purpose other than manufacturer
completed repairs is at your own risk. Before using this product, read the owner's manual completely and
familiarize yourself thoroughly with the product and the hazards associated with its improper use.
IMPORTANT: BEFORE FIRST USE on any Lift verify that a daily inspection has been completed and that all
components are in the proper working order.
This limited warranty gives you specic legal rights, and you also may have other rights, which vary from
state to state. Some states do not allow limitations or exclusions on implied warranties or incidental or
consequential damages, so the above limitations may not apply to You. This limited warranty is governed by
the laws of the State of California, without regard to rules pertaining to conicts of law. The state courts
located in San Bernardino County, California shall have exclusive jurisdiction for any disputes relating to this
warranty.
Manufacturer reserves the rights to make design changes and or improvements to this product lines and
manual without notice. We at Torin have taken every effort to ensure complete and accurate instructions have
been included in this manual. However, possible product updates, revisions and or changes may have
occurred since this printing. Torin Inc. reserves the right to change specications without incurring any
obligation for equipment previously or subsequently sold. Not responsible for typographical errors.
Alternately Customer Service can be reached through www.torin-usa.com or via email at
Not all equipment components are available for replacement, but are illustrated as a convenient reference of
location and position in the assembly sequence. Contact Customer Service for equivalent component. When
you contact us, please have your Product’s Model number, Serial Number and Description ready so that we
may help you efciently. This information can be found on a sticker on the product.
For any warranty support or if your Torin® equipment is not functioning properly contact
Torin® Customer Service directly by telephone at 1-888-44-TORIN (1-888-448-6746)
8:00am – 5:00pm Pacic Time, Monday – Friday
www.torin-usa.com Made in China

MANUEL DU PROPRIÉTAIRE
SYSTÈME DE VÉRIN HYDRAULIQUE
Article No. T70401, T71001L
Questions, problèmes, pièces manquantes? Avant de retourner voir votre fournisseur, appelez notre service à
la clientèle au 1-888-44-TORIN (1-888-448-6746) entre 8 heures et 17 heures, HNP, du lundi au vendredi.
Lisez attentivement et comprenez toutes les DIRECTIVES DE MONTAGE ET DE FONCTIONNEMENT avant
l’utilisation. Vous pouvez subir des blessures graves si vous ne vous conformez pas à ces règles et autres
précautions de sécurité.
AVERTISSEMENT!

18
UTILISATION PRÉVUE
SPÉCIFICATIONS TECHNIQUES
Les kits de puissance portatifs sont conçus afin d’être utilisés pour pousser, étendre et presser sur les
panneaux de la carrosserie du véhicule ainsi que sur plusieurs composants d’ensembles complets.
T70401S (4 TON)
Description
T71001L (10 TON)
Description
Application Manuelle Manuelle
Capacité 4 tonnes 10 tonnes
PSI en fonctionnement 9,238 8,939
Hauteur de levage maximale 15-5/16 po 20-7/8 po
Hauteur de levage minimale 10-11/16 po 14-15/16 po
Dimensions Longueur x Largeur x
Hauteur 24-9/16 po x 13-13/16 po x 6-5/16 po 37 po x 15-3/8 po. x 7-1/2 po
Boîte comprise Oui Oui
IMPORTANT
Avant de commencer, enregistrez ce produit.
Pour référence future, enregistrez le nom de modèle, le numéro, la date de fabrication et la date d’achat du
produit. Vous pouvez trouver ces renseignements sur le produit.
Nom de modèle _______________________
Numéro de modèle _______________________
Date de fabrication _______________________
Date d’achat _______________________
RESPONSABILITÉ DU PROPRIÉTAIRE OU DE L’UTILISATEUR
NE PAS UTILISER OU RÉPARER CE PRODUIT SANS AVOIR LU LE PRÉSENT MANUEL.
Lisez et suivez les directives de sécurité. Conservez ces directives à la disponibilité des opérateurs. Assurez-vous
que tous les opérateurs sont bien formés et savent comment utiliser le produit correctement et en toute
sécurité. En continuant, vous convenez que vous comprenez complètement le contenu du présent manuel.
Le produit peut causer des blessures ou provoquer la mort si vous n’utilisez pas le produit dans le but pour
lequel il a été conçu. Le fabricant n’est pas responsable des dommages ou blessures provoquées par une
utilisation inappropriée ou par négligence. Ne faites fonctionner le produit que si toutes les pièces sont en
place et fonctionnent de manière sécuritaire. N’utilisez que des pièces de rechange authentiques. Effectuez
l’entretien de ce produit uniquement avec des pièces de rechange autorisées ou approuvées; la négligence
rendra l’utilisation du produit dangereuse et annulera la garantie. Inspectez régulièrement et avec soin
le produit et effectuez tout l’entretien nécessaire. Conservez ces directives dans un endroit protégé sec.
Conservez propres et visibles tous les autocollants sur le produit. Ne modiez pas ou n’utilisez pas le produit
pour une application autre que celle pour laquelle il a été conçu. Pour toute question relative à une application
particulière, N’utilisez PAS le produit avant d’avoir communiqué avec le distributeur ou le fabricant an de
déterminer si cela peut se faire.
Pour toutes questions d’ordre technique, appelez au 1-888-44-TORIN (1-888-448-6746).

19
VEUILLEZ LIRE CES INSTRUCTIONS ATTENTIVEMENT. FAITEZ ATTENTION AUX CONSIGNES
DE SÉCURITÉ ET AUX AVERTISSEMENTS. UTILISEZ LE PRODUIT DE FAÇON CORRECTE ET
SOIGNEUSEMENT POUR LES FINS POUR LESQUELS IL A ÉTÉ CONÇU. NE PAS EN TENIR COMPTE
PEUT ENTRAÎNER DES BLESSURES ET/OU DES DOMMAGES MATÉRIELS. VEUILLEZ CONSERVER
CE MANUEL D’INSTRUCTIONS POUR UTILISATION FUTURE.
Nous avons fait de notre mieux pour assurer que cet équipement offre la meilleure sécurité, mais vous devez
faire votre part. Votre bon jugement ne peut pas être remplacé par aucun avertissement, donc assurez-vous
que cela soit la première chose que vous en apportez à tout travail. De toute façon, voici quelques conseils
incontournables :
• L’acier et d’autres matériaux peuvent voler en éclats, donc utilisez toujours des lunettes de sécurité
antichocs approuvées par ANSI, blindage de sécurité intégral et des gants de travail résistants lors de
l’utilisation.
• Enlevez tout vêtement qui ne soit pas bien serré au corps. Enlevez toute cravate, montre, bague, et tout
autre bijou pas serré, et retenez et attachez les cheveux longs.
• Veillez à avoir un bon équilibre et appui et portez des chaussures antidérapantes
• N’utilisez pas cet outil quand vous êtes fatigué, sous l’inuence de drogues, d'alcool ou de médicaments.
• Gardez les mains et les pieds loin de la zone de travail à tout moment.
• Ne permettez pas que des personnes non entraînées utilisent cet équipement.
• Si vous remarquez quelque chose qui puisse signaler une défaillance structurelle imminente, cessez
immédiatement d’utiliser le produit et faites une inspection minutieuse.
• Ne l’utilisez pas pour compresser des ressorts ou toute autre chose qui puisse se dégager et sauter en
représentant un risque potentiel.
• Utilisez cet équipement pour les ns pour lesquelles il a été conçu. Ne l’utilisez pas à toute autre n qui ne
soit pas celle pour laquelle il a été conçu.
• Assurez-vous que les enfants et toutes autres personnes non autorisées soient éloignées de la zone de
travail.
• Utilisez cet équipement seulement sur une surface stable, lisse, sèche et antidérapante, et capable de
supporter la charge. Maintenez la surface propre, ordonnée et libre de matériaux qui ne soient pas y liés,
et assurez-vous que l’éclairage soit adéquat.
• Examinez-le avant chaque usage. Ne l’utilisez pas si vous remarquez qu’il est plié, cassé, endommagé ou
avec des fuites.
• Soyez extrêmement prudent lorsque vous travaillez autour des pièces qui sont soumises à une charge de
choc.
• Vériez que tous les boulons et écrous soient bien serrez.
• Assurez-vous que la pièce à travailler soit bien centrée et sécurisée.
• Ne faites aucune modication à cet équipement.
• N’utilisez pas de liquide pour freins ou tout autre fluide inapproprié et évitez de mélanger des types
différents d’huile lorsque vous ajoutez de l’huile hydraulique. Utilisez seulement de l’huile hydraulique pour
crics de première qualité.
• N’exposez pas à la pluie et au mauvais temps.
• Si l’équipement a besoin de réparation et/ou de pièces de rechange, contactez un technicien autorisé et
utilisez seulement les pièces de rechange du fabricant lors de la réparation.
CONSIGNES GÉNÉRALES DE SÉCURITÉ
CONSIGNES GÉNÉRALES DE SÉCURITÉ
FACTEURS DE SÉCURITÉ IMPORTANTS
AVERTISSEMENT : Lisez et comprenez toutes les directives. Il peut se produire des blessures graves si
vous ne suivez pas toutes les directives ci-dessous.
AVERTISSEMENT : Les avertissements, mises en garde et directives mentionnés dans le présent
manuel d’instruction ne peuvent pas couvrir toutes les conditions ou situations qui peuvent se
produire. L’opérateur doit comprendre que le simple bon sens et la prudence sont des facteurs qui ne
peuvent pas se trouver dans ce produit, mais que l’opérateur doit y suppléer.
MISE EN GARDE : Ne permettez à personne d’utiliser ou d’assembler ce cric avant d’avoir lu le manuel
et d’avoir bien compris le fonctionnement du cric.

AVERTISSEMENT : An de réduire le risque de blessures et/ou des dommages matériels, assurez-vous
que la pression de service prévue de chaque composant sous pression soit égale ou supérieure à la
pression de service produite par la pompe hydraulique.
Vériez toujours les connections avant l’utilisation. Les modications de ces produits sont strictement
interdites. N’utilisez que des adaptateurs et des attaches fournis et approuvés par le fabricant.
Remarque : lorsque des tubes d’extension et/ou des pièces de décentrage sont utilisées, la capacité
prévue est réduite de 50% pour chaque tube et pièce de décentrage connecté.
UTILISATION ET ENTRETIEN DU KIT VÉRIN
CONSIGNES DE SÉCURITÉ GÉNÉRALES
• Ne modifiez absolument pas le kit vérin. Toute modification non autorisée pourrait dégrader le
fonctionnement et/ou la sécurité et pourrait nuire à la durée de vie de l'équipement. Il y a des applications
spéciques pour lesquelles le kit vérin a été conçu.
• Avant d’utiliser le kit vérin vériez toujours pour vous assurer que les pièces ne soient pas endommagées
ou usées. Les pièces brisées auront une incidence sur le fonctionnement du kit vérin. Remplacez ou
réparez immédiatement toute pièce endommagée ou usée.
• Rangez quand il n’est pas utilisé. Lorsque le kit vérin n'est pas utilisé, rangez-le dans un endroit sûr hors
de la portée des enfants. Vériez qu’il soit en bon état de fonctionnement avant de le ranger et avant de le
réutiliser.
• À ne pas être utilisé par des enfants ou par des personnes avec une capacité intellectuelle réduite.
• Ne l’utilisez pas sous l'inuence de drogues ou d'alcool.
• Assurez-vous que les enfants et d’autres spectateurs soient à une distance de sécurité pendant le
fonctionnement du kit vérin.
• Conservez ces instructions.
• Pour votre sécurité, lisez, comprenez et suivez les instructions fournies avec et sur ce produit avant son
utilisation.
• Le propriétaire et/ou l’opérateur de cet équipement doivent avoir une bonne compréhension des
procédures d'utilisation/opération dans des conditions de sécurité avant de l'utiliser.
• Le propriétaire et/ou l’opérateur doivent être conscients que l'utilisation de ce produit peut nécessiter des
compétences et des connaissances particulières.
• Les instructions et les consignes de sécurité doivent être exprimées dans la langue maternelle de l’opérateur
avant que l'utilisation de ce dispositif ne soit autorisée.
• Si un doute subsiste quant à l'utilisation sûre et correcte de ce produit tel que décrite dans ce manuel
autorisé par l’usine, retirez-le immédiatement du service.
• Examinez-le avant chaque usage.
• Ne l’utilisez pas si vous remarquez qu’il y a des pièces cassées, pliées, ssurées ou endommagées (y
compris les étiquettes de sécurité).
• Si le produit semble en quelque sorte endommagé, s’il ne fonctionne pas normalement ou s’il y a des
pièces manquantes, il doit être retiré immédiatement du service et le distributeur doit en être informé.
• Si vous pensez que le produit a été soumis à une charge de choc (une charge est soudainement tombée
de façon inattendue sur lui), arrêtez immédiatement de l’utiliser jusqu'à ce que le produit ait été vérié par
un centre de service autorisé par l'usine (contactez le distributeur ou le fabricant pour la liste des Centres
de Service Autorisés).
• Il est recommandé d’effectuer une inspection annuelle par des personnes qualiées.
• Les étiquettes et les manuels du propriétaire sont disponibles auprès du distributeur.
INSPECTION
• Examinez le kit vérin soigneusement avant chaque usage. Assurez-vous que le kit vérin ne soit pas
endommagé, avec une usure excessive, ou qu’il y ait des pièces manquantes.
• N’utilisez pas le kit vérin à moins qu’il soit bien lubrié.
• L’utilisation d’un kit vérin qui n'est pas propre et en bon état de fonctionnement ou bien lubrifié peut
entraîner des blessures graves.
• Examinez la zone de travail avant chaque usage. Assurez-vous qu’il n’y ait aucun danger potentiel.
This manual suits for next models
1
Table of contents
Languages:
Other Torin BIG RED Service Equipment manuals
