manuals.online logo
Brands
  1. Home
  2. •
  3. Brands
  4. •
  5. Torque
  6. •
  7. Fitness Equipment
  8. •
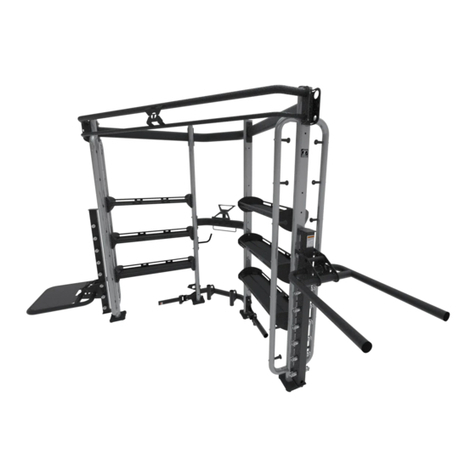
  9. Torque X-GYM POWER RACK 5.0 User manual

Torque X-GYM POWER RACK 5.0 User manual

XGYM-PR24-1.0 XGYM-PR24-9.0
X-GYM POWER RACK ASSEMBLY GUIDE
PART #: 5876001-B
VERSION: XGYM-PR24
50 180
3
190150 170160
6
130 14012090 110100403010 706020 80
1 2 4 5 7
200
ITEM NO.
PART NUMBER
DESCRIPTION
QTY.
1 5712201
WLDMT, CROSS SUPPORT
1
2
57458PA
PTD ASSY, LEFT BASE POWER RACK
1
3 5745701
WLDMT, RIGHT BASE POWER RACK
1
4 5712801
PLATE, UPRIGHT GUSSET
4
5 2005816
BOLT, 1/2-13 X 4-1/4" (108mm) SOCKET HEAD
35
6 2007801
WASHER, 1/2 X 1-3/4 X 4.5t
96
7 2001401
NUT, 1/2-13 LK ST ZN
63
8 2005812
BOLT, 1/2-13 X 3-1/4" (83mm) SOCKET HEAD
24
9
58144PA
PTD ASSY, POWER RACK BAR CATCH
2
10 5745401
WLDMT, 2 FT CONNECTOR
1
11
57454PA
PTD ASSY, 2 FT CONNECTOR
1
12
58205PA
PTD ASSY, XGYM 4FT RECTANGLE CROSS
1
13
57231PA
PTD ASSY, 7.5' UPRIGHT
4
14 5360001
LABEL, SERIAL-MARKING
2
15 5442801
WLDMT, 4' SINGLE CROSS
1
16
58207PA
PTD ASSY, XGYM 4FT MULTI GRIP CROSS
1
17
57424PA
ASSY, LOW PULLEY
1
18
57417PA
PTD ASY, TUBE, HIGH/LOW GUIDE
1
19
57416PA
PTD ASSY, HIGH BOOM
1
20
57421PA
ASSY, WEIGHT HORN CARRIAGE
1
21
57436PA
ASSY, ALUMINUM LAT BAR
1
22 5784001
ASSY, TWO POSITION STRAP HANDLE
2
23 5745001
PTD ASSY, DUAL FLTG PULY
1
24 5721301
HOLDER, LAT BAR
1
25 5742701
CABLE ASSY, XGYM HIGH
1
26 5743501
CABLE ASSY, XGYM LOW
1
27 5508801
HOUSING, CABLE COUPLER
2
28 5509001
CORE, CABLE COUPLER
2
29 2003201
CAP SCREW, M5 X 0.8 X 6MM SOCKET HEAD
4
30 5508901
GROMMET, RUBBER CABLE
2
31 5091801
SNAP HOOK, 8MM DIA X 80MM
2
ITEM NO.
PART NUMBER
DESCRIPTION
QTY.
32 2001301
WASHER, FLAT 1/2 SAE ST ZN
58
33 2005810
BOLT, 1/2-13 X 2-3/4" (70mm) SOCKET HEAD
6
34
XRG2-BS-101
BAR SUPPORT (2 PIECES - PAIR) (STORM GREY)
1
35
57242PA
PTD ASSY, 7.5U VERTICAL WEIGHT STORAGE
SSB
2
36
57244PA
PTD ASSY, UPRIGHT CONNECTOR
1
37 5724401
WLDMT, UPRIGHT CONNECTOR
1
38
55934PA
PTD ASSY, UBPA LEFT
1
39
55935PA
PTD ASSY, UBPA RIGHT
1
40
57412PA
PTD ASSY, DOUBLE PLAY
1
41
54705PA
PTD ASSY, BALL TARGET
1
42 2005822
BOLT, 1/2-13 X 5-3/4" (146mm) SOCKET HEAD
2
43 5470901
ASSY INSTRUCTIONS, BT-103
1
44 2005824
BOLT, 1/2-13 X 6-1/4" (159mm) SOCKET HEAD
2
45
56260PA
PTD ASSY, UNIVERSAL HEAVY BAG MOUNT
1
46
HBT-100LB-45.4KG
HEAVY BAG, TORQUE 100LB (45.4KG)
1
47 5715701
FINAL ASSY, RELENTLESS ROPE TRAINER
1
48 5706901
KNOB, ADJUSTER HANDLE
1
49 5676701
PLATE, MOUNTING
2
50 5708201
BPLATE, XERT MOUNTING
2
51 5494201
BSHNG, 25 OD X 13.5 ID X 75
2
52 2008904
BOLT, 1/2-13 X 1-1/4" (32mm) HEX HEAD
8
53 2008917
BOLT, 1/2-13 X 4-1/2" (114mm) HEX HEAD
10
54 2008927
BOLT, 1/2-13 X 7" (178mm) HEX HEAD
2
55 2021001
NUT, 1/2-13 LK ST ZN
16
56 5621301
ASSY, GROUND ROTATIONAL TRAINER
1
57
55782PA
PTD ASSY, BATTLE ROPE ANCHOR
1
58
57822PA
PTD ASSY, VERTICAL DUMBBELL STORAGE
1
59
57819PA
PTD ASSY, 5 PAIR VERTICAL DUMBBELL
STORAGE
1
60
VDSHK1-101
HARDWARE KIT 1, VERTICAL DUMBBELL SIDE
1
61 2005811
BOLT, 1/2-13 X 3" (76mm) SOCKET HEAD
6
2
TABLE OF CONTENTS:
Warnings: Page 3
•
General Notes: Page 4
•
Base Rack Assembly: Page 5 - 14
•
Optional Attachments: Pages 15 - 39
•
Maintenance: Pages 37 & 40
•
NOTES:
Assembly steps 1 - 5 show steps to assemble the 1.0 base system. Additional
assembly steps for the 9.0 as well as optional attachments, are shown in
subsequent steps and are listed as "optional"
WARNING !
Important safety instructions for using Equipment
There is a risk assumed by the individuals who use this type of equipment. To minimize risk, you must follow these precautions:
READ ALL INSTRUCTIONS AND WARNING LABELS COMPLETELY PRIOR TO ANY USE OR ASSEMBLY. Failure to read and follow the safety
•
instructions and warnings within the Assembly and Maintenance Guide may result in possible serious injury or death. Use this product only for the
intended uses described in the Assembly and Maintenance Guide and exercise booklet. DO NOT
modify equipment in anyway.
Any use other than as
intended or modification of product will void any and all product warranties.
Consult your physician before starting any exercise program. Warm up properly before engaging in resistance training. Stop exercising and consult a physician
•
immediately
if you experience dizziness, nausea, faintness, chest pain, shortness of breath or any other abnormal symptoms during use of this equipment.
Certain exercise equipment and/or equipment may not be suitable or appropriate for pregnant women, people with heart conditions, balance impairment or other
•
pre-existing health problems. Persons with disabilities should consult a physician and obtain medical approval prior to using this product and should only use this
product under close supervision.
Failure to comply with these instructions will void any and all product warranties.
Carefully inspect equipment before each use. Replace all parts at the first sign of wear or damage. Tighten all loose connections. Do not disassemble, remove
•
any parts or components or otherwise attempt to repair this product.
DO NOT
use product if product appears damaged.
DO NOT
attempt to fix a broken or
jammed machine.
Failure to comply with these instructions will void any and all product warranties.
Keep body and clothing clear of all moving parts. Do not put anything foreign on or near this product when in use. Wear comfortable clothing which does not
•
impair freedom of movement. Do not wear clothing which is too loose and could get caught in moving parts.
Make sure all spring pin adjustments are fully engaged after making an adjustment and before using the product.
•
Children and pets must not be allowed near this machine. Supervise teenagers. This product is not a toy.
•
If unsure of proper use of this product, contact Torque Fitness Customer service at: 763-754-7533 (8:30 am - 5:00 pm CST). [email protected]
•
Important Safety Instructions for Assembling Equipment
Assistance is required. Torque Fitness recommends using more than one person to assemble this equipment.
•
This product must be assembled on a flat, level surface to assure its proper function. Locate the unit away from walls or furniture to allow easy access during assembly
•
and use.
Read each numbered step in Assembly and Maintenance Guide and follow the steps in sequence. Skipping ahead may result in damage to the equipment and may
•
require components to be disassembled.
Wear proper attire during the assembly process. Do not wear clothing which is too loose or open toed shoes.
•
3
Obtaining Service
Do not attempt to service the product yourself except for maintenance tasks described in this manual.
•
Refer to the Adjustments and Maintenance section at the back of this manual for product operation and service.
•
For further information, visit our website at
www.torquefitness.com
or contact us at
[email protected]
•
If you call or email customer service, have the model number and serial number(s) available.
•
50 180
3
190150 170160
6
130 14012090 110100403010 706020 80
1 2 4 5 7
200
4
CAUTION:
More than one person is required to
assemble this unit. Do not attempt to assemble
by yourself.
Unpacking the Equipment
This product may be packaged and shipped in
•
multiple boxes. Parts from all of the boxes are
required for various steps during the assembly
process.
Carefully open each box and arrange all the
•
parts near the area where assembly is to take
place.
CAUTION:
Use extreme care when cutting
•
plastic tie wraps and package banding. A wire
cutter works best for protecting yourself and
the parts.
CAUTION:
Some of the internal boxes may
•
contain upholstery. Do not use a utility knife to
open any boxes or the pads may be damaged.
The hardware is packed in bags. Carefully
•
open each bag and sort them per parts list on
the next page.
Before starting assembly, identify each part
•
and hardware item as listed in the parts list on
the next page. If any items are missing,
contact Torque Fitness Customer service at:
763-754-7533 (8:30 am - 5:00 pm CST). or 1-
877-TORQUE5 (1-866-664-9894).
[email protected]
Note:
Some items listed in the parts list may
•
already be pre-installed on the product.
Tools Required
Rubber mallet or hammer
•
3/4" wrench
•
Ratchet with 3/4" socket
•
3/8" Allen wrench
•
Allen wrench set
•
Wire snips (to cut plastic tie wraps)
•
Scissors or utility knife (to cut hardware bags)
•
Step stool or ladder
•
Tape measure
•
Optional Equipment
Optional equipment may be available for this
•
product.
Follow the instructions included with the
•
optional equipment to assemble it to the base
product.
Assembly Tips
In a continual effort to improve our products,
•
specifications are subject to change.
A 6" scale is provided at the bottom of every
•
page. To correctly measure the bolts, measure
from underneath the bolt head to the end of the
bolt as illustrated below.
Read all notes on each page before beginning
•
that step.
Some of the items shown in the assembly
•
steps may already be pre-assembled.
Assembly Tips Continued
Note:
Some items have been hidden for
•
assembly clarity.
Note:
Some pre-assembled parts may need to
•
be temporarily removed in order to complete the
step. Follow the instructions or damage to the
product could occur.
Some parts may have extra holes that will not be
•
used. Use only the holes depicted in the
instructions.
Certain parts make reference to the right and left
•
side of the machine. For this product, left and
right is determined by
facing
the product.
Provide ample space around the product for
•
ease of assembly.
DO NOT
fully tighten any connections until
•
instructed to do so. This will help insure that the
alignment of all of the parts will be correct.
Insert all bolts in the direction indicated in the
•
instructions. Failure to do so may result in
clearance issues and will degrade the aesthetics
of the product.
Carefully follow instructions for all pivot points.
•
In general, primary rotating parts have
connections that should be securely tightened,
while secondary connections need to be loosen
1/4 turn.
GENERAL NOTES
50 180
3
190150 170160
6
130 14012090 110100403010 706020 80
1 2 4 5 7
200
3
2
1
5
6
7
5
NOTE:
LOOSELY
tighten bolt connections in this step.
STEP 1
50 180
3
190150 170160
6
130 14012090 110100403010 706020 80
1 2 4 5 7
200
2
3
13
8
6
7
6
NOTE:
LOOSELY
tighten bolt connections in this step.
STEP 2
50 180
3
190150 170160
6
130 14012090 110100403010 706020 80
1 2 4 5 7
200
13
2
3
4
5
6
7
7
STEP 3
NOTE:
LOOSELY
tighten bolt connections in this step.
50 180
3
190150 170160
6
130 14012090 110100403010 706020 80
1 2 4 5 7
200
6
5
7
13
4
8
STEP 4
NOTE:
LOOSELY
tighten bolt connections in this step.
50 180
3
190150 170160
6
130 14012090 110100403010 706020 80
1 2 4 5 7
200
5
13
7
6
11
10
9
STEP 5
NOTE:
LOOSELY
tighten bolt connections in this step.
50 180
3
190150 170160
6
130 14012090 110100403010 706020 80
1 2 4 5 7
200
7
5
13
6
12
CL
4
5
10
?
3.4 in
2.5 in
DETAIL CL
SCALE 1 : 4
LONGER END MUST BE
POSITIONED ON THE
TOP SIDE.
10
STEP 6
NOTE:
CROSS MUST BE MOUNTED AS SHOWN. LONGER PLATE SIDE MUST BE UP.
LOOSELY
tighten bolt connections in this step.
50 180
3
190150 170160
6
130 14012090 110100403010 706020 80
1 2 4 5 7
200
NOTE:
THE STANDARD SINGLE CROSS AND RECTANGLE
CROSS IS SHOWN FOR ASSEMBLY. THE OPTIONAL
NINJA CROSS, DOUBLE CROSS AND TRIPLE CROSS
ASSEMBLE TO THE UNIT THE EXACT SAME WAY.
IF YOU PURCHASED THE OPTIONAL MULTI
GRIP CROSS, PLEASE REFER TO NEXT PAGE
FOR ASSEMBLY.
5
6
7
15
OPTIONAL NINJA CROSS
OPTIONAL DOUBLE CROSS
OPTIONAL TRIPLE CROSS
OPTIONAL MULTI GRIP CROSS
(SEE NEXT PAGE FOR ASSEMBLY)
11
STEP 7A
NOTE:
SECURELY
tighten all bolt connections in this step and previous steps.
50 180
3
190150 170160
6
130 14012090 110100403010 706020 80
1 2 4 5 7
200
7
6
5
6
13
5
16
CN
65
NOTE:
MOUNT MULTI
GRIP WITH LONGER
PLATE END UP.
3.4 in
2.5 in
12
STEP 7B (OPTIONAL MULTI GRIP CROSS)
NOTE:
SECURELY
tighten all bolt connections in this step and previous steps.
99
INSERT BAR CATCHES INTO
DESIRED SLOTS ON UPRIGHTS.
PUSH DOWN TO LOCK IN PLACE
TO REMOVE BAR CATCHES FROM
UPRIGHTS, LIFT UP AND PULL OUT
STEP 8 (BAR CATCHES)
13
34
13
NOTE:
WARNING LABEL
INSERT BAR SUPPORTS INTO
DESIRED SLOTS ON UPRIGHTS.
PUSH DOWN TO LOCK IN PLACE
TO REMOVE BAR SUPPORTS FROM
UPRIGHTS, PULL SPRING PIN OUT TO
UNLOCK. LIFT UP AND PULL OUT
STEP 9 (OPTIONAL BAR SUPPORTS)
14
50 180
3
190150 170160
6
130 14012090 110100403010 706020 80
1 2 4 5 7
200
3
35
7
5
2
6
15
STEP 10 (OPTIONAL VERTICAL WEIGHT STORAGE)
NOTE:
LOOSELY
tighten bolt connections in this step.
50 180
3
190150 170160
6
130 14012090 110100403010 706020 80
1 2 4 5 7
200
8
35
5
NOTE:
UPRIGHT CONNECTOR IS SHOWN
IN ASSEMBLED POSITION (2X)
36
5
6
7
16
STEP 11 (OPTIONAL VERTICAL WEIGHT STORAGE)
NOTE:
SECURELY
tighten all bolt connections in this step and previous steps.
50 180
3
190150 170160
6
130 14012090 110100403010 706020 80
1 2 4 5 7
200
56
8
6
7
17
STEP 12 (OPTIONAL GROUND ROTATIONAL TRAINER)
NOTE:
SECURELY
tighten all bolt connections in this step.
50 180
3
190150 170160
6
130 14012090 110100403010 706020 80
1 2 4 5 7
200
8
57
6
7
18
STEP 13 (OPTIONAL BATTLE ROPE ANCHOR)
NOTE:
SECURELY
tighten all bolt connections in this step.
50 180
3
190150 170160
6
130 14012090 110100403010 706020 80
1 2 4 5 7
200
LOOSEN AND REMOVE
BOLTS, WASHERS AND
NUTS.
NOTE:
DISCARD BOLTS
RE-USE WASHERS
AND NUTS FROM
PREVIOUS STEP
44
41
NOTE:
USE NEW BOLTS
19
STEP 14A & 14B (OPTIONAL BALL TARGET)
NOTE:
SECURELY
tighten all bolt connections in this step.
50 180
3
190150 170160
6
130 14012090 110100403010 706020 80
1 2 4 5 7
200
39
REUSE BOLTS, WASHERS, AND
NUTS FROM PREVIOUS STEP
38
LOOSEN AND REMOVE
BOLTS, WASHERS AND
NUTS.
20
STEP 15A & 15B (OPTIONAL UPPER BAND PEG
ATTACHMENT)
NOTE:
SECURELY
tighten all bolt connections in this step.

This manual suits for next models

8

Other Torque Fitness Equipment manuals

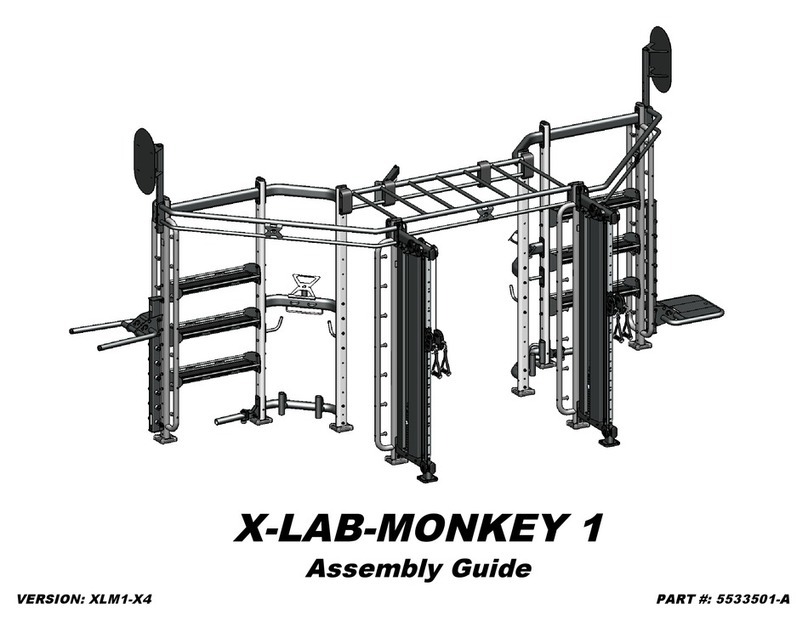
Torque X-LAB-MONKEY 1 User manual

Torque

Torque X-LAB-MONKEY 1 User manual

Torque XFIB-104 User manual

Torque

Torque XFIB-104 User manual

Torque XGYM-LSR User manual

Torque

Torque XGYM-LSR User manual

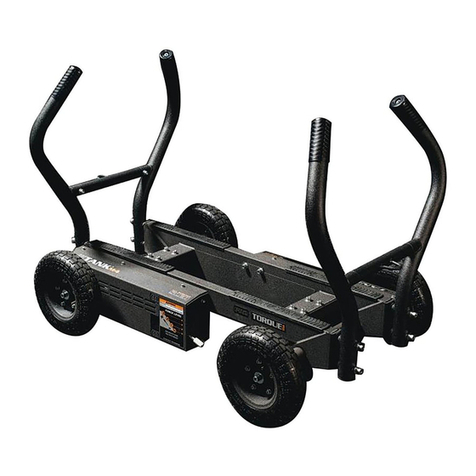
Torque TANK User manual

Torque

Torque TANK User manual

Torque 21400 User manual

Torque

Torque 21400 User manual

Torque XFIB-105 User manual

Torque

Torque XFIB-105 User manual

Torque 5854101-B User manual

Torque

Torque 5854101-B User manual

Torque X-GYM XG-OPT-101 User manual

Torque

Torque X-GYM XG-OPT-101 User manual

Torque X-RACK User manual

Torque

Torque X-RACK User manual

Torque 5854001-B User manual

Torque

Torque 5854001-B User manual

Torque X-LAB-EDGE User manual

Torque

Torque X-LAB-EDGE User manual

Torque ANKER-7 User manual

Torque

Torque ANKER-7 User manual

Torque F9 User manual

Torque

Torque F9 User manual

Torque TR2-HR-101 User manual

Torque

Torque TR2-HR-101 User manual

Torque XGYM-WR-3.0 User manual

Torque

Torque XGYM-WR-3.0 User manual

Torque XCREATE-SM-101 User manual

Torque

Torque XCREATE-SM-101 User manual

Torque TR1-7SS User manual

Torque

Torque TR1-7SS User manual

Torque X-CREATE WALL SPACE User manual

Torque

Torque X-CREATE WALL SPACE User manual

Torque TANK M1 User manual

Torque

Torque TANK M1 User manual

Torque XGYM-HSR Series User manual

Torque

Torque XGYM-HSR Series User manual

Torque XCREATE-4SRM User manual

Torque

Torque XCREATE-4SRM User manual

Torque TR2-PR-101 User manual

Torque

Torque TR2-PR-101 User manual

Torque X-GYM XG-FIB-101 User manual

Torque

Torque X-GYM XG-FIB-101 User manual

Torque XCREATE-4CCLM User manual

Torque

Torque XCREATE-4CCLM User manual

Popular Fitness Equipment manuals by other brands

Sunny Health & Fitness SF-RW5941 user manual

Sunny Health & Fitness

Sunny Health & Fitness SF-RW5941 user manual

Cortex BN-7 owner's manual

Cortex

Cortex BN-7 owner's manual

True FORCE SD1003 owner's manual

True

True FORCE SD1003 owner's manual

SCIFIT PRO2 Operation manual

SCIFIT

SCIFIT PRO2 Operation manual

Armored Fitness Equipment XPO TRAINER 2 owner's manual

Armored Fitness Equipment

Armored Fitness Equipment XPO TRAINER 2 owner's manual

Energetics ST700 Assembly instructions

Energetics

Energetics ST700 Assembly instructions

Liko Uno 102 Series Instruction guide

Liko

Liko Uno 102 Series Instruction guide

Matrix AURA Series quick start guide

Matrix

Matrix AURA Series quick start guide

Cando Digi-Flex 10-0751 user manual

Cando

Cando Digi-Flex 10-0751 user manual

Lanaform Body Stim manual

Lanaform

Lanaform Body Stim manual

PRx Performance Profile PRO Squat Rack with Multi-Grip Bar Install instructions

PRx Performance

PRx Performance Profile PRO Squat Rack with Multi-Grip Bar Install instructions

Sportplus SP-RB-9900-iE user manual

Sportplus

Sportplus SP-RB-9900-iE user manual

Precor Resolute RSL 606 Getting started guide

Precor

Precor Resolute RSL 606 Getting started guide

EastPoint 37003 Assembly instructions

EastPoint

EastPoint 37003 Assembly instructions

BM FITNESS IMPULSE 2 IT8026 Glute Master Assembly instructions

BM FITNESS

BM FITNESS IMPULSE 2 IT8026 Glute Master Assembly instructions

Movement BOLT PLATE LOADED SMITH MACHINE owner's manual

Movement

Movement BOLT PLATE LOADED SMITH MACHINE owner's manual

Aerofit IF9323 owner's manual

Aerofit

Aerofit IF9323 owner's manual

Hammer Strength Plate-Loaded PL-4W Assembly manual

Hammer Strength

Hammer Strength Plate-Loaded PL-4W Assembly manual

manuals.online logo
manuals.online logoBrands
  • About & Mission
  • Contact us
  • Privacy Policy
  • Terms and Conditions

Copyright 2025 Manuals.Online. All Rights Reserved.