3Playdium Operator Test Setup Installation Guide
Mounting the Chassis
Mounting the Chassis
1. Using the included template, mark the
position for the chassis on the wall where
you intend to install the test setup,
ensuring that the template is leveled.
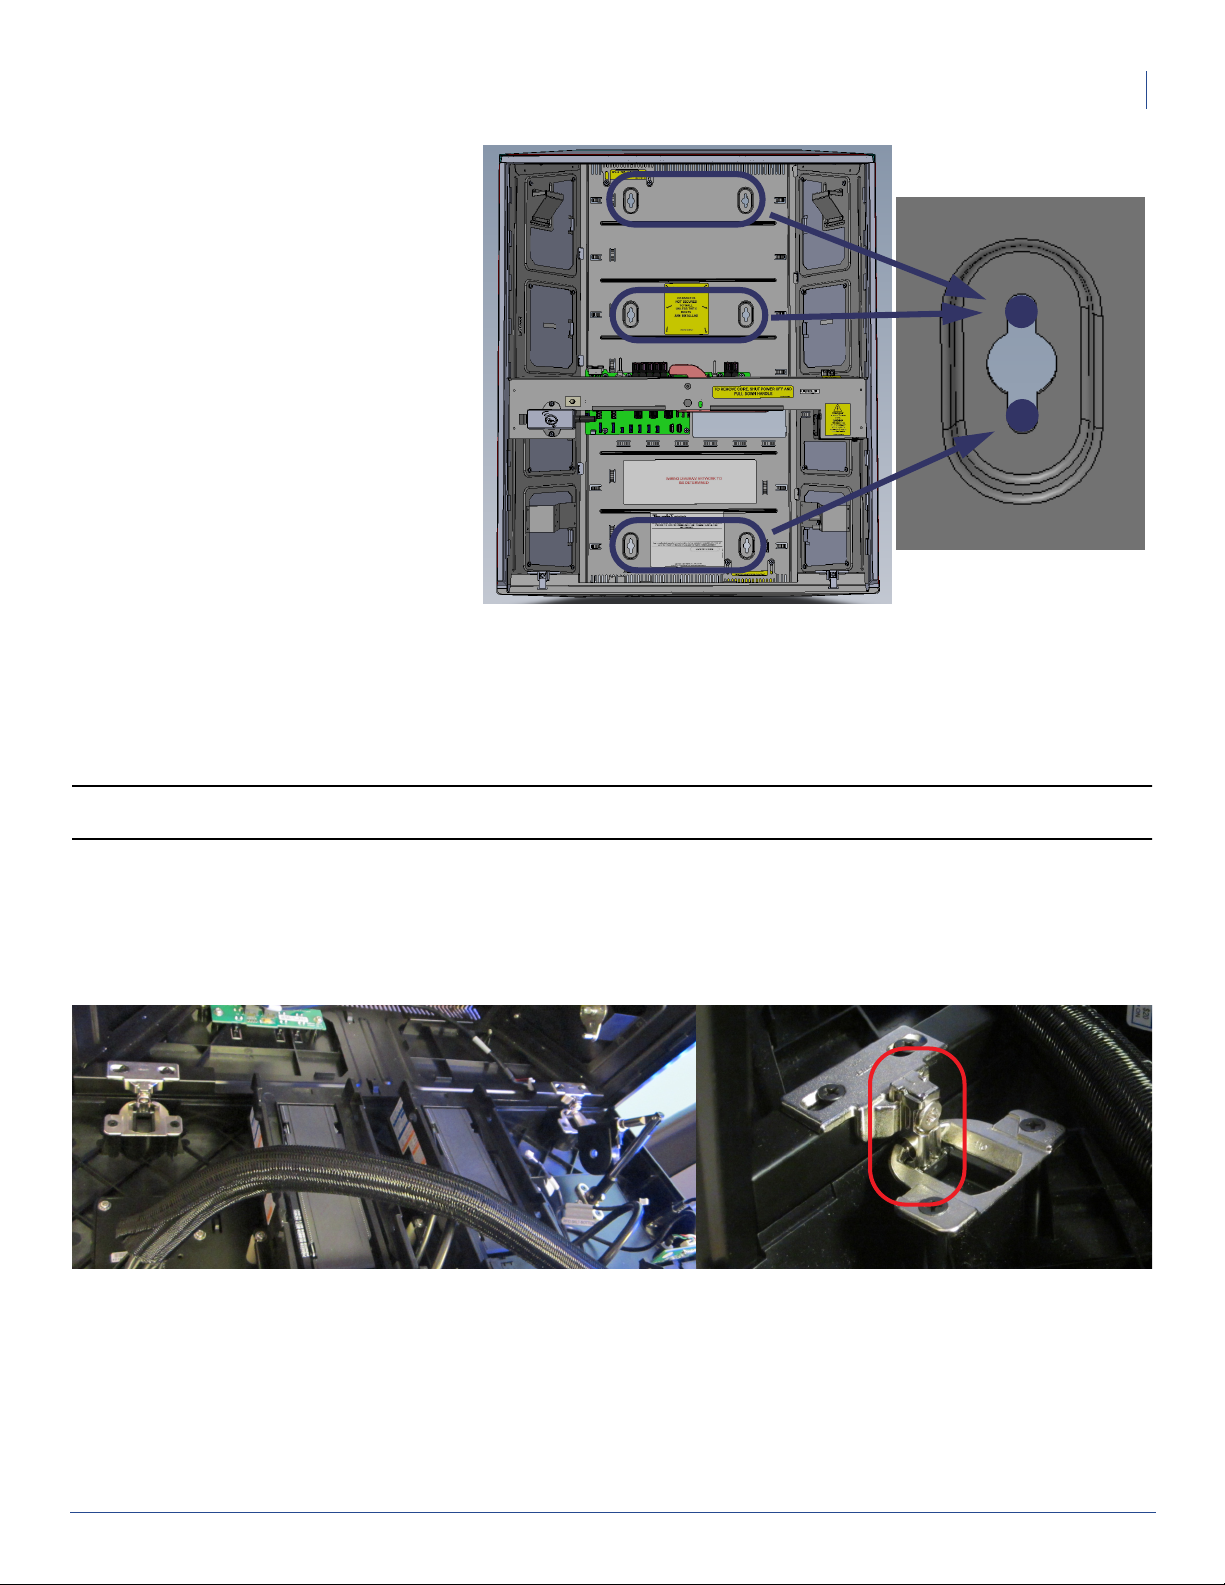
2. Mark where the screws will be inserted.
The top two holes should be aligned with
the top part of the mounting slot in the
chassis, so that the chassis will “hang”
from those two screws, while the bottom
two holes should be aligned with the
bottom of the mounting slots, so as to
better secure the chassis to the wall.
3. Partially install the top two screws on the
markings you just made. You will soon be
hanging the chassis on those two screws.
If installing on drywall or concrete, use
wall anchors designed to support at least
50lbs each, then fasten the chassis to the
wall by inserting the screws through the holes in the chassis, and into the anchors.
4. Hang the chassis on the loosened top two (2) screws.
5. Fasten the chassis to the wall using 4 screws through the middle and bottom holes. For the bottom two (2) screws,
ensure you use the top part of the mounting slots.
6. Tighten the top two (2) screws.
Note: Mounting screws and wall anchors are not provided. The correct type of screw and anchor to use depends on the
material of the surface being used for mounting.
Installing a Payment Door
This section will not provide any details about how to assemble the payment door prior to installing it on the Operator Test
Setup. For more on how to put together a payment door, see the 900908-001 Payment Door FRU document.
1. Insert the payment door into its hinges.
2. While holding the door and pushing it up slightly to keep the hinges from dropping all the way down, tighten the screw
on each hinge. You may have to readjust the height of the door on the hinges later.
3. If the payment door doesn’t come with its own damper, you may use the one included with the Operator Test Setup.
Insert the smaller end of the damper into its corresponding hole in the door, while holding it turned 90 degrees from its
final orientation. Turn it to the right position so it stays in place on the door.
Top
Bottom
Screw Position
Middle