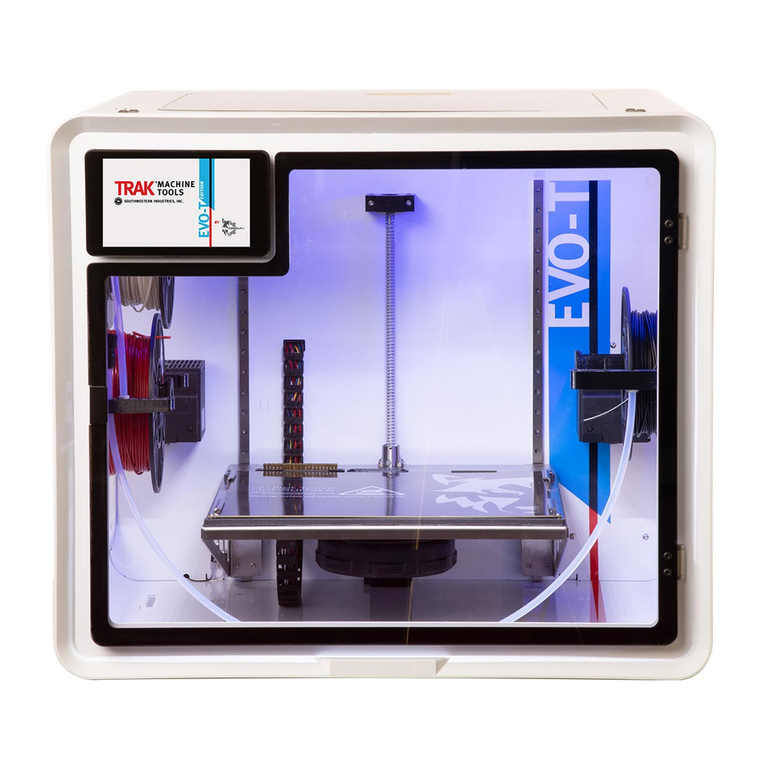
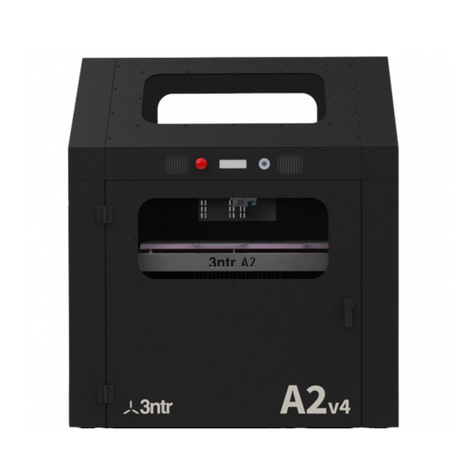
TRAK 3ntr Series User manual

TRAK®3ntr 3D Printers
Printer and MMS - Installation & Printing Manual
Covers Current Models:
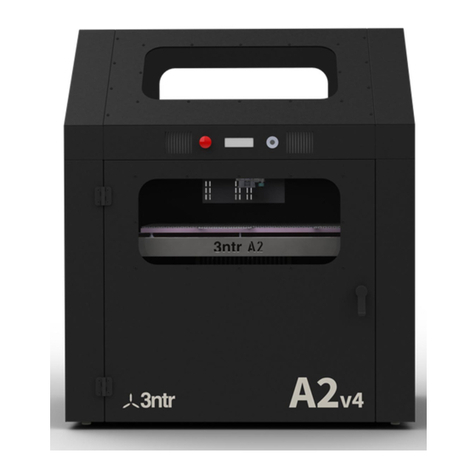
•3ntr A2v4
•3ntr A4v4
•MMS v2
2615 Homestead Place
Rancho Dominguez, CA 90220-5610 USA
T | 310.608.4422 |F | 310.764.2668
Service Department: 800.367.3165
Document: P/N 32240
Version: 122220

i
TRAK Machine Tools
Southwestern Industries, Inc.
32240 - Printer and MMS - Installation & Printing Guide
Table of Contents
Table of Contents ....................................................................................................................... i
Machine Model & Serial Number ............................................................................................... 1
SSI & KISSlicer Product Keys.................................................................................................... 1
Buytrakparts.com Login Credentials ......................................................................................... 1
1.0 Safety Specifications ....................................................................................................... 2
1.1 Safety Publications.................................................................................................................2
1.2 Safety Labels & Notices as Used in this Manual........................................................................2
1.3 Safety Precautions .................................................................................................................3
2.0 3ntr Installation & Training Checklist ............................................................................. 4
3.0 Site Preparation & Requirements.................................................................................... 8
3.1 Machine Specifications ...........................................................................................................8
3.1.1 Build Volume Configurations ............................................................................................9
3.1.1.1 A2v4 ...................................................................................................................................... 9
3.1.1.2 A4v4 ...................................................................................................................................... 9
3.2 PC Requirements for Slicers....................................................................................................9
3.3 Floor Plan, Layout & Space Requirements .............................................................................10
3.3.1 A2 Printer .....................................................................................................................10
3.3.2 A4 Printer .....................................................................................................................11
3.3.3 Material Management System (MMS) .............................................................................12
3.4 Electrical Requirements ........................................................................................................13
4.0 Installation Process....................................................................................................... 14
4.1 Lifting, Moving, Uncrating and Unpacking..............................................................................14
4.1.1 Lifting/Moving before Uncrating .....................................................................................14
4.1.2 Unpacking ....................................................................................................................14
4.1.3 Lifting/Moving after Uncrating........................................................................................14
4.2 General Packing List.............................................................................................................15
4.3 A2/A4 3ntr 3D Printers .........................................................................................................16
4.3.1 Orientation, Controls & Functions...................................................................................16
4.3.1.1 Front View............................................................................................................................ 17
4.3.1.2 Rear View............................................................................................................................. 19
4.3.1.3 Internal View ........................................................................................................................ 22
4.3.2 Installing the Spool Holder to the Back of the Printer ......................................................23
4.3.3 Connecting the Cables, Powering ON (PRINTER ONLY) ...................................................24
4.3.4 LCD Display Overview ...................................................................................................25
4.3.5 Operation Checks..........................................................................................................27
4.3.5.1 Preheat Bed.......................................................................................................................... 27
4.3.5.2 Preheat Chamber .................................................................................................................. 27
4.3.5.3 Auto-Home........................................................................................................................... 27
4.3.5.4 Cooldown ............................................................................................................................. 28
4.3.5.5 Move Axis............................................................................................................................. 28
4.3.5.6 Disable Steppers ................................................................................................................... 28
4.4 Raspberry Pi Print Server .....................................................................................................29
4.4.1 Orientation, Controls & Functions...................................................................................29
4.4.1.1 Front View............................................................................................................................ 29
4.4.1.2 Side View ............................................................................................................................. 29
4.4.1.3 Rear / Bottom View ............................................................................................................... 30
4.4.2 Connecting the Cables, Powering ON .............................................................................30

ii
TRAK Machine Tools
Southwestern Industries, Inc.
32240 - Printer and MMS - Installation & Printing Guide
4.5 External HEPA Filter .............................................................................................................33
4.5.1 Orientation, Connecting the Cables & Powering ON .........................................................33
4.5.2 Placement ....................................................................................................................34
4.6 Material Management System (MMS) ....................................................................................35
4.6.1 Orientation, Controls & Functions...................................................................................35
4.6.1.1 Front View & Side View.......................................................................................................... 35
4.6.1.2 Rear View............................................................................................................................. 37
4.6.1.3 Inside View .......................................................................................................................... 39
4.6.2 Installing Desiccant Cannister Holders ............................................................................40
4.6.3 Installing Strain Relief Flex Collars & Bowden Tubes........................................................41
4.6.4 Connecting the HEPA Filter Tube....................................................................................42
4.6.5 Connecting the Cables, Powering ON .............................................................................42
4.6.6 LCD Display and Menu Overview ....................................................................................44
4.6.7 Touch Calibration ..........................................................................................................45
4.6.8 Zeroing the cabinet .......................................................................................................46
4.6.9 Calibrating the MMS ......................................................................................................46
4.6.10 Setting the Box Temp....................................................................................................48
4.7 OnLogic Print Server ............................................................................................................49
4.7.1 Orientation, Controls & Functions...................................................................................49
4.7.1.1 Front View............................................................................................................................ 49
4.7.1.2 Rear View............................................................................................................................. 50
4.7.2 Connecting the Cables, Powering ON .............................................................................50
4.8 Repetier Server Overview .....................................................................................................54
4.8.1 Navigation Bar ..............................................................................................................54
4.8.2 Dashboard....................................................................................................................55
4.8.3 Printer Control / Management........................................................................................56
4.8.3.1 Print Tab .............................................................................................................................. 57
4.9 MMS Dashboard ..................................................................................................................58
4.9.1 MMS Summary..............................................................................................................60
5.0 Printing .......................................................................................................................... 62
5.1 Pre-Printing Steps................................................................................................................63
5.1.1 Verify all printer maintenance is up to date.....................................................................63
5.1.2 Verify correct file is loaded onto SD Card or Print Server .................................................63
5.2 Material Changes .................................................................................................................63
5.2.1 Without MMS ................................................................................................................63
5.2.1.1 Changing Filament ................................................................................................................ 63
5.2.1.2 Unloading Filament ............................................................................................................... 66
5.2.1.3 Loading Filament................................................................................................................... 68
5.2.2 With MMS.....................................................................................................................70
5.2.2.1 Changing Filament ................................................................................................................ 70
5.2.2.2 Unloading Filament ............................................................................................................... 72
5.2.2.3 Loading Filament................................................................................................................... 74
5.2.3 Nozzle Cleaning Operation .............................................................................................76
5.3 Nozzle Changes ...................................................................................................................79
5.3.1 Nozzle Change Procedure ..............................................................................................79
5.4 Basic Setup Steps ................................................................................................................89
5.4.1 Verify Correct Material is Loaded....................................................................................89
5.4.2 Verify Filament Quantity ................................................................................................89
5.4.2.1 Without an MMS ................................................................................................................... 89
5.4.2.2 With an MMS ........................................................................................................................ 89
5.4.3 Verify Filament Feed Path is Clear ..................................................................................89
5.4.4 Turn HEPA Filter On ......................................................................................................89

iii
TRAK Machine Tools
Southwestern Industries, Inc.
32240 - Printer and MMS - Installation & Printing Guide
5.4.4.1 Without an MMS ................................................................................................................... 89
5.4.4.2 With an MMS ........................................................................................................................ 89
5.4.5 Check the Build Plate ....................................................................................................89
5.4.6 Purge the Nozzles .........................................................................................................89
5.4.6.1 Purge Procedure: .................................................................................................................. 90
5.5 Printing ...............................................................................................................................91
5.5.1 Print from an SD Card ...................................................................................................91
5.5.2 Print from the Print Server.............................................................................................91
5.5.2.1 Direct Print ........................................................................................................................... 91
5.5.2.2 Upload G-Code ..................................................................................................................... 91
5.6 Post Printing........................................................................................................................93
5.6.1 Wait for Build Plate to cool ............................................................................................93
5.6.2 Wipe Build Plate with Alcohol .........................................................................................93
5.6.3 Turn HEPA Filter Off......................................................................................................93
5.7 Post Processing ...................................................................................................................93
TRAK Warranty Policy ............................................................................................................. 94

1
TRAK Machine Tools
Southwestern Industries, Inc.
32240 - Printer and MMS - Installation & Printing Guide
Machine Model & Serial Number
The plate below is for you to write down your model and serial number. Keep this info handy for when
you contact Customer Service.
Serial Number: ____________________________
SSI & KISSlicer Product Keys
SSI Product Key #1: ____________________________
Computer Name / Location: ___________________________
SSI Product Key #2: ____________________________
Computer Name / Location: ___________________________
SSI Product Key #3: ____________________________
Computer Name / Location: ___________________________
KISSlicer Product Key #1: ____________________________
Computer Name / Location: ___________________________
KISSlicer Product Key #2: ____________________________
Computer Name / Location: ___________________________
KISSlicer Product Key #3: ____________________________
Computer Name / Location: ___________________________
Buytrakparts.com Login Credentials
Login: ____________________________
Password: ____________________________

2
TRAK Machine Tools
Southwestern Industries, Inc.
32240 - Printer and MMS - Installation & Printing Guide
1.0 Safety Specifications
The safe operation of the TRAK 3ntr 3D printer and MMS depends on its proper use and the precautions
taken by each operator.
•Read and study the TRAK 3ntr 3D printer and MMS manuals. Be certain that every operator
understands the operation and safety requirements of this machine before its use.
1.1 Safety Publications
Please note that FFF/FDM 3D printing can produce hazardous Ultra-Fine Particles (UFP’s) and Volatile
Organic Compounds (VOCs). Our 3ntr printers come with a HEPA Filter and enclosed print chamber to
help reduce the amount of UFP and VOC’s you come in contact with. Always close the print chamber door
and turn on the HEPA Filter while printing.
1.2 Safety Labels & Notices as Used in this Manual
•DANGER - Immediate hazards that will result in severe personal injury or death.
•WARNING - Hazards or unsafe practices that could result in severe personal injury and/or
damage to the equipment.
•CAUTION - Hazards or unsafe practices that could result in minor personal injury or
equipment/product damage.
•NOTE - Call attention to specific issues requiring special attention or understanding.
Safety & Information Labels Used on the TRAK 3ntr A2 / A4
It is forbidden by OSHA regulations and by law to deface, destroy or remove any of these labels from
the printers.
Burn Hazard
Hot Surface Hazard
Fire Hazard
Risk of Crush
Crush Hazard
Pinch Hazard
Electromagnetic Interference
Hazard
Electrocution Hazard
Toxic Fumes Hazard

3
TRAK Machine Tools
Southwestern Industries, Inc.
32240 - Printer and MMS - Installation & Printing Guide
1.3 Safety Precautions
•Before printing, make sure the HEPA Filter is connected and functioning properly, as this reduces
the amount of VOC’s in the air. It is highly recommended that you use the HEPA filter with the
printers at all times.
•Do not run this machine without knowing the function of every control key, button, knob, or
handle. Ask your supervisor or a qualified instructor for help when needed.
•The 3ntr A2 / A4 generate high temperatures and hot moving parts. Allow the printer to cool
before reaching inside. The printer bed, printer surface plate, printed part, extruders/nozzles, and
other printer interior components can reach very high temperatures and cause serious burns.
•Do not operate the printer with the printer door open or any of the windows or service access
panels removed.
•Never reach inside of the 3ntr A2 / A4 while in operation.
•Do not lean on the machine while it is running.
•Always follow OSHA and workplace electrical safety guidelines when working with these products,
as there is a static current and users should be cautious.
•Prevent slippage. Keep the work area dry and clean.
•Protect your eyes. Wear approved safety glasses (with side shields) at all times.
•Don't get caught in moving parts. Before operating this machine remove all jewelry including
watches and rings, neckties, and any loose-fitting clothing.
•Keep your hair away from moving parts.
•Remove all tools (wrenches, check keys, etc.) from the machine before you start.
•The printer bed or extruder arm movement can cause a crush or pinch injury
•Make sure to remove the build plate from the chamber before spraying alcohol to clean it. Not
doing so can cause fire hazards as IPA is highly inflammable and volatile.
•Turn off printer before unplugging or re-plugging feeder/extruder assembly wires
•Use E-stop button to stop printer before touching any failed parts (in case of print failure).

4
TRAK Machine Tools
Southwestern Industries, Inc.
32240 - Printer and MMS - Installation & Printing Guide
2.0 3ntr Installation & Training Checklist
This checklist is used by our Field Service Technicians in order to ensure that all installation steps are
completed, and to ensure all in-person training topics are covered.
Day 1 –Installation
Check
Steps
1. Site Preparation & Requirements
a. Verify Floor Plan, Layout & Space Requirements were met
b. Verify Electrical Requirements were met
i. Measure between ground on 220v circuit and on ground 110v circuit
= 0v
ii. Measure between two normal phases = 208v to 240v is okay
iii. Measure between printer chassis on ground 110v circuit = 0v
iv. Double check wiring by repeating
c. Verify PC Requirements were met
2. Lifting, Moving, Uncrating and Unpacking
a. Lift and move the printer/MMS near the final location
b. Uncrate and unpack printer/MMS
c. Lift and move the printer/MMS after uncrating
3. Review Packing List & Report any missing items immediately
Write down Product ID’s for SSI / KS in the Additional Comments Section.
4. Printer Installation
a. Review: Orientation, Controls and Functions
b. Install Spool Holder on the Back of the Printer
c. Connect the cables & Power ON
d. Review: LCD Display Overview
e. Complete a few Operation Checks –to verify the printer is functioning
▪Preheat Print Bed –just check the plate heater works
▪Cooldown –to check the fans & cooling system work
▪Move axis –always move Z down before X/Y or you might
damage the plate
▪Disable Steppers - move print head around
(make sure z has been moved
down first)
▪Auto-home –verify the z sensor arm comes out
Printer Only
Check
Steps
5. Raspberry Pi
a. Review: Orientation, Controls and Functions
b. Connect the cables & Power ON
6. External HEPA Filter
a. Review: Orientation, Controls and Functions
b. Connect the cables & Power ON
c. Confirm filter placement

5
TRAK Machine Tools
Southwestern Industries, Inc.
32240 - Printer and MMS - Installation & Printing Guide
Printer with MMS
Check
Steps
5. Material Management System (MMS)
a. Review: Orientation, Controls and Functions
a. Install Desiccant Cannister Holder
b. Install Strain Relief Flex Collars & Bowden Tubes
c. Connect HEPA Filter tube from Printer to MMS
d. Connect the cables & Power ON
e. Review: LCD Display Overview
f. Zero the cabinet
g. Calibrate the MMS
6. OnLogic Print Server
a. Review: Orientation, Controls and Functions
b. Connect the cables & Power ON
Day 1
(continued...)
–Training
Check
Steps
1. Extruder Training
a. Disassemble Extruder
b. Change Nozzles
c. Assemble Extruder
d. Ensure zero gap between heat bridge and nozzle
e. Install Extruder Assembly
f. Torque nozzles –
i. Hardened Nozzles - Torque while hot (use Unload Filament function)
g. Perform Z nozzle height comparison
h. Install adapter holding bracket
i. Check extruder gains match the gains value in printer’s Hardware Menu
j. Auto-home & Check for Z Nozzle Height from the Build plate using feeler
gauge
i. 0.4mm gap (standard for 0.4mm nozzle)
2. Load Filament
3. Calibration Prints
a. Run Z Offset Calibration Print & save offset value
b. Run XY Calibration Print & save offset value
c. Print Cube Test (Plate leveling) –let cube print start, and move onto the next
steps
4. Slicer Training
a. Install Slicer
Write down Product ID’s for SSI / KS in the Additional Comments Section.
b. Review SSI –Easy Mode & slice part
c. Review KISSlicer –Basic Operations & slice parts
(if applicable)
d. Add G-Code to SD Card or Print Server
5. Follow Basic Printing Checklist

6
TRAK Machine Tools
Southwestern Industries, Inc.
32240 - Printer and MMS - Installation & Printing Guide
Basic Printing Checklist
Check
Steps
1. Pre-Printing Steps
a. Verify printer maintenance is up to date
b. Verify the correct file is loaded onto SD card, or Print Server
2. Material Changes
a. Unload / Load / Change Filament
b. Clean the Nozzles
3. Nozzle Changes
a. Verify you are using the correct nozzle type
b. Verify you are using the correct nozzle size
4. Basic Set up Steps
a. Verify the correct material type is loaded
b. Verify filament quantity
c. Verify the filament feed path is clear
d. Turn HEPA Filter on
e. Check the Build Plate
f. Purge the nozzles you plan to use
(if no material change is required)
5. Printing
a. Print Benchmark Part #1 from an SD Card or the Print Server
Day 2 –Training
Check
Steps
1. Review Printed Part from Day 1
2. Post Printing
a. Let the print cool down & remove
b. Wipe Build Plate with alcohol
c. Turn off HEPA filter
3. Post Processing
a. Support Removal
b. Additional Post Processing
4. Repetier Overview
5. Following Printing Checklist for Benchmark Part # 2
(if applicable)

7
TRAK Machine Tools
Southwestern Industries, Inc.
32240 - Printer and MMS - Installation & Printing Guide
Basic Printing Checklist (if applicable)
Check
Steps
1. Pre-Printing Steps
a. Verify printer maintenance is up to date
b. Verify the correct file is loaded onto SD card, or Print Server
2. Material Changes
a. Unload / Load / Change Filament
b. Clean the Nozzles
3. Nozzle Changes
a. Verify you are using the correct nozzle type
b. Verify you are using the correct nozzle size
4. Basic Set up Steps
a. Verify the correct material type is loaded
b. Verify filament quantity
c. Verify the filament feed path is clear
d. Turn HEPA Filter on
e. Check the Build Plate
f. Purge the nozzles you plan to use
(if no material change is required)
5. Printing
a. Print your Benchmark Part #2 from an SD Card or the Print Server
Additional Items
Check
Steps
1. Answer any Customer Questions
2. Get print server set up on the network
(if applicable)
3. Set up conference call to follow up on Benchmark Part #2 results
(if
applicable)
Additional Comments
Product ID(s):

8
TRAK Machine Tools
Southwestern Industries, Inc.
32240 - Printer and MMS - Installation & Printing Guide
3.0 Site Preparation & Requirements
This section includes the machine specifications, site preparation information and requirements. Please
read this section carefully and make sure all requirements are met, in order to ensure that your facility is
effectively and safely prepared for printer installation.
3.1 Machine Specifications
Dimensions
A2
A4 110v
A4 220v
MMS
Printer Dimensions
(w/ Doors Closed)
32.3 x 36.9 x 44.9”
820 x 937 x 1140 mm
24.8 x 22 x 28”
635 x 560 x 710 mm
30.6 x 38 x 32.5”
777 x 965 x 825 mm
Printer Dimensions
(w/ Doors Opened)
61 x 36.9 x 44.9”
1550 x 937 x 1140 mm
40.2 x 22 x 28”
1022 x 560 x 710 mm
88 x 38 x 32.5”
2235 x 965 x 825 mm
Printer Weight
242 lbs. | 110 kg.
94 lbs. | 43 kg.
250 lbs. | 114 kg
Shipping Dimensions
35 x 42 x 52”
890 x 1067 x 1320 mm
24.5 x 26.5 x 38.3”
622 x 673 x 973mm
45.5 x 38.3 x 42.3”
1156 x 973 x 1074 mm
Shipping Weight
498 lbs. | 226kg
152 lbs. | 69 kg
370 lbs. | 168 kg
Heated Print Bed
Anticorodal aluminum 6082
Removable & Reusable
Tray
Yes
Steel Cabinet / Frame
Construction
0.08” (2 mm) Powder Coated
Clear Panels
Polycarbonate
Printing Specifications
Printer Build Volume*
23.6 x 11.8 x 19.6”
600 x 325 x 500mm
11.6 x 6.1 x 7.4”
295 x 195 x 190mm
No. of Extruders
3
Min Layer Thickness
0.00157” | 40 Microns
Printer Technology
FFF
Max X/Y Axis Speed
11.8”/s | 300 mm/s
Max Z Axis Speed
0.08”/s | 2 mm/s
Max Extruders Speed
1.7”/s | 43 mm/s
Positioning Precision –
X/Y
0.000433” | 11 Microns
Positioning Precision –
Z
0.00157” | 40 Microns
Positioning Precision -
Extruders
0.9 Microns
Filament Diameter
2.85 mm +/- 0.1 mm
Standard Nozzle
Diameter
0.01575” | 0.4 mm
Max Extruder
Temperature
806° F | 430° C
Max Heated Bed
Temperature
266 °F
130 °C
230 °F
110 °C
266 °F
130 °C
Max Heated Chamber
Temperature
194 °F
90 °C
176 °F
80 °C
194 °F
90 °C

9
TRAK Machine Tools
Southwestern Industries, Inc.
32240 - Printer and MMS - Installation & Printing Guide
Environmental
Ambient Operating
Temperature
61-90°F | 16-32°C
Relative humidity 30% to 70% non-condensing
Storage Operating
Temperature
41-104°F | 5-40°C
Relative humidity 30% to 70% non-condensing
*Printer Build Volume may increase with different nozzle configurations. See Build Volume Configurations
below.
3.1.1 Build Volume Configurations
3.1.1.1 A2v4
Nozzle Configuration
Volume - Metric
Volume - Imperial
Bed Center - Metric
3 Nozzle - 3 Nozzle
Prints
(#1 + #2 + #3)
600mm (X) x 300mm
(Y) x 500mm
23.622” (X) x 11.811”
(Y) x 19.68”
X 310.5, Y 201
3 Nozzle - 2 Nozzle
Prints
(#1 + #2 or #2 + #3)
600mm (X) x 325mm
(Y) x 500mm
23.622” (X) x 12.79”
(Y) x 19.68”
X 310.5, Y 189 | Y
209.5
3 Nozzle - 1 Nozzle
Prints (#2)
600mm (X) x 350mm
(Y) x 500mm
23.622” (X) x 13.77”
(Y) x 19.68”
X 310.5, Y 201
3.1.1.2 A4v4
Nozzle Configuration
Volume - Metric
Volume - Imperial
Bed Center - Metric
3 Nozzle - 3 Nozzle
Prints
(#1 + #2 + #3)
295mm (X) x 156mm
(Y) x 200mm
11.61” (X) x 6.14” (Y) x
7.87”
X 148, Y 127
3 Nozzle - 2 Nozzle
Prints
(#1 + #2 or #2 + #3)
295mm (X) x 180mm
(Y) x 200mm
11.61” (X) x 7.08” (Y) x
7.87”
X 148, Y 119.5 | Y
140.5
3 Nozzle - 1 Nozzle
Prints (#2)
295mm (X) x 204mm
(Y) x 200mm
11.61” (X) x 8.03” (Y) x
7.87”
X 148, Y 128.5
3.2 PC Requirements for Slicers
This section contains PC requirements in order to provide you with the best slicing experience possible.
Please make sure your PC meets at least the minimum requirements to be able to install the software.
Smart Slicer Interface (SSI) & KISSlicer
Requirements
Minimum
Recommended
Operating System
Windows 7, Windows 8
Windows 10
Display Resolution
1280 x 720
1920 x 1080
RAM
4GB
16GB +
Hard Disk Space
250 MB
1 GB +
Core Processor
2.0Ghz single-core
2.5 Ghz dual-core & up
*Slicing is multi-core, the more the
better

10
TRAK Machine Tools
Southwestern Industries, Inc.
32240 - Printer and MMS - Installation & Printing Guide
3.3 Floor Plan, Layout & Space Requirements
This section has dimension information for the A2, A4 and Material Management System (MMS).
3.3.1 A2 Printer
CAUTION!
Always maintain a 24” clearance in order to access the printer for maintenance. If performing
maintenance while printer is powered on, please see your local regulations on how much clearance you
must provide.

11
TRAK Machine Tools
Southwestern Industries, Inc.
32240 - Printer and MMS - Installation & Printing Guide
3.3.2 A4 Printer

12
TRAK Machine Tools
Southwestern Industries, Inc.
32240 - Printer and MMS - Installation & Printing Guide
3.3.3 Material Management System (MMS)

13
TRAK Machine Tools
Southwestern Industries, Inc.
32240 - Printer and MMS - Installation & Printing Guide
3.4 Electrical Requirements
This section has electrical information for the A2, A4 and Material Management System (MMS). Please
review carefully. Always contact a licensed electrician if you are unsure about any electrical wiring.
A2
A4 110v
A4 220v
MMS
AC Input
220 / 230 VAC –
15A
110 / 120 –10A
220 / 230 VAC –
10A
220 / 230 VAC –
15A
TRAK supplies you with one of two plugs, depending on whether you ordered a printer that runs on 110v
or 220v.
Supplied by TRAK for 220v
Supplied by TRAK for 110v
For 220v devices, the customer is responsible for providing the L14-20R socket prior to the installation. If
you do not have the socket set up, please see the diagram below for information on wiring the L14-20R
socket.

14
TRAK Machine Tools
Southwestern Industries, Inc.
32240 - Printer and MMS - Installation & Printing Guide
4.0 Installation Process
In this section we will walk you through the installation process, from the moment your printer arrives, to
the moment that it is powered on and ready to start printing. Do not proceed with this section, or the
following sections until the Site Preparation & Requirements section has been completed.
4.1 Lifting, Moving, Uncrating and Unpacking
CAUTION!
Proper equipment of sufficient capacity must be used when lifting and/or moving the printer.
4.1.1 Lifting/Moving before Uncrating
•A2 or MMS - The best option for lifting an A2 printer or MMS
is a forklift or fork pallet. When using a forklift or fork pallet,
orient the printer or MMS with the sides or front, facing the
fork truck to prevent damage to the back. The second-best
option is using 5-6 people (so that each person does not carry
more than 50lbs).
•A4 - The best option for lifting an A4 printer is a fork pallet. When using a fork pallet, orient
the printer with the sides or front, facing the fork pallet handle, to prevent damage to the
back of the printer. The second-best option would be using 2-3 people (so that each person
does not carry more than 50lbs).
4.1.2 Unpacking
•Never use cutters; you risk piercing the packaging, therefore damaging content. Remove
plastic straps, using scissors.
•To open the wooden box, don't use crowbars: use a screwdriver to remove cover and side
panels.
•Remove cover, packaging foam/bubbles & packaging side panels.
Steps:
1. Use a forklift or fork pallet to move the printer/MMS unit as close as possible to the final
location before uncrating or removing from the pallet.
2. Remove shipping screws holding top portion of printer shipping crate to base. Lift off the top
portion of shipping crate from base.
3. Remove contents of printer/MMS and place on table.
4. Remove protective wrapping from outside printer/MMS.
NOTE - Protective film must be removed from printer or it will melt from the heat during the
printing process, causing damage to the printer.
5. Open the access door to the printer and identify the protective materials and film at all
locations inside. Remove protective materials and plastic film from all printer windows and
access doors.
4.1.3 Lifting/Moving after Uncrating
Once the pallet has been removed from the printer/MMS it must be moved by hand. The printers
have fixed feet, thus must be lifted and carried to their final position.
•A2 - Five to six people are recommended to move the A2 printer by hand - lifting it onto a
table, printer stand, or MMS.
•A4 - Two to three people are recommended to move the A2 printer by hand - lifting it onto
a table, printer stand, or MMS.
•MMS –The MMS has casters, so it can be wheeled over to the designated final location. If
lifting is required, five to six people are recommended.
CAUTION!
After uncrating a printer or MMS, DO NOT lift printer directly with forklift or slings. The printer housing
could be damaged if excessive force is exerted at any location other than the four printer feet. Always
place the printer onto a shipping pallet before using a fork truck or fork pallet.

15
TRAK Machine Tools
Southwestern Industries, Inc.
32240 - Printer and MMS - Installation & Printing Guide
4.2 General Packing List
In this section we will go over a general packing list. This is not your final packing list!
If you are interested in purchasing any additional options, please contact your local sales representative.
Printer Purchase
Every printer purchase comes with the following
items:
Printer
Key for Front Panel Door
(please store in a
safe location)
Printer Power Cable
License code for SSI
USB Drive with Docs and G-Code Files
Micro SD
Micro SD to SD Converter Card
USB SD Card Reader
Digital Dial Indicator & Stand
Metric Feeler Gauge
PTFE Tube Adapter Wrench
Gloves
Machine Parts:
Spool Spacers & Spool Holders
HEPA Elbow w/ Washer
Materials:
Cleaning Nylon
1 - 1kg Spool of HIPS (Support Material)
2 - 1kg Spools of ASA (Build Materials)
Print Server Items:
Print Server & Power Supply
Webcam
LCD Monitor & HDMI Cable
Keyboard & Mouse Set
Toolbox Items:
Hex Bit - 2.5mm
Socket - 7mm
Wrench - 7mm
Coolant Refill Bottle
Fuse-AC Power 15 Amps - Kit of 2
Allen Wrench Set
Pick/Hook Set - Kit of 4
Brass Wire Brush
Cutter 5" Long
Aluminum Pencil Sharpener
Dynamometric Screwdriver
Additional Items
(If no MMS was ordered)
External HEPA Filter, Power Supply & Feeder
Hose to Printer
MMS Purchase
(optional)
If you purchased an MMS, below is the list of
additional items you should expect to arrive with
your shipment.
MMS
Tablet & Power Supply
Tablet Magnet Holder
Desiccant Tray
Desiccant Cannisters
Machine Parts:
Feeder Brackets
HEPA Filter Hose (MMS to Printer)
Filament Feeder Guides
Reel Holders w/ 2 locking pins
Round Magnets w/ Tube Plugs
Additional Cables:
DP to HDMI
Ethernet
Printer to MMS Power Supply
Male to Male USB Cables
Options
TRAK sells additional options that you might be
interested in.
Nozzles
Materials
PrintDry
PolyBox
Printer Stands
Please contact your local sales rep for more
options and price information.
Suggested Items for MMS
TRAK recommends having the following items
handy when you order an MMS. TRAK does not sell
these items.
Oven for Desiccant Drying
Postal Scale (up to 10lbs)
Step Ladder

16
TRAK Machine Tools
Southwestern Industries, Inc.
32240 - Printer and MMS - Installation & Printing Guide
4.3 A2/A4 3ntr 3D Printers
Once you are satisfied with the placement of your printer/MMS, and have made sure everything in your
packing list has been received, it’s time to go over setting up the printer, print server and MMS, if
applicable.
In the upcoming sections, there will be parts that might not apply to you depending on whether you
purchased an MMS, or not.
The green sections are required to read regardless of what you ordered. The blue and orange depend on
what you ordered.
See diagram below to understand what sections apply to you, and in what order you should read them.
4.3.1 Orientation, Controls & Functions
Whether you purchased an A2 or an A4, everything is almost the same, with the exception of a few key
differences like printer size, printer build volume and power supply. For demonstration purposes, we will
reference an A2 in the following section.
Other manuals for 3ntr Series
7
Table of contents
Other TRAK 3D Printer manuals

TRAK
TRAK 3ntr A2 Programming manual

TRAK
TRAK 3ntr Series Programming manual

TRAK
TRAK 3ntr Series User manual

TRAK
TRAK Airwolf EVO-T Programming manual

TRAK
TRAK 3ntr Series User manual

TRAK
TRAK 3ntr Series User manual

TRAK
TRAK 3ntr Series Manual

TRAK
TRAK 3ntr Series User manual

TRAK
TRAK 3ntr Series User manual

TRAK
TRAK Airwolf 3D EVO-T Operating instructions