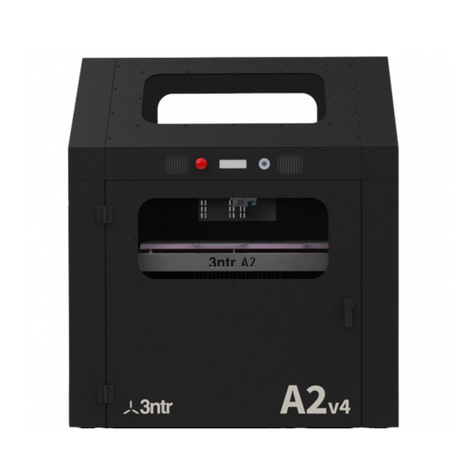
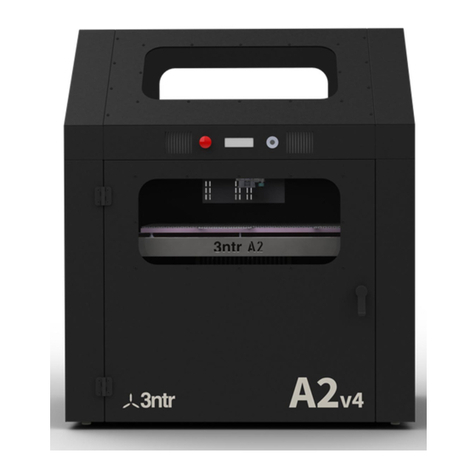
TRAK 3ntr Series User manual

TRAK®3ntr 3D Printers
Printer & MMS Guide
Covers Current Models:
•3ntr A2
•3ntr A4
•MMS v2
2615 Homestead Place
Rancho Dominguez, CA 90220-5610 USA
T | 310.608.4422 |F | 310.764.2668
Service Department: 800.367.3165
e-mail: sales@trakmt.com | service@trakmt.com | web: www.trakmt.com
Document: P/N 32238
Version: 010620

Copyright ©2019, Southwestern Industries, Inc. All rights are reserved. No part of this publication may
be reproduced, stored in a retrieval system, or transmitted, in any form or by any means, mechanical,
photocopying, recording or otherwise, without the prior written permission of Southwestern Industries,
Inc.
While every effort has been made to include all the information required for the purposes of this guide,
Southwestern Industries, Inc. assumes no responsibility for inaccuracies or omission and accepts no
liability for damages resulting from the use of the information contained in this guide.
All brand names and products are trademarks or registered trademarks of their respective holders.
Southwestern Industries, Inc.
2615 Homestead Place
Rancho Dominguez, CA 90220
Phone 310-608-4422 Fax 310-764-2668
Service Department
Phone 800-367-3165 Fax 310-886-8029

i
TRAK Machine Tools
Southwestern Industries, Inc.
TRAK 3ntr 3D Printers –Printer & MMS Guide
Table of Contents
1Introduction ...............................................................1
1.1 Printer Guide Overview......................................................................... 1
1.2 Helpful Tips for Using this Printer Guide.............................................. 2
1.2.1 Organization.................................................................................... 2
1.2.2 Procedure/Work Instruction Guide Summary................................ 2
2Safety..........................................................................4
2.1 Important Safety Notice....................................................................... 4
2.2 Safety Issues to be Considered ............................................................ 4
2.3 Safety Precautions................................................................................ 5
3Certifications ..............................................................7
3.1 EC Declaration of Conformity ............................................................... 7
4Printer Orientation......................................................8
4.1 Printer Identification Guide: Front, Rear, and Side Views................... 8
4.2 Front Panel Controls ........................................................................... 10
5Initial Printer Installation, Set-Up & Calibration......11
5.1 Initial Printer Set-Up & Calibration Checklist .................................... 11
5.2 Uncrate & Unpack Printer/MMS Unit.................................................. 12
5.2.1 Site Preparation Guidelines .......................................................... 12
5.2.2 Uncrate & Unpack MMS Unit (If Applicable) ................................ 15
5.2.3 Uncrate & Unpack Printer............................................................. 16
5.2.4 Place Printer and MMS Unit/Printer Stand in Desired Location... 16
5.3 Install HEPA Filter............................................................................... 17
5.3.1 Install HEPA Filter (Common to MMSV2 & External Filter Unit) .. 17
5.3.2 Complete HEPA Filter Installation (for MMS V2 Only) ................. 22
5.3.3 Complete HEPA Filter Installation (External HEPA Filter Unit Only)
23
5.4 Remove Factory Printed Part (Cone).................................................. 25

ii
TRAK Machine Tools
Southwestern Industries, Inc.
TRAK 3ntr 3D Printers –Printer & MMS Guide
5.5 Check and Fill Coolant ........................................................................ 25
5.6 Electrical Connections......................................................................... 25
5.6.1 Verify Input Power Source Voltage/Phase................................... 26
5.6.2 MMS Unit 220V Electrical Power Connection ............................... 26
5.6.3 Standard 3ntr 220V Electrical Power Connections....................... 28
5.6.4 Wiring a Printer or MMS Power Cable for 220V Single Phase...... 29
5.6.5 3ntr A4 printer with 120 VAC US Power Connection.................... 30
5.7 Power ON Printer and MMS Unit (if applicable)................................. 30
5.8 Printer Orientation.............................................................................. 31
5.9 Operate the Printer Manually Using LCD Screen................................ 31
5.10 Load Filament to the Back of Printer.................................................. 31
5.11 Purge Nozzles/Filament ..................................................................... 31
5.12 Clean Nozzles (Not Normally Required on Initial Set-Up) ................. 31
5.13 Installation & Initial Set-Up Calibrations........................................... 31
5.14 Print Part from SD Card ...................................................................... 32
5.15 Set-Up and Install Printer Server ....................................................... 32
5.15.1 Introduction to Print Server ......................................................... 32
5.15.2 Assemble, Connect, and Start-Up Printer Server ......................... 33
5.15.3 Configure Printer Port................................................................... 37
5.15.4 Archive Factory Firmware Settings............................................... 40
5.16 Set-Up and Calibrate MMS Unit .......................................................... 45
5.16.1 MMS Unit Installation, Set-Up & Calibration................................ 45
5.16.2 Complete Connections & Power ON the MMS Unit....................... 45
5.16.3 Install & Connect Server within the MMS Unit............................. 45
5.16.4 MMS Server Connection & Set-Up ................................................ 50
5.16.5
Zero the Cabinet
.......................................................................... 52
5.16.6
Calibrate the Cabinet
.................................................................. 52
5.16.7 MMS PTFE Tube Material Handling Installation ........................... 53
5.16.8 Install the Desiccant in the MMS.................................................. 59

iii
TRAK Machine Tools
Southwestern Industries, Inc.
TRAK 3ntr 3D Printers –Printer & MMS Guide
6Operate the Printer Manually Using LCD/Front Panel
Controls...........................................................................60
6.1 LCD Display and Control Menus Overview ......................................... 60
6.1.1 LCD Display –Idle Machine Menu ................................................ 60
6.1.2 LCD Display –Information Screen................................................ 60
6.1.3 LCD Display –Prepare Menu......................................................... 61
6.2 Move Axis Function............................................................................. 62
6.3 Auto Home Function ........................................................................... 64
6.4 Disable Steppers ................................................................................. 65
7Everyday Printer Operational Procedures.................66
7.1 Power on the Printer and MMS Unit (If applicable) ........................... 66
7.1.1 Power on the MMS Unit (If applicable) ........................................ 66
7.1.2 Power on the Printer..................................................................... 66
7.1.3 Power OFF Sequence (Print Server/MMS/Printer) ...................... 67
7.2 Remove Parts from Printer................................................................. 68
7.3 Load Filament/Materials..................................................................... 70
7.3.1 Load Filament to Back of Printer .................................................. 70
7.3.2 Loading Filament/Material into the MMS Unit ............................. 77
7.4 Filament Care/Storage ....................................................................... 78
7.5 Purge Nozzle/Filament....................................................................... 81
7.6 Clean Nozzles...................................................................................... 84
7.6.1 Clean Nozzle Procedure Overview:............................................... 84
7.6.2 Unload Filament Using Change Filament Function....................... 84
7.6.3 Load Cleaning Filament ................................................................ 88
7.6.4 Nozzle Cleaning (Automated Function)........................................ 91
7.7 Operate the MMS Unit......................................................................... 94
7.7.1 MMS Touch Screen Control........................................................... 94
7.7.2 MMS Dashboard ............................................................................ 94
7.7.3 Accessing the MMS Dashboard over a network............................ 96

iv
TRAK Machine Tools
Southwestern Industries, Inc.
TRAK 3ntr 3D Printers –Printer & MMS Guide
8Before you Print........................................................97
8.1 Print Job Set-Up/Printer Configuration.............................................. 97
8.1.1 Print Job Set-Up and Materials Loading Process Flowchart......... 98
8.1.2 Print Job Set-Up and Materials Loading Checklist ..................... 101
8.2 Review the G-Code File for Printer Print Job Set-Up Information... 104
8.3 Nozzle Change .................................................................................. 106
8.3.1 Nozzle Overview ......................................................................... 106
8.3.2 Nozzle Change –On Machine...................................................... 107
8.4 Extruder Configuration Change........................................................ 108
8.4.1 Extruder Configuration Overview............................................... 109
8.5 Install SPFU Unit............................................................................... 110
9Print Parts.............................................................. 120
9.1 Print Parts from an SD Card.............................................................. 120
9.2 Printing Machine Menu..................................................................... 123
9.2.1 Stop/Pause Printing.................................................................... 123
9.2.2 Tune Menu –Adjust Process Parameters Mid-Print................... 124
9.2.3 Statistics ..................................................................................... 125
9.3 Filament Change –During Printing .................................................. 125
10 Calibrate Printer .................................................... 130
10.1 Z Offset.............................................................................................. 130
10.1.1 Z Offset Calibration Print............................................................ 130
10.1.2 Z Offset –Read, Enter & Save..................................................... 132
10.2 XY Offset ........................................................................................... 134
10.2.1 XY Offset Calibration Print.......................................................... 135
10.2.2 XY Offset –Read, Enter & Save .................................................. 136
10.3 Z Nozzle Comparison -3 Nozzles Relative Z Position Calibration..... 140
10.4 Plate Leveling –User Procedure....................................................... 146
10.5 Z Nozzle Leveling Check –Calibration Print..................................... 147
10.6 Cubes - Calibration Test Print.......................................................... 148

v
TRAK Machine Tools
Southwestern Industries, Inc.
TRAK 3ntr 3D Printers –Printer & MMS Guide
10.7 Thermal Calibration .......................................................................... 148
11 Maintain Your Printer & MMS Unit......................... 150
11.1 Periodic Maintenance & Calibration Schedule.................................. 150
11.2 Check & Fill Coolant Level ................................................................ 151
11.3 Extruder Handling & Service............................................................. 152
11.3.1 Extruder Overview...................................................................... 152
11.3.2 Extruder Assembly Breakdown................................................... 153
11.3.3 Extruder Configurations –Normal/HI TEMP.............................. 154
11.3.4 Handling Extruder Assemblies –Best Practices......................... 154
11.3.5 Tools Required for Extruder Service........................................... 155
11.3.6 Avoid Damaging the Ceramic Heater Assembly ......................... 155
11.3.7 Tool for Nozzle and Heat Bridge Service .................................... 156
11.3.8 Nozzle and Ceramic Heater Assembly/Disassembly .................. 157
11.3.9 Other Extruder Handling Considerations.................................... 158
11.4 Extruder Disassembly....................................................................... 159
11.5 Filament Feeder Installation ............................................................ 163
11.6 Feeder Roller Cleaning...................................................................... 166
11.7 Printer Firmware Update.................................................................. 167
11.7.1 Check Firmware Version ............................................................. 167
11.7.2 Firmware Upgrade Process......................................................... 168
11.7.3 Firmware update –PC procedure............................................... 169
11.7.4 Firmware update –Print server procedure ................................ 170
11.8 MMS Firmware Update...................................................................... 171
11.9 Controlling Relative Humidity (RH) within MMS Cabinet ................ 173
12 Troubleshooting..................................................... 175
12.1 Troubleshooting Tables .................................................................... 175
13 Appendix................................................................ 180
13.1 Appendix 1 –Useful Gcode Commands............................................ 180
13.2 Appendix 2 –3ntr Printable Materials.............................................. 181

vi
TRAK Machine Tools
Southwestern Industries, Inc.
TRAK 3ntr 3D Printers –Printer & MMS Guide
13.3 Appendix 3 –Compatible Material Combinations ............................ 182
13.4 Appendix 4 –Print Envelope (Per Model/Version/Configuration) .. 183
TRAK Warranty Policy .................................................. 184

1
TRAK Machine Tools
Southwestern Industries, Inc.
TRAK 3ntr 3D Printers –Printer & MMS Guide
1Introduction
Congratulations! Whether you purchased a TRAK 3ntr A2 or A4, you have an industrial-grade, 3D printer
that will produce high quality, functional parts, using an accurate and repeatable FFF print process, at low
cost per part.
TRAK 3ntr 3D Printers offer:
•An open materials platform enabling selection of a wide range of materials
•Complete flexibility in tailoring/tuning process settings and part characteristics
•Temperature controlled build chambers and printer plates
oNozzles up to 840° F (450°C)
oBed Up to 320° F (160° C)
oChamber up to 194° F (90° C)
•Generous build capacity/volume
oPrint Parts up to 24”x13”x19” for the A2
oPrint Parts up to 12”x7.5”x 8” for the A4
•Simultaneously prints 2 or 3 different print materials
•Integrated camera offering remote web monitoring
•Optional Material Management System to protect expensive environmentally sensitive materials
•KISSlicer software that converts STL files to printer ready g-code programs
•HEPA Filter
1.1 Printer Guide Overview
This Printer Guide covers the following topics:
•Initial printer installation, connection, set-up, and calibrations
•Operating the printer manually from the LCD front panel
•Everyday operating, print job set-up, & maintenance procedures
•Before you print
•Printing parts
•Calibrating the printer
•Maintaining the printer
•Troubleshooting machine/print problems
•Some basic information about print materials
Programming of the TRAK 3ntr 3D printers is not covered within this Printer Guide because programming
is performed with separate slicing software that outputs a printer program file (G-code). The TRAK 3ntr
is supplied with KISSlicer software and associated reference files necessary to make G-Code files for
printing, please consult the appropriate manuals for that software in order to create G-code files for
printing.
NOTE - Despite the best efforts for completeness, the scope and detail of the Printer Guide set-up,
calibration, operation, and maintenance manual contents can be somewhat limited. Where additional
information is required please consult the appropriate manual or contact your dealer.
2
TRAK Machine Tools
Southwestern Industries, Inc.
TRAK 3ntr 3D Printers –Printer & MMS Guide
CAUTION - Section 2 contains important safety information, it is highly recommended that all personnel
and operators review and understand this information before starting. Only qualified and trained
operators should use this Quick Start Guide.
1.2 Helpful Tips for Using this Printer Guide
You may use the table of contents or the navigational bookmarks in the left panel to browse, navigate
and jump to any desired guide chapter or specific procedure. Many procedures require other procedures
to be performed as steps –accordingly, hyperlinks to referenced procedure instructions are also
embedded for easy reference.
1.2.1 Organization
Individual procedures are organized within chapters based on their functional use/most common
application. You can jump directly to any of the chapters based on the job at hand to follow all the steps
for that area, or to select individual procedure instructions within the chapter. A table of common
navigation links (as shown below) is provided at the end of various pages/section throughout the
document to speed navigation through the document
Printer & MMS Guide Navigational Links
Complete List of Procedure/Work Instructions
Printer
Orientation
Initial Printer Installation,
Set-Up & Calibration
Before you
Print
Everyday
Procedures
Maintain
Printer/MMS
Calibrate
Printer
1.2.2 Procedure/Work Instruction Guide Summary
This section outlines a list of the individual procedures/work instructions contained within this guide
grouped by category for easy reference. Click the hyperlinks to jump directly to an individual procedure
as needed.
Category
TRAK 3NTR A2/A4 & MMS Procedure
Printer Orientation
Safety Precautions
Printer Identification Guide: Front, Rear, and Side Views
Front Panel Controls
LCD Display and Control Menus Overview
Operate the Printer Manually Using LCD/Front Panel Controls
Initial Printer
Installation, Set-Up
& Calibration
Initial Printer Set-Up & Calibration Checklist
Site Preparation Guide
Uncrate & Unpack Printer/MMS Unit
Install HEPA Filter
Electrical Connections
Installation & Initial Set-Up Calibrations
Set-Up and Install Printer Server
Set-Up and Calibrate MMS Unit

3
TRAK Machine Tools
Southwestern Industries, Inc.
TRAK 3ntr 3D Printers –Printer & MMS Guide
Category
TRAK 3NTR A2/A4 & MMS Procedure
Print Job Set-Up/
Extruder
Configuration
Print Job Set-Up/Configuration Process (Flowchart/Checklist)
Review G-Code File for Print Job Set-Up/Config. Requirements
Extruder Overview, Handling, & Service
Nozzle Change
Clean Nozzles
Extruder Configuration Change (Normal/Hi TEMP)
Install SPFU Unit
Everyday Printer
Operations
Power on the Printer and MMS Unit
Power OFF Sequence (Print Server/MMS/Printer)
Operate the Printer Manually Using LCD/Front Panel Controls
Load Filament/Materials
Filament Care/Storage
Purge Nozzle/Filament
Clean Nozzles
Print Parts
Printing Machine Menu (Stop/Pause/Tune during Printing)
Filament change - During Printing
Remove Parts from Printer
Operate the MMS Unit
Troubleshooting Tables
Printer/MMS
Maintenance
Maintain your Printer –Summary Schedule/Frequency
Check & Fill Coolant Level
Disable Steppers
Feeder Roller Cleaning
Filament Feeder Installation
Extruder Overview, Handling, & Service
Extruder Disassembly
Printer Firmware Update
MMS Firmware Update
Controlling Relative Humidity (RH) within MMS Cabinet
MMS –Zero Scales/Calibrate Cabinet
Troubleshooting Tables
Calibrate Printer
Periodic Calibration Schedule/Frequency (Normal Use)
Installation & Initial Set-Up Calibrations
Z Offset
XY Offset
Z Nozzle Comparison -3 Nozzles Relative Z Position Calibration
Plate Leveling –User Procedure
Z Nozzle Leveling Check –Calibration Print
Cubes - Calibration Test Print
Thermal Calibration

4
TRAK Machine Tools
Southwestern Industries, Inc.
TRAK 3ntr 3D Printers –Printer & MMS Guide
2Safety
The safe set-up, calibration, and operation of your TRAK 3ntr 3D printer depends on its proper use and
precautions taken by each operator. If these activities are performed incorrectly, there are risks, not
limited to, electric shock, pinch/crush, burns, inhalation of fumes/debris that can cause serious injury or
death.
Read and follow this Quick Start Guide. Understand the printer operation and safety precautions before
setting up, calibrating, or operating the 3D printer.
•Always wear safety glasses, face mask, and safety shoes.
•Always stop the printer before opening the access door and reaching into the printer.
•Always allow the printer, printer surface plate and workpiece to cool adequately before reaching
into the printer.
•Have a qualified electrician make all electrical connections and cable wiring
•Never wear gloves, rings, watches, long sleeves, neckties, jewelry, or other loose items when
operating the printer.
2.1 Important Safety Notice
Your printer has been built with user safety as main concern, yet it must NOT be used by individuals with
reduced mental or physical abilities. This printer is not a toy, is meant to be used by fully responsible and
knowledgeable people and printing area must be kept locked in presence of children or people with
serious mental problems.
2.2 Safety Issues to be Considered
Risk of burns
Hot surfaces are involved into the printing process. To
minimize risks, be sure not to access any part inside the
printing area while printer is working. Once printing
process is finished, wait until printed part(s) cool down
to room temperature, or use protective gear (gloves) to
remove finished prints.
Risk of pinching:
Machine can suddenly start: even if the power of
actuators is low, the speed is high enough to hurt. Don't
access machine until printing process isn't completed -
or- the machine is remotely actuated (i.e.: using a print
server).
Risk of fire:
Don't turn on printer close to flammable substances.
Don't use any flammable substance to clean the
machine inner parts. Do not use printer without
supplied removable print tray. Do not use any spray
product inside printer. Allow correct printer ventilation:
don't obstruct air inlets and outlets, keeping them free
from dust and other contaminants.

5
TRAK Machine Tools
Southwestern Industries, Inc.
TRAK 3ntr 3D Printers –Printer & MMS Guide
Risk of toxic fumes:
Wrong temperature settings may cause toxic fumes
emissions. Be sure to follow guidelines and settings
from supplier of your filament. Use printer in a well
vented room. If possible, use machine smoke exhaust
port: our F1 filtering unit is available –contact us to
know more!
Electrocution Risk:
Do not use in presence of condensing moisture and/or
conductive dusts. Disconnect AC power cord before
accessing inner parts. Do not attempt any maintenance
work on electric or electromechanical parts. Should you
notice any electrical malfunctioning immediately stop
machine use and report.
Electromagnetic Interference
Electromagnetic compliance: this is a class A product. In
a domestic environment this product may cause radio
interference in which case the user may be required to
take adequate measures.
2.3 Safety Precautions
1) Do not operate this machine before the TRAK 3ntr Safety, Installation, Maintenance, Service and
Parts List Manual, and the Safety, Programming, Operating & Care Manual have been studied and
understood.
2) Do not run this machine without knowing the function of every control key, button, knob, or
handle. Ask your supervisor or a qualified instructor for help when needed.
3) Protect your eyes. Wear approved safety glasses (with side shields) at all times.
4) Allow the machine to cool before reaching into it for any reason. The printer bed, printer surface
plate, printed part, extruders/nozzles, and other printer interior components can reach very high
temperatures and cause serious burns.
5) Don't get caught in moving parts. Before operating this machine remove all jewelry including
watches and rings, neckties, and any loose-fitting clothing.
6) Keep your hair away from moving parts. Wear adequate safety headgear.
7) Protect your feet. Wear safety shoes with oil-resistant, anti-skid soles, and steel toes.
8) Take off gloves before you start the machine. Gloves are easily caught in moving parts.
9) Remove all tools (wrenches, check keys, etc.) from the machine before you start. Loose items
can become dangerous flying projectiles.
10) Never operate a 3D printer after consuming alcoholic beverages, or taking strong medication, or
while using non-prescription drugs.
11) Protect your hands. Stop the printer bed movement and extruder translation mechanism:
a. Before opening the printer access door
b. Before reaching into the machine for any reason
c. Before changing parts
d. Before removing the printer bed tray, printed parts, or filament debris
e. Before you make an adjustment to the extruder, nozzles or any interior mechanism.
12) Protect your eyes and the machine as well. Don't use a compressed air hose to remove the
debris or clean the machine.
13) Keep work area well lighted. Ask for additional light if needed.
14) Do not lean on the machine while it is running.

6
TRAK Machine Tools
Southwestern Industries, Inc.
TRAK 3ntr 3D Printers –Printer & MMS Guide
15) Prevent slippage. Keep the work area dry and clean. Remove obstacles of any kind around the
machine.
16) Avoid getting pinched in places where the printer bed or extruder arm movement can cause a
crush or pinch injury
17) Do not operate the printer with the printer access door open or any of the windows or service
access panels removed.

7
TRAK Machine Tools
Southwestern Industries, Inc.
TRAK 3ntr 3D Printers –Printer & MMS Guide
3Certifications
3.1 EC Declaration of Conformity

8
TRAK Machine Tools
Southwestern Industries, Inc.
TRAK 3ntr 3D Printers –Printer & MMS Guide
4Printer Orientation
In this section, you will meet your new TRAK 3ntr 3D printer. Please take a moment to identify the
important components of the printer before operating, maintaining, or setting-up the printer.
4.1 Printer Identification Guide: Front, Rear, and Side Views
1) Emergency -E-STOP
Button. Powers ON
and OFF the Printer
2) LCD Display –Use for
printer control and
printing information
3) Jog Wheel and Black
Selector Button
4) Printer Door –Locking
Handle
5) Tank Port –Coolant
Check & Fill Location
Figure 4.1.1 Printer Front View

9
TRAK Machine Tools
Southwestern Industries, Inc.
TRAK 3ntr 3D Printers –Printer & MMS Guide
1) SD Card Port: Insert SD
card with print (g-code
files).
2) USB Port for PC or Print
Server connection.
3) Filament Feeders –Feed
mechanism for extruders
#1, #2, #3.
4) AC Inlet –Printer Power
Cord plugs in here.
Power On-OFF switch.
5) Spool Holders –Filament
Spools are mounted here
for Extruders #1, #2, #3.
Figure 4.1.2 Printer Rear View
1) VENT –Print fume
extraction port. Remove
plate and install HEPA
filter elbow/hose here.
2) Feeder PR –Feeder
pressure knob, adjusts
filament feeder pressure.
3) Handle –engages or
releases filament feeder
(engaged position shown)
4) AC Inlet –Printer Power
Cord plugs in here.
Power On-OFF switch.
5) Collar –Filament Spools
are mounted here for
Extruders #1, #2, #3.
Figure 4.1.3 Printer Side View

10
TRAK Machine Tools
Southwestern Industries, Inc.
TRAK 3ntr 3D Printers –Printer & MMS Guide
4.2 Front Panel Controls
All relevant machine duties can be performed using the printer front panel controls. Front panel controls
consist of a power/E-Stop button, LCD display screen, jog wheel, and black selector button.
•Power E-Stop button –Push in to Emergency STOP printer. Pull with clockwise turn to power ON
the printer.
•LCD Display –Displays printer information, status, control menus.
•Jog Wheel –Rotate in either direction to navigate menus, change values, control printer
•Black Jog Wheel Button –Push to select/initiate
Figure 4.2.1 Printer Front Panel Controls
Printer manual operation and control is performed by navigating through various menus that appear on
the LCD screen using the jog wheel to scroll up/down, increase/decrease a value, and pressing the black
jog wheel button to select/initiate.
Printer & MMS Guide Navigational Links
Complete List of Procedure/Work Instructions
Printer
Orientation
Initial Printer Installation,
Set-Up & Calibration
Before you
Print
Everyday
Procedures
Maintain
Printer/MMS
Calibrate
Printer

11
TRAK Machine Tools
Southwestern Industries, Inc.
TRAK 3ntr 3D Printers –Printer & MMS Guide
5Initial Printer Installation, Set-Up & Calibration
Before your TRAK 3ntr A2/A4 printer is ready to 3D print parts, it must be properly installed, set-up, and
calibrated. Factory Trained personnel should have performed and completed this entire process after
delivery; however, the instructions are provided within this guide in the event the printer is to be
shipped/moved to a new location after the initial set-up.
Procedure instructions unique to the initial installation Set-Up & Calibration (not used elsewhere) are
contained within this section. Those procedure instructions common to both initial Set-Up and Calibration
and other printer use are only listed within this Section; however, the procedure instruction details reside
in the other sections of the guide with hyperlinks to allow easy access.
NOTE - Those new to the TRAK 3ntr A2/A4 printers may find using the separate, dedicated set-up
document TRAK3ntr A2 A4 Printer & MMS –Set-Up and Calibration Quick Start Guide faster and easier
than using this guide for new printer installations because it has all the procedures presented in a step-
step process for beginners.
5.1 Initial Printer Set-Up & Calibration Checklist
Follow the checklist when installing a new printer and applicable items any time the printer is physically
moved from its resting position on the printer stand/MMS Unit.
TRAK 3NTR Initial Printer Set-up & Calibration Checklist
1. Uncrate & Unpack Printer/MMS Unit
2. Printer Orientation
3. Install HEPA Filter
4. Remove Factory Printed Part (Cone)
5. Check and Fill Coolant
6. Electrical Connections
7. Power ON the Printer/MMS Unit
8. Operate the Printer Manually Using LCD and Front Panel Controls
9. Load Filament to the Back of Printer
10. Purge Nozzles/Filament
11. Calibrate Printer –Initial Installation & Set-Up Calibrations
12. Print Part from SD Card
13. Set-Up and Install Print Server
14. Set-Up and Calibrate MMS Unit (if applicable)
15. Operate MMS Unit (if applicable)
Click on the Hyperlinks to jump to the procedure/instructions for each individual step.

12
TRAK Machine Tools
Southwestern Industries, Inc.
TRAK 3ntr 3D Printers –Printer & MMS Guide
5.2 Uncrate & Unpack Printer/MMS Unit
The first steps to get started with your new TRAK 3ntr A2/A4 printer are described in this section. The
process will vary if you are using a TRAK supplied 3ntr Printer stand, MMS unit, or some other
table/bench for the printer.
5.2.1 Site Preparation Guidelines
Review the requirements for Printer & MMS Unit to select a suitable location before unpacking.
Site Preparation Guide Space & Weight Requirements:
A2 Printer
•Dimensions = 37” x 32”/61.5” door
closed/open
•Height = 44.3”/72-78.3” On Stand/MMS Unit
•Net (approx.) Weight = 242 lbs.
•Shipping (approx.) Weight = 498 lbs.
•Shipping Dimensions 42”x 36”x 53”
•4 levelling screws are provided
MMS Unit
•Dimensions = 37” x 31.5”/88.5” doors
closed/open
•Height = 34.2”
•Net (approx.) Weight = 250 lbs. (approx.)
•Shipping (approx.) Weight = 425 lbs.
•Shipping Dimensions = 46” x 39” x 43”
•Mounted on locking casters/wheels
NOTE: A minimum 24” clearance on both sides, top, front, and rear (beyond Doors OPEN dimension of
printer/MMS Unit) is required for materials loading, service, and repair access.
NOTE: A solid and level foundation is required for printer and MMS
Electrical
A2 Printer
•220/230 VAC 15A power required for A2
Printer.
Note: Also requires 3x 110/120 VAC 15A
60 Hz external power for Print Server,
External HEPA filter unit, optional display
A2 Printer & MMS Unit
•220/230 VAC 15A single connection
required for A2 Printer and MMS Unit (A2
Printer plugs to MMS, MMS plugs to
external power)
•Print Server & HEPA filter unit (no external
power required for MMS V2)
NOTE: For shops with 440 VAC, a step-down transformer to 220 VAC must be used. The
transformer must be sized to carry a loadof 15 amps minimum.
Air
•Not required
Environmental
•Ambient Operating Temperature 16-32°C/61-90°F
•Storage Operating Temperatures 5--40°C/41-104°F
Other manuals for 3ntr Series
7
This manual suits for next models
3
Table of contents
Other TRAK 3D Printer manuals

TRAK
TRAK 3ntr Series Manual

TRAK
TRAK 3ntr Series User manual

TRAK
TRAK 3ntr Series User manual

TRAK
TRAK 3ntr Series Programming manual

TRAK
TRAK Airwolf 3D EVO-T Operating instructions

TRAK
TRAK 3ntr A2 Programming manual

TRAK
TRAK Airwolf EVO-T Programming manual

TRAK
TRAK 3ntr Series User manual

TRAK
TRAK 3ntr Series User manual

TRAK
TRAK 3ntr Series User manual