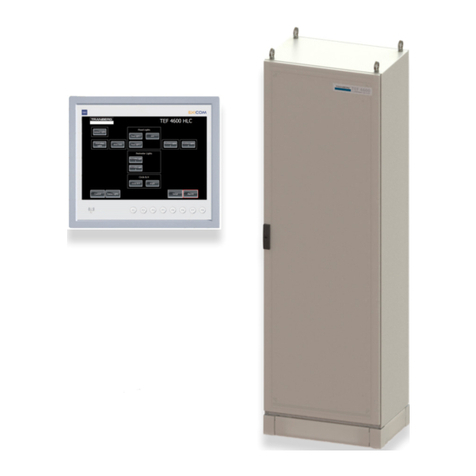
Tranberg TEF 4900 User manual

Copyright © 2005 –2021 R. STAHL TRANBERG AS. All rights reserved.
Installation and User Manual
Tranberg 4900 Commander Control system
Version 2.9
R. STAHL TRANBERG AS
Feb. 2021

Copyright © 2005 - 2021 R. STAHL TRANBERG AS. All rights reserved. Page ii of 38
Document Information
Document Title: Installation and user Manual TEF 4900 Commander
Control System
Version: 2.9
Document Type: Installation and user manual
Status: Issued for use
Amendment Date: February 02, 2021
Issued by:R. STAHL TRANBERG AS, R&D.
Summary of Revisions (abbr.)
Date
Version
Status
Issued By
May 2015
2.2
Issued for use
TRANBERG AS
Technical dept.
October 2015
2.3
Issued for use
TRANBERG AS
Technical dept.
July 2017
2.4
Issued for use
R. STAHL TRANBERG AS
R&D
August 2017
2.5
Issued for use
R. STAHL TRANBERG AS
R&D
October 2017
2.6
Issued for use
R. STAHL TRANBERG AS
R&D
November 2017
2.7
Issued for use
R. STAHL TRANBERG AS
R&D
July 2018
2.8
Issued for use
R. STAHL TRANBERG AS
R&D
Feb. 2021
2.9
Issued for use
R. STAHL TRANBERG AS
R&D
R. STAHL TRANBERG AS has made every effort to provide accurate information, but makes no claims as to the accuracy or
completeness of this information. R. STAHL TRANBERG AS disclaims liability for errors, omissions, misinterpretation or
misuse of this information by others.
TRANBERG, Commander and other names are either trademarks or registered trademarks of R. STAHL TRANBERG AS.

Copyright © 2005 –2021 R. STAHL TRANBERG AS. All rights reserved. Page iii of 38
Table of Contents
CHAPTER I. INTRODUCTION....................................................................................... 5
SECTION 1.01 GENERAL INFORMATION........................................................................... 5
CHAPTER II. TECHNICAL OVERVIEW.......................................................................... 6
SECTION 2.01 INTRODUCTION ........................................................................................ 6
SECTION 2.02 SYSTEM OVERVIEW.................................................................................. 6
CHAPTER III. FUNCTIONAL DESCRIPTION.................................................................. 7
SECTION 3.01 INTRODUCTION ........................................................................................ 7
SECTION 3.02 BUTTONS AND LEDS ON PANEL ................................................................ 7
Text and graphics on panel ...............................................................................................8
Button quantity and panel size ..........................................................................................8
Button placement...............................................................................................................8
Button functionality ............................................................................................................8
Button and led status.......................................................................................................10
Button state diagram........................................................................................................10
Button configurations.......................................................................................................11
Spare lamp test................................................................................................................12
CHAPTER IV. MASTER CPU..........................................................................................13
SECTION 4.01 CONNECTIONS........................................................................................13
Inputs...............................................................................................................................13
Outputs ............................................................................................................................13
Power supply ...................................................................................................................13
LED indicator ...................................................................................................................13
SECTION 4.02 VDR GATEWAY.......................................................................................14
SECTION 4.03 SCADA GATEWAY..................................................................................18
CHAPTER V. PANEL.....................................................................................................23
SECTION 5.01 OVERVIEW .............................................................................................23
Hardware .........................................................................................................................23
Buttons and LEDs............................................................................................................24
Settings on the panel.......................................................................................................25
Non-volatile memory........................................................................................................25
Connections.....................................................................................................................26
CHAPTER VI. OUTPUT MODULES................................................................................27
SECTION 6.01 OVERVIEW .............................................................................................27
Common hardware ..........................................................................................................27
Relay output modules......................................................................................................29
Analog output modules....................................................................................................30
Connections and fuses....................................................................................................31
CHAPTER VII. INSTALLATION........................................................................................32
SECTION 7.01 INTRODUCTION .......................................................................................32

Copyright © 2005 –2021 R. STAHL TRANBERG AS. All rights reserved. Page iv of 38
SECTION 7.02 POWER CABLES TO MODULES..................................................................32
SECTION 7.03 COMMUNICATION CABLES TO MODULES....................................................32
SECTION 7.04 MAIN POWER SUPPLIES...........................................................................33
SECTION 7.05 TERMINATION OF SYSTEM........................................................................33
SECTION 7.06 TERMINATION OF OUTPUTS......................................................................34
SECTION 7.07 APPLYING POWER FOR THE FIRST TIME ....................................................34
SECTION 7.08 TESTING THE SYSTEM .............................................................................35
SECTION 7.09 FAILURES...............................................................................................35
CHAPTER VIII. APPROVALS ..........................................................................................37
SECTION 8.01 APPROVALS ...........................................................................................37
CHAPTER IX. ADDITIONAL INFORMATION..................................................................38
SECTION 9.01 TECHNICAL CLARIFICATIONS ...................................................................38

Copyright © 2005 –2021 R. STAHL TRANBERG AS. All rights reserved. Page 5 of 38
Chapter I. Introduction
Section 1.01 General Information
The 4900 Commander is a control system developed by R. STAHL TRANBERG AS.
R. STAHL TRANBERG has a long history of designing and manufacturing navigation
lights controllers for medium sized and large vessels. The traditional design principle
has been a direct control of each channel, meaning that the cable for each individual
lantern needs to be laid from the lantern to the actual controller. This is both a costly
and challenging task.
The Commander has been developed with greater flexibility in mind, and in particular
with the objective to avoid pulling each lantern cable into the bridge. The concept is
therefore based upon the industry-proven RS-485 network with a number of nodes
connected to this.
A node may in this respect be a control panel, a relay output module, the master CPU
and more. Each node is given a unique address and the corresponding action between
a single button and the panel is defined in the configuration of the system.

Copyright © 2005 –2021 R. STAHL TRANBERG AS. All rights reserved. Page 6 of 38
Chapter II. Technical overview
Section 2.01 Introduction
The TEF 4900 Commander system consists of three main components:
Master CPU
Panels
Output modules
The three main components are interconnected via a RS-485 network. Each node has a
unique address, and the Master CPU controls the network traffic by allowing one and
only one node to ‘talk’ at any given time.
Section 2.02 System overview
Generic system diagram:
Master
CPU
Panel 1
Output module 1
Panel 2
Panel 3
Output module 2
Output module 3
RS-485 Network
RS-485 Network
Config data

Copyright © 2005 –2021 R. STAHL TRANBERG AS. All rights reserved. Page 7 of 38
Chapter III. Functional description
Section 3.01 Introduction
The TEF 4900 Commander remote control system can have to up to 7 operator panels
connected in one system.
Each operator panel consist of up to 64 buttons, each stacked up to 8 rows. The panels
are backlit for easy reading of text and graphics, in daylight as well as at night. In
addition, up to 16 relay output modules may be connected, providing a flexible control
system with current sensing feedback from the outputs.
Application areas:
The Commander system is designed specifically for marine use and has a
contemporary design with backlit front panels. The design concept allows customization
of number of buttons, text and graphics, and is therefore useful for a wide range of
customer-specific navigation and signal lights controllers.
Communications:
Robust, industry proven and noise immune RS-485 is used for communication between
control panels, Master CPU and relay output modules. As an option, a communication
interface to Voyage Data Recorder and/or vessel control system will be available,
allowing data recording and external reset of alarms. The system supervises the
integrity and issues an alarm if a node fails to respond in the network.
Features at a glance:
24 VAC/VDC and 230 VAC versions
With or without current sensing capabilities on outputs
Optional compensation for voltage loss in long cable feeds
Analog output module: Combined dimmer and flasher, triac-based, 230VAC
Operator panels with dimmable backlight
Audible and flashing led alarm, with potential free relay alarm contacts
RapidAction™ buttons: One touch turns on and off dedicated outputs
GroupSelect™ buttons: Similar to radio buttons (select one buttons in a row)
Optional functionalities include VDR (Voyage Data Recorder) and/or SCADA
(Supervisory Control And Data Acquisition)
Section 3.02 Buttons and LEDs on panel
The TEF 4900 Commander is designed to be extensively configurable. This is in order
to meet customer requirements with a minimum of production or engineering changes.
Configuration options:
Text and graphics on panel
Button quantity and panel size
Button placement (installed or not installed in the grid pattern)
Button functionality (ranging from one single channel to a group of output
changes)
Output module type (analogue, discrete relay or relay with current sensing)

Copyright © 2005 –2021 R. STAHL TRANBERG AS. All rights reserved. Page 8 of 38
Manual or automatic changeover to spare outputs
Text and graphics on panel
The panels have backlight with manual dimming functionality. The text and graphics are
laser engraved, providing the users with clear and precise information, readable in
daylight as well as in the dark.
The construction consists of a machined, black aluminum frame with a recessed button
surface made of Lexan. The Lexan film is painted on the reverse side as well as laser
engraved on the same side. This ensures a very durable front.
Button quantity and panel size
The panels come in five different lengths, depending on the number of buttons. All
panels have the same height.
The buttons are injection molded in black color. A Lexan film in various colors is
inserted in a recess on top of the button. All button switch elements are of the metallic
dome type.
Button placement
Buttons are placed in a grid with 8 positions vertically and from 3 to 8 horizontally.
Buttons may be left out for clarity. This has no impact on software or any other settings.
Button functionality
Each button has two LEDs: One green and one red. Via software commands, these may
light up in a number of combinations: Off, steady on or flashing.
A single press on a button may have several functions, depending on the on the
configuration, button status, and the time the button has been pressed (short / long).
In general, there are four ‘normal’ states of a button:
Off. No LEDs will light up.
Rapid green flash: The panel awaits a confirmation from the output module that
the corresponding output has turned on.
Continuous green: The output module has confirmed that the corresponding
output has been turned on.
Slow green flash: The corresponding spare output has been turned on and is
confirmed.
Failure combinations include:
Flashing red and green: The output channel (relay) reports a malfunction
(broken fuse or lamp) on the main output (e.g. main lantern). The buzzer will
sound. This is an unacknowledged alarm. When pressed at this stage, the
button will flash green and the spare output will be switched on.

Copyright © 2005 –2021 R. STAHL TRANBERG AS. All rights reserved. Page 9 of 38
Flashing red: The output channel (relay) reports a malfunction (broken fuse or
lamp) on the spare output (e.g. spare lantern). The buzzer will sound. This is an
unacknowledged alarm. When pressed at this stage, the button will light up with
a continuous red light.
Continuous red light: The spare output is defect. The panel must be turned off to
reset this state.
Depending on the configuration, a single push on a button may turn on or off a number
of outputs (and panel LEDs) to accommodate the needs. This yields a high density in
functionality, while simplifying the tasks of the user. As an example, one press on a
single button may ‘remote’ operate a selection of other buttons, as if the user pressed
each and one of these. In any case the user will have control over each single button
by turning this on or off.
See the two chapters Button and led status and Button state diagram over the next two
pages.

Copyright © 2005 –2021 R. STAHL TRANBERG AS. All rights reserved. Page 10 of 38
Button and led status
With reference to the description on the previous page, this is a summary of the button
functionality and the corresponding led status, including alarm buzzer.
State
Description
Effect
Led
0
Nothing (off). The default
position of any button.
Outputs associated with
this key will be turned off.
Green and red led off.
1
A normal press on a key
(< 5 seconds).
Not confirmed.
The output module will
receive a message to turn
on the respective (main)
output.
Rapid green flash.
2
A long press on a key (> 5
seconds).
Not confirmed.
The output module will
receive a message to turn
on the respective (spare)
output.
Rapid green flash, each
4th blink is dark.
3
Main output is confirmed
on.
The green led will light up
continuously.
Steady green light.
4
Spare output is confirmed
on.
The green led will flash
slowly.
Slow green flash.
5
Main output reports a
malfunction.
Unacknowledged alarm.
The buzzer will sound and
both the green and red
LEDs on the button will
flash.
Alternating red and green
flash.
6
Spare output reports a
malfunction.
Unacknowledged alarm.
The buzzer will sound and
the red led on the button
will flash.
Rapid red flash.
7
Spare output is defect and
has been confirmed by the
user.
The buzzer will stop and
the red led will turn on
continuously.
Steady red light. Turn off
panel to reset.
Rapid flash: 2 flashes per second.
Slow flash: 1 sec on, 1 sec off.
Button state diagram
With reference to the table above, the button states operate in a fixed state process.
State 0 is the default state where both the green and red led on a button is turned off
and associated outputs are in an off position.
The left branch on the diagram below shows the states when the user wants to turn on
a main output, e.g. the main lantern. By pressing the button for less than 5 seconds, the
button changes to state 1. In this state a message is sent to the corresponding output,
and the led flashes rapidly awaiting a confirmation from the output module. Another
press on the key at this state will return to state 0 and a message to turn the output off.

Copyright © 2005 –2021 R. STAHL TRANBERG AS. All rights reserved. Page 11 of 38
All short dotted lines show states from where an output may be turned off.
The two long dotted lines indicate two options: Depending on whether an automatic
switch-over to a spare lantern is present and configured the line from 5 to 2 indicates
that it will turn on the spare lantern. If no spare lantern is present and configured, the
line from 5 to 7 indicates that the red led will turn on steady to indicate that the
corresponding lantern is defect and no spare is available.
Button configurations
Besides regular button functionality as described in the table above, the flexible
configuration of the Commander allows buttons to be defined as RapidAction™ buttons
or GroupSelect™ buttons.
RapidAction™ buttons: One touch on such a button turns on and/or off dedicated
outputs and the corresponding buttons green LEDs, while no led will lit up in the
RapidAction™ button itself. The button merely acts as a hot key, simplifying standard
operations, such as turning on sailing lanterns or anchor lanterns.
GroupSelect™ buttons: Similar to radio buttons on computer software. The user press
one such button and the other buttons in the row will turn off all LEDs, while the green
led on the GroupSelect™ button that has been pressed will light up. This functionality
may be used for setting a dimmer level, e.g. with four buttons that allows four
settings/levels.
For navigation lights control system, the first button column at the panel is normally
used for RapidAction™ functionality, named F-keys at the panel. The function of F-keys
is software configurable and will switch on and off a predefined set of outputs.
The setup of F-keys is specific for each system, please refer to project drawings for
details.
0
1
2
3
4
5
6
7
Turn off
panel

Copyright © 2005 –2021 R. STAHL TRANBERG AS. All rights reserved. Page 12 of 38
Spare lamp test
Test of individual spare lamp:
1
Turn the respective circuit off.
2
Press and hold the respective button for min. 5 seconds.
3
Release button and spare lamp turns on.
Test of all spare lamps simultaneously:
1
Panel in standby mode.
2
Press and hold “on/standby” button for min. 5 seconds and while still “on/standby” is
pressed, press “backlight level” button. (Tip: While “on/standby” is pressed, press
“backlight level” repeatedly till spare lamp test mode starts.)
3
All spare lamp outputs are switched on.
4
Press “on/standby” to stop test.
Indicator lights, buttons:
Rapid green flashing: Circuit on, unconfirmed status.
Green steady: Main lamp on.
Slow green flashing: Spare lamp on.
Red flashing: Unacknowledged alarm.
Red Steady: Acknowledged alarm.
Alarm
Silence
On / Stby
Emcy. Supply Out
Main Supply Out
Level
Backlight
Spare Lamp Test

Copyright © 2005 –2021 R. STAHL TRANBERG AS. All rights reserved. Page 13 of 38
Chapter IV. Master CPU
Section 4.01 Connections
Only one Master CPU may be connected to a network.
Inputs
The master CPU has one digital input, 24VDC galvanic isolated. It is used as an Alarm
Silence Input function, allowing external equipment to silence the panel buzzer. It is
activated with a rising edge on the input (from 0 V to 24 V).
Outputs
The module has two single pole change-over relays. The Alarm Output relay is
energized in the inactive state, in order to signal a total power loss to an external
system. The relay will activate when an alarm condition is present, either power loss,
output failure or communication errors on the bus (no messages from panel or
modules). The alarm conditions are indicated on the panel with flashing red or steady
red LED indicators.
For faults which can be cleared by switching over to a spare or second power net, the
alarm output will be deactivated when the alarm is acknowledged (This applies to
outputs / lanterns with a spare, and for main (1) and emergency (2) power net). This
makes it possible to indicate several alarm conditions to the external system.
The second relay provides the Alarm Silence signal. This relay gives a pulse of about 1
- 2 seconds when the Alarm Silence button on the panel has been operated.
Power supply
The Master CPU can be connected to up to 4 power supplies (24 VDC), which are
connected in parallel via a set of diodes. This combined power output supplies the
panels and output modules. The power inputs are monitored by the Master CPU and
their states are signaled to all connected nodes via the RS- 485 network.
LED indicator
The green Activity LED is flashing under normal conditions. This indicates that all
nodes (relay modules and panel) are responding correctly.
If this LED is constantly lit it indicates that minimum one node is not responding. This
may be due to a broken communications cable, a faulty module or a combination of
both. If this happens, the Alarm relay will be activated, the alarm buzzer in the panel
will sound and the indicator in the Alarm Silence button will flash continuously (provided
the connection towards the panel is ok). See also Chapter V Panels, Section 5.01
Overview, Power Supply Monitoring.

Copyright © 2005 –2021 R. STAHL TRANBERG AS. All rights reserved. Page 14 of 38
Section 4.02 VDR gateway
In order to send information to a VDR (Voyage Data Recorder) onboard the vessel, a
VDR gateway module may optionally be installed in the Master CPU unit. This device
passively listens to the network traffic and sends out information about the status of the
system and the various output modules.
The VDR gateway sends out two types of messages, 1) system status messages
according to a proprietary Tranberg protocol, and 2) alarm messages according to
NMEA-0183 ALR and ACK messages.
Electrical interface
Baud rate: 38.400 bps
Data bits: 8N1
Electrical: Isolated RS-422, output only
System status messages
The output string is a proprietary NMEA-0183 structure with the following setup:
1
2
3
4
5
6
7
8
9
10
11
12
13
14
15
16
17
18
19
20
21
$PTRA
1
2
1
1
1
1
C
5
0
1
1
1
4
4
4
4
1
*
7
E
$PTRA
ComStatus
FailCode
Net 1
Net 2
Net 3
Net 4
Node type
Node number
Manual o’ride
Channel 8
Channel 7
Channel 6
Channel 5
Channel 4
Channel 3
Channel 2
Channel 1
*
Checksum MSB
Checksum LSB
Example:
$PTRA,1,2,1,1,1,1,C,5,0,1,1,1,4,4,4,4,1*7E
Packet length: 25 characters (normal), plus commas, carriage return and new line.
Total number of characters (including commas) sent are 42 characters, plus carriage
return and new line. Packet lengths are shorter in case of irregularities (see later in this
document).
Repetition rate: Packages are sent continuously at a rate of approx. 5-10 packets per
second.
Explanations:
$PTRA: A fixed proprietary beginning of the telegram (Proprietary TRAnberg)
Comma: A comma sign (,), ASCII code 44 (0x2C)
Asterix: An asterix sign (*), ASCII code 42 (0x2A)
ComStatus: If minimum one node does not respond. 0 = Failure, 1 = Ok
FailCode: Common code for a fail on the module. 0 = Disregard, 1 = Ok, 2 = Net failure,
3 = Output failure, 4 = Net and output failure. If node is set to Manual override, the
code is 3 or 4.
Net1 –Net4: Status of the (up to) 4 independent power supply networks. 1 = On, 0=Off.

Copyright © 2005 –2021 R. STAHL TRANBERG AS. All rights reserved. Page 15 of 38
Node type: B = Relay module (8 relays) without current sensing, C = Relay module (8
relays) with current sensing, D = combined dimmer and flasher module.
Node number: Address of the output module. This address corresponds to the address
set on the particular output module, and is in the region of 1 –77 (octal values).
Manual override: Indicates a manual override on the particular module (1 = Normal, 2 =
Override)
Channel 8 –Channel 1: Status of relay setting: 0 = Disregard/testing, 1 = Off, 2 = On,
no current, 3 = Not used, 4 = On, current ok, 5 = Manual override, no current, 6 =
Manual override, current ok. (Current = current flows in circuit, meaning lamp and fuse
is ok).
Checksum is a 2 digit ASCII hex checksum, MSB first.
Checksum MSB: The MSB of the checksum (e.g. 7 if the checksum is 7E).
Checksum LSB: The LSB of the checksum (e.g. E if the checksum is 7E).
Comments:
When calculating the checksum, the ASCII value of each character has been used. The
checksum is the XOR-ing of all characters between the leading $-character and
checksum delimiter *.
No spaces occur in any packet.
All packets are ended with a carriage return (CR) and new line (LF).
All characters referred to above are 7-bit ASCII and represented by the appropriate
ASCII number (e.g. a ‘1’ is ASCII character 49, A is 65, B is 66, etc.).
Note on systems delivered prior November 1st 2017
NOTE: Due to a change in checksum calculation, systems delivered before November
1st 2017 will have the following format:
The output string is a proprietary NMEA-0183 structure with the following setup:
1
2
3
4
5
6
7
8
9
10
11
12
13
14
15
16
17
18
19
20
21
22
$PTRA
1
2
1
1
1
1
C
5
0
1
1
1
4
4
4
4
1
*
1
2
0
$PTRA
ComStatus
FailCode
Net 1
Net 2
Net 3
Net 4
Node type
Node number
Manual o’ride
Channel 8
Channel 7
Channel 6
Channel 5
Channel 4
Channel 3
Channel 2
Channel 1
*
Checksum H
Checksum M
Checksum L
Example:
$PTRA,1,2,1,1,1,1,C,5,0,1,1,1,4,4,4,4,1,*,1,2,0
Packet length: 26 characters (normal), plus commas, carriage return and new line.
Total number of characters (including commas) sent are 47 characters, plus carriage
return and new line. Packet lengths are shorter in case of irregularities (see later in this
document).

Copyright © 2005 –2021 R. STAHL TRANBERG AS. All rights reserved. Page 16 of 38
Fields are the same as for systems delivered after November 1st 2017, except the
checksum calculation:
Checksum H: The ‘hundreds’ digit of the checksum (e.g. 1 if the che cksum is 120).
Checksum M: The ‘tens’ digit of the checksum (e.g. 2 if the checksum is 120).
Checksum L: The ‘ones’ digit of the checksum (e.g. 0 if the checksum is 120).
When calculating the checksum, the ASCII value of each character has been used. The
checksum is the XOR-ing of all characters sent, except the leading $-character, the
commas and the final carriage return and new line characters.
Channel 8 –Channel 1 detailed information:
The data in the corresponding positions Channel 8 –Channel 1 depends on which type
of module the message is sent from. See the table below for details.
Module type
Ch. 8
Ch. 7
Ch. 6
Ch. 5
Ch. 4
Ch. 3
Ch. 2
Ch. 1
Type B, without
current sensing
Relay 8
Relay 7
Relay 6
Relay 5
Relay 4
Relay 3
Relay 2
Relay 1
Output states, see table below
Type C, with
current sensing
Relay 8
Relay 7
Relay 6
Relay 5
Relay 4
Relay 3
Relay 2
Relay 1
Output states, see table below
Type D
combined
dimmer and
flasher module
Output state,
see table
below
Dim
or
Flash
value
0
0
0
0
0
0
Output state:
Value
Description
Applies to
Type B
Applies to
Type C
Applies to
Type D
‘0’
Disregard
Y
Y
Y
‘1’
Off
Y
Y
Y
‘2’
On, but no current
N
Y
Y
‘3’
Not used, disregard
N
Y
Y
‘4’
On, current ok
Y
Y
Y
‘5’
Manual override, no current
N
Y
Y
‘6’
Manual override, current ok
N
Y
Y
Dimmer and flasher value:
Value
Dimmer level
(%)
Flasher rate
(blink / min.)
‘0’
0 (off)
0 (off)
‘1’
15
30
‘2’
30
60
‘3’
45
90
‘4’
60
120
‘5’
75
260
‘6’
90
180
‘7’
100 (max)
200

Copyright © 2005 –2021 R. STAHL TRANBERG AS. All rights reserved. Page 17 of 38
Alarm messages
The alarm messages are sent out at an interval of approx. 30 seconds, if no changes in
alarm state have occurred. If there are any changes in alarm state, a message
indicating the new state will be sent out immediately. If several alarms are active
simultaneously, a list with all messages will be sent out (Note that alarm messages and
VDR messages are mixed and appear randomly in relation to each other).
The system is able to report 3 different types of alarm: Output failure (lantern bulb
failure, cable break or other), power failure (one or more power supplies are out), and
communication failure (if the Master CPU do not get responses from modules or panel).
If there are no alarms present, the ‘No alarm’ message will be sent out.
Errorno.
Message
Description
-
$IIALR,,,V,V,*73
No alarm
001
$IIALR,,001,A,V,Output failure*2A
unacknowledged
001
$IIALR,,001,A,A,Output failure*3D
acknowledged
002
$IIALR,,002,A,V,Power failure*49
unack.
002
$IIALR,,002,A,A,Power failure*5E
ack.
003
$IIALR,,003,A,V,Comm. failure*15
unack.
003
$IIALR,,003,A,A,Comm. failure*02
ack.

Copyright © 2005 –2021 R. STAHL TRANBERG AS. All rights reserved. Page 18 of 38
Section 4.03 SCADA Gateway
In order to receive commands from the outside of the Commander system, a SCADA
gateway module may optionally be installed in the Master CPU unit. This unit will listen
to incoming commands and issue these onto the internal network when queried by the
Master CPU. This will allow for remote control of the system and panel.
The SCADA gateway accepts two types of input messages, 1) panel control messages
according to a proprietary Tranberg protocol, and 2) alarm silence messages according
to NMEA-0183 ALR and ACK messages.
Electrical interface
Baud rate: 38.400 bps
Data bits: 8N1
Electrical: Isolated RS-422, input only
Panel control messages
The output string is a proprietary NMEA-0183 structure with the following setup:
1
2
3
4
5
6
7
$PTRA
)
5
1
*
1
6
$PTRA
Panel
Button
State
*
Checksum MSB
Checksum LSB
Example:
$PTRA,),5,1*16
Packet length: 10 characters (normal), plus commas, carriage return and new line.
Explanations:
$PTRA: A fixed start of the telegram (Proprietary TRAnberg)
Comma: A comma sign (,)
Asterix: An asterix sign (*)
Panel: Panel address
Button: Button number
State: Button state
Checksum is a 2 digit ASCII hex checksum, MSB first.
Checksum MSB: The MSB of the checksum (e.g. 1 if the checksum is 16).
Checksum LSB: The LSB of the checksum (e.g. 6 if the checksum is 16).

Copyright © 2005 –2021 R. STAHL TRANBERG AS. All rights reserved. Page 19 of 38
Comments:
When calculating the checksum, the ASCII value of each character has been used. The
checksum is the XOR-ing of all characters between the leading $-character and
checksum delimiter *.
No spaces must occur in any packet.
All packets are ended with a carriage return (CR) and new line (LF).
All characters referred to above are 7-bit ASCII and represented by the appropriate
ASCII number (e.g. a ‘1’ is ASCII character 49, A is 65, B is 66, etc.).
The XOR-value of the initial ‘PTRA’ is 23.
Note on systems delivered prior November 1st 2017
NOTE: Due to a change in checksum calculation, systems delivered before November
1st 2017 will have the following format:
The output string is a proprietary NMEA-0183 structure with the following setup:
1
2
3
4
5
6
7
8
$PTRA
)
5
1
*
0
1
6
$PTRA
Panel
Button
State
*
Checksum H
Checksum M
Checksum L
Example:
$PTRA,),5,1,*,0,1,6
Packet length: 12 characters (normal), plus commas, carriage return and new line.
Fields are the same as for systems delivered after November 1st 2017, except the
checksum calculation
Checksum H: The ‘hundreds’ digit of the checksum (e.g. 1 if the checksum is 120).
Checksum M: The ‘tens’ digit of the checksum (e.g. 2 if the checksum is 120).
Checksum L: The ‘ones’ digit of the checksum (e.g. 0 if the checksum is 120).
The checksum is the XOR-ing of all characters sent, except the leading $-character, the
commas and the final carriage return and new line characters. When calculating the
checksums, the ASCII value of each character shall been used.

Copyright © 2005 –2021 R. STAHL TRANBERG AS. All rights reserved. Page 20 of 38
Legal values
The following commands and data are allowed to remotely control a panel:
Item
From
To (including)
Panel
Panel 1
ASCII character 41 “)“
Panel 7
ASCII character 47 “/”
Button
Button 1
ASCII character 49 “1”
See tables on next two pages.
Button 64
ASCII character 115 “s”
See tables on next two pages.
Notes on buttons:
Buttons are indexed from top to bottom in each column. There are 8 buttons in each column.
Continue to the top of next column when you have passed one column.
Example: Top button in third column is button number 17. It’s address is 48 + 17 = 65, which is
represented by the ASCII character ‘A’.
See tables on next two pages.
State
State 0 (Off), send ASCII character 48 “0”
State 1 (Request main output on), send ASCII character 49 “1”
State 2 (Request spare output on), send ASCII character 50 “2”
Other States are not legal
States to be used when using special buttons:
Alarm acknowledge: Send ASCII character 49 “1”
Power on panel: Send ASCII character 48 “0” for OFF. Send ASCII character 49 “1” for ON
Panel address
Panel
ASCII char
ASCII code
1
)
41
2
*
52
3
+
43
4
,
44
5
-
45
6
.
46
7
/
47
Table of contents
Other Tranberg Control System manuals
Popular Control System manuals by other brands

NPI
NPI TMR-02M Operating instructions and system description

power automation
power automation PA 9000 MC installation instructions

Skov
Skov DOL 635 Technical manual

Balboa
Balboa GS100 Operation guide

Cardin Elettronica
Cardin Elettronica EL Series manual

Beacon
Beacon BM2 Installation and commissioning manual