manuals.online logo
Brands
  1. Home
  2. •
  3. Brands
  4. •
  5. TREND
  6. •
  7. Control Unit
  8. •
  9. TREND 2SRM/24VAC User manual

TREND 2SRM/24VAC User manual

2SRM/24VAC Installation Instructions TG103210 Issue 5, 11-Dec-2015. 1
Installation Instructions
2SRM/24VAC
Two Single Relays Module (24 Vac/dc)
Important: Retain these instructions
These instructions shall be used by trained service
personnel only. If the equipment is used in a manner not
specied by these instructions, the protection provided by the
equipment may be impaired. https://partners.trendcontrols.com
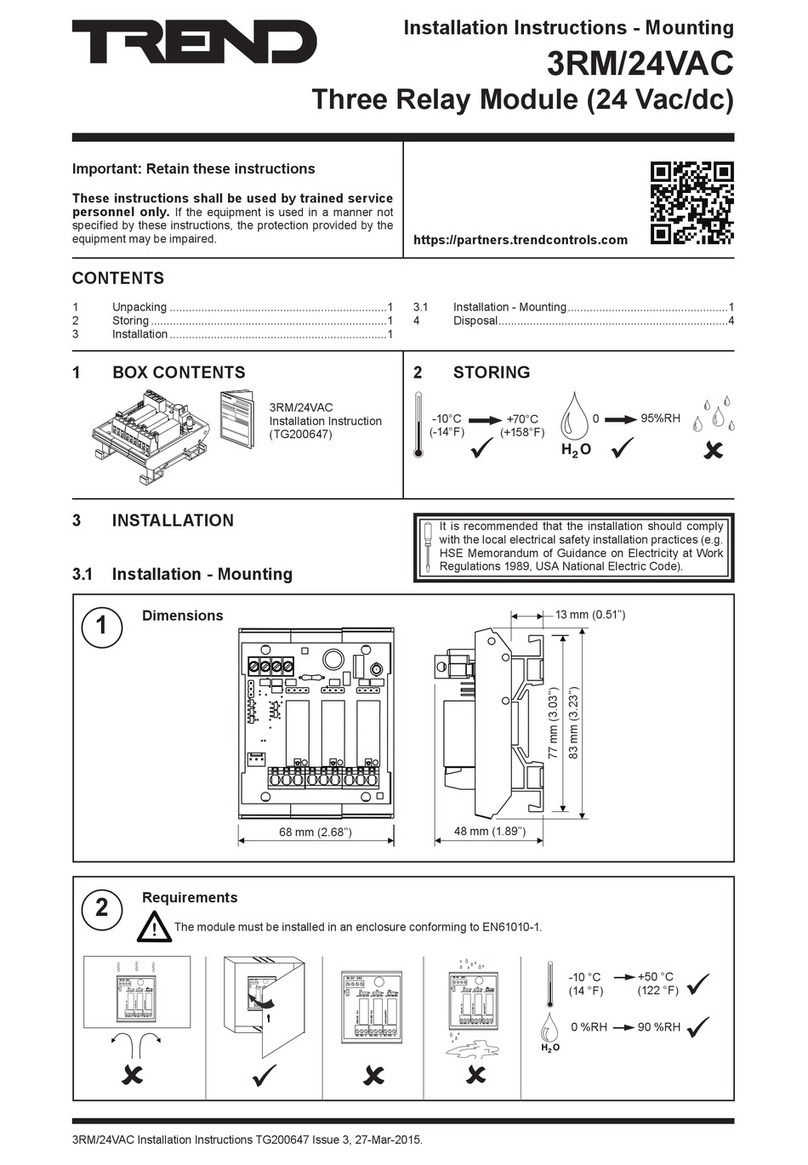
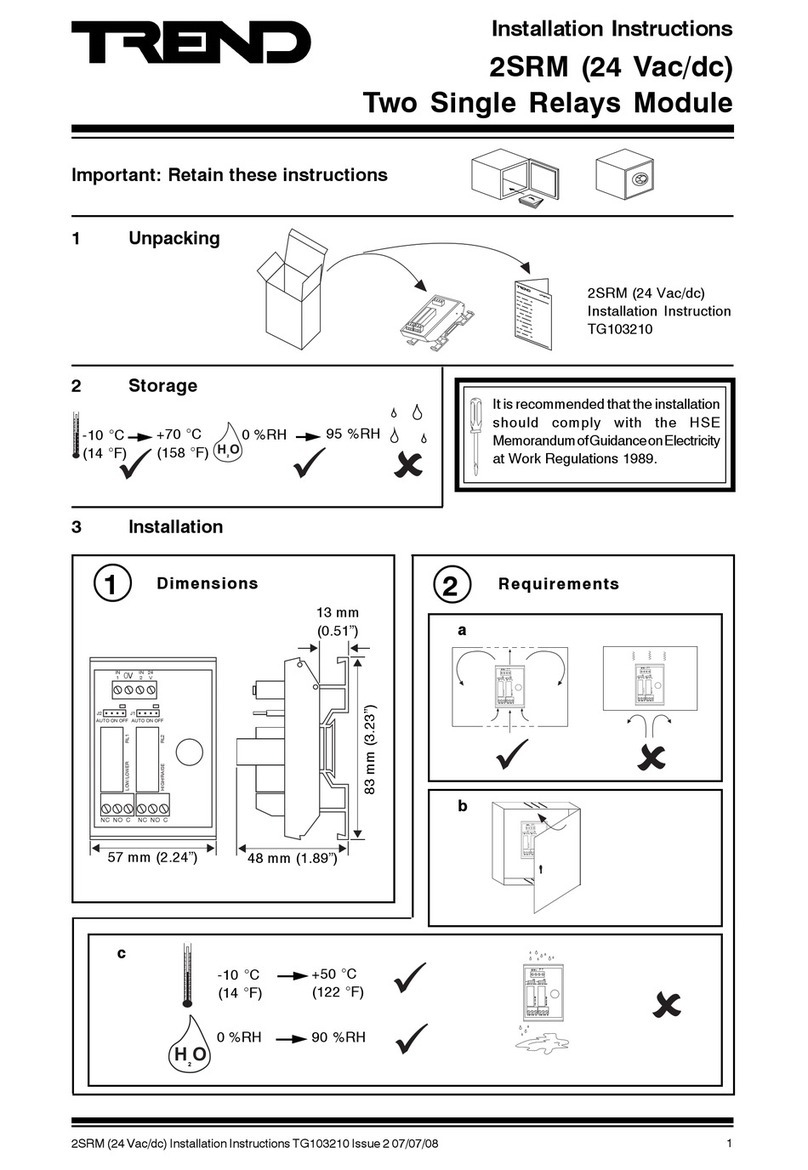
1Dimensions
2Requirements
3 INSTALLATION
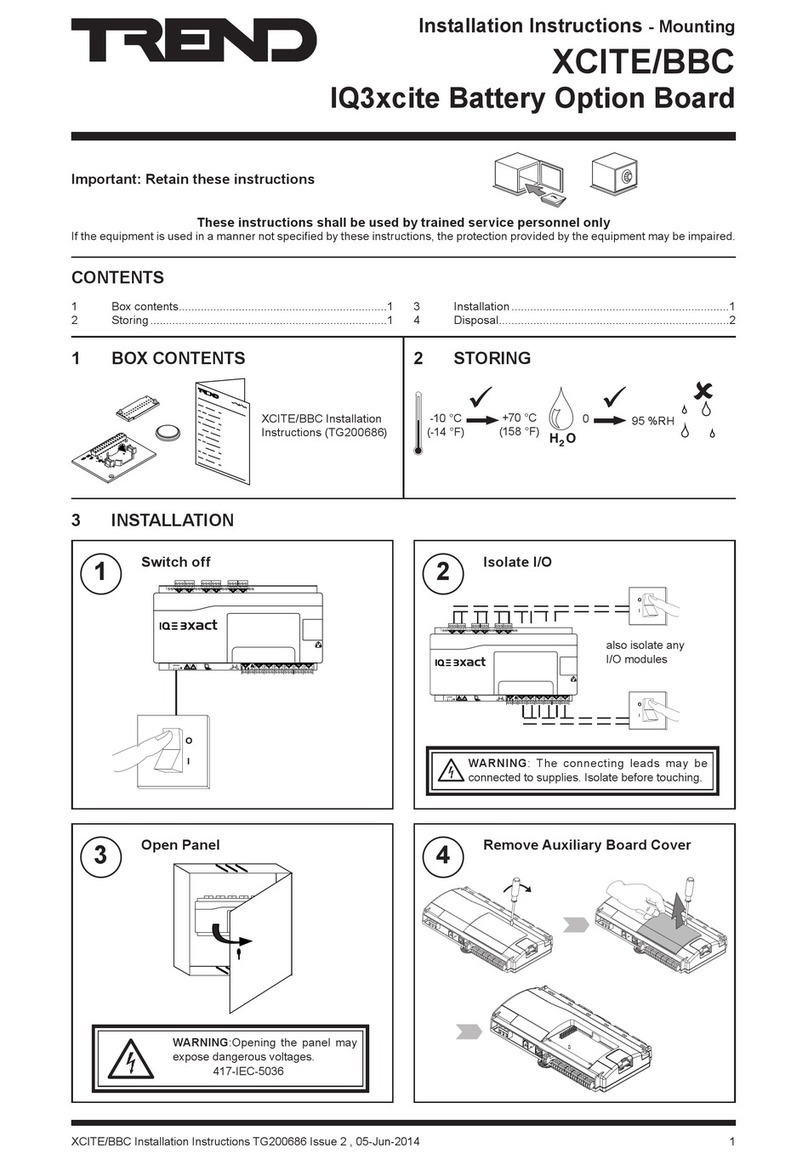
1 BOX CONTENTS 2 STORING
It is recommended that the installation should comply
with the local electrical safety installation practices
(e.g. HSE Memorandum of Guidance on Electricity at
Work Regulations 1989, USA National Electric Code).
CONTENTS
1 Box Contents.................................................................1
2 Storing ...........................................................................1
2SRM/24VAC
Installation
Instructions
(TG103210)
HO
2
-10 °C
(14 °F)
+70 °C
(158 °F)
0 %RH 95 %RH
57 mm (2.24”) 48 mm (1.89”)
83 mm (3.23”)
13 mm (0.51”)
IN
0V
24
V
AUTOON OFF AUTO ON OFF
J1J2
LOW/LOWER
HIGH/RAISE
NO
NC C
NO
NC C
IN
2
IN
0V
24
V
AUTOON OFFAUTOON OFF
J1J2
LOW/LOWER
HIGH/RAISE
NO
NC C
NO
NC C
IN
2
-10 °C
(14 °F)
+50 °C
(122 °F)
HO
2
0 %RH 90 %RH
IN
0V
24
V
AUTO ON OFF AUTO ON OFF
J1J2
LOW/LOWER
HIGH/RAISE
NO
NC C
NO
NC C
IN
2
The module must be installed
in an enclosure conforming to
EN61010-1.
0V
24
V
AUTO ON OFF AUTO ON OFF
J1J2
LOW/LOWER
HIGH/RAISE
NC
NO
CNC
NO
C
IN
2
IN
1
RL1
RL2
!
3 Installation .....................................................................1
4 Disposal.........................................................................4
2 2SRM/24VAC Installation Instructions TG103210 Issue 5, 11-Dec-2015.
2SRM/24VAC Installation Instructions
3Mount on DIN Rail
4Set AUTO/ON/OFF Links to AUTO
5Switch off IQ Controller 6Ensure IQ Output channels are
Analogue set to Voltage V
7Wire Module to Controller
3 INSTALLATION (continued)
0V
24
V
AUTO ON OFF AUTO ON OFF
J1J2
LOW/LOWER
HIGH/RAISE
NC
NO
CNC
NO
C
IN
2
IN
1
RL1
RL2
Cable size 0.5 to 2.5 mm2 (20 to 14 AWG), CU only
2SRM 0 V
OUT 2
0 V
OUT 1
24 V
IN 2
0 V
IN 1
24 Vac/dc
PSU
or using external 24 Vac/dc supply
maximum current consumed from supply:24 Vac 73 mA,
24 Vdc 33 mA
Note that external 24 V supply should be isolated
or earthed (grounded) at IQ earth (ground); ensure
correct polarity
0 V
OUT 2
0 V
OUT 1
IQ IQ Controller
Installation
Instructions



 

0V
24
V
AUTO ON OFF AUTO ON OFF
J1J2
LOW/LOWER
HIGH/RAISE
NC
NO
CNC
NO
C
IN
2
IN
1
RL1
RL2
 
Link for Channel 1
(Low/Lower relay)
Link for Channel 2
(High/Raise relay
Note that each link may be replaced by a three position
(SPDT) switch which will normally be centre off; this would be
wired as adjacent diagram (see note step 13).
O
I
V
V
either using IQ 24 Vdc Auxiliary Supply
24 V
0 V
OUT 2
0 V
OUT 1
24 V
IN 2
0 V
IN 1
IQ
2SRM
IQ
Set automatically
on IQ4
2SRM/24VAC Installation Instructions TG103210 Issue 5, 11-Dec-2015. 3
Installation Instructions 2SRM/24VAC
8Ensure HVAC Equipment Power Supplies are Switched Off
10 Close Panel 11 Switch on IQ Controller
9Connect Module to HVAC Equipment
3 INSTALLATION (continued)
O
I
O
I
HVAC
Equipment
2
Supply Supply
HVAC
Equipment
1
IN
0V
24
V
AUTO ON OFFAUTOON OFF
J1J2
LOW/LOWER
HIGH/RAISE
NO
NC C
NO
NC C
IN
2
O
I
Cable size 0.5 to 2.5 mm2 (20 to 14 AWG), CU only
0V
24
V
AUTO ON OFF AUTO ON OFF
J1J2
LOW/LOWER
HIGH/RAISE
NC
NO
CNC
NO
C
IN
2
IN
1
RL1
RL2
2SRM
C
NO
NC
C
NO
NC
Supply Supply
Channel
2 OUT
Channel
1 OUT
HVAC
Equip-
ment
2
To meet safety requirements, for the 2 relays (OUT1
and OUT2), those being used must all be switching
either low voltage or mains and not a mixture of
voltages. If switching mains, they must all switch the same
phase and polarity.
Contact ratings:
5 A @ 240 Vac (cosø>=0.4)
Single phase only.
5 A @ 30 Vdc (resistive)
2 A @ 24 Vdc (inductive T<=30ms).
HVAC
Equip-
ment
1
WARNING: The wires may be connected
to hazardous voltages.
Disconnect power before
attempting any wiring.
Arc suppression
recommended
Relay Output Arc
Suppression Installation
Instructions (TG200208)
!
4 2SRM/24VAC Installation Instructions TG103210 Issue 5, 11-Dec-2015.
2SRM/24VAC Installation Instructions
Please send any comments about this or any other Trend technical
publication to [email protected]
© 2015 Honeywell Technologies Sàrl, ECC Division. All rights reserved. Manufactured for and on behalf of the Environmental and Combustion Controls
Division of Honeywell Technologies Sàrl, Z.A. La Pièce, 16, 1180 Rolle, Switzerland by its Authorized Representative, Trend Control Systems Limited.
Trend Control Systems Limited reserves the right to revise this publication from time to time and make changes to the content hereof without obligation
to notify any person of such revisions or changes.
Trend Control Systems Limited
Albery House, Springeld Road, Horsham, West Sussex, RH12 2PQ, UK. Tel:+44 (0)1403 211888 Fax:+44 (0)1403 241608 www.trendcontrols.com
TR CU Certication
12 Switch on HVAC Equipment Power Supplies
13 Check Relay Operations
4 DISPOSAL
WEEE Directive:
At the end of their useful life the packaging and
product should be disposed of by a suitable
recycling centre.
Do not dispose of with normal household waste.
Do not burn.
O
I
O
I
2SRM
Supply Supply
C
NO
NC
C
NO
NC
Channel 2
OUT
Channel 1
OUT
HVAC
Equipment
2
HVAC
Equipment
1
Note that the AUTO/ON/OFF links may be used to test
2SRM to HVAC Equipment installation, however, when using
manual overrides (ON, OFF), feeds switched from other
relays on the same module, or interlocks with other relays
may not be operative.
0V
24
V
AUTO ON OFF AUTO ON OFF
J1J2
LOW/LOWER
HIGH/RAISE
NC
NO
CNC
NO
C
IN
2
IN
1
RL1
RL1
‘click’
2SRM
Channel 2
‘click’
Channel 1
HVAC
Equipment 2
HVAC
Equipment 1
3 INSTALLATION (continued)

Other TREND Control Unit manuals

TREND IQ251 Instruction Manual

TREND

TREND IQ251 Instruction Manual

TREND 3RM/24VAC User manual

TREND

TREND 3RM/24VAC User manual

TREND XCITE/BBC User manual

TREND

TREND XCITE/BBC User manual

TREND 2SRM User manual

TREND

TREND 2SRM User manual

Popular Control Unit manuals by other brands

Mini-Circuits RC8DAT-8G-95 user guide

Mini-Circuits

Mini-Circuits RC8DAT-8G-95 user guide

Legend T-45NL installation guide

Legend

Legend T-45NL installation guide

VIPA System 300S IM 353-1DP01 manual

VIPA

VIPA System 300S IM 353-1DP01 manual

LS ELECTRIC XGT Series user manual

LS ELECTRIC

LS ELECTRIC XGT Series user manual

Pfeiffer Vacuum TC 110 operating instructions

Pfeiffer Vacuum

Pfeiffer Vacuum TC 110 operating instructions

sprecher + schuh CEP7-EMR Series manual

sprecher + schuh

sprecher + schuh CEP7-EMR Series manual

Yoshitake MD-53 product manual

Yoshitake

Yoshitake MD-53 product manual

GBD F4 PLUS AS04180 Instructions for installations

GBD

GBD F4 PLUS AS04180 Instructions for installations

Quectel EM12-G Hardware design

Quectel

Quectel EM12-G Hardware design

Fibocom SU806D-EAU Hardware guide

Fibocom

Fibocom SU806D-EAU Hardware guide

Siemens SIMATIC ET 200SP manual

Siemens

Siemens SIMATIC ET 200SP manual

Extron electronics IRCM-DVplus user manual

Extron electronics

Extron electronics IRCM-DVplus user manual

SMC Corporation VT307 Series Operation manual

SMC Corporation

SMC Corporation VT307 Series Operation manual

MonkMakes 00063 instructions

MonkMakes

MonkMakes 00063 instructions

AVK 41 Series Installation, operation and maintenance manual

AVK

AVK 41 Series Installation, operation and maintenance manual

EverFocus EMV400SSD Quick installation guide

EverFocus

EverFocus EMV400SSD Quick installation guide

Kohler K-10673 Maintenance Guide

Kohler

Kohler K-10673 Maintenance Guide

Rasmussen RPK1-N Assembly, installation and operation instructions

Rasmussen

Rasmussen RPK1-N Assembly, installation and operation instructions

manuals.online logo
manuals.online logoBrands
  • About & Mission
  • Contact us
  • Privacy Policy
  • Terms and Conditions

Copyright 2025 Manuals.Online. All Rights Reserved.